
Can I Clear Coat My Aka. Carbon Fiber Exhaust


Thread Starter
|
April 2011 Ride of the Month
Joined: Jul 2009
Posts: 5,686
Likes: 0
Okay I got a undertail carbon fiber akaprovic exhaust for cheap from my cousin... its in good shape... but i am very **** and cal tell there are some areas that are rough and stuff... i have found on some site you can wet sand and reclear (i shorted out the process its actually alot longer than that but you get the point)
My question is this can it be done on a cf aka. exhaust? I know alot of guys say if its a gel coat then no if its a clear coat then yes....
Any opinions??????????
thanks guys
My question is this can it be done on a cf aka. exhaust? I know alot of guys say if its a gel coat then no if its a clear coat then yes....
Any opinions??????????
thanks guys

Thread Starter
|
April 2011 Ride of the Month
Joined: Jul 2009
Posts: 5,686
Likes: 0
http://www.triumphrat.net/t3-sport-t...bon-fiber.html
lol and bored of course they do because they want you to buy a new one... saying you can fix it its making them any profit...
lol and bored of course they do because they want you to buy a new one... saying you can fix it its making them any profit...
Thread Starter
|
April 2011 Ride of the Month
Joined: Jul 2009
Posts: 5,686
Likes: 0
LOL nothing from anyone??????????? come on guys ur killin me lol...
unless i hear otherwise ive read that VHT high temp engine clear will work just fine... so ill go that route please some one chime in if they have hear otherwise... thx guys
unless i hear otherwise ive read that VHT high temp engine clear will work just fine... so ill go that route please some one chime in if they have hear otherwise... thx guys

Junior Member
Joined: Apr 2010
Posts: 22
Likes: 0
From: Dyess AFB
i believe you'll want to use an epoxy resin to cover the cf. check out http://www.uscomposites.com and see what they recommend.
Thread Starter
|
April 2011 Ride of the Month
Joined: Jul 2009
Posts: 5,686
Likes: 0
Thread Starter
|
April 2011 Ride of the Month
Joined: Jul 2009
Posts: 5,686
Likes: 0
Let me say right up front I am not a professional painter. And I am sure there are some of you out there who are and will probably correct me on things. that said I thought I would give you guys a how to thread. I am not responsible for your results so don't call me if it does not come out. this is my what I do for my bike.
the first tool that you need if you do not have a spray booth is PATIENCE something that is free but in short supply especially for me!
1) First step clean the surface starting with a wax remover and then wash thoroughly to remove any wax, grease dirt or other. For me I do this the ultimate garage style rattle cans. I use Rustoleum clear Lacquer. given this I lay down a lot of coats. this is for three reasons. one the carbon is a rough surface and get that glass like effect you have to get it smooth. two doing it with rattle cans will give you lots of orange peel. the third is once you start smoothing things you you can cut thru all the clear back to bare carbon, done this a couple of times, not fun now you have to start spraying again.
2) once you have done multiple coats. and I do mean multiple I lost count of how many. I did spray over several days. then allow the paint to cure for a couple of days. I know some of you will say that You finished in one day. great! I am cautious, as I don't want to ball up fresh paint.
3) now the patience part wet sanding. this I learned from a friend who is a pro painter. Get a bucket of water and some wet/dry sandpaper and start dulling up your paint. this time I started with 220 grit as I had lots of clear and the surface is rather rough. I have started with 400 before and had good result it just takes longer to get that initial smooth. what you want to do is sand until you have a smooth dull finish. when you have worked a section for a while dry the surface and look for shiney spots. in this case the shiney spots are not our friends. see picture
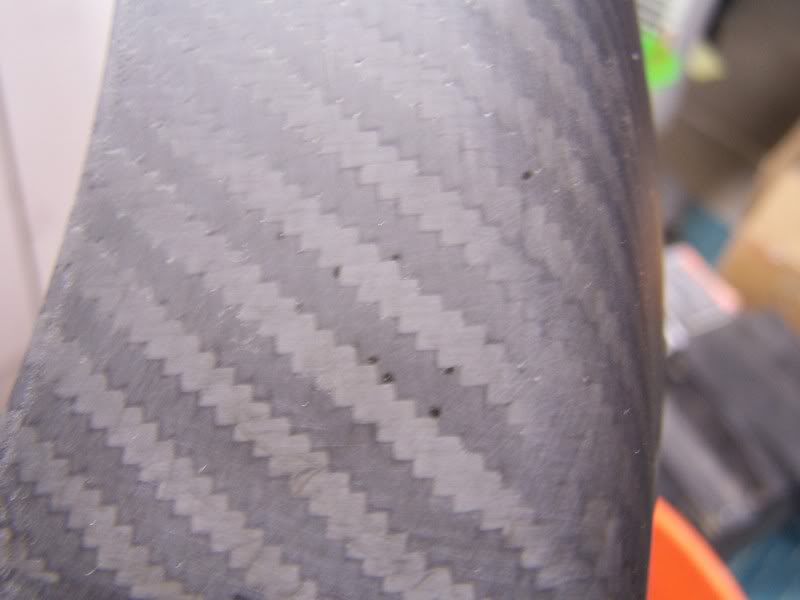
shiney spots are low spots and mean more sanding. once you have and even dull surface.

once you have achieved this you can go on to polish this paint in steps.
If you guys like this topic post replies and I will continue this thread with updates over the week as I continue my work on the bike.
Next installment.
The polishing begins as you can see inthe previous post in the first picture you can see the rough finish in addition to the dark spots. we will progressively go to finer and finer swirls by increasing the grit of the sandpaper. next step I went to 800 you have to take it in steps to be sure that you remove all the previous gouges.
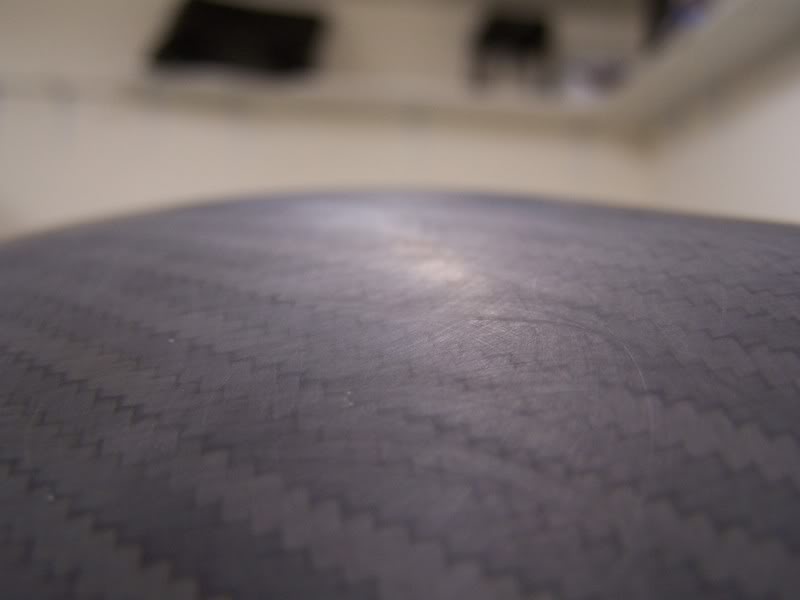
here is the finish notice that the gouges are finer but still remain. we next move down to 1000 grit not much of a increase but it gets it slightly smoother.
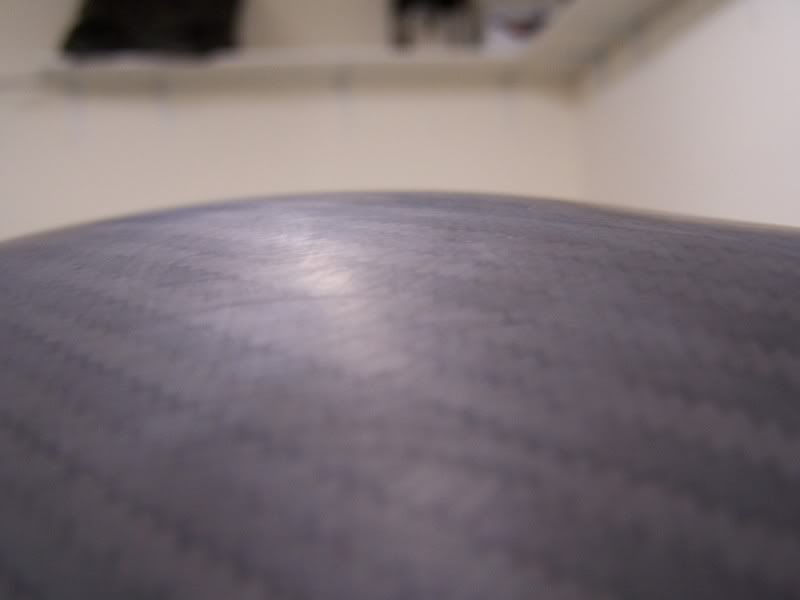
the gouges are finer yet. we then step down to 2000 grit. producing a rather smooth dull finish. up close it looks almost the same as the 1000 grit so I won't bore you with another picture it but now the gouges are so fine that you can go the final polishing stage.
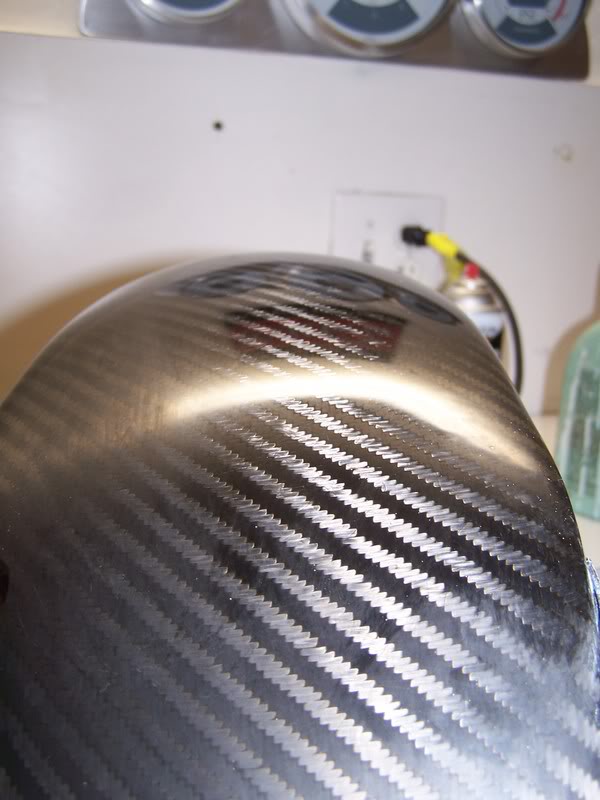
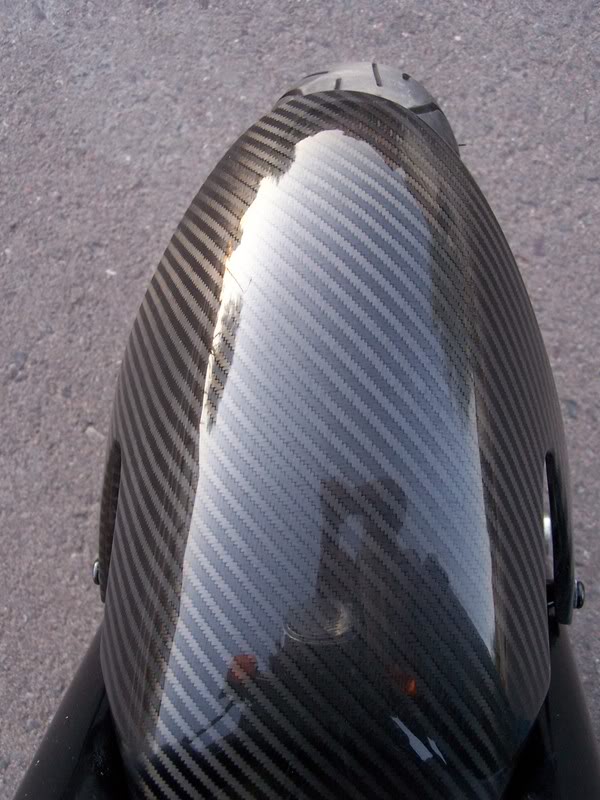
Here is the final picture of the night I just took a cleaner wax and rubbed it on by hand you can see how easily it polishes up at this point but the finish is better if we follow the rest of the procedure.
final segment.
the finishing of the paint is to use a good polish to cut the swirls. I use meguires mirror glaze products. for mine it only needed a fine cut cleaner to finish it up after the 2000 grit. once it is all shiny I use a glaze to give it the best shine, and then a wax to protect the finish.
hopefully some of you enjoyed this, I thought I would try something different for the forum as I have not seen any how to's.
I think that our sharing of information is what it is all about.
Keep in mind all of this applies to any paint finish clear or pigmented, hence the term color sanding. __________________
the first tool that you need if you do not have a spray booth is PATIENCE something that is free but in short supply especially for me!
1) First step clean the surface starting with a wax remover and then wash thoroughly to remove any wax, grease dirt or other. For me I do this the ultimate garage style rattle cans. I use Rustoleum clear Lacquer. given this I lay down a lot of coats. this is for three reasons. one the carbon is a rough surface and get that glass like effect you have to get it smooth. two doing it with rattle cans will give you lots of orange peel. the third is once you start smoothing things you you can cut thru all the clear back to bare carbon, done this a couple of times, not fun now you have to start spraying again.
2) once you have done multiple coats. and I do mean multiple I lost count of how many. I did spray over several days. then allow the paint to cure for a couple of days. I know some of you will say that You finished in one day. great! I am cautious, as I don't want to ball up fresh paint.
3) now the patience part wet sanding. this I learned from a friend who is a pro painter. Get a bucket of water and some wet/dry sandpaper and start dulling up your paint. this time I started with 220 grit as I had lots of clear and the surface is rather rough. I have started with 400 before and had good result it just takes longer to get that initial smooth. what you want to do is sand until you have a smooth dull finish. when you have worked a section for a while dry the surface and look for shiney spots. in this case the shiney spots are not our friends. see picture
shiney spots are low spots and mean more sanding. once you have and even dull surface.
once you have achieved this you can go on to polish this paint in steps.
If you guys like this topic post replies and I will continue this thread with updates over the week as I continue my work on the bike.
Next installment.
The polishing begins as you can see inthe previous post in the first picture you can see the rough finish in addition to the dark spots. we will progressively go to finer and finer swirls by increasing the grit of the sandpaper. next step I went to 800 you have to take it in steps to be sure that you remove all the previous gouges.
here is the finish notice that the gouges are finer but still remain. we next move down to 1000 grit not much of a increase but it gets it slightly smoother.
the gouges are finer yet. we then step down to 2000 grit. producing a rather smooth dull finish. up close it looks almost the same as the 1000 grit so I won't bore you with another picture it but now the gouges are so fine that you can go the final polishing stage.
Here is the final picture of the night I just took a cleaner wax and rubbed it on by hand you can see how easily it polishes up at this point but the finish is better if we follow the rest of the procedure.
final segment.
the finishing of the paint is to use a good polish to cut the swirls. I use meguires mirror glaze products. for mine it only needed a fine cut cleaner to finish it up after the 2000 grit. once it is all shiny I use a glaze to give it the best shine, and then a wax to protect the finish.
hopefully some of you enjoyed this, I thought I would try something different for the forum as I have not seen any how to's.
I think that our sharing of information is what it is all about.
Keep in mind all of this applies to any paint finish clear or pigmented, hence the term color sanding. __________________
Last edited by __Z__; Jun 16, 2010 at 02:47 PM.
