
06 1000RR Subframe on 01 F4i
#11
 04-21-2013 | 11:58 PM

Thread Starter
|
Junior Member
Joined: Jan 2013
Posts: 16
Likes: 0
**I'd like to change the title of this thread to "1000RR tail mod on F4i" or something like that if possible, thanks sir moderators!**
It's been a while since I've posted an update, and an even longer while since I've started this mod. I must admit I have been a little lazy, but I feel its coming together quite lovely. Pics first, thoughts afterwards.
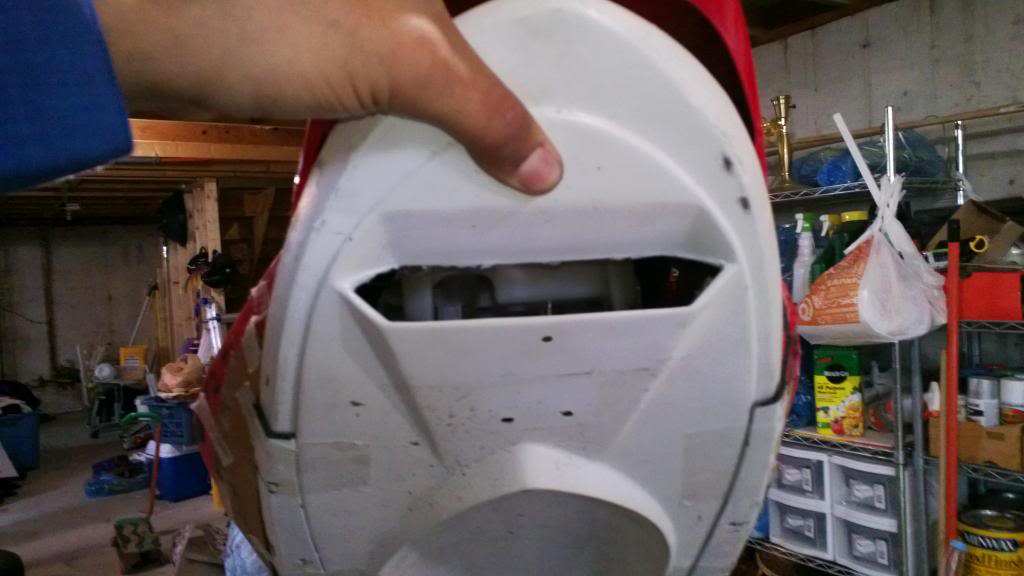

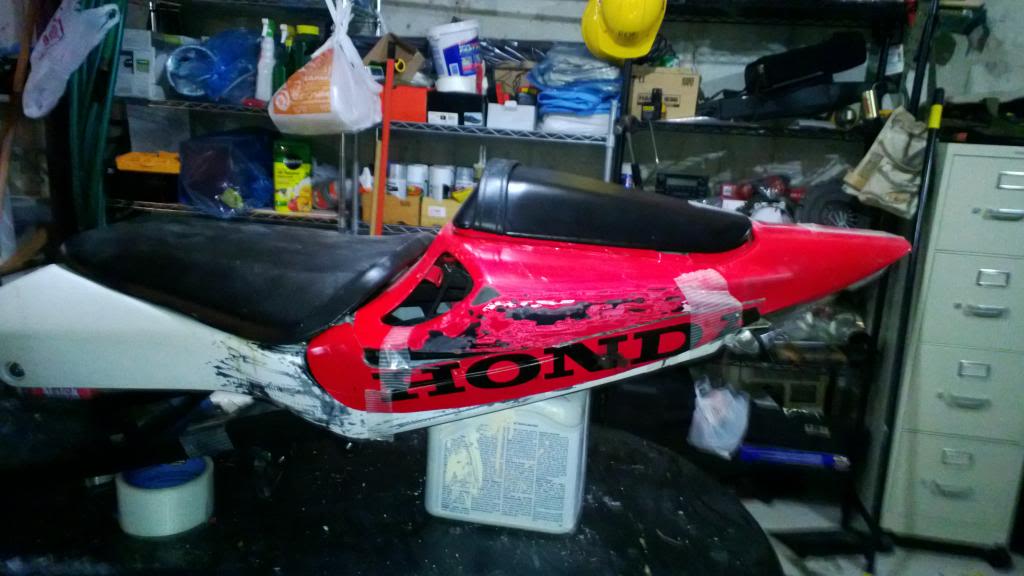
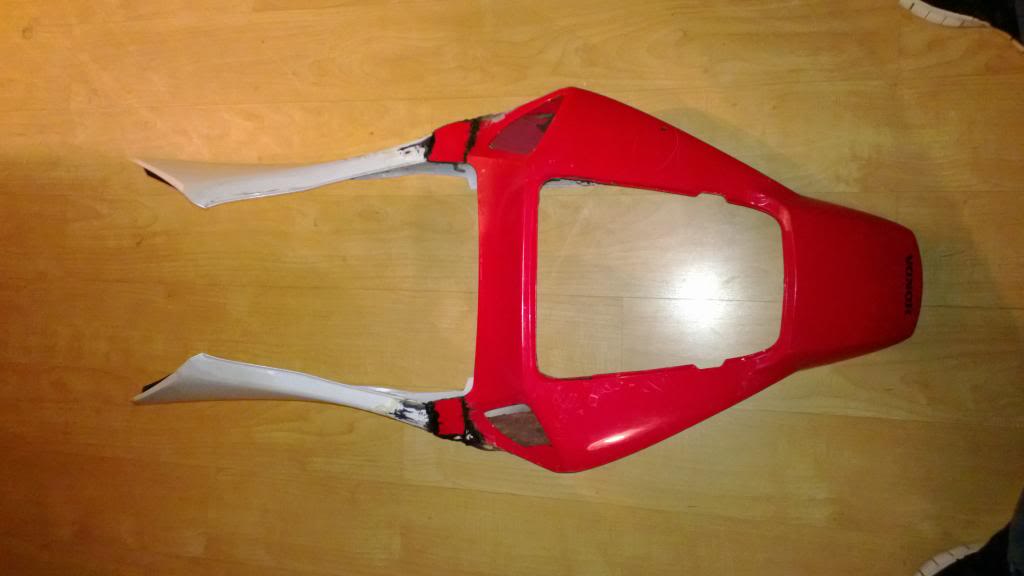
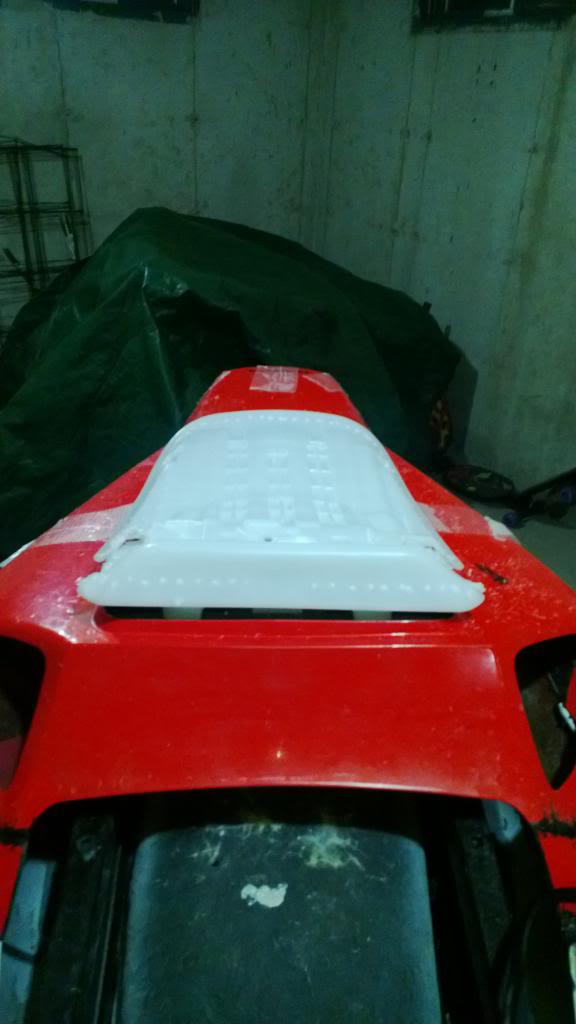
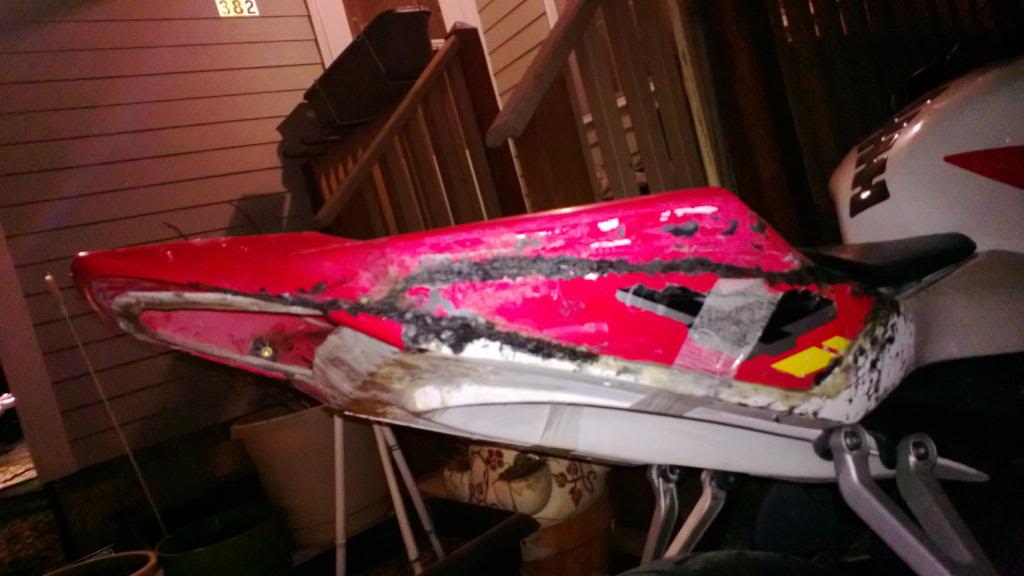
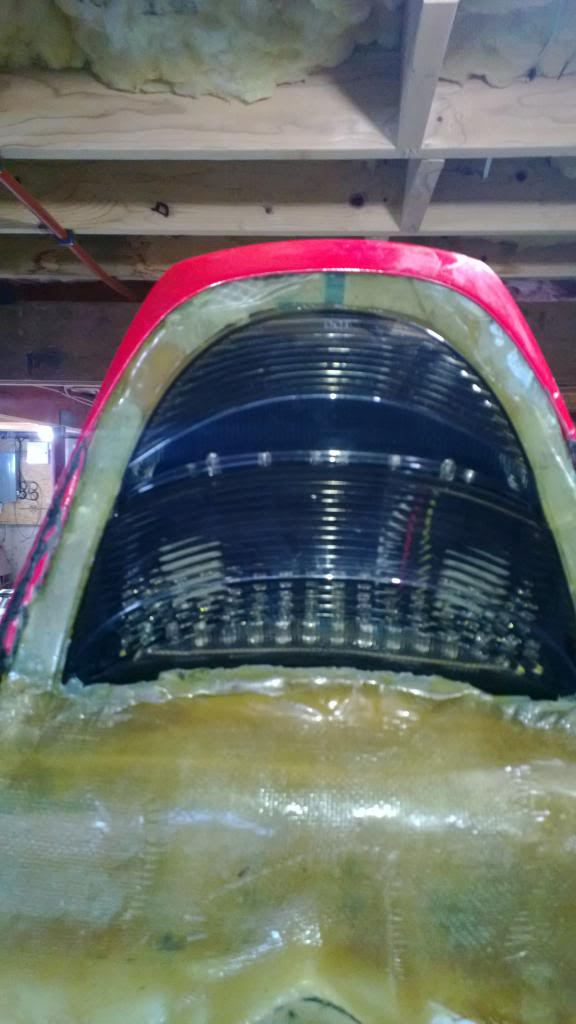
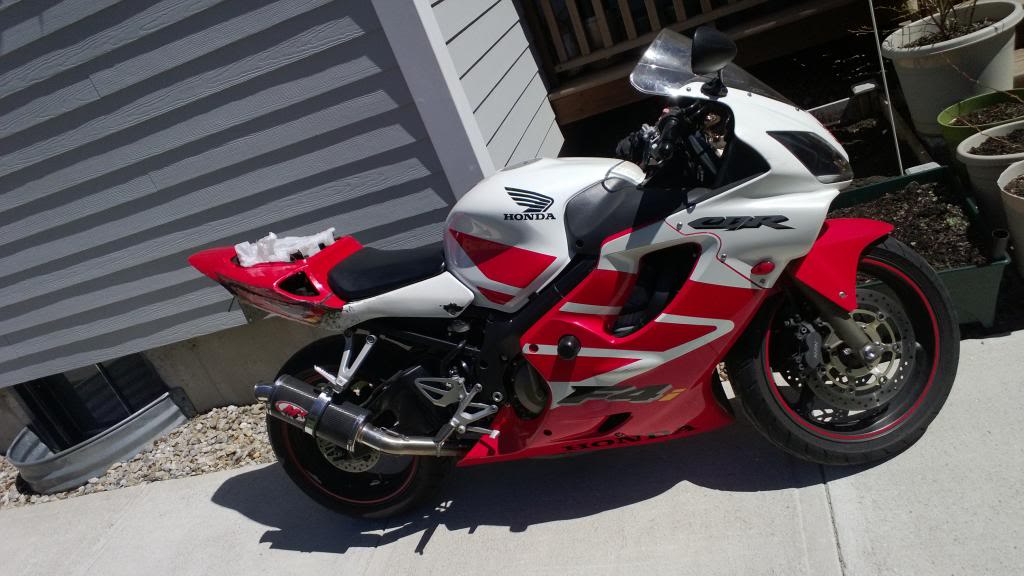

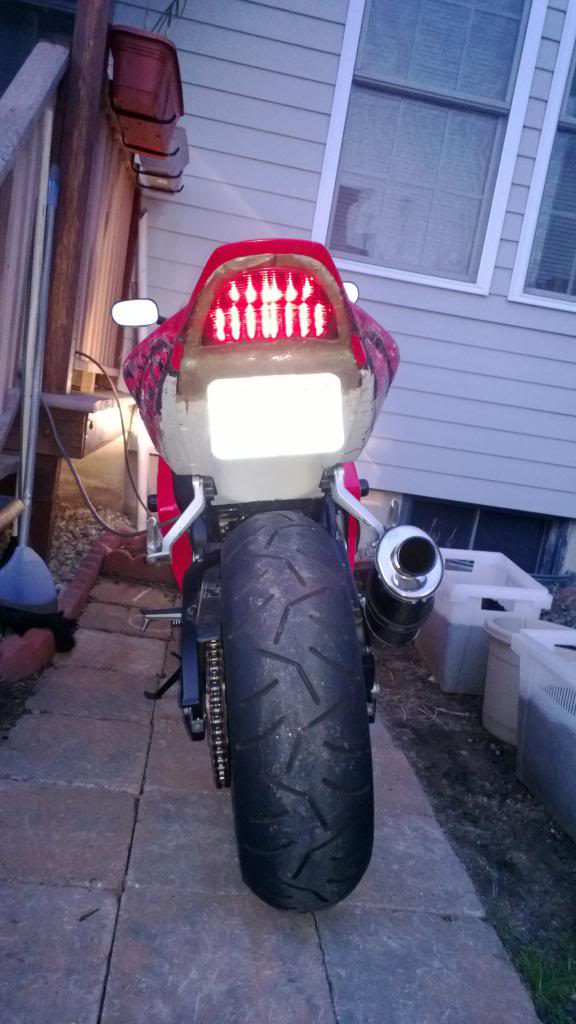
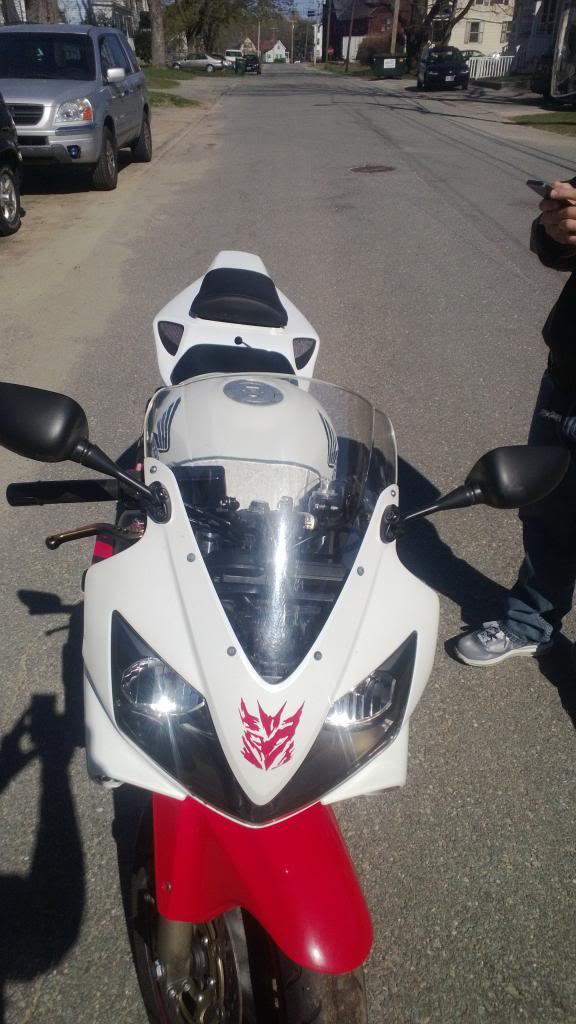
I remembered I had an old fairing I acquired from a cousin, and started using this as spare ABS. Cut up some pieces to fit in the gaps, and used a heat gun to curve them accordingly. After using a soldering iron, small pieces of abs, and a lot a patience I was able to confidently take it off and put it back on with confidence. I made sure to heat up both sides of the plastic, and the tail feels very good, can flex and is fairly durable. The seat has been on the backburner, but now that I am nearly ready to paint, that will be my next update. Just a few. At this point, I needed to rework the undertail as it was not as strong as it should have been. A couple of layers of fiberglass later, I had something much more durable, but it still needs to be trimmed for a better fitment. Final photos are of the bike with the tail on, first time in months! Integrated light could've had more LED's, but it was worth the price. May attach some extra turn signals on the plate or undertail though (still debating). I reckon all that's left is the trimming and paint. I'm not too much of a painter, so I'm leaning towards having it done professionally. Either way, I'd like to do some trimming and prep work, just to make sure everything is in tip top shape before doing so.
It hasn't been easy, the work looks a little messy, and if it ever gets damaged, I'd have to make it all over again, but so far I think it has been worth it. At least for me. I am truly excited to see the end product. I am thinking of going with an all white tail, simply because If I choose a different color scheme, its less work to deal with I have to admit, though, that the Red end piece is growing on me.
Updates whenever I have the time to finish the seat.
As always, questions and comments are welcome.
It's been a while since I've posted an update, and an even longer while since I've started this mod. I must admit I have been a little lazy, but I feel its coming together quite lovely. Pics first, thoughts afterwards.


I remembered I had an old fairing I acquired from a cousin, and started using this as spare ABS. Cut up some pieces to fit in the gaps, and used a heat gun to curve them accordingly. After using a soldering iron, small pieces of abs, and a lot a patience I was able to confidently take it off and put it back on with confidence. I made sure to heat up both sides of the plastic, and the tail feels very good, can flex and is fairly durable. The seat has been on the backburner, but now that I am nearly ready to paint, that will be my next update. Just a few. At this point, I needed to rework the undertail as it was not as strong as it should have been. A couple of layers of fiberglass later, I had something much more durable, but it still needs to be trimmed for a better fitment. Final photos are of the bike with the tail on, first time in months! Integrated light could've had more LED's, but it was worth the price. May attach some extra turn signals on the plate or undertail though (still debating). I reckon all that's left is the trimming and paint. I'm not too much of a painter, so I'm leaning towards having it done professionally. Either way, I'd like to do some trimming and prep work, just to make sure everything is in tip top shape before doing so.
It hasn't been easy, the work looks a little messy, and if it ever gets damaged, I'd have to make it all over again, but so far I think it has been worth it. At least for me. I am truly excited to see the end product. I am thinking of going with an all white tail, simply because If I choose a different color scheme, its less work to deal with I have to admit, though, that the Red end piece is growing on me.
Updates whenever I have the time to finish the seat.
As always, questions and comments are welcome.
#12
04-25-2013 | 10:20 PM
Thread Starter
|
Junior Member
Joined: Jan 2013
Posts: 16
Likes: 0
#13
04-26-2013 | 12:59 PM

Senior Member
Joined: Feb 2013
Posts: 106
Likes: 0
From: Santa Maria, CA
#14
05-05-2013 | 10:54 AM
Thread Starter
|
Junior Member
Joined: Jan 2013
Posts: 16
Likes: 0
Well my friends, I know there hasn't been much interest in my build (Possibly due to the name of it, how can I get it changed?) but I just wanted to post an update.
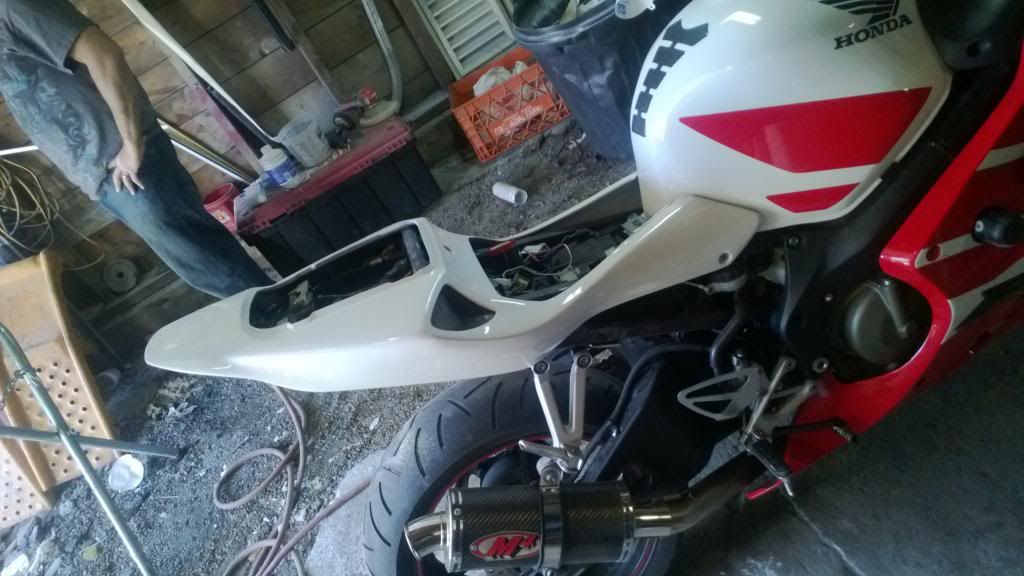
Halzinky, you asked if it was worth the trouble earlier next week. I was going to answer, but I figured I wouldn't know if it was worth it until I got it back and saw it in person. After doing so, I have to say that for me, it was definitely worth it. My first project of this caliber, and it came out pretty darn good. I've learned a thing or two dealing with this project, including fiberglass work and a little ingenuity. If I had to do it again, I would, BUT now that I know how I did it, I reckon I could do it in less time, and not be lazy. The Fiberglassing killed 2-3 weeks of my time, and I had to backtrack when I peeled it off and started fresh. Some days I was lazy, while others I had no time. Additionally, during the beginning my bike was at another location, so it wasn't readily accessible. I wouldn't have cut as much of my stock tail fairing, and I would've left my helmet hooks (darn!). Also, trying to get the mounting brackets for the 1000rr seat on my bike killed a week or two as well, and I ended up scrapping that idea (not worth it IMO). The fitment of the seat needs to be adjusted, but that's nothing major.
The finish and paint - $400
1000RR Tail - $45
1000RR Seat -$40
954 Taillight - $30
Fiberglass (3qts + 3 cloths) ~$75
ABS - Free
Tools - ~$80
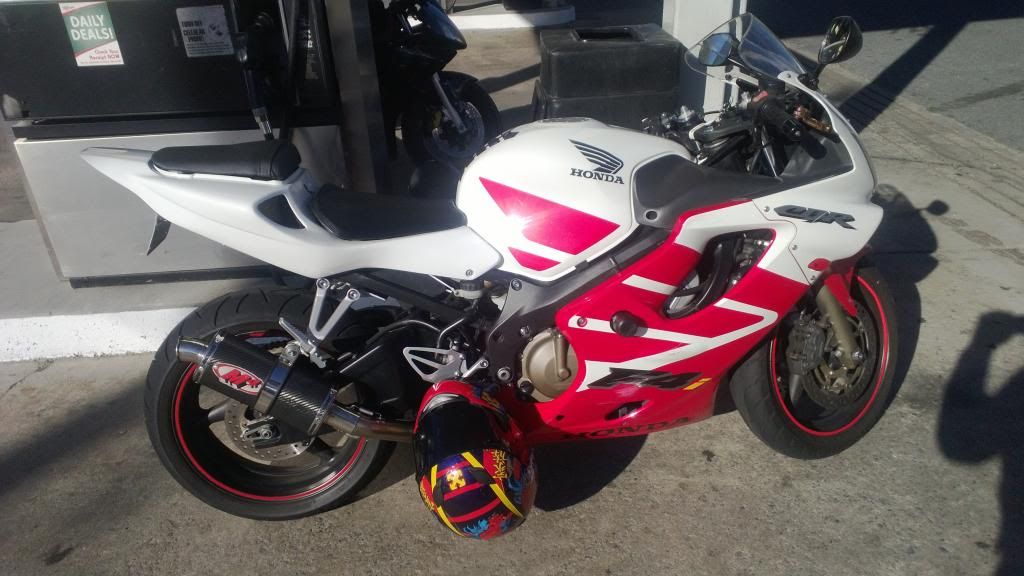
Grand total of $670. I may be missing a thing or two, but I'd say it was anywhere between 700-800 USD over the course of these past months. If someone could do the finishing and paint themselves, I'm sure they'd save that money. My painting skills are rubbish, and I didn't want to risk messing this up so close to the end, so I chose to have it done by a third party. I'd say it was a 9-9.5 out of 10 as there were a few VERY small blemishes (nothing that would drive me crazy). Either way, I plan on repainting the bike this winter. Same scheme, possibly different colors. All in all, I am very satisfied with the finished result, and Yes, I would do it again.
tl;dr: Wasn't easy, total $800 or so, but definitely worth it
Now time for pics! Thoughts?
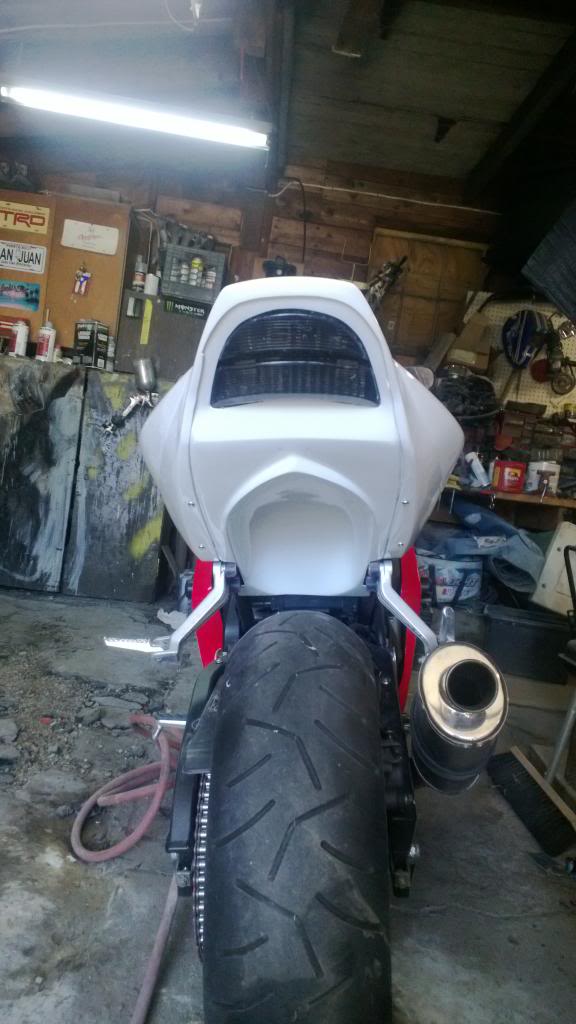
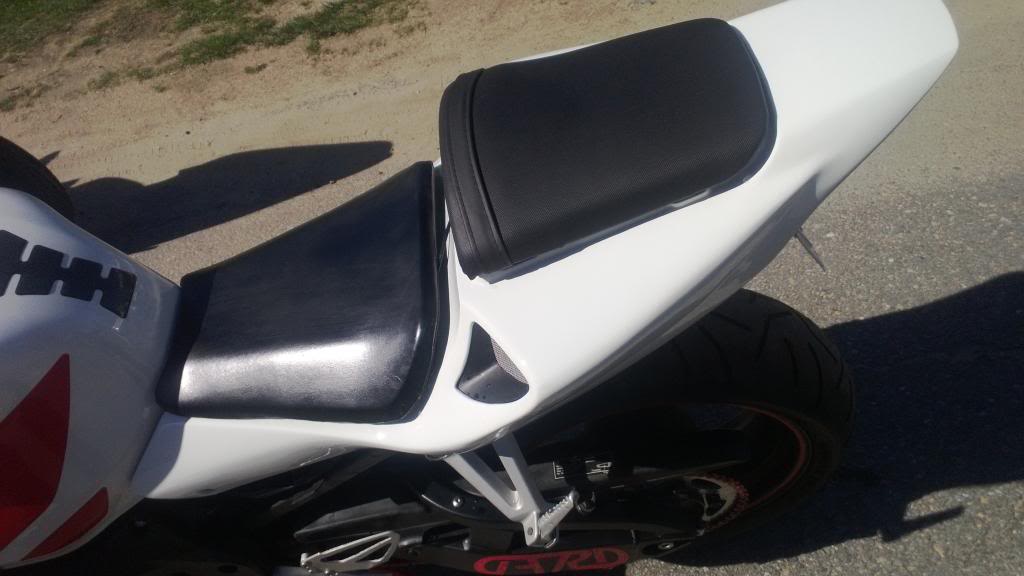
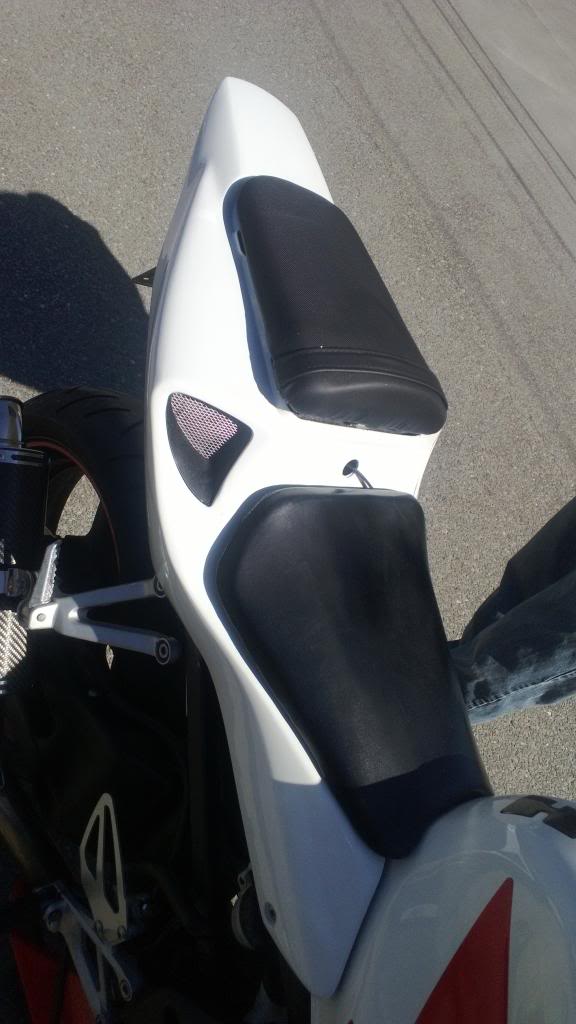
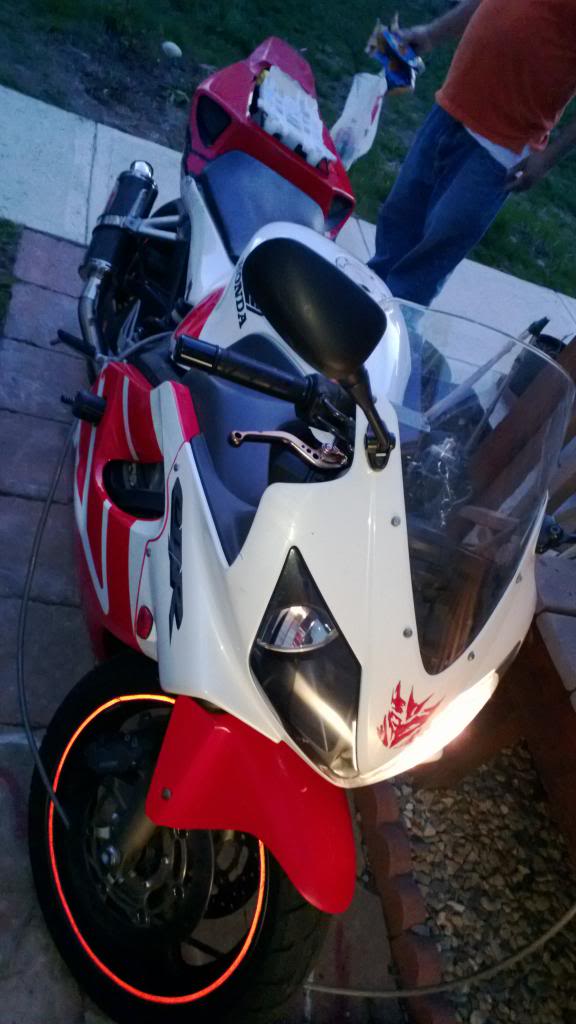
Here you can see the curves I wanted to keep. I know other users have done it a bit differently, but I wanted to keep them and further separate my bike from the other F4i's around. I love it!
As always, questions and comments are appreciated. Woohoo!
Halzinky, you asked if it was worth the trouble earlier next week. I was going to answer, but I figured I wouldn't know if it was worth it until I got it back and saw it in person. After doing so, I have to say that for me, it was definitely worth it. My first project of this caliber, and it came out pretty darn good. I've learned a thing or two dealing with this project, including fiberglass work and a little ingenuity. If I had to do it again, I would, BUT now that I know how I did it, I reckon I could do it in less time, and not be lazy. The Fiberglassing killed 2-3 weeks of my time, and I had to backtrack when I peeled it off and started fresh. Some days I was lazy, while others I had no time. Additionally, during the beginning my bike was at another location, so it wasn't readily accessible. I wouldn't have cut as much of my stock tail fairing, and I would've left my helmet hooks (darn!). Also, trying to get the mounting brackets for the 1000rr seat on my bike killed a week or two as well, and I ended up scrapping that idea (not worth it IMO). The fitment of the seat needs to be adjusted, but that's nothing major.
The finish and paint - $400
1000RR Tail - $45
1000RR Seat -$40
954 Taillight - $30
Fiberglass (3qts + 3 cloths) ~$75
ABS - Free
Tools - ~$80
Grand total of $670. I may be missing a thing or two, but I'd say it was anywhere between 700-800 USD over the course of these past months. If someone could do the finishing and paint themselves, I'm sure they'd save that money. My painting skills are rubbish, and I didn't want to risk messing this up so close to the end, so I chose to have it done by a third party. I'd say it was a 9-9.5 out of 10 as there were a few VERY small blemishes (nothing that would drive me crazy). Either way, I plan on repainting the bike this winter. Same scheme, possibly different colors. All in all, I am very satisfied with the finished result, and Yes, I would do it again.
tl;dr: Wasn't easy, total $800 or so, but definitely worth it
Now time for pics! Thoughts?


Here you can see the curves I wanted to keep. I know other users have done it a bit differently, but I wanted to keep them and further separate my bike from the other F4i's around. I love it!

As always, questions and comments are appreciated. Woohoo!


#17
05-06-2013 | 10:39 AM
Thread Starter
|
Junior Member
Joined: Jan 2013
Posts: 16
Likes: 0
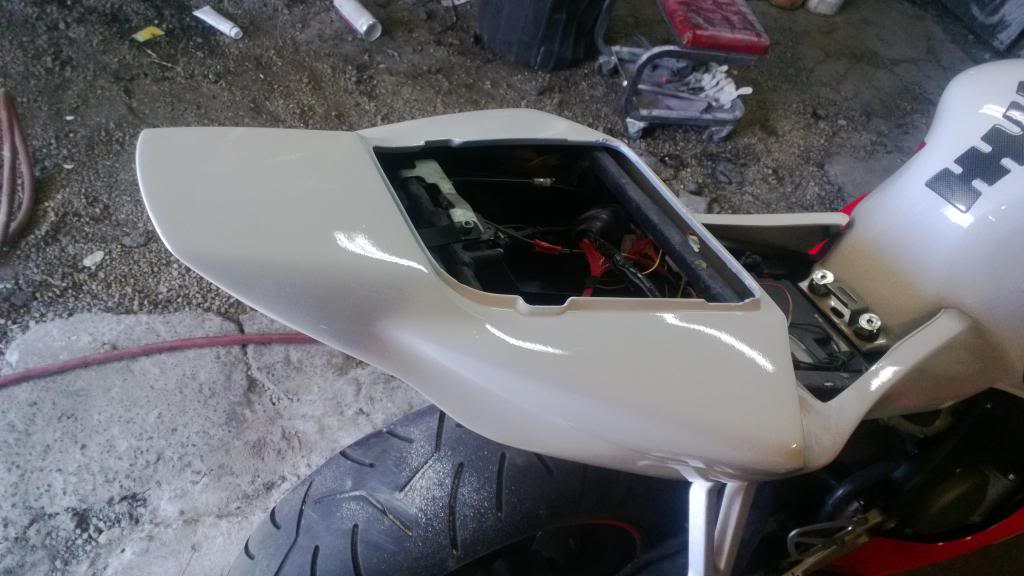
Spartan86, Thanks! Storage area is the same as any other undertail mod. Trimmed the battery tray a little more, but I still have the area for the tool kit and such. The tail light takes a little more room than my old one, but nothing major. I will try and take a photo after work.
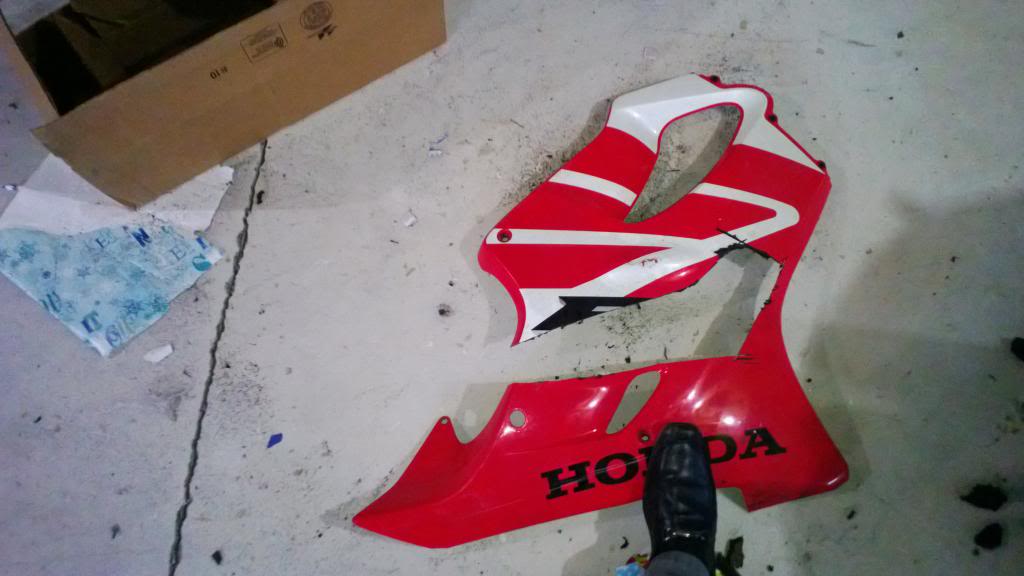
Ser Jon, I had this spare fairing and it was scuffed up. Needed some ABS so I used this to complete my tail. Not ideal, but it got the job done.
Ser Jon, I had this spare fairing and it was scuffed up. Needed some ABS so I used this to complete my tail. Not ideal, but it got the job done.

Thread
Thread Starter
Forum
Replies
Last Post