
'02 CBR600F4i Project
#11
 04-28-2011, 06:20 PM

Senior Member
Join Date: Jan 2010
Location: Philadelphia
Posts: 330
Likes: 0
Received 0 Likes
on
0 Posts
Dude you're like my hero, hahaha. I definitely look forward to reading through all of this. I have massive fairing issues, the F4i i bought had the front turning signals ripped off, so there's two huge holes there, and the seat at the front is cracked on both sides. I'll be reading through this and trying it out myself. i look forward to seeing more.

#13
04-28-2011, 07:47 PM

Senior Member
Hey, nice job there.
What kind of mud are you using? I need to repair some cut-slider holes on my fairings. I've slapped some fiberglass cloth on the back and somewhat in the front to try to level it out, but I'll need to sand it smooth and rebuild some of the fairing. The guys at the hardware store had no idea what I needed, lol.
What kind of mud are you using? I need to repair some cut-slider holes on my fairings. I've slapped some fiberglass cloth on the back and somewhat in the front to try to level it out, but I'll need to sand it smooth and rebuild some of the fairing. The guys at the hardware store had no idea what I needed, lol.
#15
04-29-2011, 06:49 PM

Join Date: Mar 2011
Posts: 573
Likes: 0
Received 0 Likes
on
0 Posts
I am in Madison, on the east side near Woodmans.
We had a nice day here today so I got a bit of work done. Unfortunately I had things to do so I only got 2 hours in on the bike

I am using 3M "Glazing and Spot Putty" but this is just for leveling panels and filling small scuffs and nicks. Don't try to build your fairing up with this stuff. Use something stronger like fiberglass resin or the 2 part Bondo putty. I was going to make a video today for you all but I didn't really need to do any putty today, I was busy taking the fuel tank off and trying not to blow myself up! lol
#16
05-03-2011, 03:01 PM

Senior Member
#18
05-03-2011, 09:31 PM

I just finished doing plastic work and tank repair on my bike. I mainly used bondo and fiberglass+resin. It turned out pretty good (although the fiberglass work on my front panel needs to be redone, it's a learning experience). You just need to really take your time though with the bondo. I ended up rushing through the process faster than I should have, and didn't spend enough time ensuring that EVERYTHING was properly filled and smoothed. It really all is in a proper prep job. Great write up though, as far as the paint goes, there is a pretty good write up on this forum that I used (don't remember who made it). Seems like a lot of work at first, but it was some of the most fun I've had when it comes to car/motorcycle repair yet. Just make sure you have plenty of your favorite type of beer around and some good tunes to make the time more enjoyable.
#19
05-11-2011, 04:54 PM
Join Date: Mar 2011
Posts: 573
Likes: 0
Received 0 Likes
on
0 Posts
Sorry I haven't been around lately. I decided to go up to visit my dad for the week and get some work done on the bike. So far we have done all kinds of stuff, but only managed to get primer and the first coat of base color on the bike... this is the problem when you have 1000 projects going at the same time! lol
I will post pics and details of everything when I get home tomorrow.
I will post pics and details of everything when I get home tomorrow.
#20
05-12-2011, 10:10 PM
Join Date: Mar 2011
Posts: 573
Likes: 0
Received 0 Likes
on
0 Posts
I got 2 coats of primer and one coat of color on. I have a few little things to fix up before the final color coat. I will then put the decals on and clear coat it. I haven't decided what to do about the clear just yet, but will probably use Wheel Paint. The white primer was Duplicolor and the top coat was Krylon Fusion. I must say, I waited 24 hours between coats, and I waited nearly 48 hours before I handled the pieces after final coat, and I am not at all impressed with the durability of the Krylon. It is VERY soft and chips/scratches easily! I am going to have to sand some patches all the way back and rebuild them with the primer/top coat...

This was after the second coat of primer.

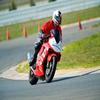
This is how it looks at the moment. Still heaps of work to do, but I must say I really like the look now, not that I didn't like the look of the blacked out bike, but this is for sure much more my style!
This was after the second coat of primer.
This is how it looks at the moment. Still heaps of work to do, but I must say I really like the look now, not that I didn't like the look of the blacked out bike, but this is for sure much more my style!