
Guide: Changing chain and sprockets - the old school way


Thread Starter
|
Senior Member
Joined: Jul 2007
Posts: 192
Likes: 1
From: Norway
Hi all,
I did a sprocket and chain replacement on my F2 a few days ago and in the process I shot
a few pictures. Thought id share them with you and present them as a small
mini how-to-guide.
As all the guides i already found on the net involved using a special tool for breaking and
riveting the chain, i decided to make this an old school way guide. Not everyone wants to
pay $100 for a special tool - myself included.
Now, before we get started i should explain that this guide does not tell you how to
remove the fairings to get access. I expect any F2 owner to already know how to do that
(and if you don't do a search in the forum).
---
Now lets get started.
Once all the fairings and covers are gone you need to jack up the bike.
Place the bike on its centerstand (alternatively use a swingarm stand or similar).
Put the bike into neutral gear.
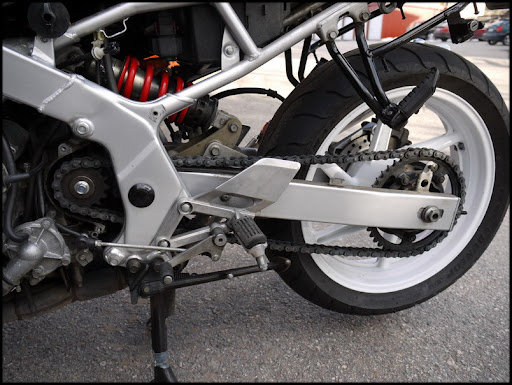
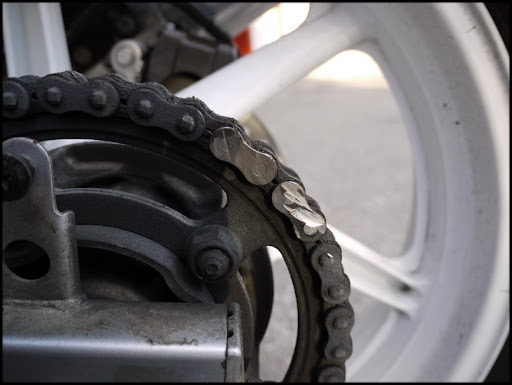
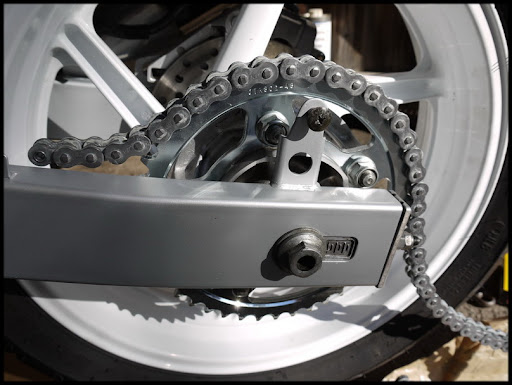
Now its time to cut the old chain.
Rotate the wheel and choose a chainlink to cut. If you plan to reuse the chain, then you need to
locate the old masterlink and cut that, otherwise it doesnt really matter where you cut.
If you do not plan to reuse the chain you could simply cut the old chain straight across. Othewiser
you would need to do it a bit more carefully, like shown in this guide.
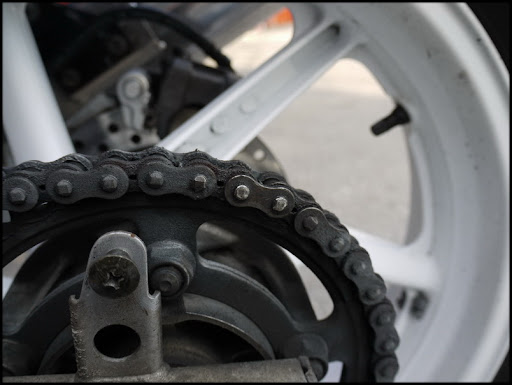
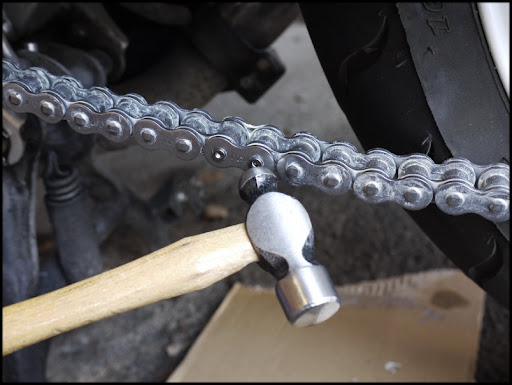
Using a dremel or anglegrinder grind away the heads of the pins.
Again, if you plan to reuse the chain be careful not to damage the adjacent links (like i have).

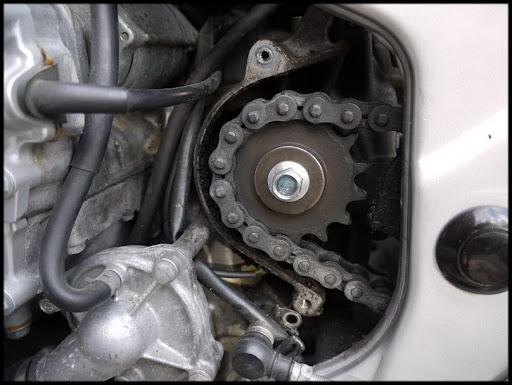
Using a hammer and some sort of punch, carefully tap the center pins out of the link.
(A note of warning here: If you plan to reuse the sprocket do not do this at a link by the sprocket
like i do in this guide. Instead do it with some other form of heavy support behind the chain)
You should see the pin start to come out after just a few taps.
One side is of.
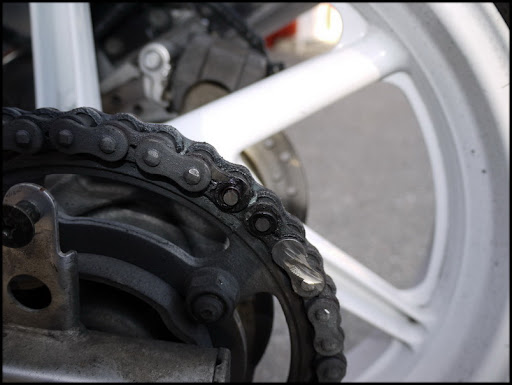
By this point you should have enough space between the links to pry out the remainder with a flat
head screwdriver or similar.

I did a sprocket and chain replacement on my F2 a few days ago and in the process I shot
a few pictures. Thought id share them with you and present them as a small
mini how-to-guide.
As all the guides i already found on the net involved using a special tool for breaking and
riveting the chain, i decided to make this an old school way guide. Not everyone wants to
pay $100 for a special tool - myself included.
Now, before we get started i should explain that this guide does not tell you how to
remove the fairings to get access. I expect any F2 owner to already know how to do that
(and if you don't do a search in the forum).
---
Now lets get started.
Once all the fairings and covers are gone you need to jack up the bike.
Place the bike on its centerstand (alternatively use a swingarm stand or similar).
Put the bike into neutral gear.
Now its time to cut the old chain.
Rotate the wheel and choose a chainlink to cut. If you plan to reuse the chain, then you need to
locate the old masterlink and cut that, otherwise it doesnt really matter where you cut.
If you do not plan to reuse the chain you could simply cut the old chain straight across. Othewiser
you would need to do it a bit more carefully, like shown in this guide.
Using a dremel or anglegrinder grind away the heads of the pins.
Again, if you plan to reuse the chain be careful not to damage the adjacent links (like i have).
Using a hammer and some sort of punch, carefully tap the center pins out of the link.
(A note of warning here: If you plan to reuse the sprocket do not do this at a link by the sprocket
like i do in this guide. Instead do it with some other form of heavy support behind the chain)
You should see the pin start to come out after just a few taps.
One side is of.
By this point you should have enough space between the links to pry out the remainder with a flat
head screwdriver or similar.
Last edited by Viking; May 21, 2010 at 01:16 PM.
Thread Starter
|
Senior Member
Joined: Jul 2007
Posts: 192
Likes: 1
From: Norway
Guide: Changing chain and sprockets - the old school way -pt II
The old chain should now be free.
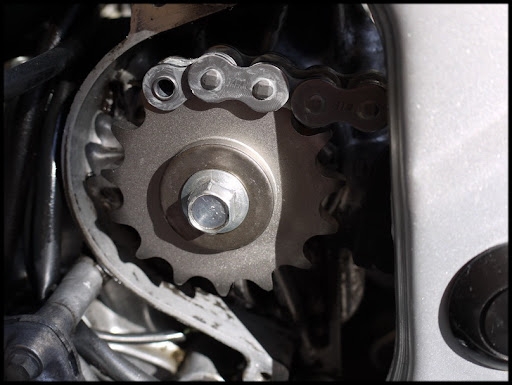
Now on to the front sprocket.
Warning! Make sure the transmission is in neutral when unscrewing the bolt. Otherwise you might damage
the transmission.
Lay the old chain over the sprockets. Get a friend to press down the rear brake lever.
By doing this you effectively use the rear brakes to retain the sprocket.
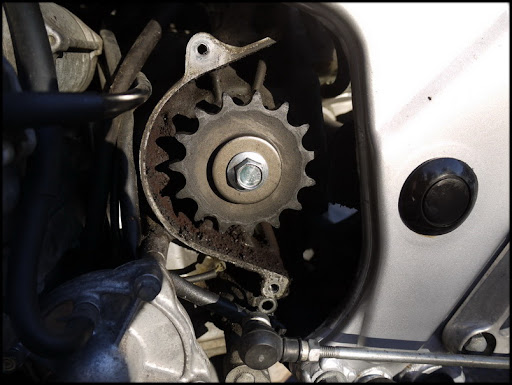
While the rear break is engaged loosen the front sprocket bolt.
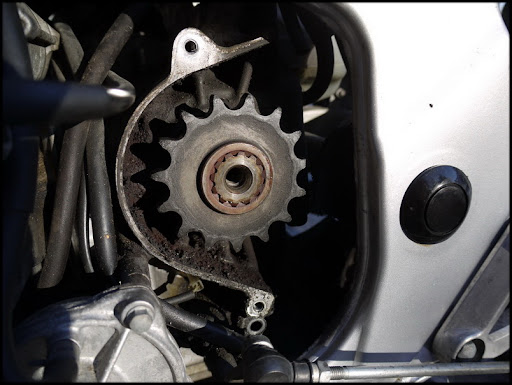
...and remove the old sprocket.
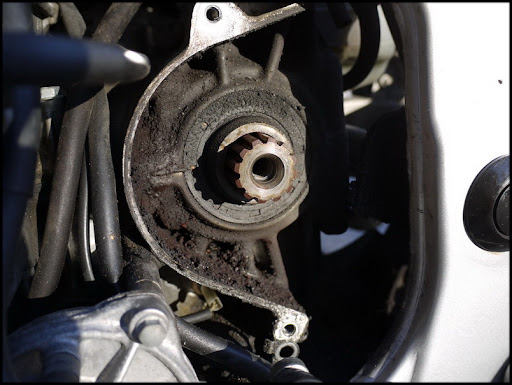
Now, while everything is accessible this is a good time to get rid of that old grease, gravel and
other dirt that might potentially damage the sprocket and chain.

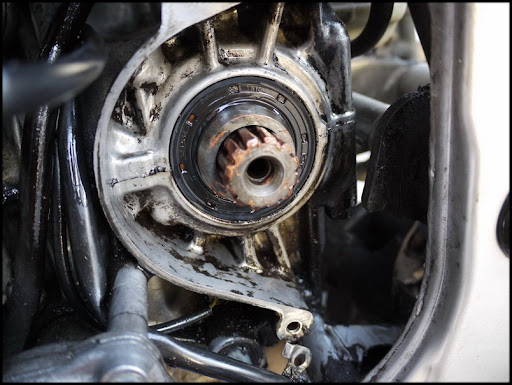
All clean. Dont worry about getting it sparkling clean as it will soon get dirty again.
A dab of copper paste on the shaft is recommended, but not required.
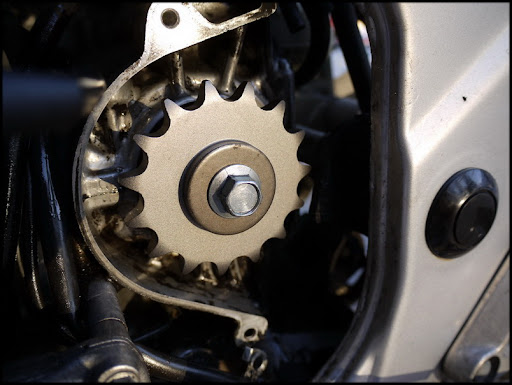
Insert the new sprocket and screw in the bolt. Just do it finger tight for now,
as we will torque it up once the new chain is installed.
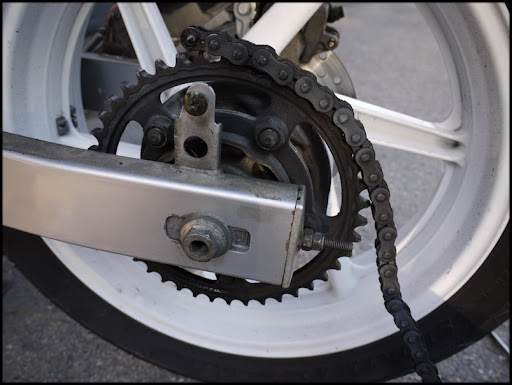
With the front sprocket done it is time to do the rear one.
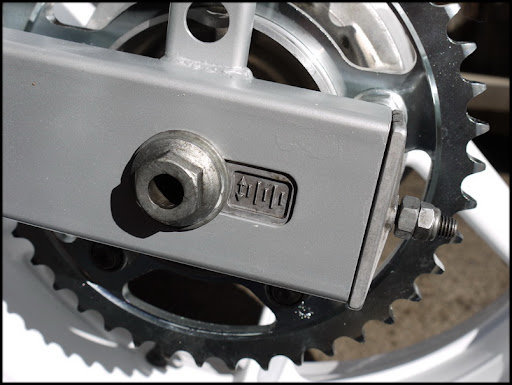
Slacken the chain tensioner all the way out.

The old chain should now be free.
Now on to the front sprocket.
Warning! Make sure the transmission is in neutral when unscrewing the bolt. Otherwise you might damage
the transmission.
Lay the old chain over the sprockets. Get a friend to press down the rear brake lever.
By doing this you effectively use the rear brakes to retain the sprocket.
While the rear break is engaged loosen the front sprocket bolt.
...and remove the old sprocket.
Now, while everything is accessible this is a good time to get rid of that old grease, gravel and
other dirt that might potentially damage the sprocket and chain.
All clean. Dont worry about getting it sparkling clean as it will soon get dirty again.
A dab of copper paste on the shaft is recommended, but not required.
Insert the new sprocket and screw in the bolt. Just do it finger tight for now,
as we will torque it up once the new chain is installed.
With the front sprocket done it is time to do the rear one.
Slacken the chain tensioner all the way out.
Last edited by Viking; May 21, 2010 at 01:28 PM.
Thread Starter
|
Senior Member
Joined: Jul 2007
Posts: 192
Likes: 1
From: Norway
Guide: Changing chain and sprockets - the old school way - pt III
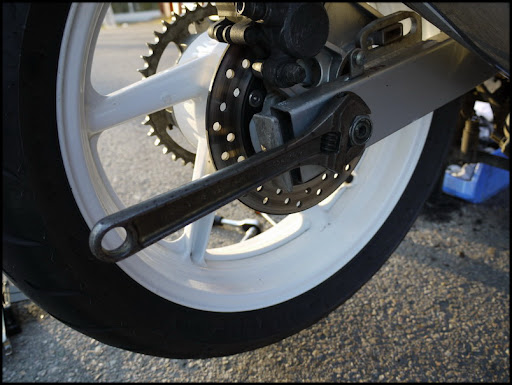
Loosen the rear wheel nut, pull the shaft out and remove the rear wheel.
(Be careful not to loose the wheel spacers.)
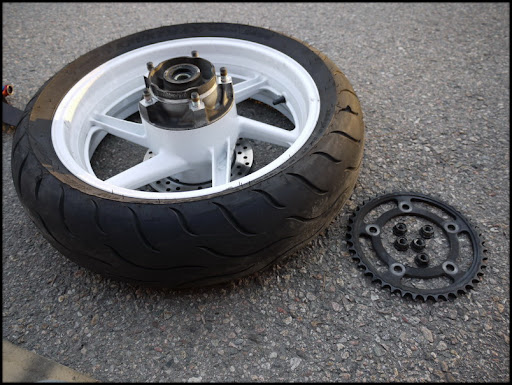
Undo the five sprocket retaining nuts.
(Make sure brakepad is not resting on anything if you lay the wheel down flat)

Remove the rear sprocket.
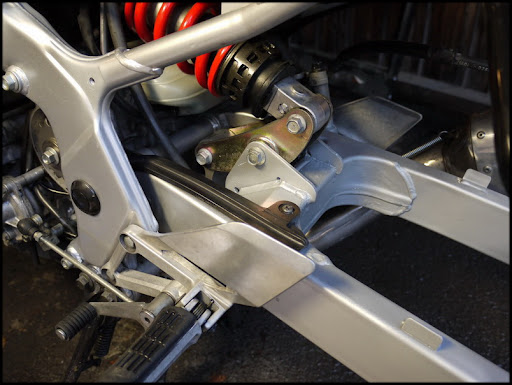
This is the perfect opportunity to do some more cleaning of the bike, as we have good access
to the rear swingarm.
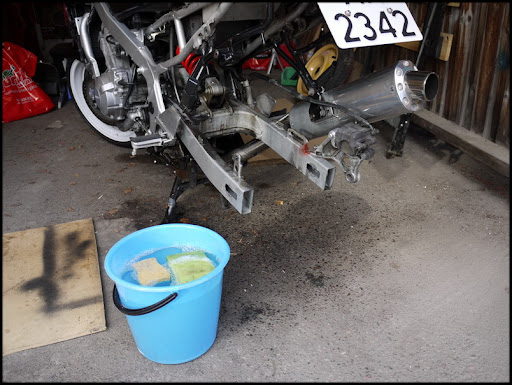
Before:
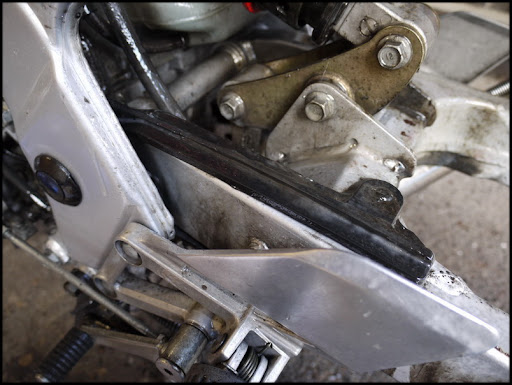
After:
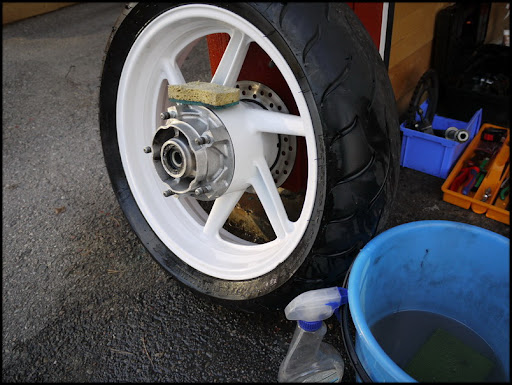
The rear wheel deserves some polishing aswell
Install the new sprocket and tighten up the five nuts.
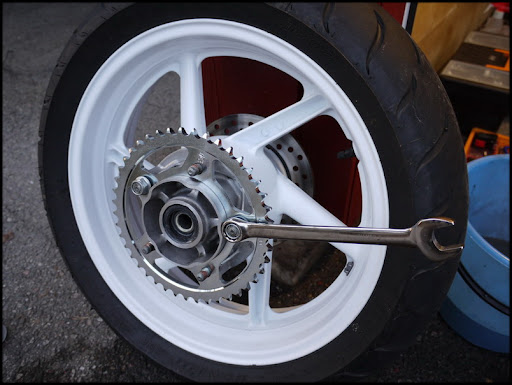
All done and shiny.

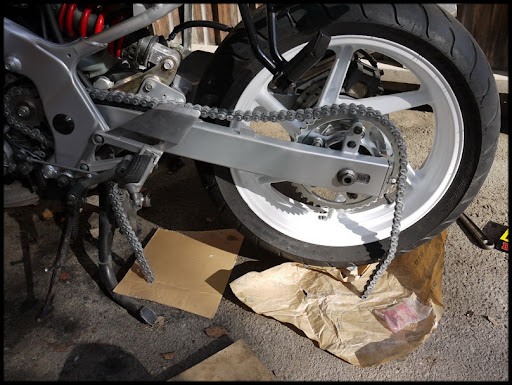
Reinstall the rear wheel, but do not tighten.
Place the wheel in its front-most position and loosely tighten the nut.
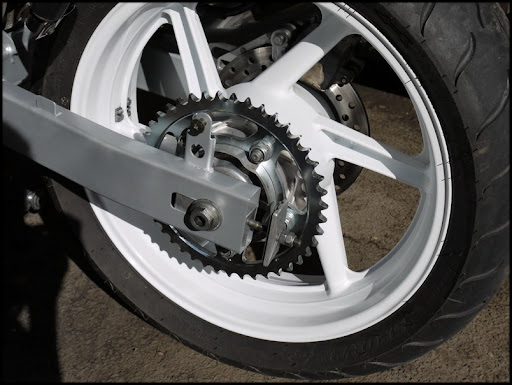
Time to get out the new chain.

Feed the chain over the rear sprocket...
Loosen the rear wheel nut, pull the shaft out and remove the rear wheel.
(Be careful not to loose the wheel spacers.)
Undo the five sprocket retaining nuts.
(Make sure brakepad is not resting on anything if you lay the wheel down flat)
Remove the rear sprocket.
This is the perfect opportunity to do some more cleaning of the bike, as we have good access
to the rear swingarm.
Before:
After:
The rear wheel deserves some polishing aswell
Install the new sprocket and tighten up the five nuts.
All done and shiny.
Reinstall the rear wheel, but do not tighten.
Place the wheel in its front-most position and loosely tighten the nut.
Time to get out the new chain.
Feed the chain over the rear sprocket...
Last edited by Viking; May 21, 2010 at 01:38 PM.
Thread Starter
|
Senior Member
Joined: Jul 2007
Posts: 192
Likes: 1
From: Norway
Guide: Changing chain and sprockets - the old school way - pt IV
... and onto the front sprocket.
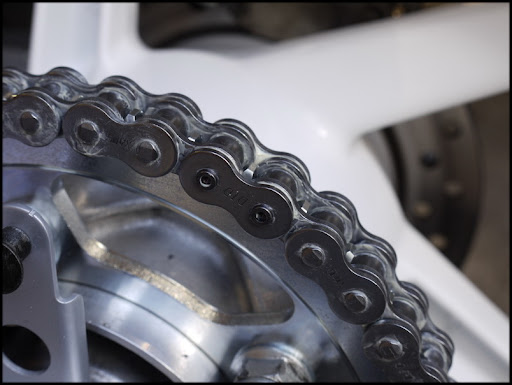
Chain ready for joining:
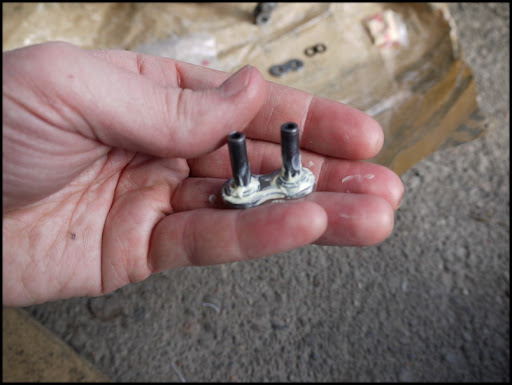
Get out your new master link and o-/x-rings The one i'm using here is a peening master link.
I strongly recommend using such a link instead of a clip-on link.
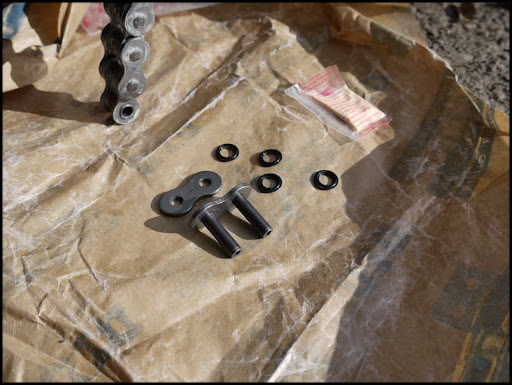
Thread one o-ring onto each of the pins and ad a liberal amount of grease to the o-rings and
pins. (Grease should be supplied with the chain)
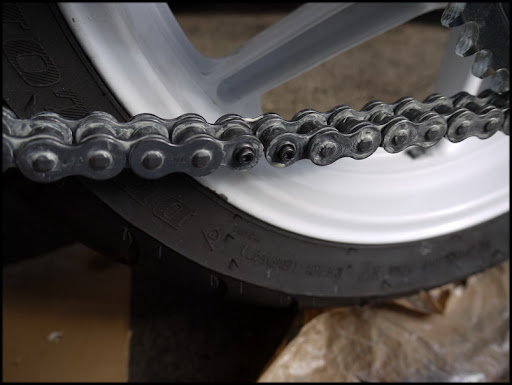
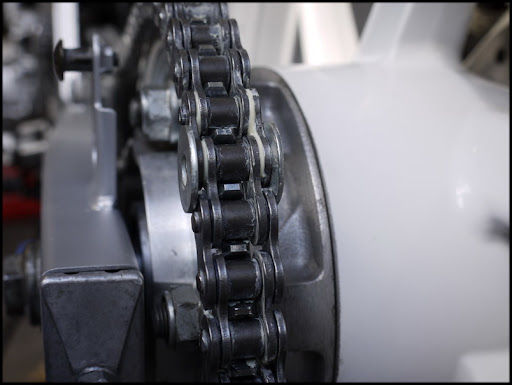
Bring the two ends of the chain together and thread in the new master link.
Put the other set of o-rings onto the pins. Add a liberal amount of grease to the outside of the
master-link and o-rings. Fit the master link retaining plate onto the outside.
Be careful not to loose or damage the o-rings in this process.
(Sequence of components: Master link, o-rings (x2), chain, o-rings (x2), master link plate.)
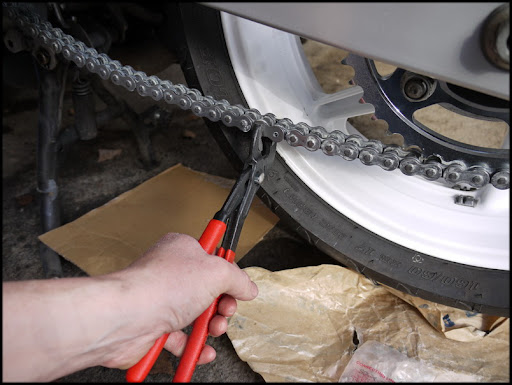
The master link plate should be a press fit onto the pins so you will need some sort of tool
to press the plate onto the pins. I used a set of polygrip pliers, but you can use other tools such as
vice grip or similar. Bigger tools with more leverage will make the job easier.
The fit will be very tight so take you time. Alternate pressing the two sides of the master link
so the plate fits evenly over the two plates.
Once you hit the end of the pins with your pliers, stop.

Get a few washers and place the over the pins. This will enable us to press the plate further over the pins.

At this point you should go slowly. Pressing the master link to much together could damage
the o-rings or seize up the link.
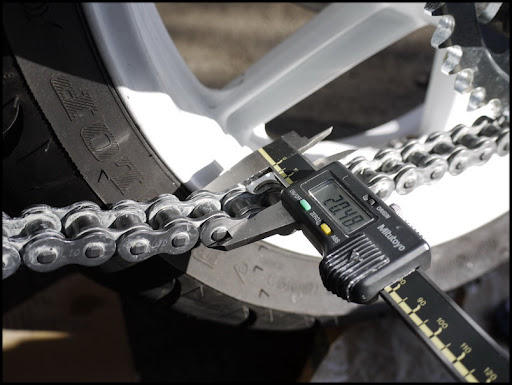
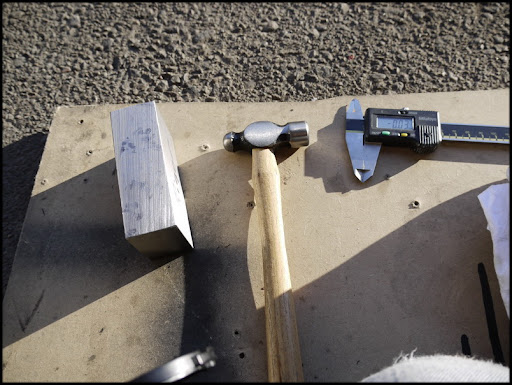
If you happen to have a caliper you could use this to measure the othe links on the chain and
compare this measurement to you master link. Otherwise eyeballing it works ok too.
Heres a tip: A dab of grease on the washers will keep them in place.
Heres another tip:
By using large washers that overlaps the other links, you avoid pressing too far.
(Oh and be careful if doing this by the sprocket, so you don't damage it.)
The pins should be protruding from the plate by about 1mm when finished:
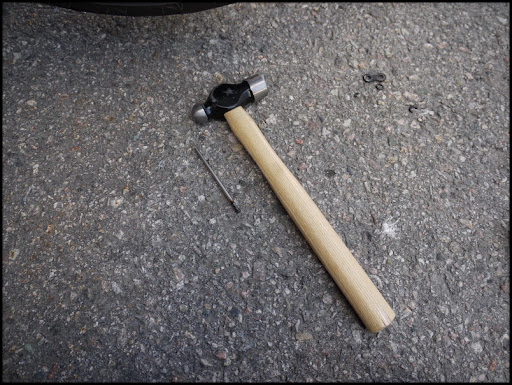
Time to get peening. A small peening hammer is best suited for this job.
You will also need some sort of heavy metal piece as a counterhold behind the chain.
... and onto the front sprocket.
Chain ready for joining:
Get out your new master link and o-/x-rings The one i'm using here is a peening master link.
I strongly recommend using such a link instead of a clip-on link.
Thread one o-ring onto each of the pins and ad a liberal amount of grease to the o-rings and
pins. (Grease should be supplied with the chain)
Bring the two ends of the chain together and thread in the new master link.
Put the other set of o-rings onto the pins. Add a liberal amount of grease to the outside of the
master-link and o-rings. Fit the master link retaining plate onto the outside.
Be careful not to loose or damage the o-rings in this process.
(Sequence of components: Master link, o-rings (x2), chain, o-rings (x2), master link plate.)
The master link plate should be a press fit onto the pins so you will need some sort of tool
to press the plate onto the pins. I used a set of polygrip pliers, but you can use other tools such as
vice grip or similar. Bigger tools with more leverage will make the job easier.
The fit will be very tight so take you time. Alternate pressing the two sides of the master link
so the plate fits evenly over the two plates.
Once you hit the end of the pins with your pliers, stop.
Get a few washers and place the over the pins. This will enable us to press the plate further over the pins.
At this point you should go slowly. Pressing the master link to much together could damage
the o-rings or seize up the link.
If you happen to have a caliper you could use this to measure the othe links on the chain and
compare this measurement to you master link. Otherwise eyeballing it works ok too.
Heres a tip: A dab of grease on the washers will keep them in place.
Heres another tip:
By using large washers that overlaps the other links, you avoid pressing too far.
(Oh and be careful if doing this by the sprocket, so you don't damage it.)
The pins should be protruding from the plate by about 1mm when finished:
Time to get peening. A small peening hammer is best suited for this job.
You will also need some sort of heavy metal piece as a counterhold behind the chain.
Last edited by Viking; May 23, 2010 at 03:59 AM.
Thread Starter
|
Senior Member
Joined: Jul 2007
Posts: 192
Likes: 1
From: Norway
Guide: Changing chain and sprockets - the old school way - pt V
Support the back of the master link with your heavy piece of metal.
With fairly light taps hit the pins with the round side of peening hammer.
Work your way around the pin and slowly peen the pin flat like a mushroom.
Not a lot of peening is needed to hold the plate into place as the fit is very tight already.
An increased diemeter of the pins end of 0.2-0.3mm is sufficient. If you are unsure;
it is better to peen too little than too much.
Using light taps it will probably take you about 40-50 taps on each pin to get the desired peening effect.
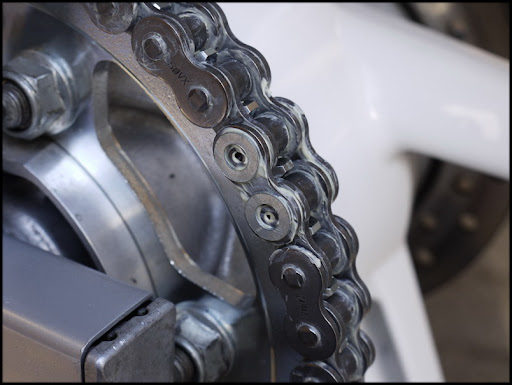
The end result should look something like this:
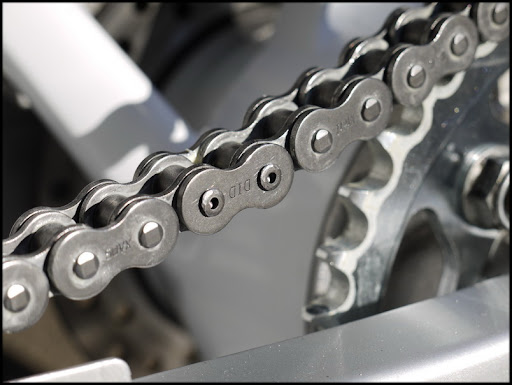
Chain replacement finished:
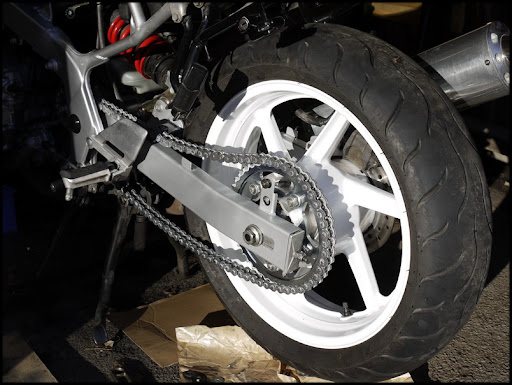
Adjust the slack in the chain and tighten up the rear wheel.
With the new chain installed you can now tighten up the front sprocket retaining bolt using the
rear brake to retain the sprocket.
And thats it. All that remains is to refit the covers and fairings.
Good luck!
Support the back of the master link with your heavy piece of metal.
With fairly light taps hit the pins with the round side of peening hammer.
Work your way around the pin and slowly peen the pin flat like a mushroom.
Not a lot of peening is needed to hold the plate into place as the fit is very tight already.
An increased diemeter of the pins end of 0.2-0.3mm is sufficient. If you are unsure;
it is better to peen too little than too much.
Using light taps it will probably take you about 40-50 taps on each pin to get the desired peening effect.
The end result should look something like this:
Chain replacement finished:
Adjust the slack in the chain and tighten up the rear wheel.
With the new chain installed you can now tighten up the front sprocket retaining bolt using the
rear brake to retain the sprocket.
And thats it. All that remains is to refit the covers and fairings.
Good luck!
Last edited by Viking; May 21, 2010 at 04:40 PM.


Thread Starter
|
Senior Member
Joined: Jul 2007
Posts: 192
Likes: 1
From: Norway
I used this:

Its a degreaser, but in gel-form so it doesn't dry up.
Left it on for half an hour, then washed with regular soap and water.
Regular all-purpose oils such as WD-40 or CRC 5-45 also works excellent as a degreaser.
Having problems getting those oily spots of your rims? Apply a generous amount of WD-40, wait 10 minutes then wash of.
Works every time.
An old toothbrush is great for cleaning those small hard to reach places.
Last edited by Viking; May 21, 2010 at 04:38 PM.

