
Can I make my own gasket?


Thread Starter
|
Member
Joined: Mar 2012
Posts: 30
Likes: 0
Hi everyone, its been awhile. Not too much riding these couple of months because of the wet season, so I though some maintenance work could be done on the bike. lol.
Anyway, I noticed a small puddle of oil under the clutch cover everytime I rode out. I slightly re-tightened all the bolts hoping it would fix the problem but it didn't. So i'm guessing I need to replace the gasket.
My question is, can I make my own gasket? What material are the oem gaskets made of? There aren't any available gaskets to buy off a store, and i'ts gonna take alot of waiting if I order online.
Thanks guys.

Retired Super Moderator, Tin Star Man & Hurricane Saloon Prospect, ROTM Feb 2015
Joined: Sep 2011
Posts: 2,382
Likes: 5
From: V��ksy, Finland
Well, you can make your own gaskets, if you have the skills and tools. It takes a really sharp knife, sharper than an average cheapo carpet-knife. A surgical scalpel is a good choice if you can get your hands on one, they are sold in pharmacies round here. The gasket itself is made of a paper-like material specially engineered for the purpose, it is being sold by arks in some places, dunno who sells it there. The main things are to trace the old gasket as accurate as possible when you draw the outlines onto the paper, match the material and it's thickness (propably not that relevant in a clutch cover seal though, can make all the difference for example under a cylinder block...) and have patience when you cut it so you won't slip the knife too far and cut the new seal... I've done a few between a clutch cover, the first one came out perfect but started leaking, after some research I found out the oil was actually seeping through the gasket cause it was made out of wrong seal material, the second one held after a few ffffffkkk:s Because the knife slipped, but managed to make one after all...
Thread Starter
|
Member
Joined: Mar 2012
Posts: 30
Likes: 0
Well, you can make your own gaskets, if you have the skills and tools. It takes a really sharp knife, sharper than an average cheapo carpet-knife. A surgical scalpel is a good choice if you can get your hands on one, they are sold in pharmacies round here. The gasket itself is made of a paper-like material specially engineered for the purpose, it is being sold by arks in some places, dunno who sells it there. The main things are to trace the old gasket as accurate as possible when you draw the outlines onto the paper, match the material and it's thickness (propably not that relevant in a clutch cover seal though, can make all the difference for example under a cylinder block...) and have patience when you cut it so you won't slip the knife too far and cut the new seal... I've done a few between a clutch cover, the first one came out perfect but started leaking, after some research I found out the oil was actually seeping through the gasket cause it was made out of wrong seal material, the second one held after a few ffffffkkk:s Because the knife slipped, but managed to make one after all...
Could you tell me what kind of gasket material I should be using? I don't really know what the OEMs were made of.
Retired Super Moderator, Tin Star Man & Hurricane Saloon Prospect, ROTM Feb 2015
Joined: Sep 2011
Posts: 2,382
Likes: 5
From: V��ksy, Finland
Sorry, dunno more spesific, i just walzed onto a counter, gave the shopkeep my piece and asked if he got anything better. The problen with the knife is not so much of the skill, cheap dull knife will rip and stick and bounce just when you're in the most difficult bend resulting in a split gasket and foul language. My first version was kind of thick, and the second one was more dense as well as thinner. If you go to a parts shop to ask around tell them what use it's goin to and they'll propably give U the right material... Google seacrhes "gasket paper" and "gasket material' yielded all kinds of interesting liks as well as a few how-to-DIY Youtube vids. Start from there.

Retired Super Moderator, Tin Star Man & Hurricane Saloon Prospect, ROTM Feb 2015
Joined: Sep 2011
Posts: 2,382
Likes: 5
From: V��ksy, Finland
hmm, was the same case with my Cagiva, only there the PO had rammed a screwdriver in between there thus making small nicks in there where the oil was seeping through. It's possible to draw a gasket in between there using the cover itself as a template, a very small film of oil onto the surface makes a pretty mark onto the paper to cut along, but you either have to pull the guide "pipes" out or make the mark on a styrofoam sheet or something else the guides can sink into. i used a dense cell-foam sheet called FinnFoam.

Retired Super Moderator and Fighterer
Joined: Nov 2006
Posts: 6,146
Likes: 37
take your cover off, run some hi-temp silicone around the edge of the cover, put the cover back on. done.
you don't need a scalpel or anything like that.
you'll see it come out of the sides of the cover. after a day, come out and clean up the mess that's on the outside of the cover by simply pulling the excess off. the cover is holding on all it needs because you've torqued the bolts down.
i've done it multiple times on multiple engines including the 954.
just don't put a crazy amount on.
Thread Starter
|
Member
Joined: Mar 2012
Posts: 30
Likes: 0
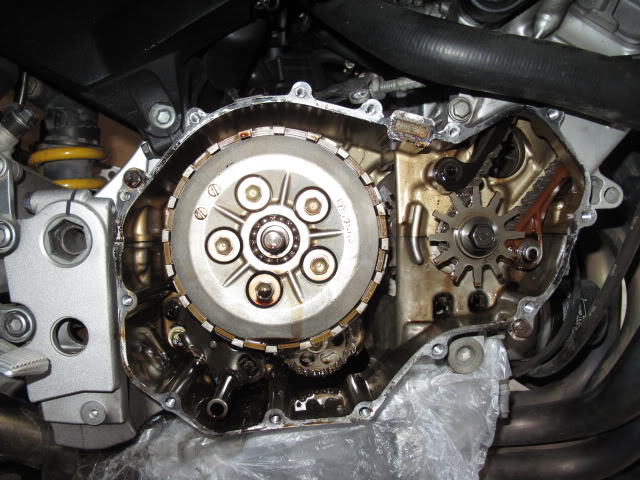
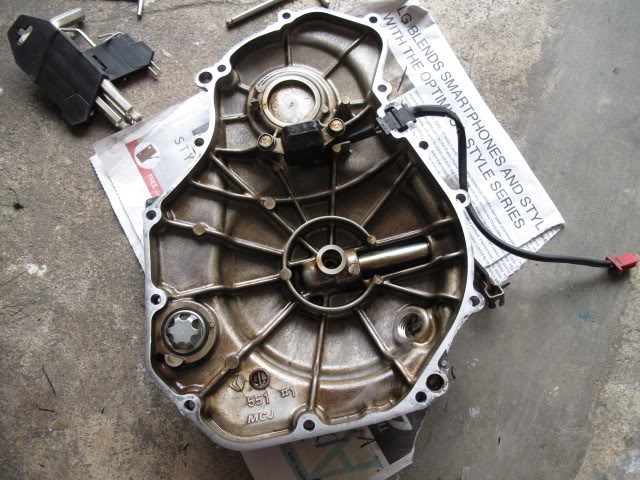
Well I had some free time today so I thought I would try and fix the leak problem. I took out all the bolts and the clutch cable bracket and removed the case cover. I discovered there was no gasket in between and just sealant to mate them together. By the way thanks Conrice for confirming that there was no gasket in the first place ( i checked the manual as well). So I decided just to use some hi-temp sealant instead.
So I cleaned both surfaces using a thin blade and a clean rag...
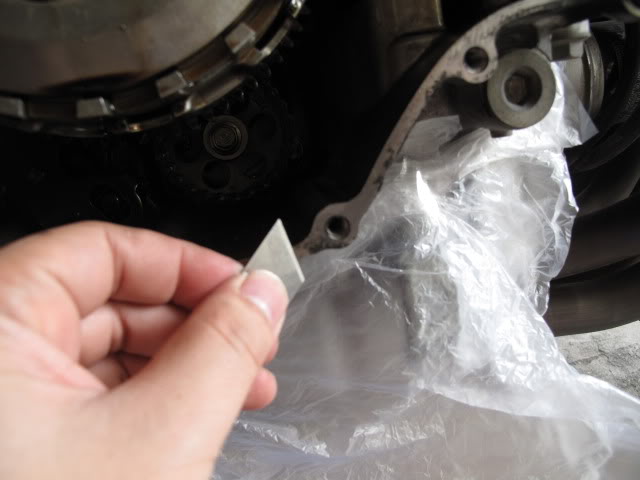
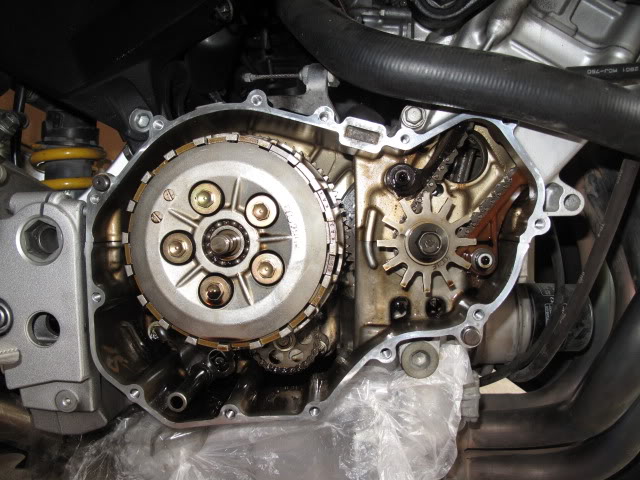
...after cleaning the engine side.
Before and after of the cover side.
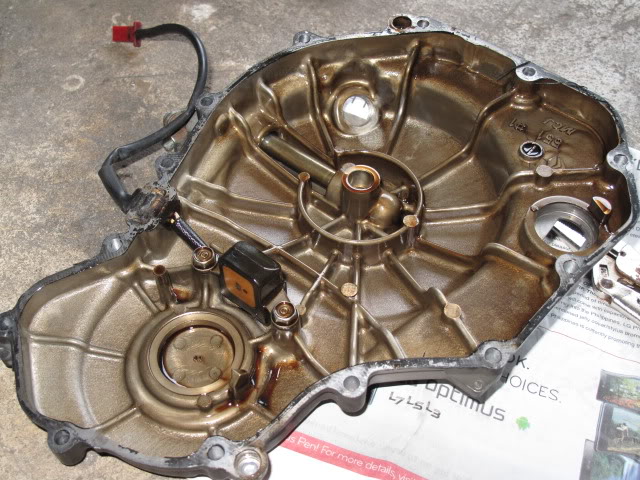
By the way, the oil level sight glass was so stained that you couldn't see if there was oil in the engine hahaha...so I took the extra step and cleaned it as well...before and after.
So here's a pic with sealant...sorry for the messy application. I lost the nozzle and had to do it using my fingers.lol.

Yeah i used red instead of black, but I think it doesn't really matter. I'll be cleaning off the excess anyway and there wont be traces of red after some thorough wipe downs.lol.
So I just put all parts back together, and will wait for the sealant to cure. Then I'll run the engine and see if my efforts will hold up, hopefully haha.
Thank you to all the guys that commented on this thread. I will update the results ASAP.
So I cleaned both surfaces using a thin blade and a clean rag...
...after cleaning the engine side.
Before and after of the cover side.
By the way, the oil level sight glass was so stained that you couldn't see if there was oil in the engine hahaha...so I took the extra step and cleaned it as well...before and after.
So here's a pic with sealant...sorry for the messy application. I lost the nozzle and had to do it using my fingers.lol.
Yeah i used red instead of black, but I think it doesn't really matter. I'll be cleaning off the excess anyway and there wont be traces of red after some thorough wipe downs.lol.
So I just put all parts back together, and will wait for the sealant to cure. Then I'll run the engine and see if my efforts will hold up, hopefully haha.
Thank you to all the guys that commented on this thread. I will update the results ASAP.