
How To: Installing Temp Sensor (InLine)

EDIT: GO TO PAGE2 FOR THE UPDATE WITH COPPER.
Hey boys and girls!
Thought you kids would like a spicycat walk-through on my progress so far of making my bike better than all of yours.. combined.
Note: This is pretty watered down how-to, its more of an overview. if you have any questions because im sure i left a ton of stuff out, post and ill answer as best i can.
RAWRRR
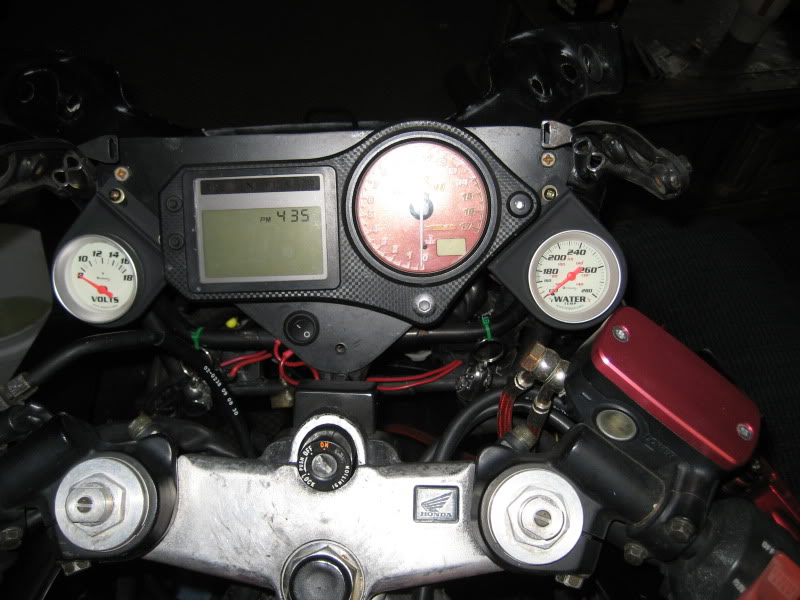
So this is a In-Line radiator temp sensor for you kids who did the f4i gauge swap.

---
Difficulty level: can you get your fairings off? know what a temp sensor is? then yes you can do this.
Tools: everything required to get your fairings off. pliers, wrenches, drill (for drilling the mount screws). razor blade. screwdrivers. wire crimpers and spare electrical wiring. a bucket for your rad fluid. wire strippers.
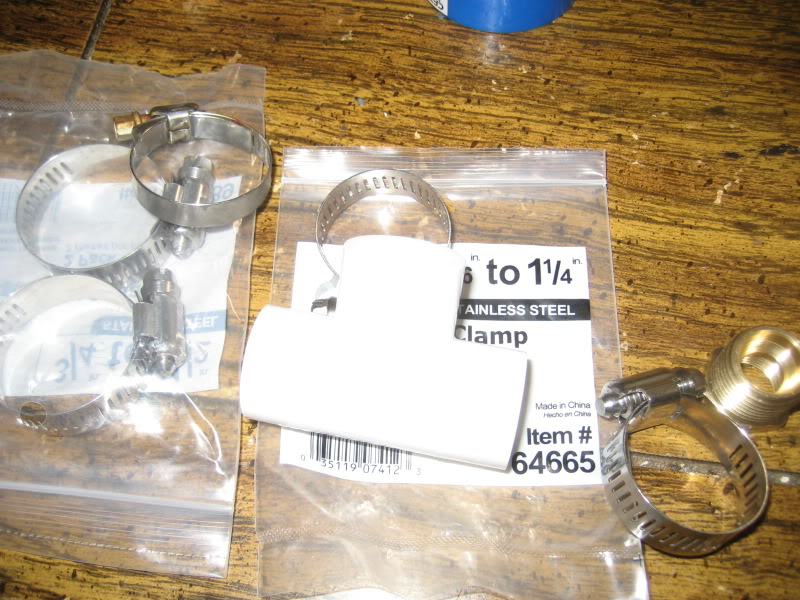
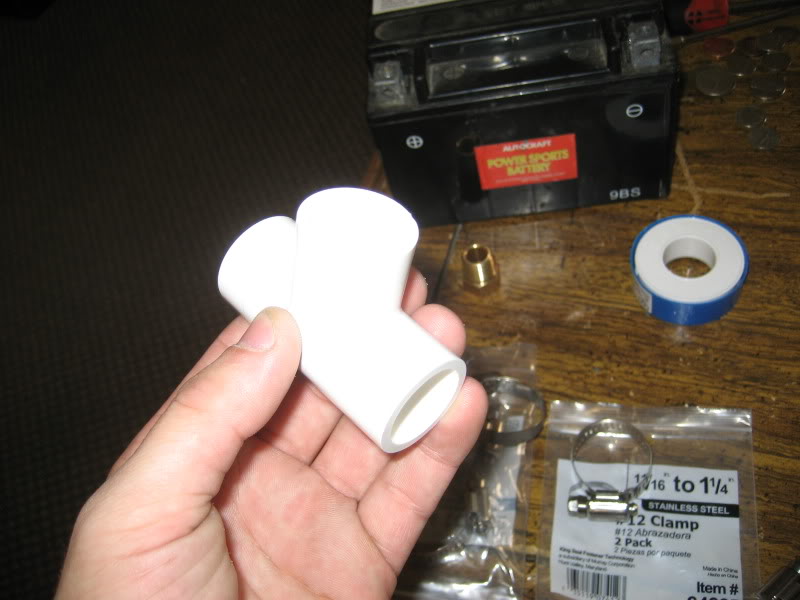
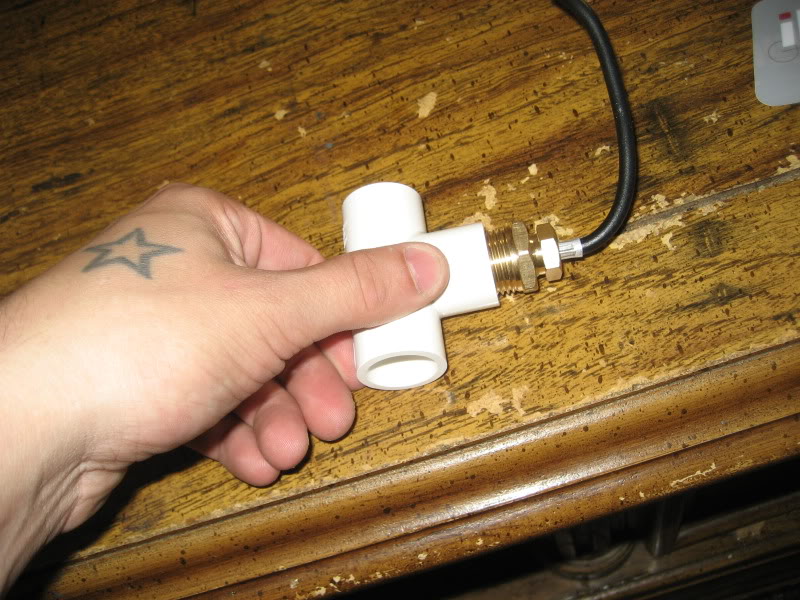
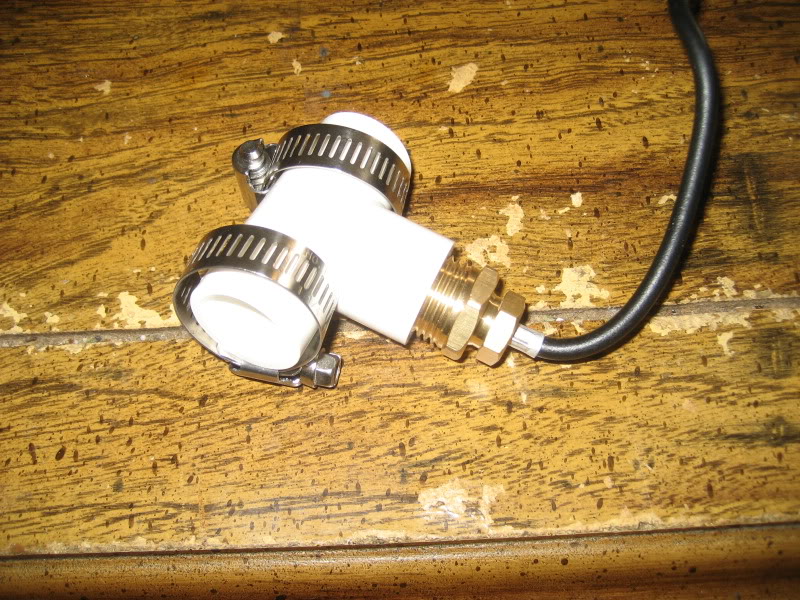
Supplies: flat black (or your choice to paint the mount or not)(1.00), A pvc T-Line from lowes (make sure it has threads for the correct screw in)(2.00), and relative size to the radiator hose. temp sensor (mine was from oriley and was about 20 bucks) and a mount for it (5.00). zip ties, and metal crimps to hold the hose one (2.00), teflon tape (2.00). water (...), and water wetter (? dunno, had some lying around, maybe 10 bucks?)
12 pack coors light is mandatory. (10 bucks)
---
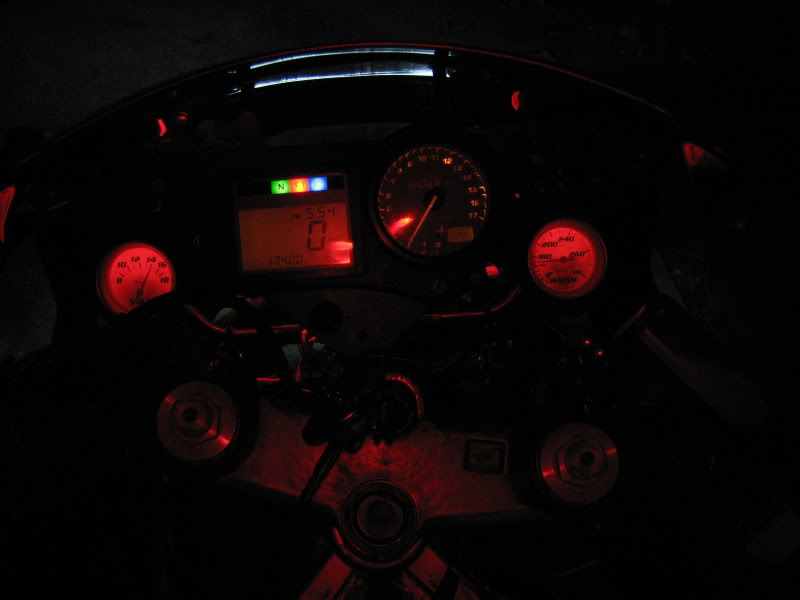
Before
Aight...
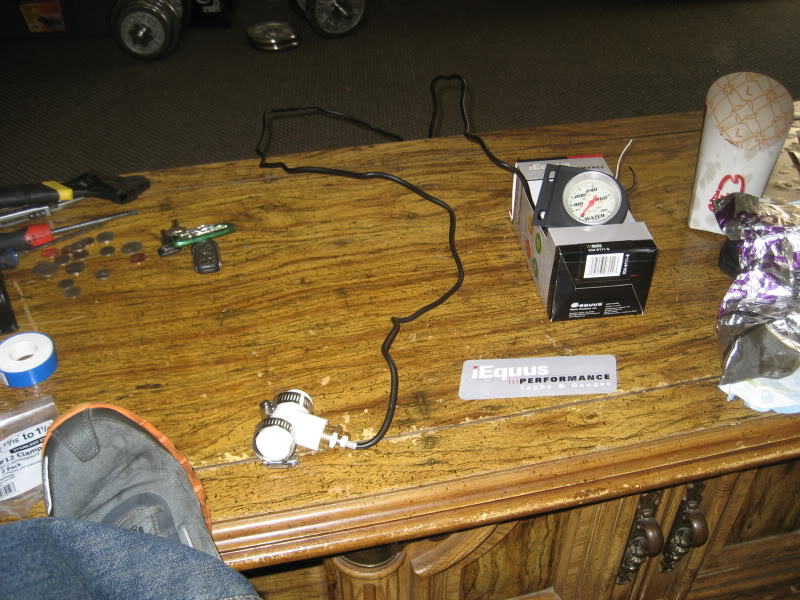
So i got all my supplies together and made sure everything fit together.
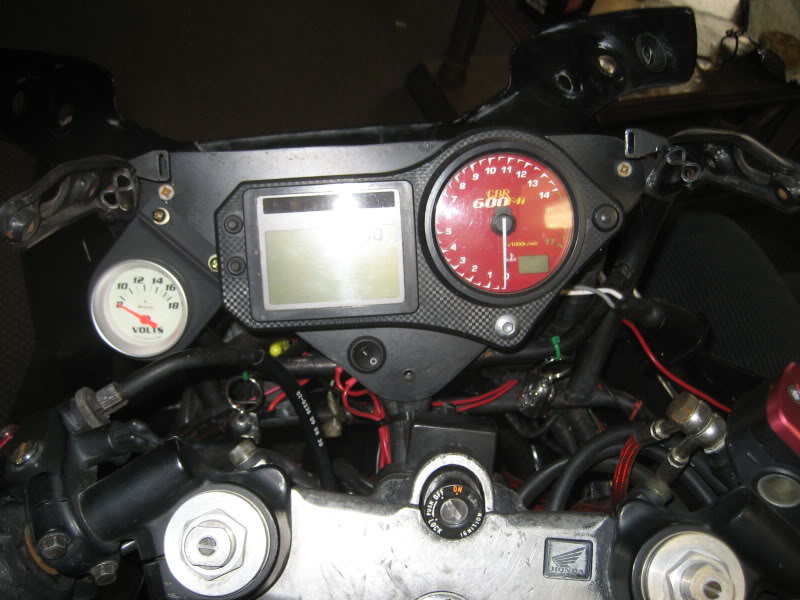
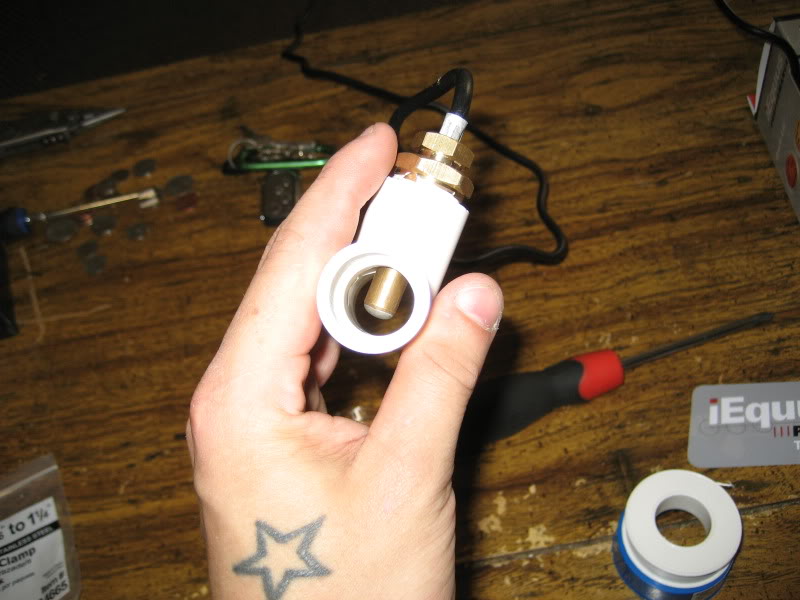
Bracket painted, and assembled with the gauge.
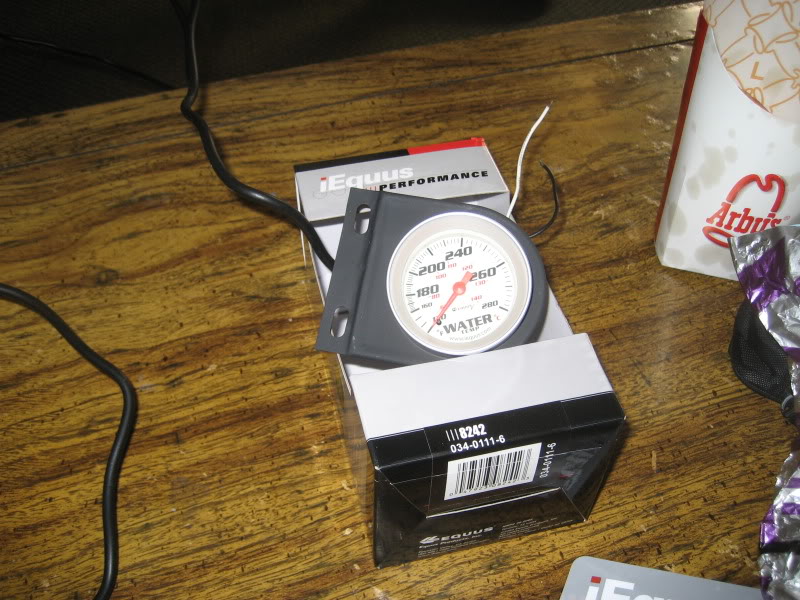
Assembled:
Full view:
Teflon taped the initial screw:
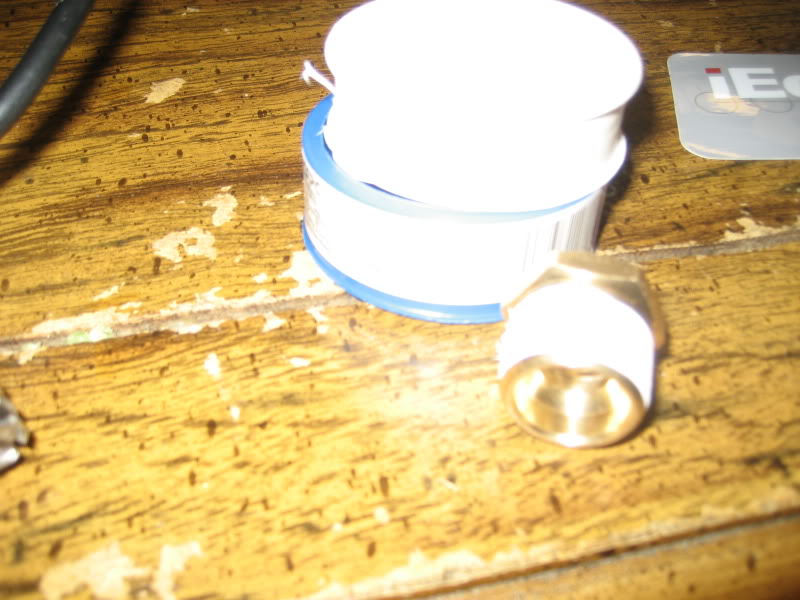
Screwed in place:
Placement:
---
OK SOOOOO
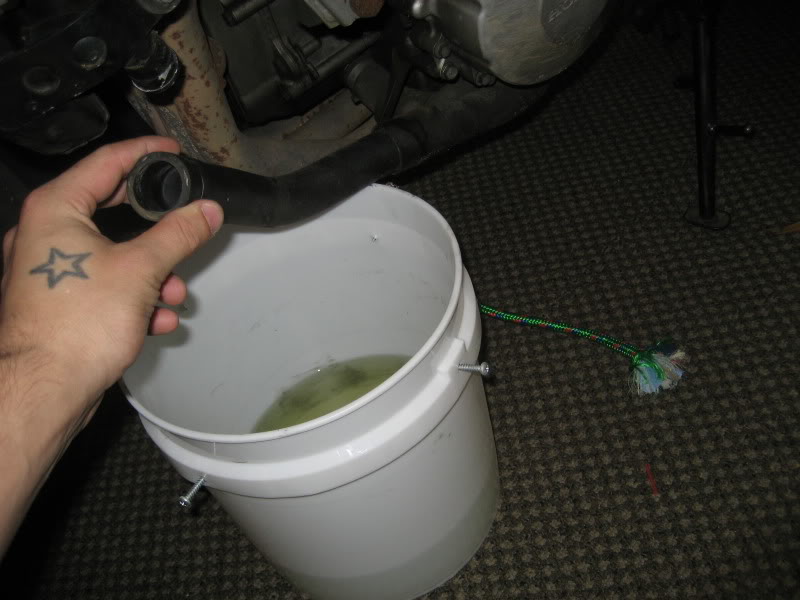
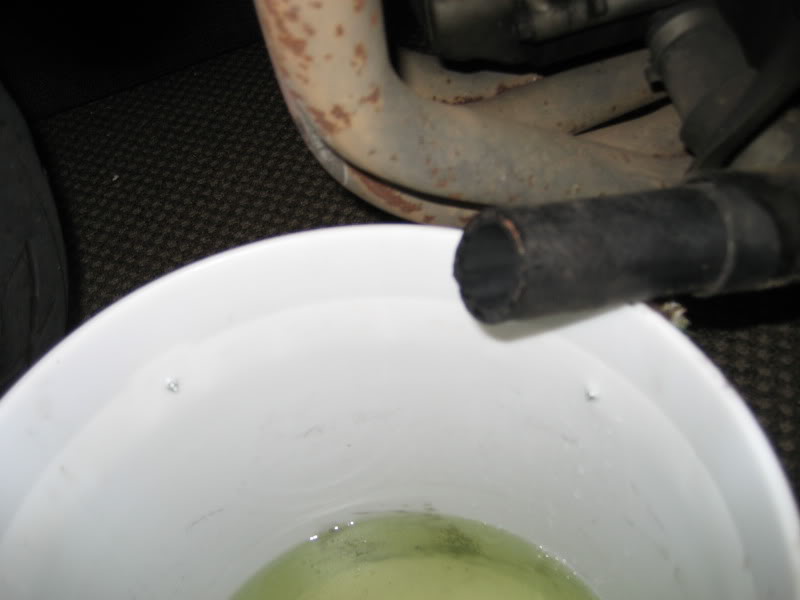
Drain your coolant from the left side of the bike.
Have a bucket handy. Have papertowels handy. Be handy.
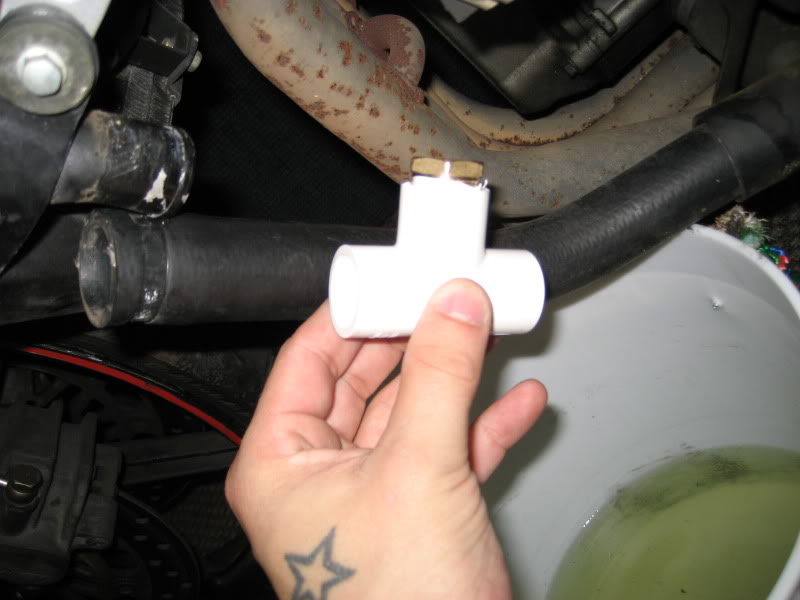
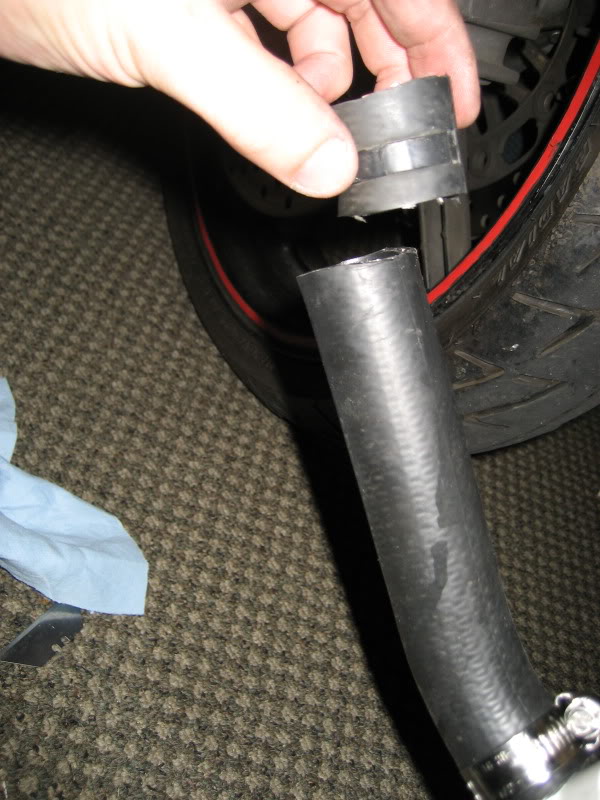
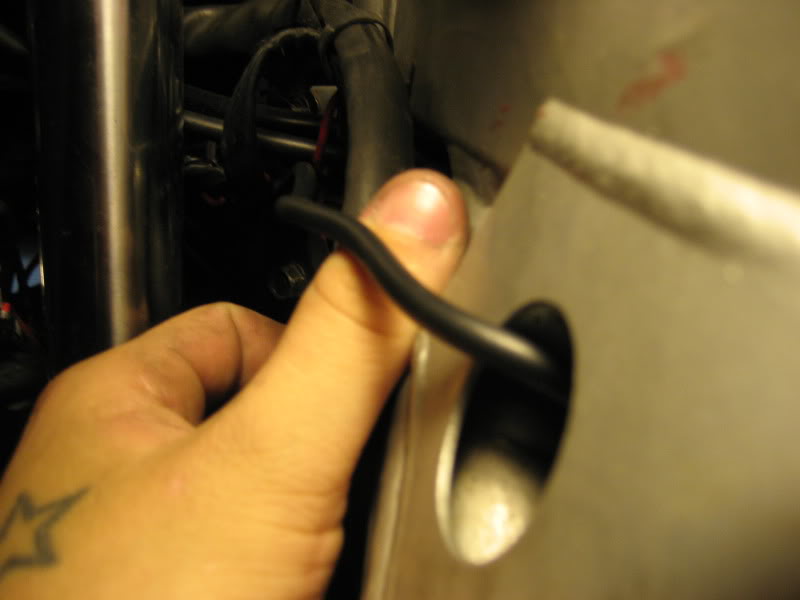
Make a proper cut with a razorblade. be careful.

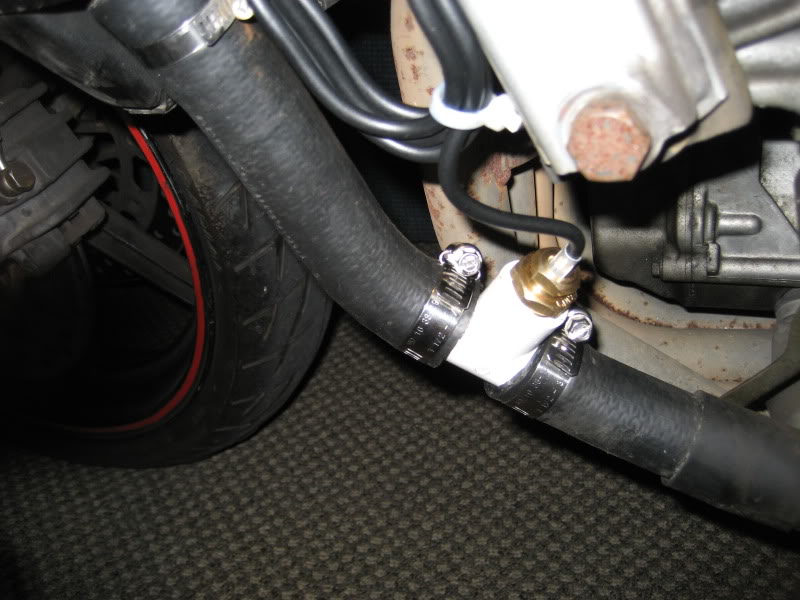
Its going to take some patience to get this bad boy on, i used some lube to make things easier. Make sure the bracket is already slid on.
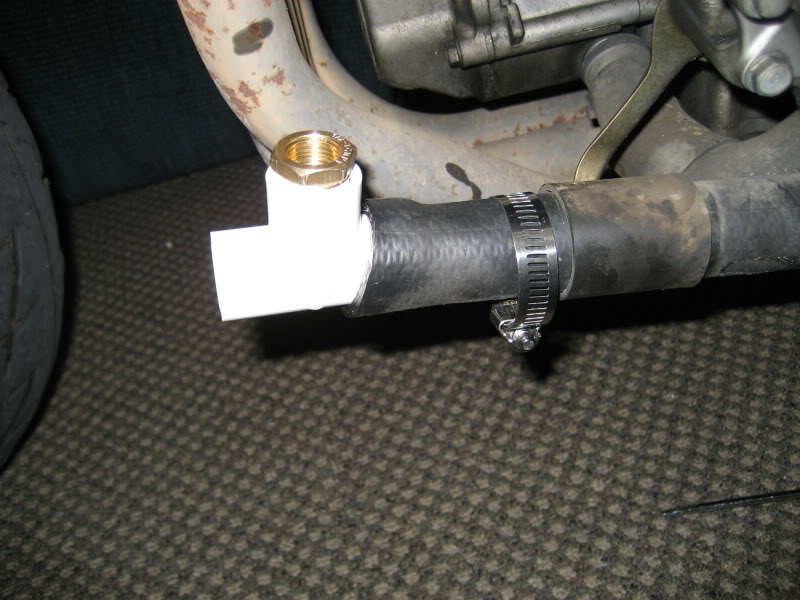
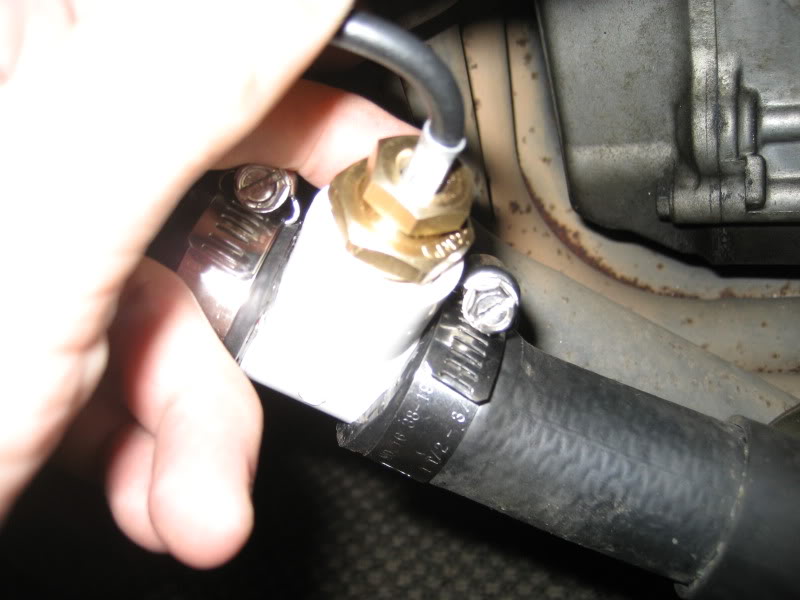
Tighten it down.
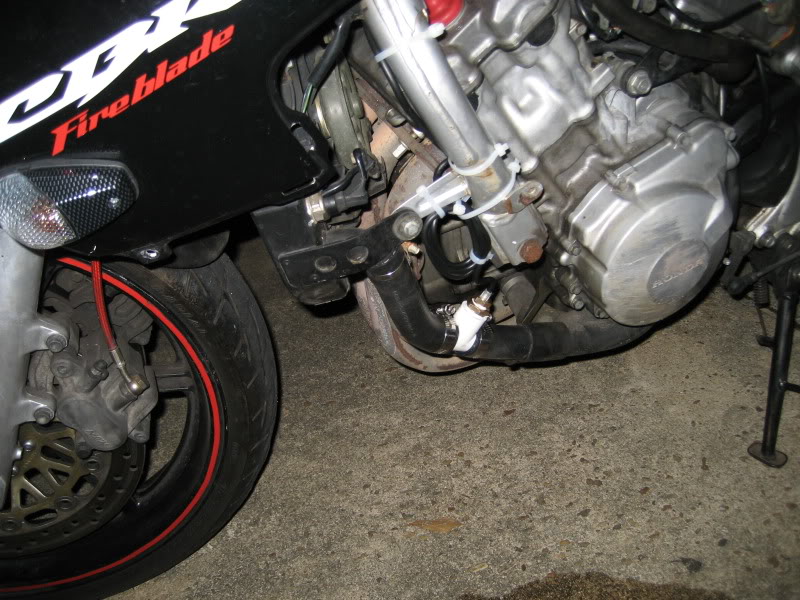
Put the other side back on, make appropriate segment cuts to make it fit back properly... mine was about 1inch total.
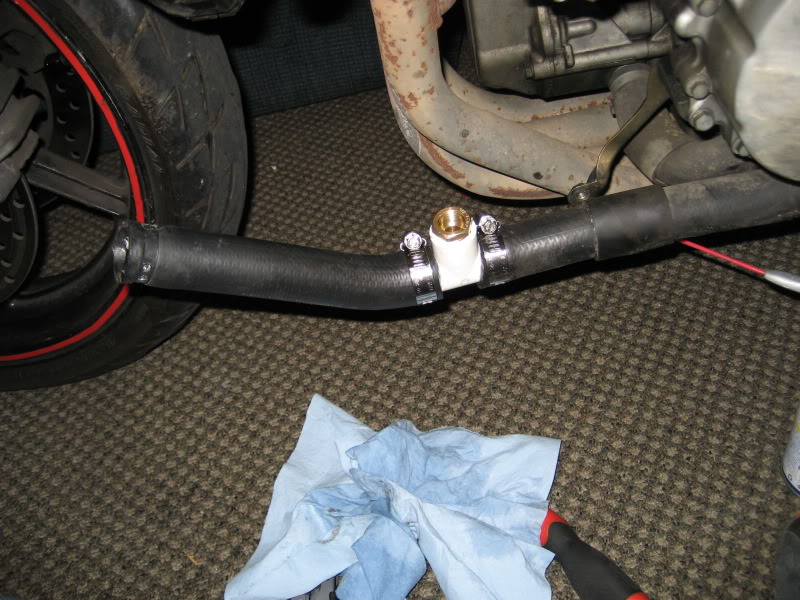
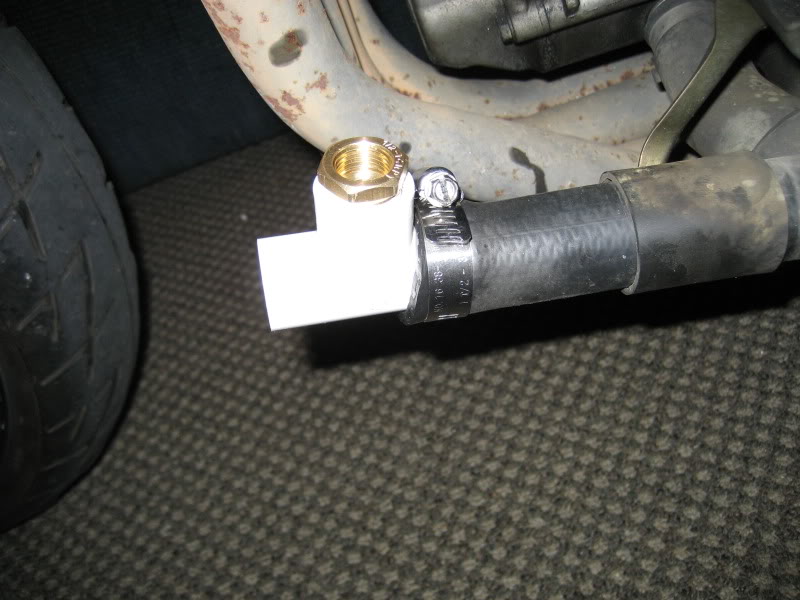
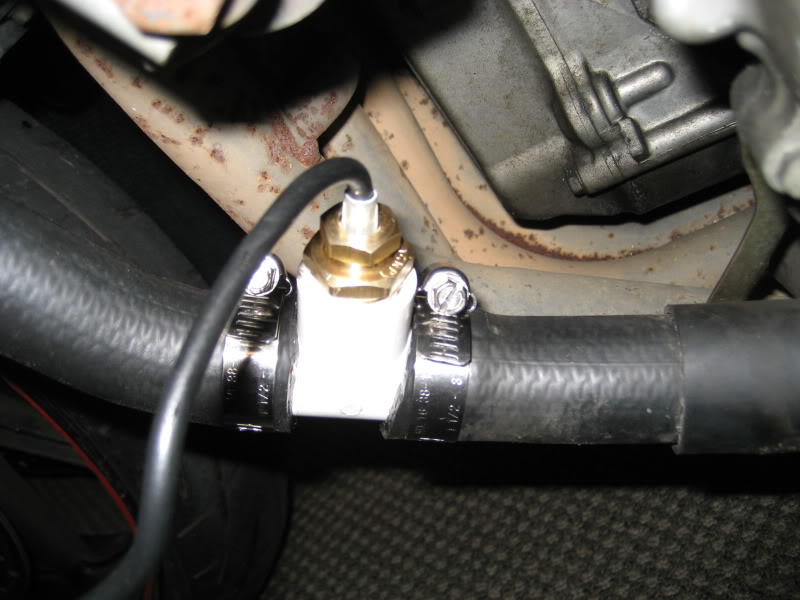
Put her back together:
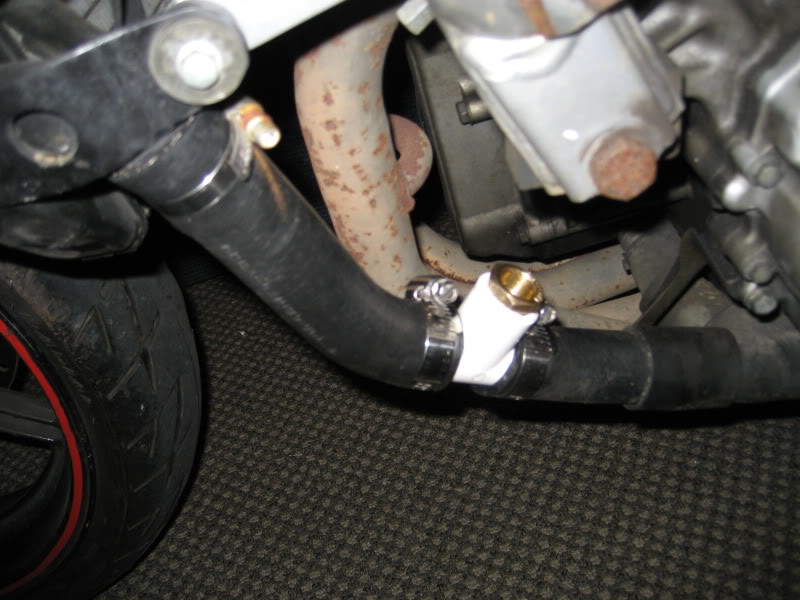
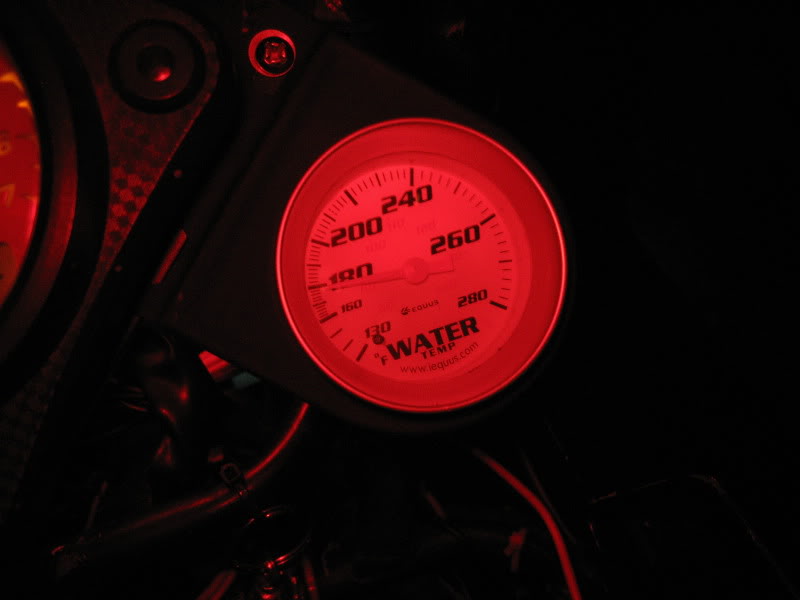
Testing it all together:
CALL OF DUTY makes things go by smoother:
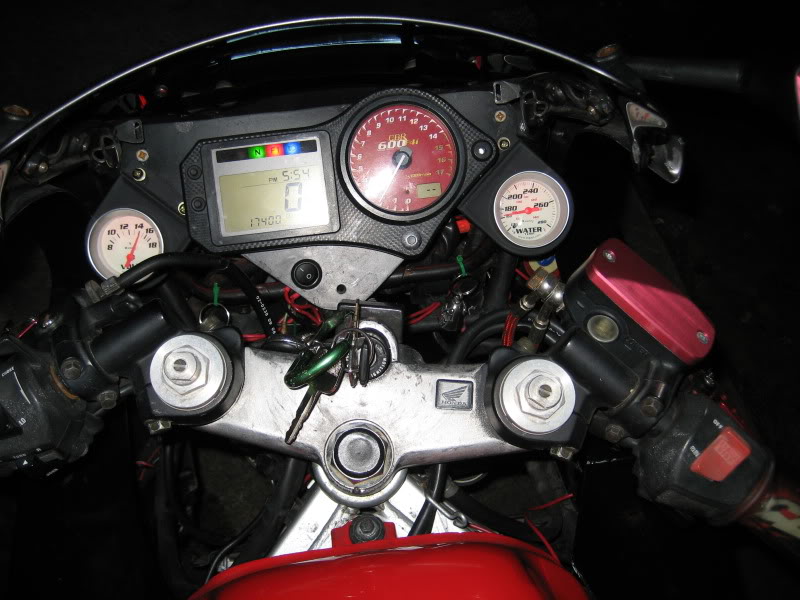
Gauge line up:
Run the cable along the frame, making sure to secure with zipties and keeping it snug so it doesnt touch the forks.
Notice the extra cable wound up above it:
Line up and testing:
Fill er back up, warm her up and take off!
---
Sex on wheels:
RAWRRR
Hey boys and girls!
Thought you kids would like a spicycat walk-through on my progress so far of making my bike better than all of yours.. combined.
Note: This is pretty watered down how-to, its more of an overview. if you have any questions because im sure i left a ton of stuff out, post and ill answer as best i can.
RAWRRR
So this is a In-Line radiator temp sensor for you kids who did the f4i gauge swap.
---
Difficulty level: can you get your fairings off? know what a temp sensor is? then yes you can do this.
Tools: everything required to get your fairings off. pliers, wrenches, drill (for drilling the mount screws). razor blade. screwdrivers. wire crimpers and spare electrical wiring. a bucket for your rad fluid. wire strippers.
Supplies: flat black (or your choice to paint the mount or not)(1.00), A pvc T-Line from lowes (make sure it has threads for the correct screw in)(2.00), and relative size to the radiator hose. temp sensor (mine was from oriley and was about 20 bucks) and a mount for it (5.00). zip ties, and metal crimps to hold the hose one (2.00), teflon tape (2.00). water (...), and water wetter (? dunno, had some lying around, maybe 10 bucks?)
12 pack coors light is mandatory. (10 bucks)
---
Before
Aight...
So i got all my supplies together and made sure everything fit together.
Bracket painted, and assembled with the gauge.
Assembled:
Full view:
Teflon taped the initial screw:
Screwed in place:
Placement:
---
OK SOOOOO
Drain your coolant from the left side of the bike.
Have a bucket handy. Have papertowels handy. Be handy.
Make a proper cut with a razorblade. be careful.
Its going to take some patience to get this bad boy on, i used some lube to make things easier. Make sure the bracket is already slid on.
Tighten it down.
Put the other side back on, make appropriate segment cuts to make it fit back properly... mine was about 1inch total.
Put her back together:
Testing it all together:
CALL OF DUTY makes things go by smoother:
Gauge line up:
Run the cable along the frame, making sure to secure with zipties and keeping it snug so it doesnt touch the forks.
Notice the extra cable wound up above it:
Line up and testing:
Fill er back up, warm her up and take off!
---
Sex on wheels:
RAWRRR
Last edited by spicymeowmix; Feb 26, 2011 at 07:31 PM.

well yea i thought about it,cept its hidden and well, i didnt want it to chip or anything like that.

is this what you were effing talking about? i effing knew you were doing this last night. i told you i was going to be effing pissed. eff you spicy eff you. you effed with my drinking time GD it (gosh darn)
totally worth you speeding home to see.
does it look nice, yes, but **** off. lol totally wasn't worth that. you could have just told me and i still would have looked at it later. you made it sound like it was really important. ugh... and for that, you aren't cuddling with me on the trip, you can cuddle with english chris.
the bike has been warmed up to fan on temp, and stayed there a bit, and no problems so far, but ill keep an eye out.
cpvc is what lowes sells, and its rated well above normal pvc for pressure and heat.
there seems to be come controversy on its max temperature saying as low as 180*f (and as high as 450*f) but at a high pressure/low pressure situations...
there seems to be come controversy on its max temperature saying as low as 180*f (and as high as 450*f) but at a high pressure/low pressure situations...

Senior Member
Joined: Apr 2010
Posts: 484
Likes: 0
From: Chicago, IL
http://www.harvel.com/piping-cpvc-derating.asp
"THE MAXIMUM SERVICE TEMPERATURE FOR CPVC IS 200�F."
The more pressure the lower heat rating it has... pvc is also soft. I'll stop by HD and Menards and look for a copper T, I just need to find the right size for it to fit in the hose.
"THE MAXIMUM SERVICE TEMPERATURE FOR CPVC IS 200�F."
The more pressure the lower heat rating it has... pvc is also soft. I'll stop by HD and Menards and look for a copper T, I just need to find the right size for it to fit in the hose.