
Crazytaxi's 1998 CBR 600 F3


Super Moderator
Joined: Aug 2006
Posts: 5,304
Likes: 512
From: South Florida, USA
Very nice and well documented. I often thought that if ever did that change of the gauges on one of my F3's that I'd do it that way. Nice to see how it looks.
I suppose it's kinda cold there in Norway now.
I suppose it's kinda cold there in Norway now.


Thread Starter
|
Member
Joined: Apr 2010
Posts: 36
Likes: 0
From: Norway
 Nice to inspire others Yeah, I tried to document it as good as possible, as every guide I found, I always ended up with some questions.. So I found the electrical schemes for both the f3 and f4i, and started to make my own
I''m wondering about placing a gear indicator somewhere to, to "fill up" some space, and maybe a logo. Yeah yesterday it came about 10 inches with snow, and was about -10 degrees celcius. So no more CBR until spring now

I'm unsure about changing to different colour leds, since I have to de-solder the display to change most of them..
Thread Starter
|
Member
Joined: Apr 2010
Posts: 36
Likes: 0
From: Norway
I was wondering to go this route with the bike during the off season, aka the winter..
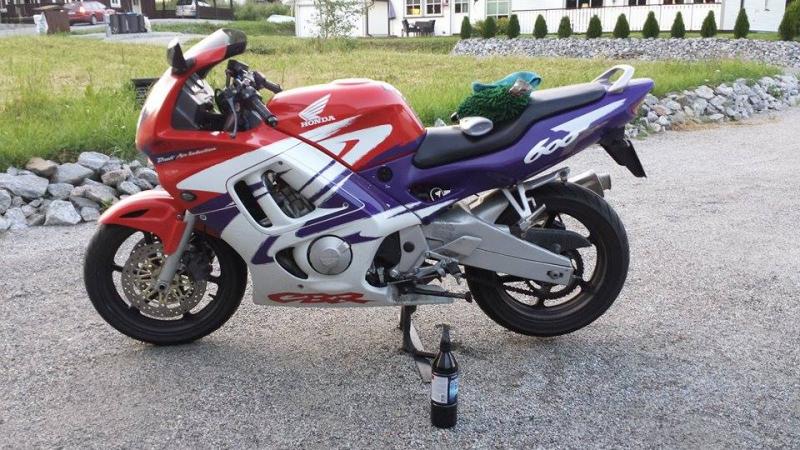
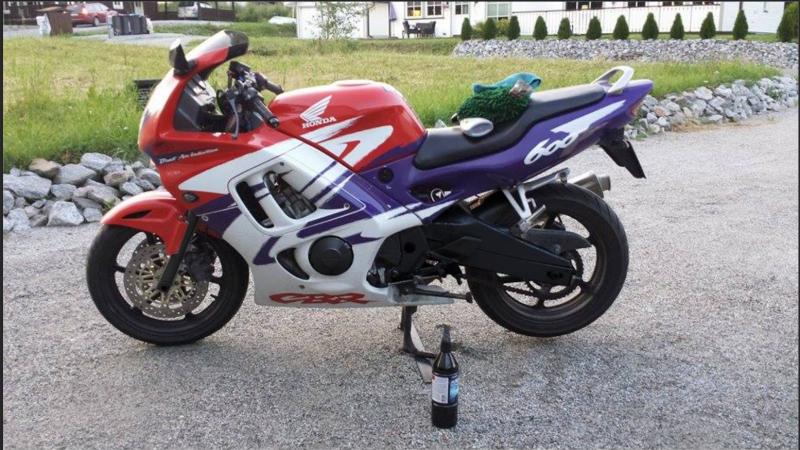
This is how it looks now:
was wondering about going this route, maybe with powdercoating the rims white.
Any opinions on this?
And was also wondering if there is a rule of thumb regarding the forks, and when to take a service on them? since the bike now has almost 60 000 km's on the meter.
This is how it looks now:

was wondering about going this route, maybe with powdercoating the rims white.

Any opinions on this?
And was also wondering if there is a rule of thumb regarding the forks, and when to take a service on them? since the bike now has almost 60 000 km's on the meter.
Thread Starter
|
Member
Joined: Apr 2010
Posts: 36
Likes: 0
From: Norway
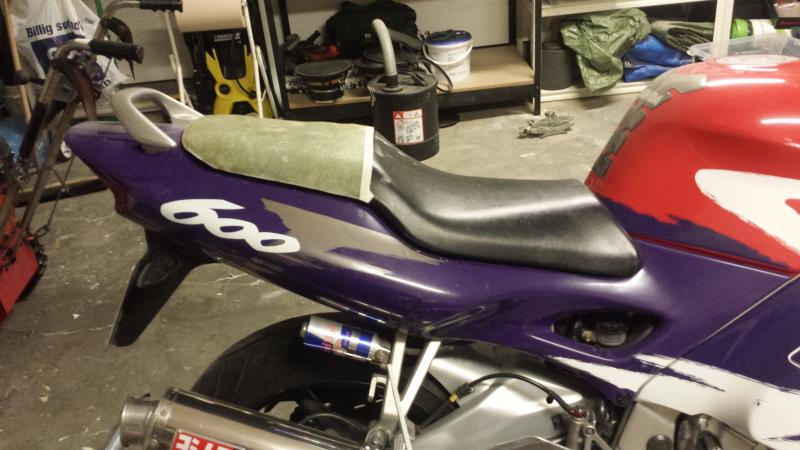
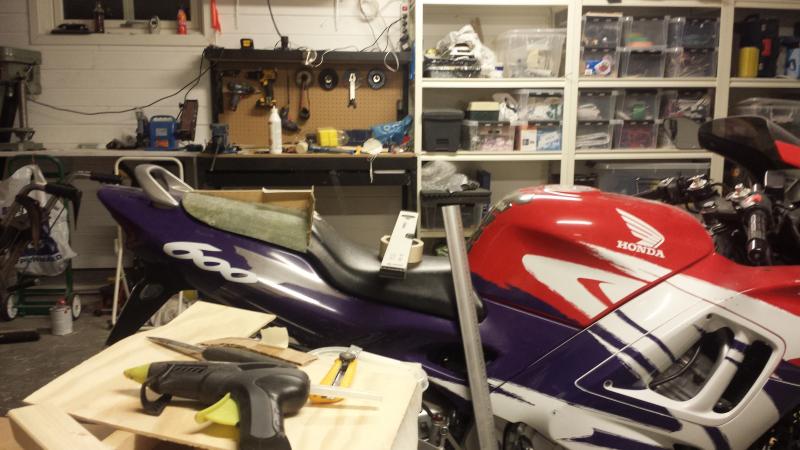
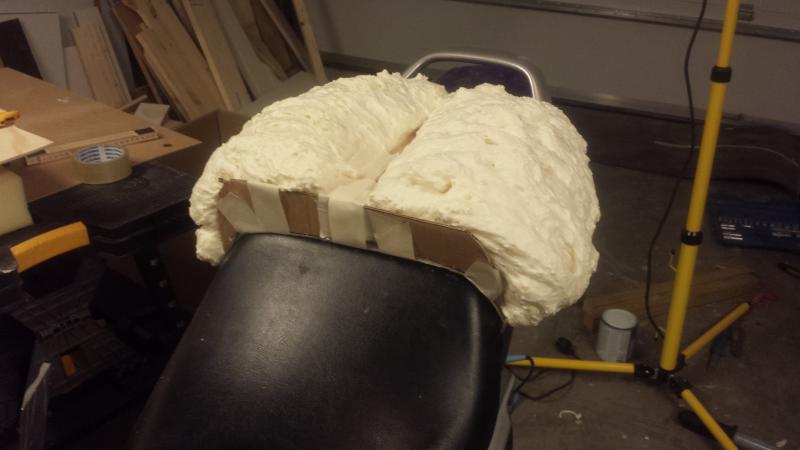
Had some free time that I had to fill, so I started making a Seat Cowl.
I was wondering about purchasing a Cowl from Pyramid. But even a 2.nd quality one would end up costing me $150 before paint, with the shipping and taxes..
so started making one with materials I had lying around.
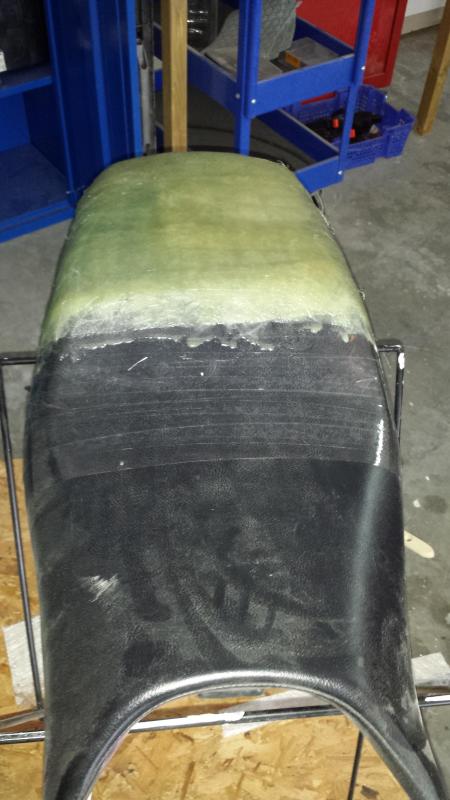
fibreglassing the bottom:
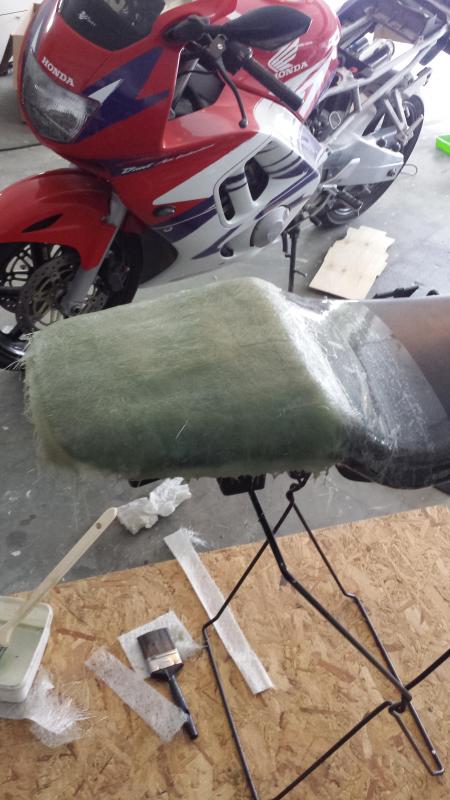
testfitting after cutting away excess fibreglass:
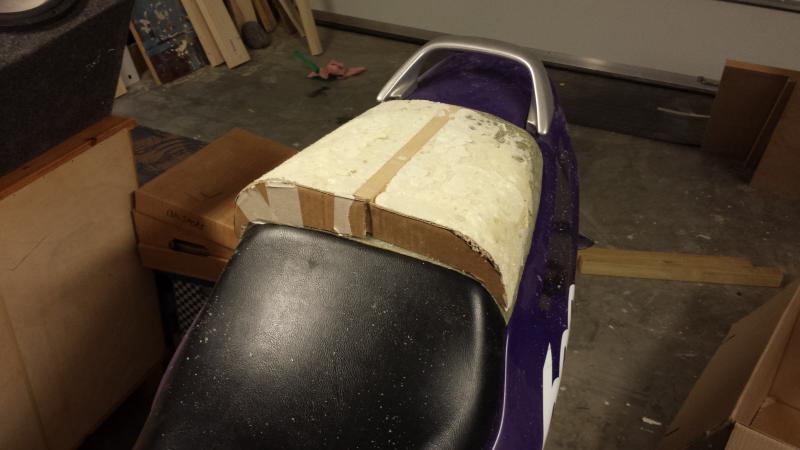
using cardboard to make a template for the front of the cowl:
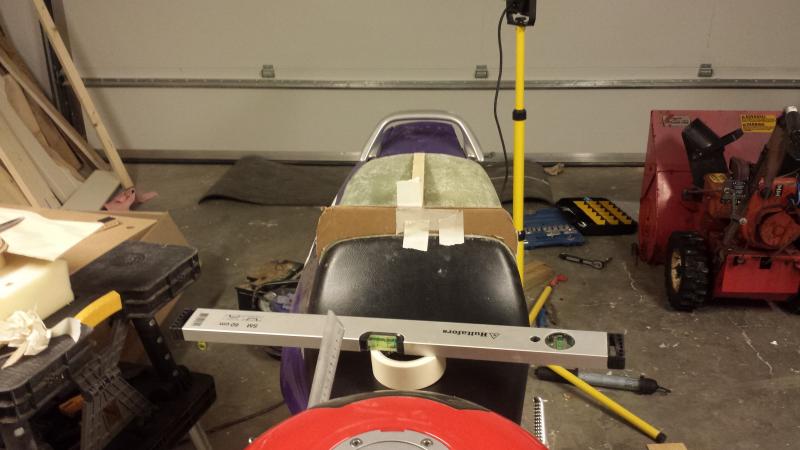
hotglued a piece of mdf to help me with the angle and keep a straight line:
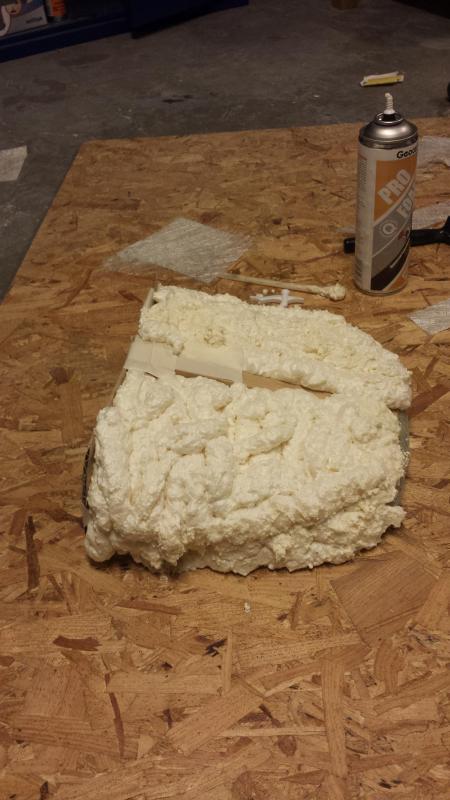
used expanding foam to make a base to work on. I used the foam because its much easier to make a rough shape before filler..
I was wondering about purchasing a Cowl from Pyramid. But even a 2.nd quality one would end up costing me $150 before paint, with the shipping and taxes..
so started making one with materials I had lying around.
fibreglassing the bottom:


testfitting after cutting away excess fibreglass:

using cardboard to make a template for the front of the cowl:

hotglued a piece of mdf to help me with the angle and keep a straight line:

used expanding foam to make a base to work on. I used the foam because its much easier to make a rough shape before filler..

Thread Starter
|
Member
Joined: Apr 2010
Posts: 36
Likes: 0
From: Norway
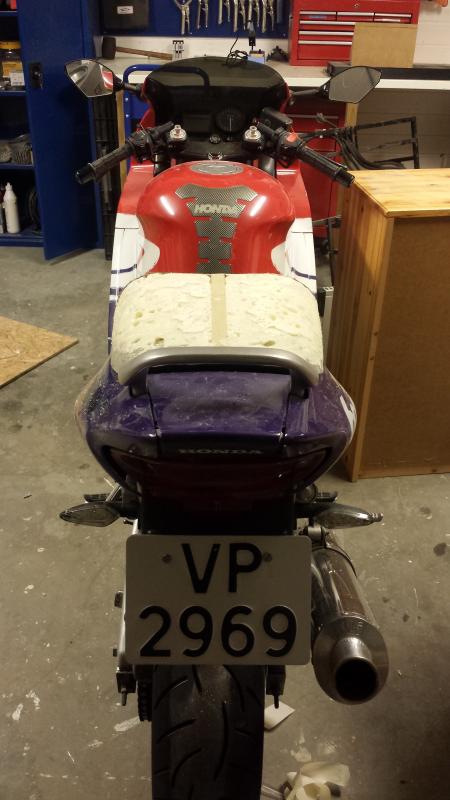
A little testfit revealed that I maybe needed to do some minor adjustments... 
After some work I was satisfied with the result and put a couple of layers with fibreglass mat on it:
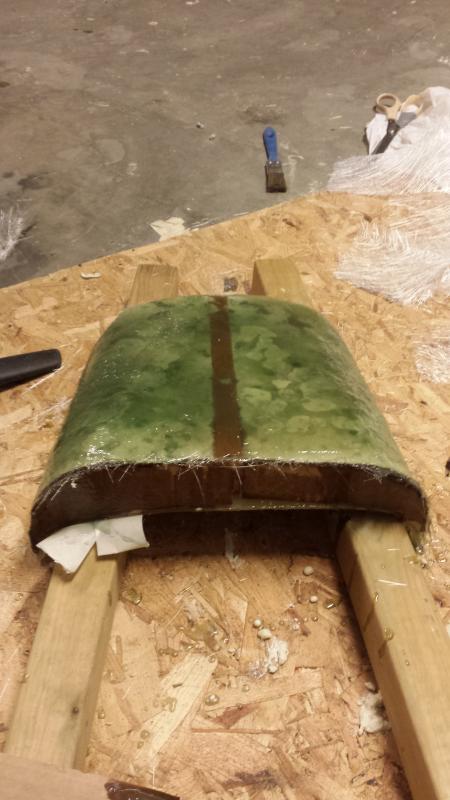

After some work I was satisfied with the result and put a couple of layers with fibreglass mat on it:


Retired Super Moderator, Tin Star Man & Hurricane Saloon Prospect, ROTM Feb 2015
Joined: Sep 2011
Posts: 2,382
Likes: 5
From: V��ksy, Finland
You know what that`s not bad work at all. Are you planning to leave the mold in the cowl or are you gonna cast the final part over that one? And if so what are you planning to use as "cast wax"? I`ve used tinfoil and molten stearin with moderate success.
Retired Super Moderator, Tin Star Man & Hurricane Saloon Prospect, ROTM Feb 2015
Joined: Sep 2011
Posts: 2,382
Likes: 5
From: V��ksy, Finland
Each to their own taste, subtle details are what makes the bike look like yours so it boils down to a matter of preference. Honestly, being dead tired I did stare at the pic for some time at first thinking you accidentally posted the same pic twice. a ton of work to not much gain IMO but if you want it that way you just gotta have it, these things can`t be reasoned...
Thread Starter
|
Member
Joined: Apr 2010
Posts: 36
Likes: 0
From: Norway
To get the shape of the seat, I only used a couple of layers with packing tape.
If I'm working with shapes that could crack easily, I often try to use compressed Air to losen the piece.
Each to their own taste, subtle details are what makes the bike look like yours so it boils down to a matter of preference. Honestly, being dead tired I did stare at the pic for some time at first thinking you accidentally posted the same pic twice. a ton of work to not much gain IMO but if you want it that way you just gotta have it, these things can`t be reasoned...