
1996 CBR600 F3 resurrection - Part 1


Thread Starter
|
Junior Member
Joined: Oct 2012
Posts: 21
Likes: 0
This project started last October. Although there have been times where I didn't touch it for a month due to life interfering with fun, I have continued to plug away at it. I told myself that I was going to work on it as time allowed and not get in a hurry to half-*** things. I have spent many hours pouring over the service manual and exploded parts diagrams on-line. I have also purchased lots of parts to make things right. All the work with the exception of sand blasting parts, mounting tires and driving out the swing arm bearing and the fork bushings (those took a torch and over an hour for the Honda mechanics to get out) has been done inside my garage by me without any assistance. My garage has become my private sanctuary.
The following is the stuff I posted on another forum over the months as the work progressed, but have been consolidated into two threads here. I tried to make it one, but the forum software says it's too long. I hope you guys enjoy it and maybe learn a tip or trick along the way.
THE STORY BEGINS HERE======> Soooo...a couple of years ago, one of the soldiers I worked with had an old CBR 600 F3 that he bought to "fix up". Then he and his wife made a baby and the CBR got pushed to the side and forgotten. One day at work he asked me if I wanted to buy it. Taking pity on him, I bought it thinking "how bad can it be?"
Then it sat in my garage until about a month ago. That's when I decided that I would spruce it up a tad. Well, as I started taking bits and pieces off of it, it became very apparent that it was going to require a lot more than rubbing the ugly off of it.
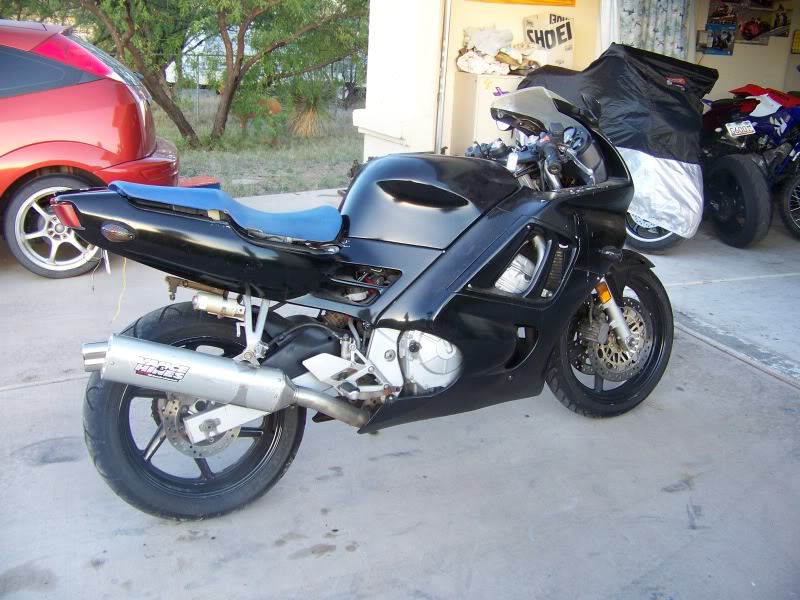
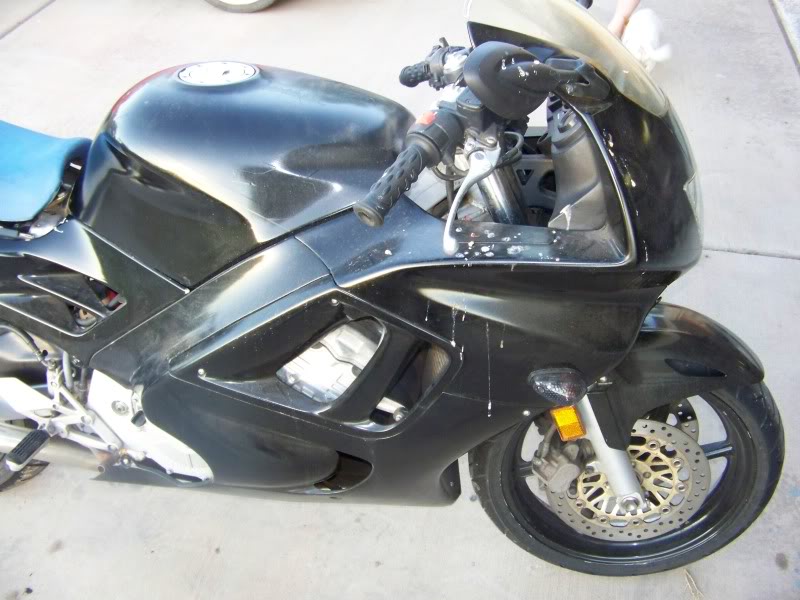
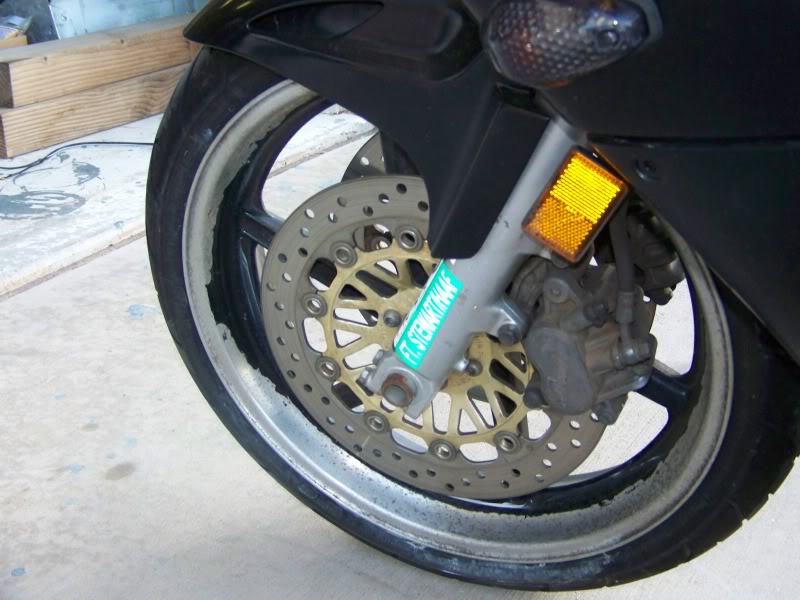
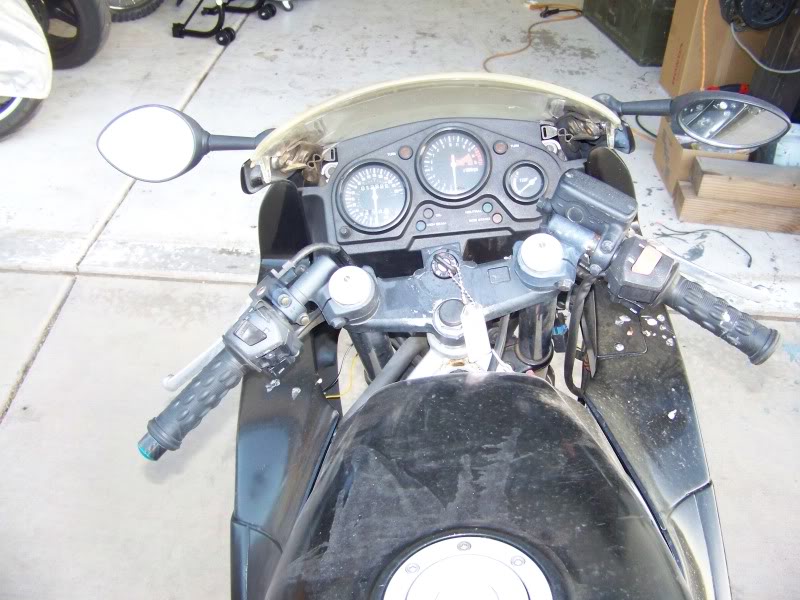
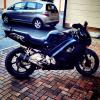
Here are some pictures just the way it looked when it rolled off the trailer.

There was so much that needed to be redone I decided to take it down to the frame and go through everything.
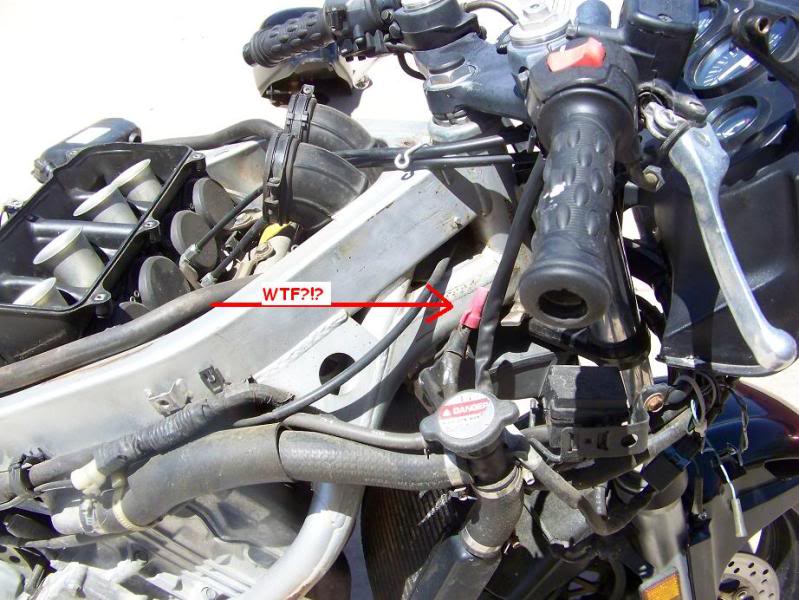
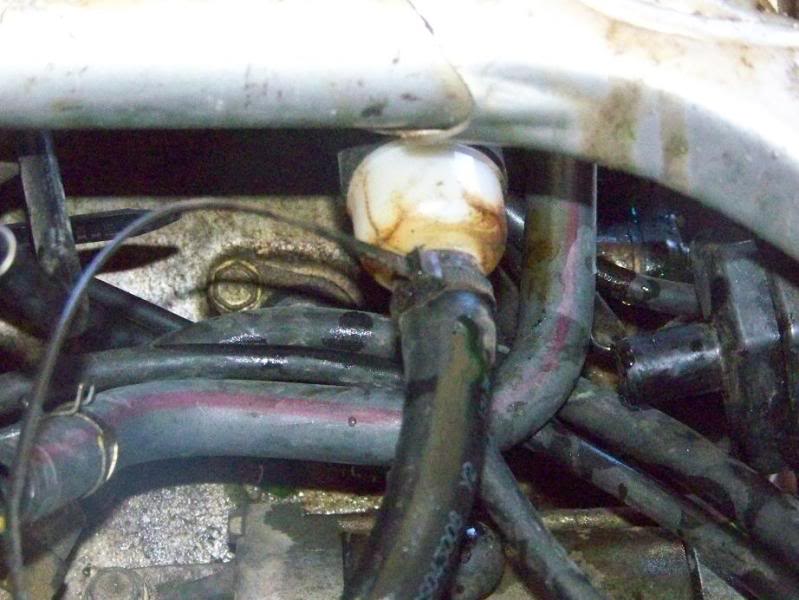
I should mention that when I brought the bike home, I threw a battery and some gas in it and some air in the tires. I drove it down the street and made sure the transmission worked. It ran like crap, but it ran. When I got it in the garage, I found 3 of the carbs weren't connected to their manifolds, they were just sitting loosely on top. I found out later that was because the rubber boots were as hard as stone. Can you say vacuum leak?
I decided that the first order of business would be to strip the bike down to the bare frame. There was just too much neglect to be able to get to it all without disassembly. Everything was either bent, broken, rusty or all of the above.
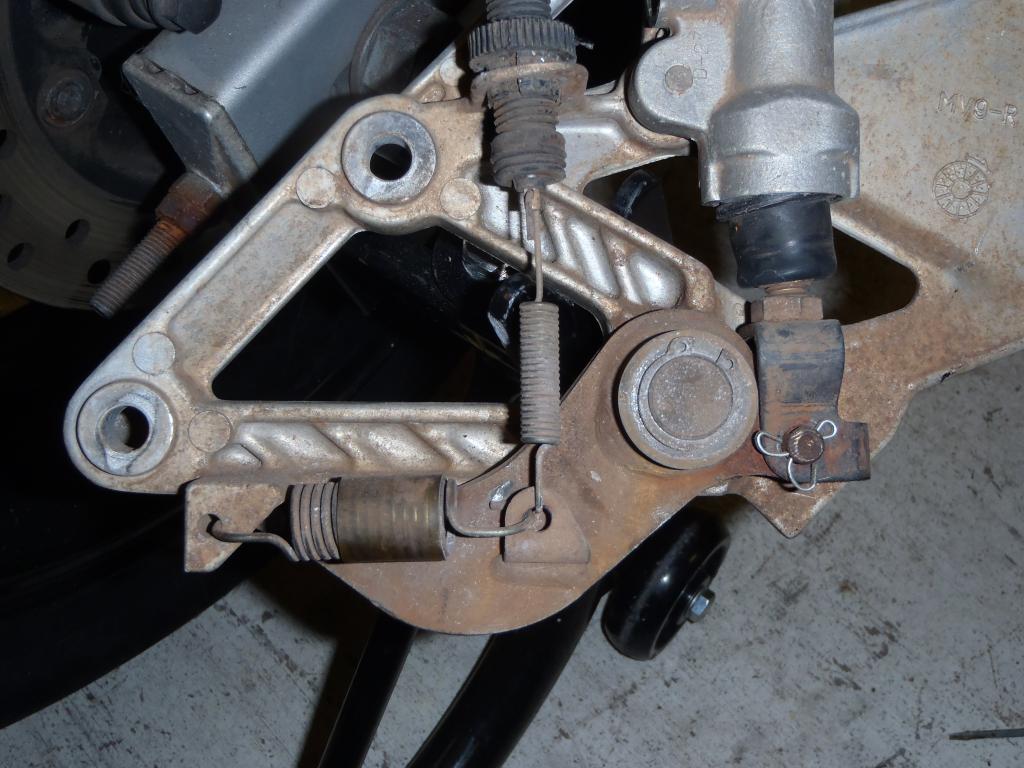
Notice the rubber boot on the brake master cylinder? See how it's kind of not seated? When I took the cotter key out of the plunger, the whole thing thing came apart in my hand. Some one had been in there and didn't seat the snap ring in it's groove.
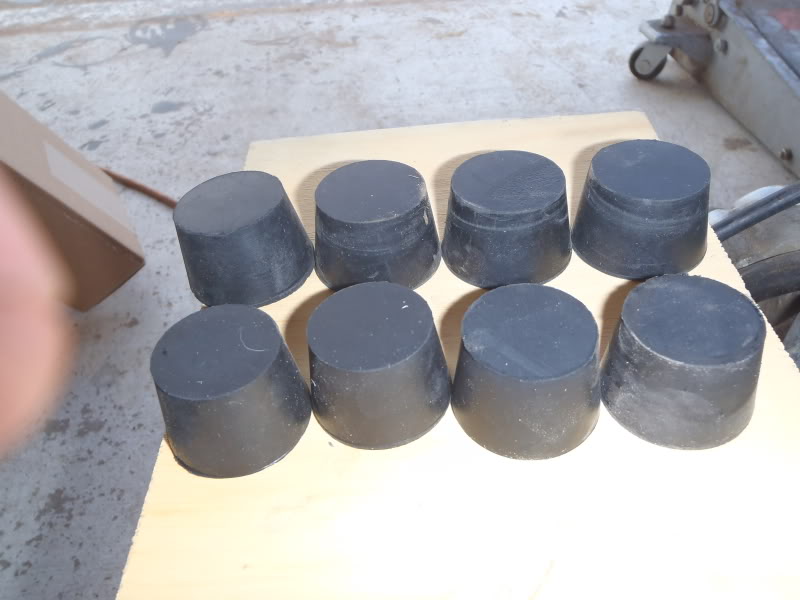
I bought some rubber plugs at Lowes and proceeded to hose the motor down with degreaser. The grease laughed at me.
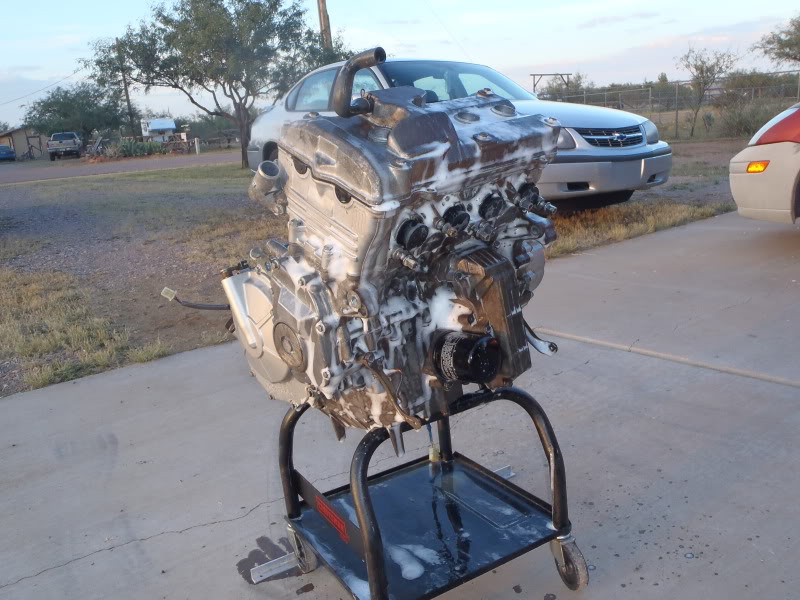
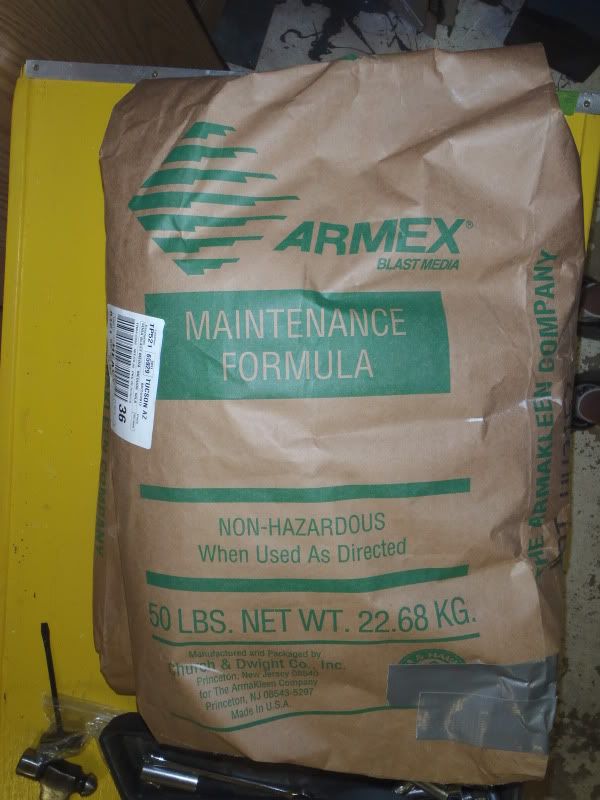
So I went to Harbor freight and bought a baking soda blaster and 100 lbs of baking soda. My wimpy little compressor can't keep up with the blaster, but it got the job done. The grease just came right off and nothing else was affected. The best thing about it is that it washes right off with water. And unlike sand, if it finds it way into the motor, it's not going to destroy anything. Pretty slick stuff.
Here are some after before and after pictures.


To be continued in Part 2.
The following is the stuff I posted on another forum over the months as the work progressed, but have been consolidated into two threads here. I tried to make it one, but the forum software says it's too long. I hope you guys enjoy it and maybe learn a tip or trick along the way.
THE STORY BEGINS HERE======> Soooo...a couple of years ago, one of the soldiers I worked with had an old CBR 600 F3 that he bought to "fix up". Then he and his wife made a baby and the CBR got pushed to the side and forgotten. One day at work he asked me if I wanted to buy it. Taking pity on him, I bought it thinking "how bad can it be?"
Then it sat in my garage until about a month ago. That's when I decided that I would spruce it up a tad. Well, as I started taking bits and pieces off of it, it became very apparent that it was going to require a lot more than rubbing the ugly off of it.
Here are some pictures just the way it looked when it rolled off the trailer.
There was so much that needed to be redone I decided to take it down to the frame and go through everything.
I should mention that when I brought the bike home, I threw a battery and some gas in it and some air in the tires. I drove it down the street and made sure the transmission worked. It ran like crap, but it ran. When I got it in the garage, I found 3 of the carbs weren't connected to their manifolds, they were just sitting loosely on top. I found out later that was because the rubber boots were as hard as stone. Can you say vacuum leak?
I decided that the first order of business would be to strip the bike down to the bare frame. There was just too much neglect to be able to get to it all without disassembly. Everything was either bent, broken, rusty or all of the above.
Notice the rubber boot on the brake master cylinder? See how it's kind of not seated? When I took the cotter key out of the plunger, the whole thing thing came apart in my hand. Some one had been in there and didn't seat the snap ring in it's groove.
I bought some rubber plugs at Lowes and proceeded to hose the motor down with degreaser. The grease laughed at me.
So I went to Harbor freight and bought a baking soda blaster and 100 lbs of baking soda. My wimpy little compressor can't keep up with the blaster, but it got the job done. The grease just came right off and nothing else was affected. The best thing about it is that it washes right off with water. And unlike sand, if it finds it way into the motor, it's not going to destroy anything. Pretty slick stuff.
Here are some after before and after pictures.
To be continued in Part 2.
Last edited by LARRYTHEPIRATE; May 26, 2013 at 10:09 PM.
Thread Starter
|
Junior Member
Joined: Oct 2012
Posts: 21
Likes: 0
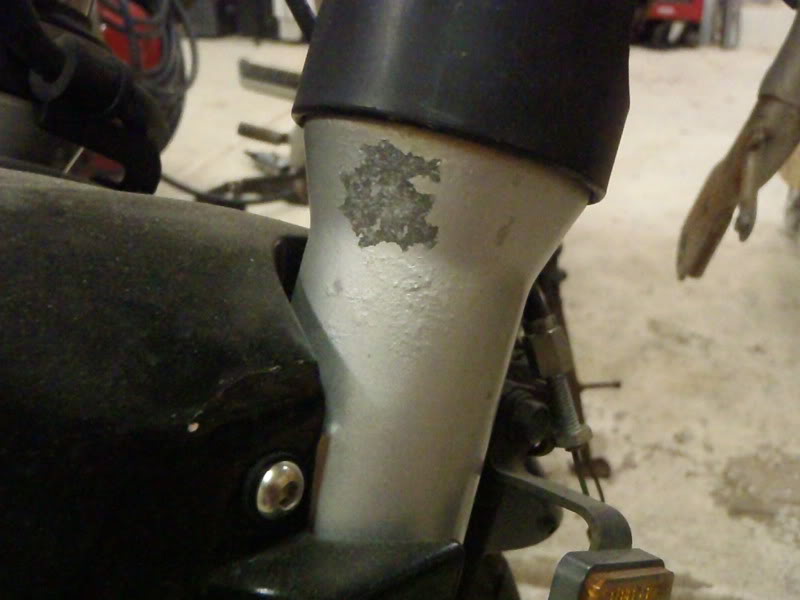
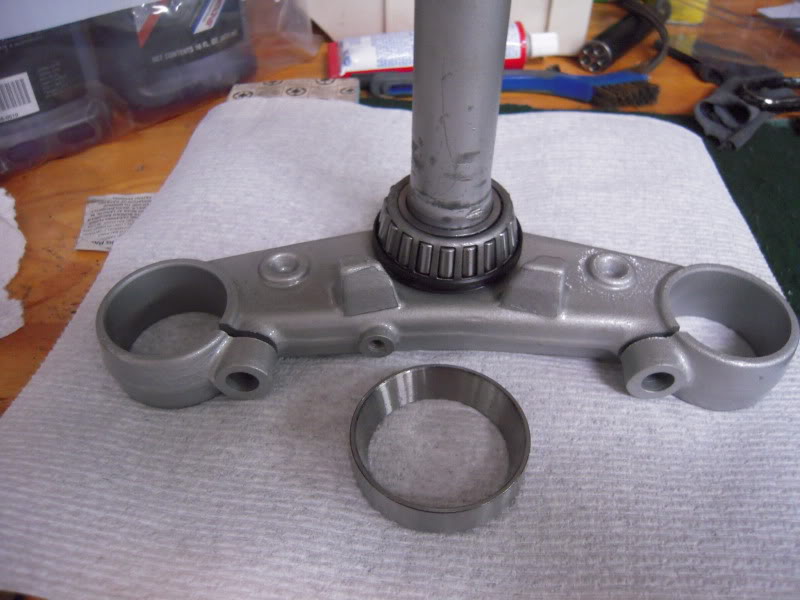
I took the frame, swing arm, wheels, sprocket carrier, triple tree, lower fork tubes and the stay to the sand blast shop to clean them up.
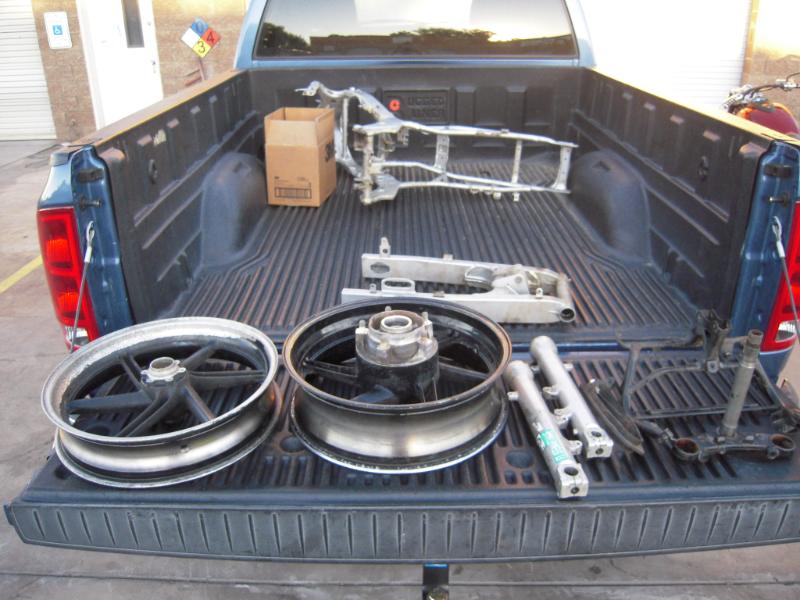
The fairing stay was rusted to hell.

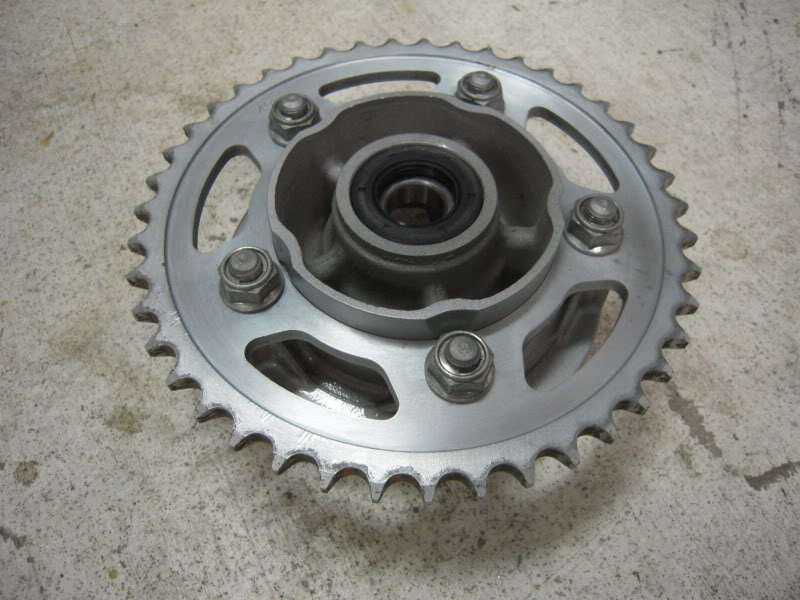
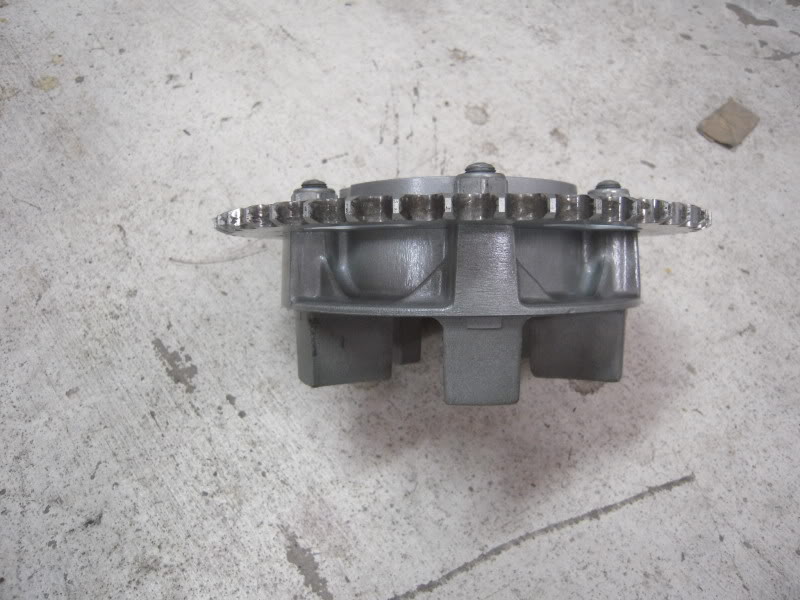
The swing arm bearings were seized and didn't turn in the races, so they all got replaced. I also replaced the bearings in the sprocket carrier, front and rear wheels and the steering stem.
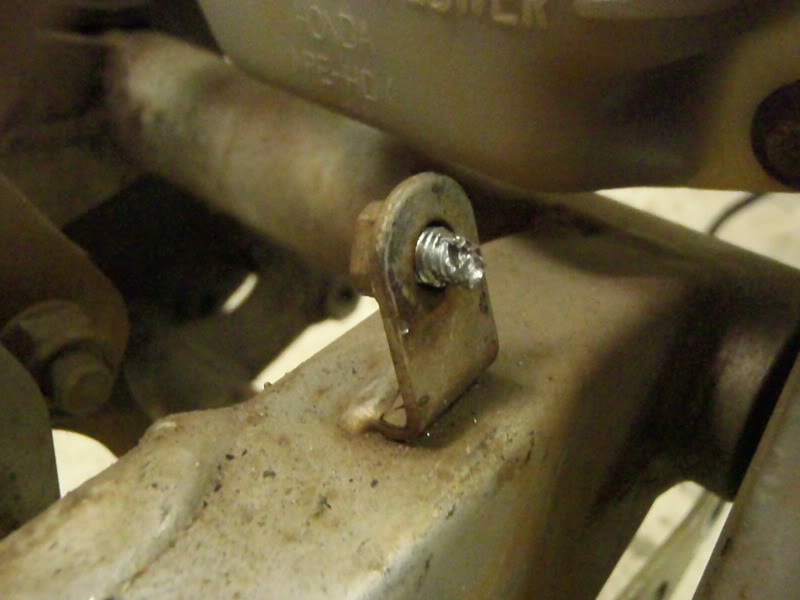
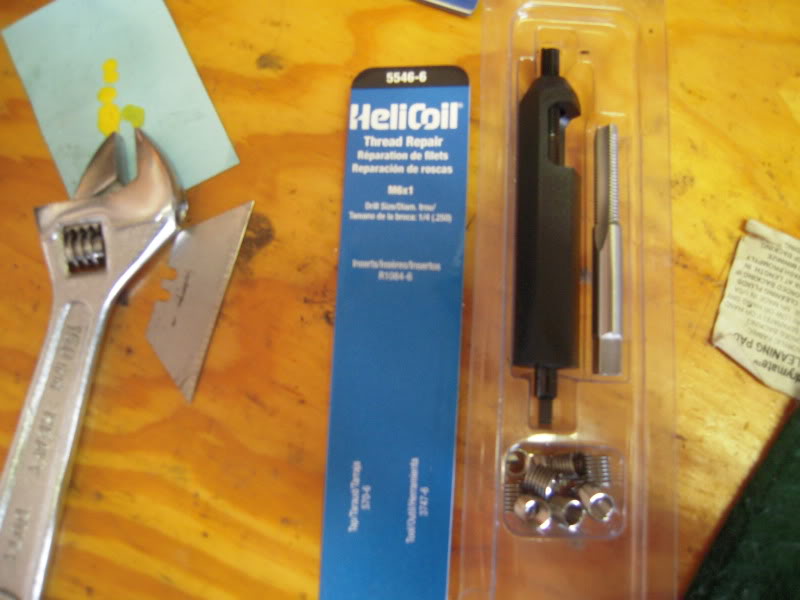
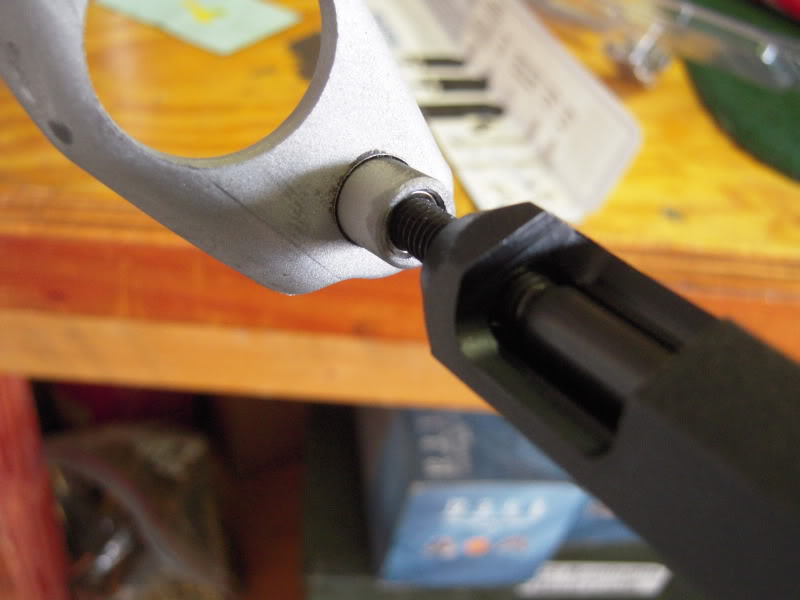
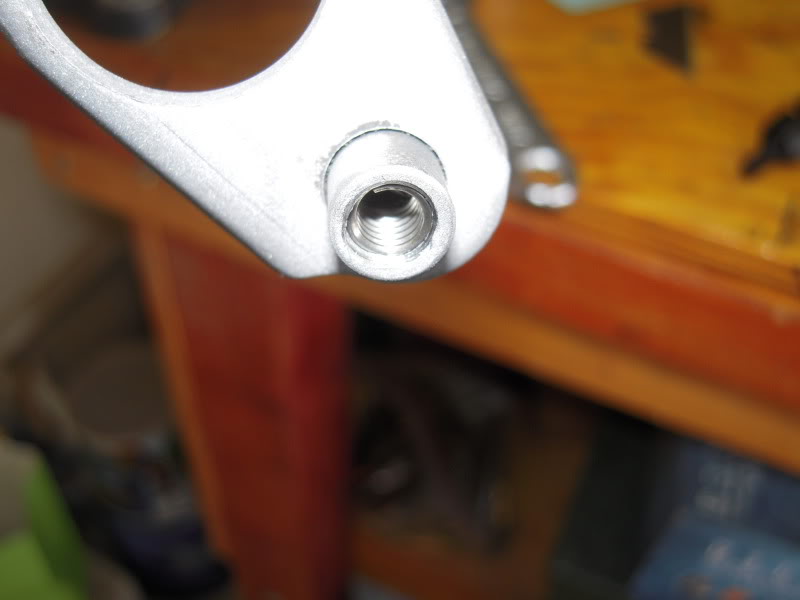
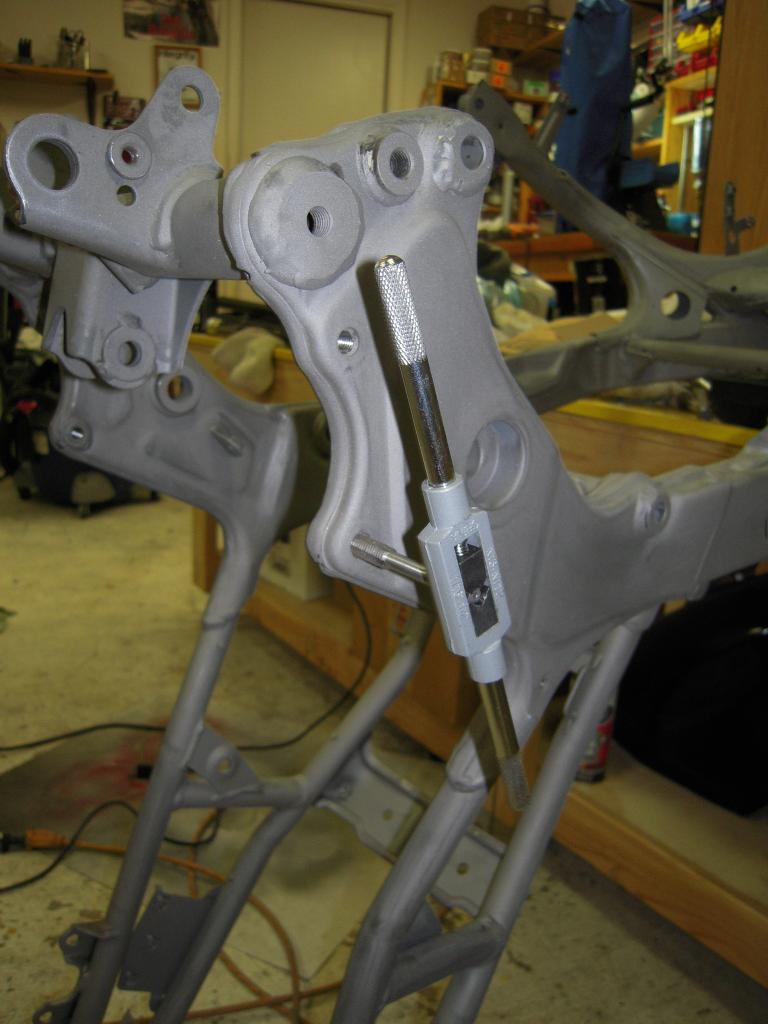
One of the wind screen screws was boogered up. I had to insert a helicoil stainless steel thread insert to fix it. There were 4 more jacked up bolt holes on the frame that needed the same treatment.
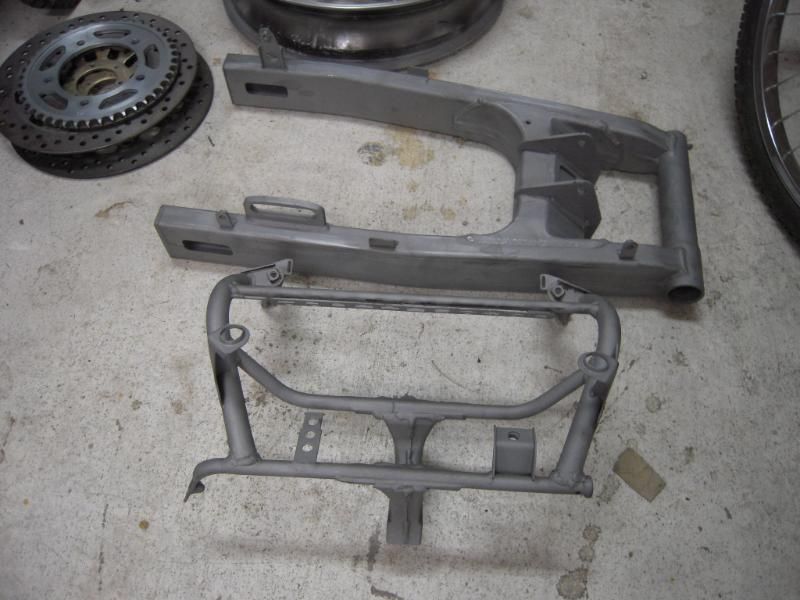
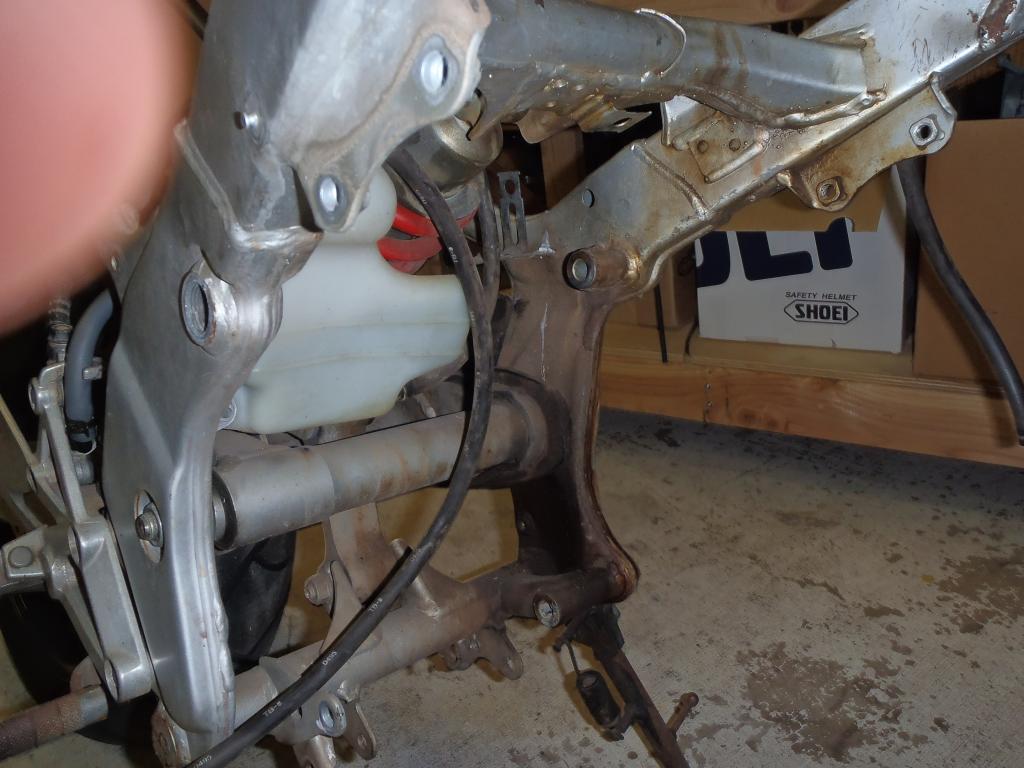
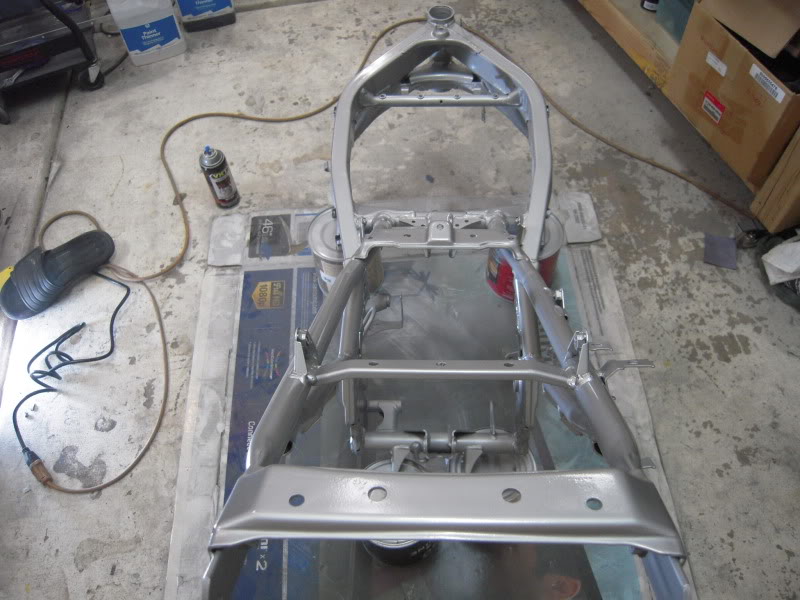
The frame had crud and rust at every weld and joint.
The sand blasting took care of that. I then chased every threaded hole on the frame with a tap. That removed all the sand blast media that was hiding after blowing it off with compressed air. There was a lot of stuff that came out of the holes. I then used bits of paper towel to plug the holes before priming and painting.
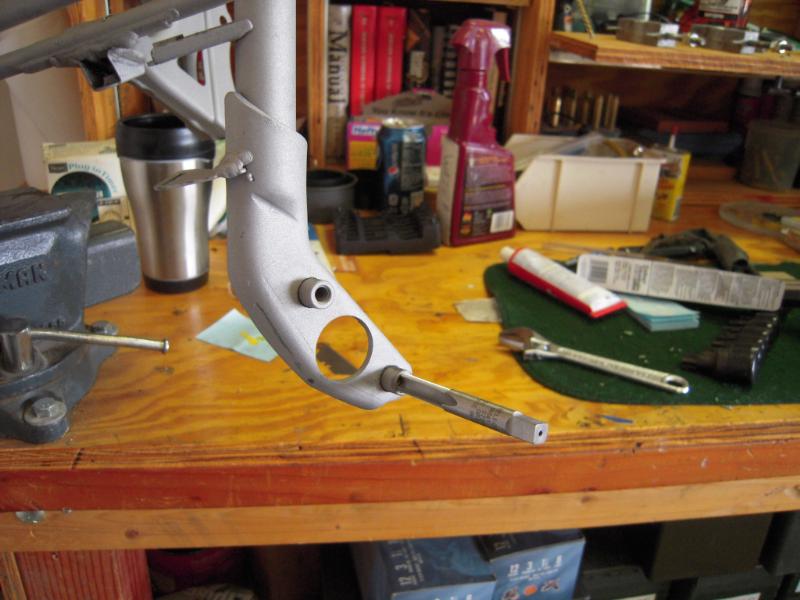
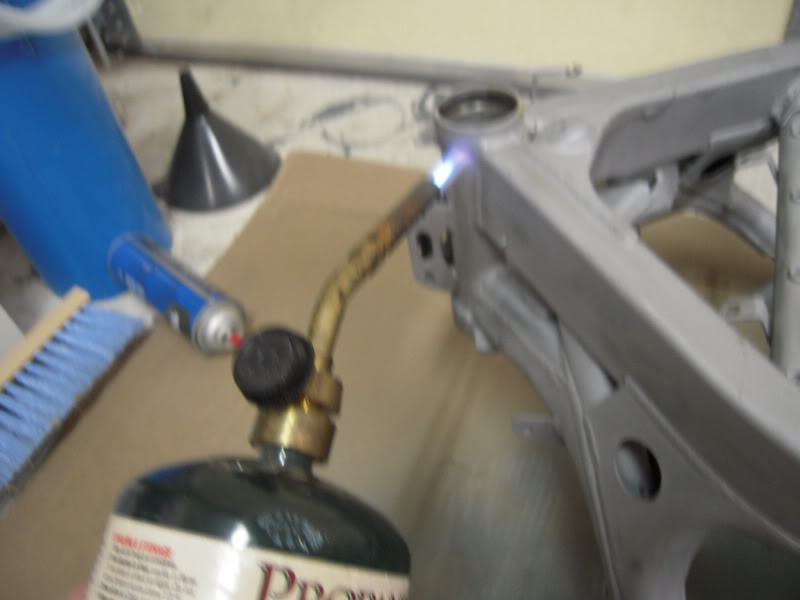
I put the steering neck bearing races in next. Races in the freezer and propane torch on the frame with a little bearing grease on the frame make the job a lot easier. I used a flat hunk of steel to get the race started and the old race to seat it home.
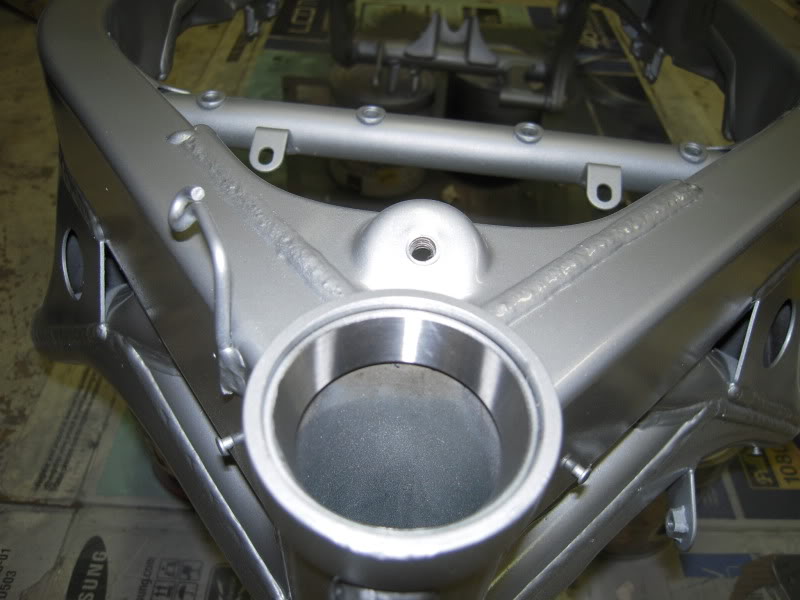
I followed up with rattle can Rustoleum self etching primer.
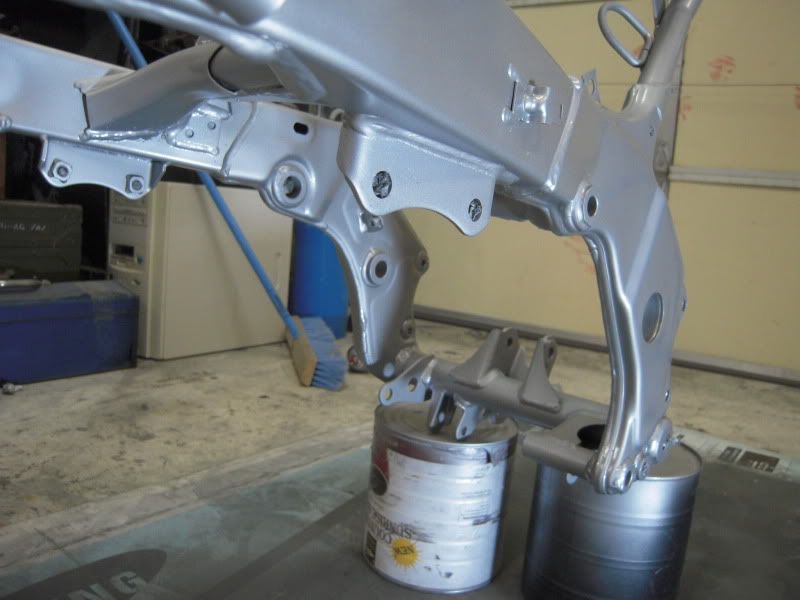
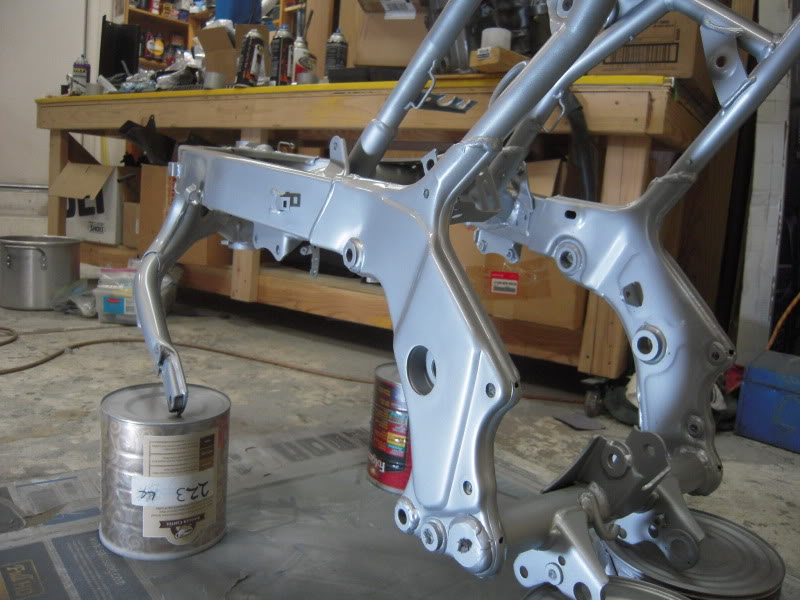
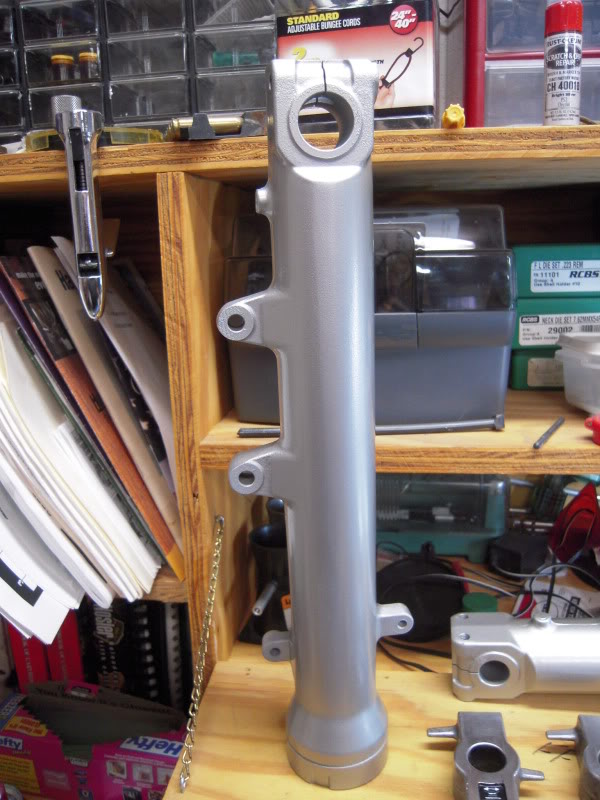
Painted it with VHT wheel paint in Ford Argent Silver followed by VHT clear wheel paint. The swing arm and sprocket carrier got the same treatment after I installed the bearings in them.
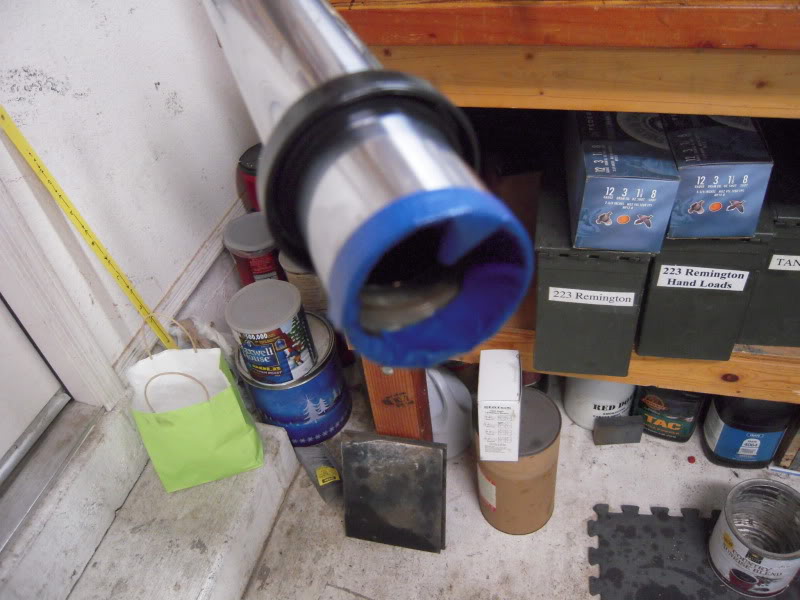
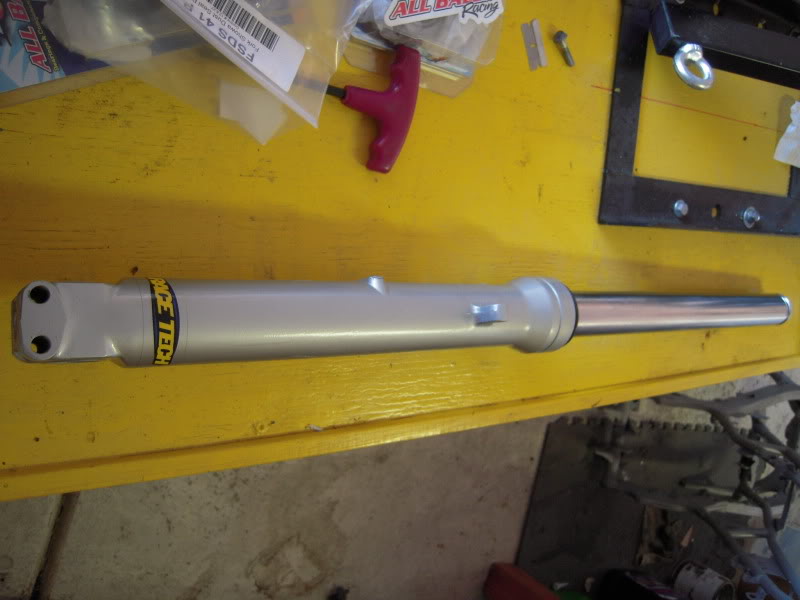
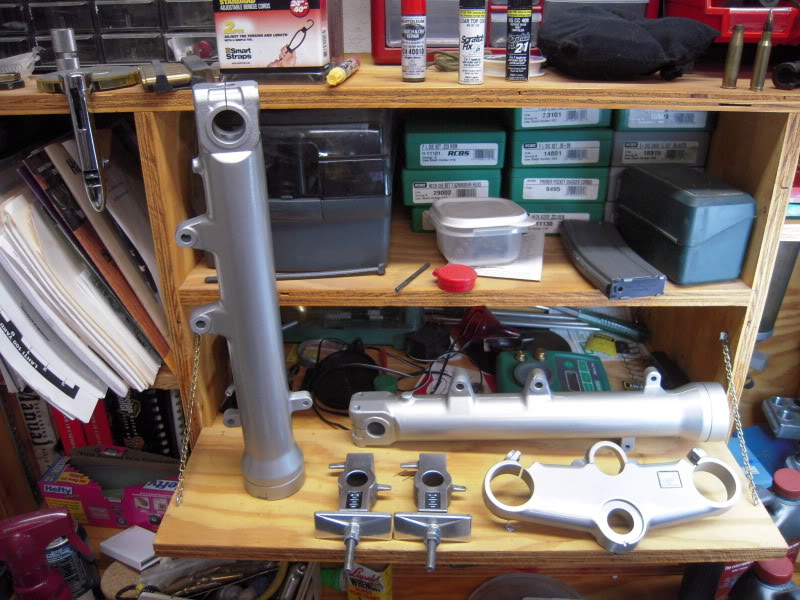
The fork tubes got a fresh coat of paint, then new bushings, oil seals and dust seals were installed. Masking tape was placed over the end of the tube to prevent it from damaging the oil seal as it was slid over the end.
Evaporust. Let me say that again, Evaporust. This stuff is unbelievable. Non-toxic, biodegragable and it works. Just soak parts in it over night and the rust disappears. I'm pretty sure it's magic.


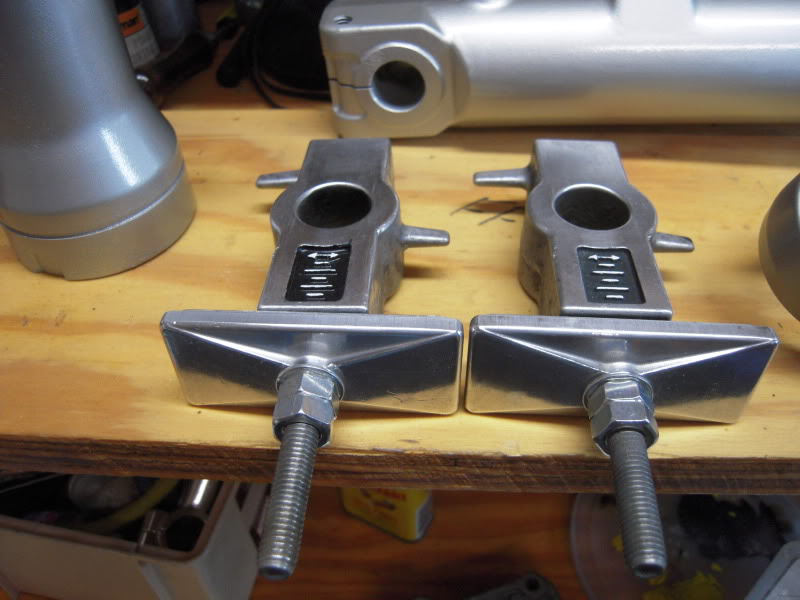
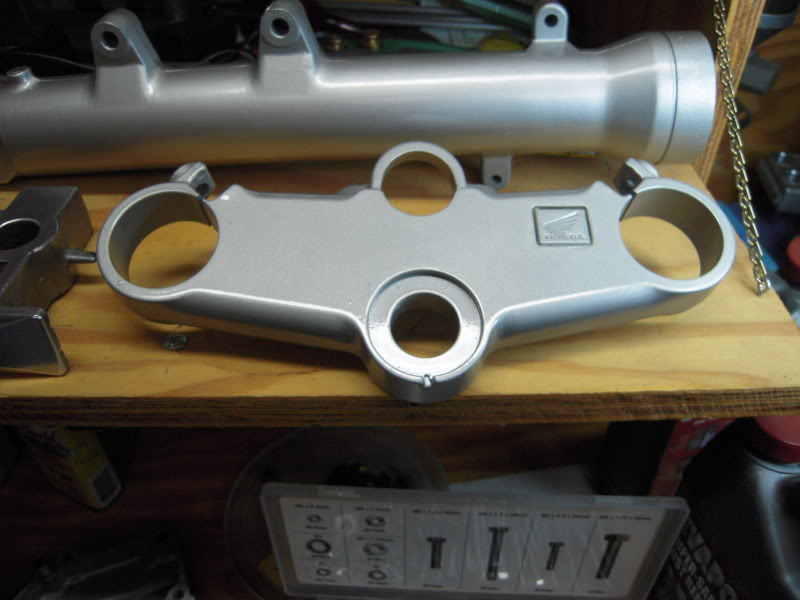
Miscellaneous parts that have been polished, painted and purdied up.
[img]http://img.photobucket.com/albums/0803/rrwacko/CBR600/DSCN2455.jpg[/img]
The fairing stay was rusted to hell.
The swing arm bearings were seized and didn't turn in the races, so they all got replaced. I also replaced the bearings in the sprocket carrier, front and rear wheels and the steering stem.
One of the wind screen screws was boogered up. I had to insert a helicoil stainless steel thread insert to fix it. There were 4 more jacked up bolt holes on the frame that needed the same treatment.
The frame had crud and rust at every weld and joint.
The sand blasting took care of that. I then chased every threaded hole on the frame with a tap. That removed all the sand blast media that was hiding after blowing it off with compressed air. There was a lot of stuff that came out of the holes. I then used bits of paper towel to plug the holes before priming and painting.
I put the steering neck bearing races in next. Races in the freezer and propane torch on the frame with a little bearing grease on the frame make the job a lot easier. I used a flat hunk of steel to get the race started and the old race to seat it home.
I followed up with rattle can Rustoleum self etching primer.
Painted it with VHT wheel paint in Ford Argent Silver followed by VHT clear wheel paint. The swing arm and sprocket carrier got the same treatment after I installed the bearings in them.
The fork tubes got a fresh coat of paint, then new bushings, oil seals and dust seals were installed. Masking tape was placed over the end of the tube to prevent it from damaging the oil seal as it was slid over the end.
Evaporust. Let me say that again, Evaporust. This stuff is unbelievable. Non-toxic, biodegragable and it works. Just soak parts in it over night and the rust disappears. I'm pretty sure it's magic.
Miscellaneous parts that have been polished, painted and purdied up.
[img]http://img.photobucket.com/albums/0803/rrwacko/CBR600/DSCN2455.jpg[/img]
Last edited by LARRYTHEPIRATE; May 26, 2013 at 10:04 PM.
Thread Starter
|
Junior Member
Joined: Oct 2012
Posts: 21
Likes: 0
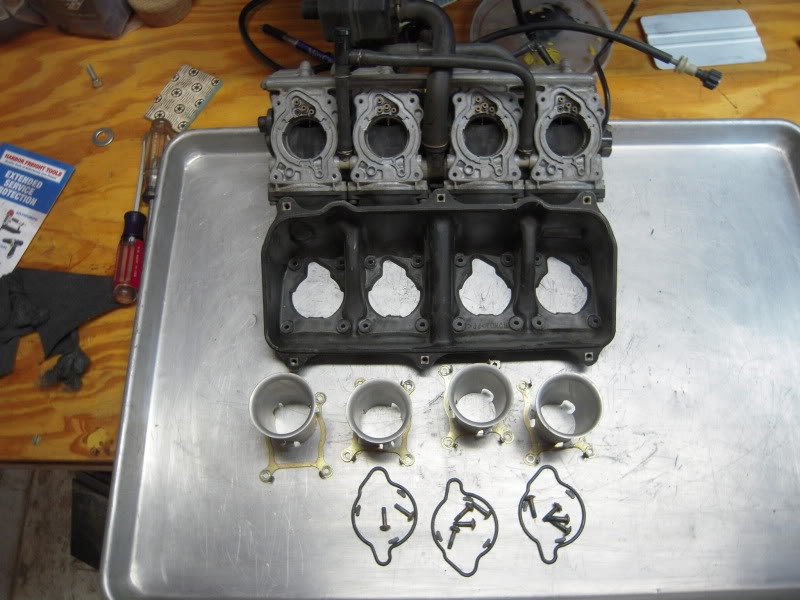
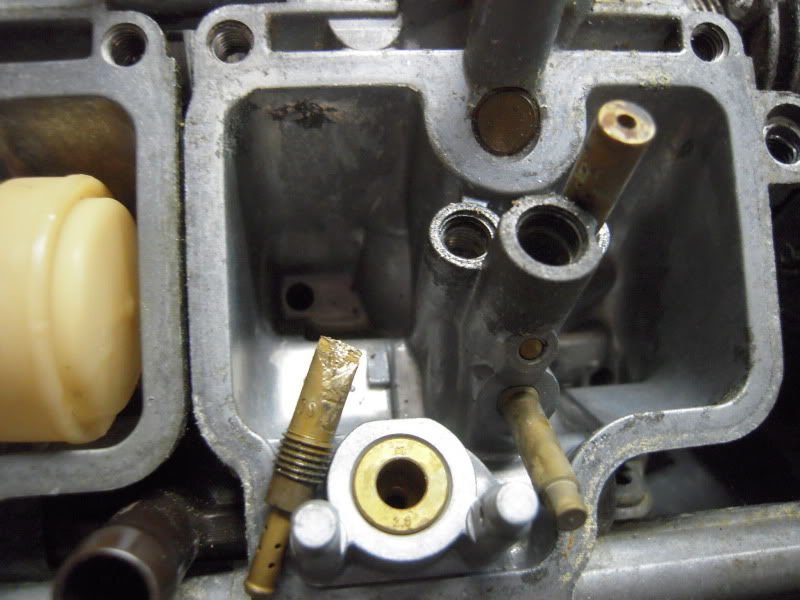
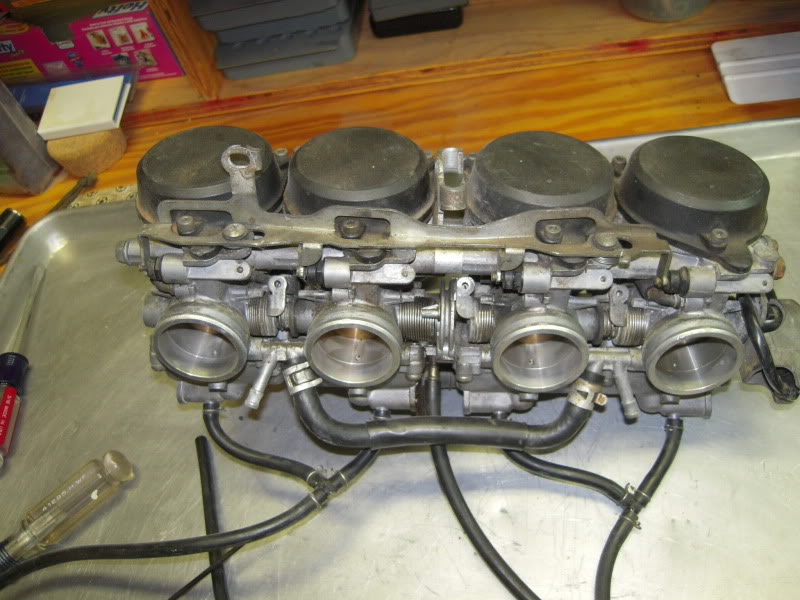
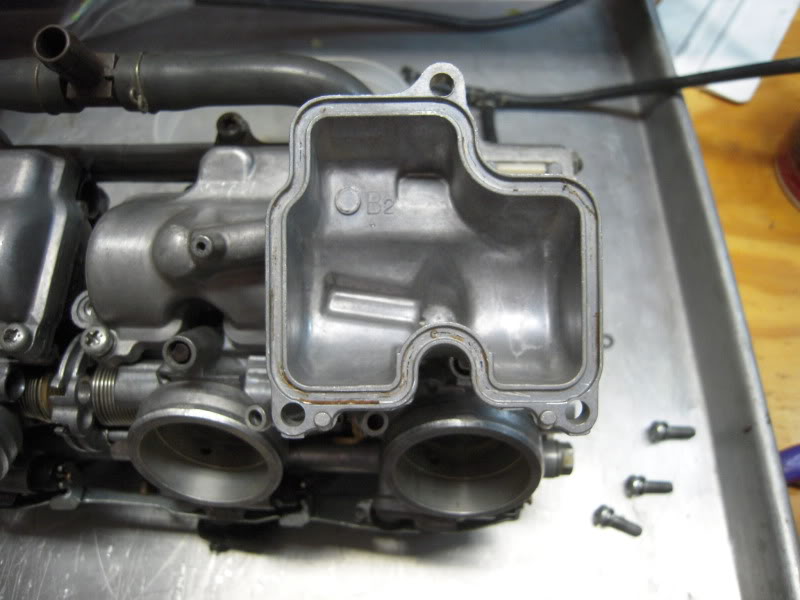
I went through the carbs and cleaned all the crud out of them. All in all, they didn't look too bad, but definitely needed a thorough cleaning and inventory to identify any missing bits and pieces.
I found one air box gasket missing. 6 airbox screws missing. All the float bowl gaskets are hard as stone and need to be replaced.
One slow jet was broken off.
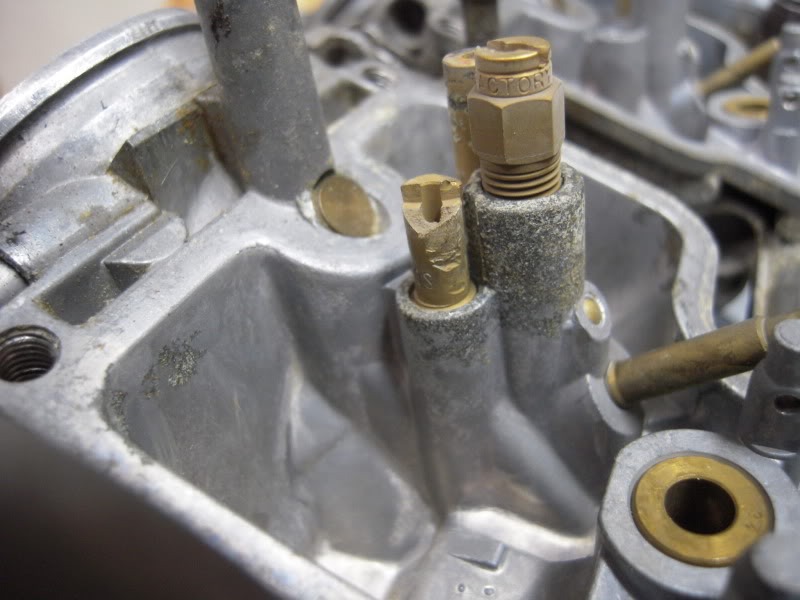
I used some penetrating oil and a little tapping on it, followed with some propane torch heat on the carb body next to it. A twist of the needle nose pliers and it came right out. It's a little unnerving when you first see these things. It's always a possible garbage can moment.
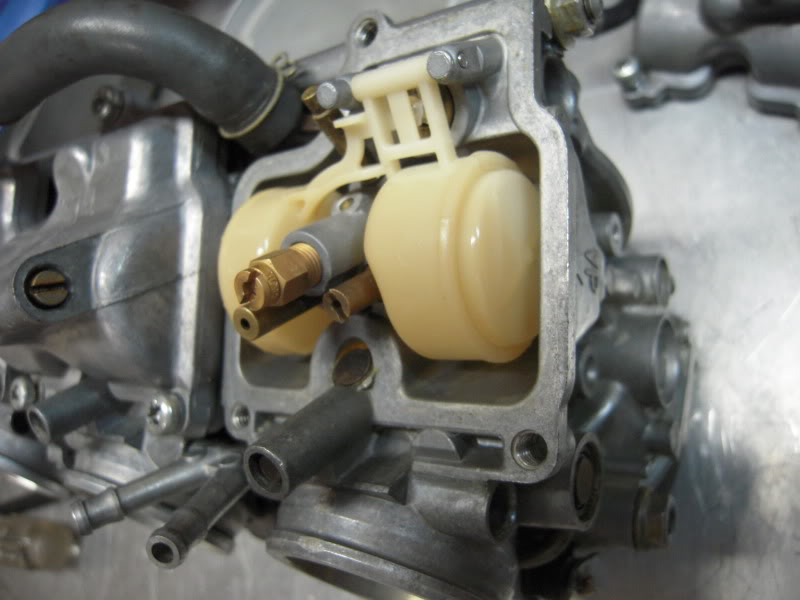
The carbs were kind of grungy, so I thought it would be a good time to see if the Pine Sol soak I heard about would do the job. I poured two large bottles of that nasty smelling stuff in a tub. Then after removing the jets, floats, throttle position sensor, air valve and vacuum diaphragms and caps, I dunked them in the juice for 24 hours.
Don't use plastic drink cups to hold the small parts. They wilt pretty badly. Live and learn.
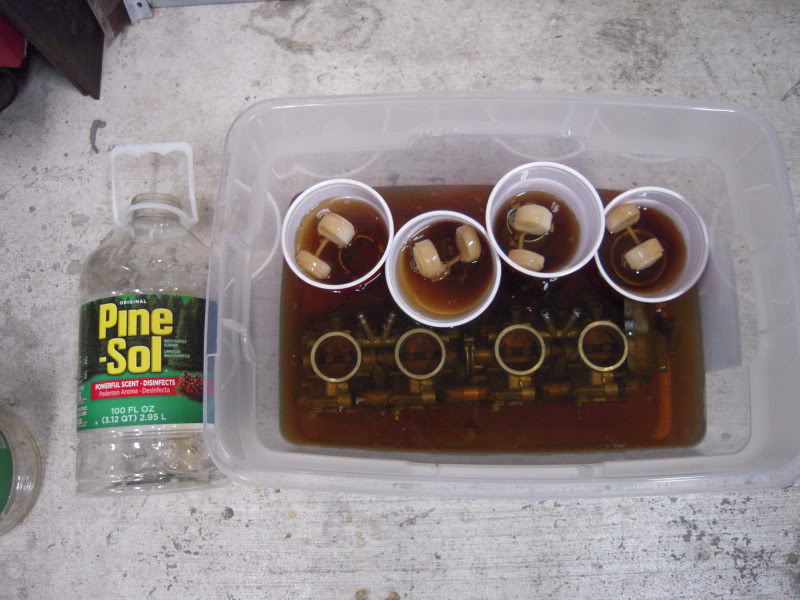
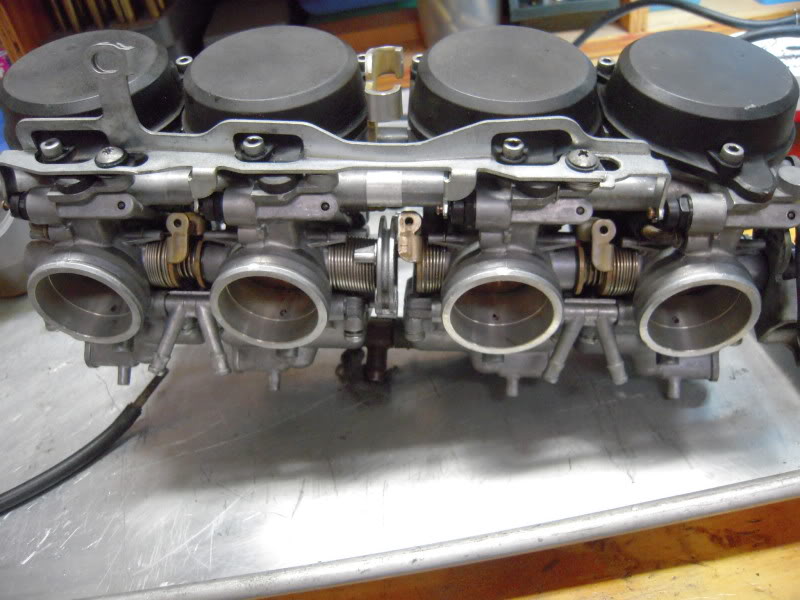
They came out looking pretty good. I put them in the kitchen sink and sprayed them off. Then followed up with compressed air to blow everything out. As soon as I order the parts, I think they are ready to go back into service. The best thing is Pine Sol doesn't attack rubber like carb cleaner does. And...they smell really, really fresh.
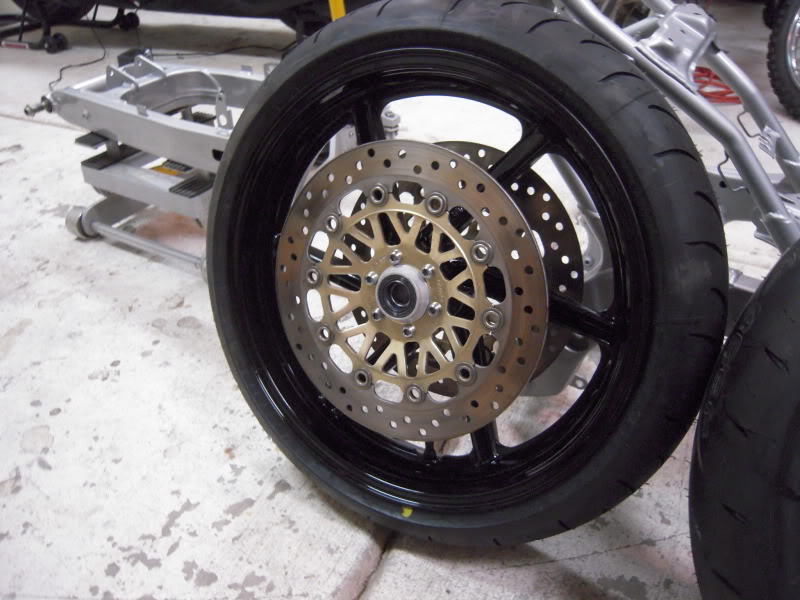
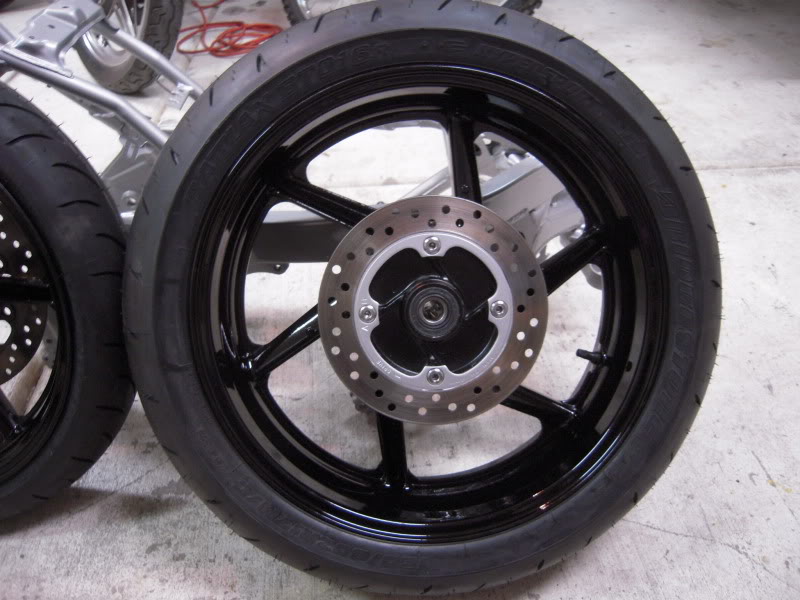
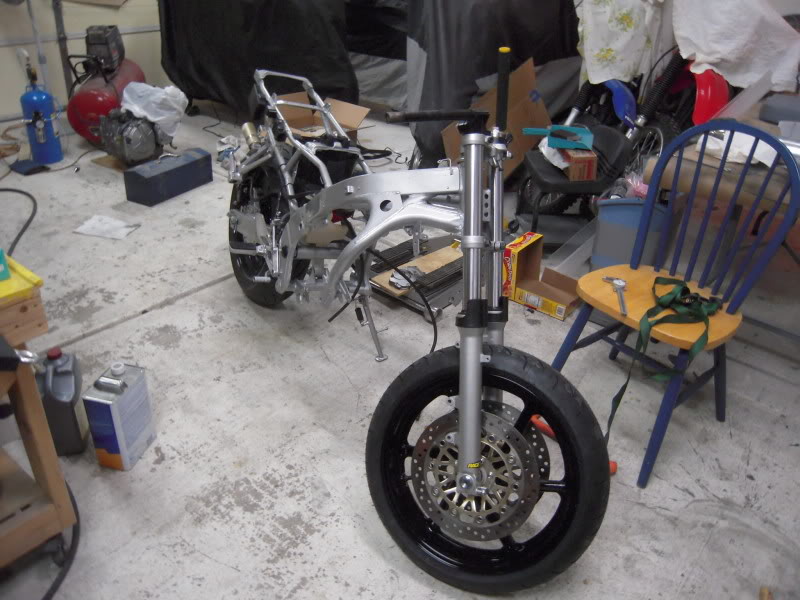
I had the day off, so I thought I would drop my wheels off at the local sickle emporium and have them lovingly caress the new tires onto my freshly painted wheels.
So I ran some errands and headed home with my spiffy new hoops. Nason base coat/clear coat in 1953 GM black with Bridgestone BT016 tire for those that need to know the details.
Of course my 16 year old Sears compressor gave up 1/2 through the clear coat, so it was spray 3 seconds-wait 3 seconds-spray 3 seconds-wait 3 seconds. I managed to hang draperies on the front wheel with all the squirt and wait stuff going on. Kinda hard to get a good rhythm going when you're swearing and praying at the same time. Good thing the brake disks are big.
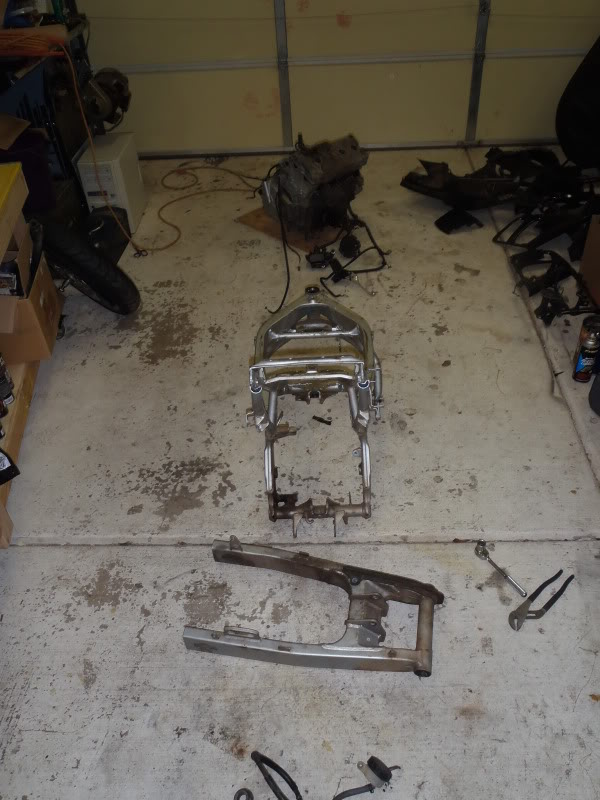
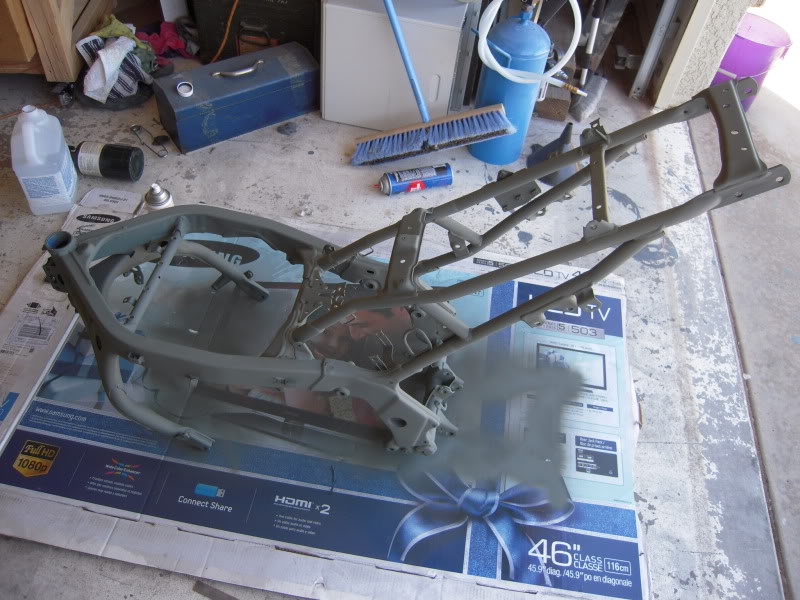
Dragged the frame out to the garage and fitted the swing arm and shock just so I could feel like I am accomplishing something.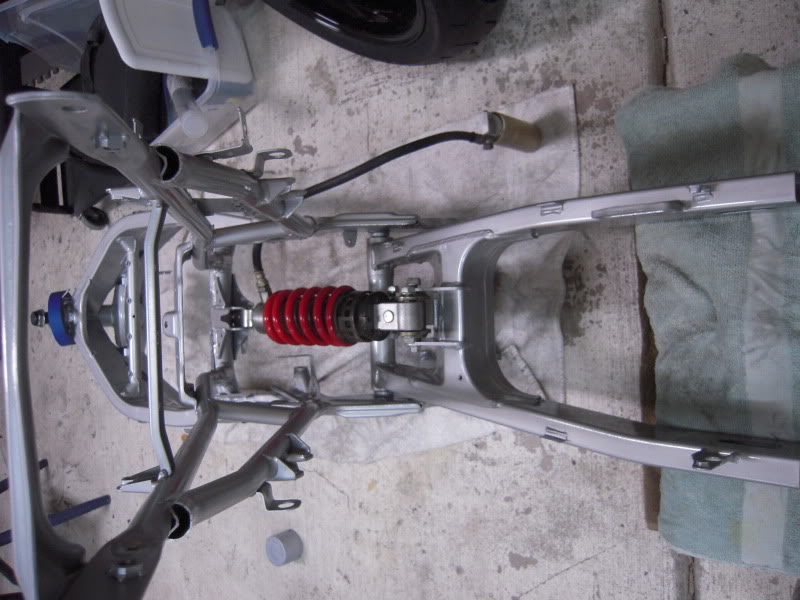
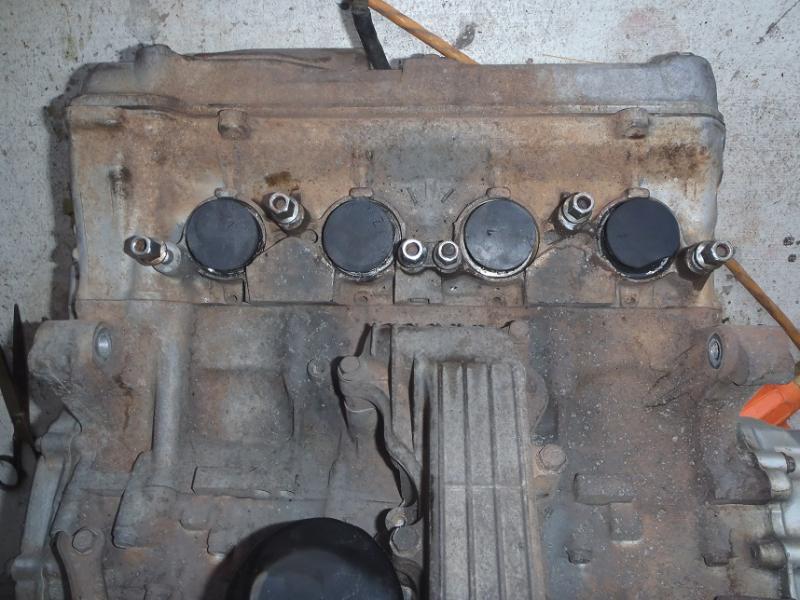
I decided I better do something about the nasty looking cam cover, so I pulled it off, sanded it down and painted it.
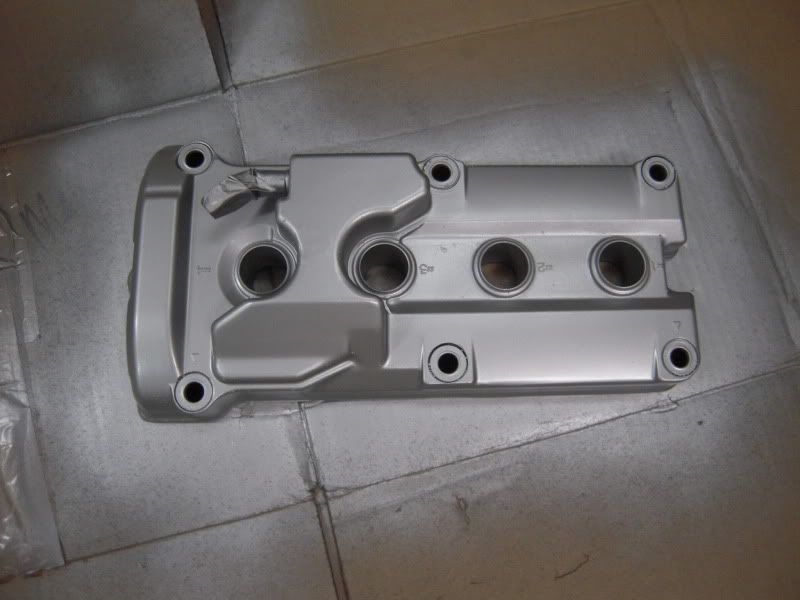
While the cam cover was off, I decided to pull the cams and take a peek at the wear. As you know the bike was not treated well by it's past owners and although it only had 12K miles on the clock, I wondered how many of those were at red line with no oil. I ran the bike a little when I got it, and it wasn't blowing smoke or rattling, so I made an uninformed decision that the motor was probably in good shape. Just as I suspected! The upper end was pristine. Not a mark on any of the cam lobes or bearing surfaces. :hello2: It seems Ricky Racer just fell off a lot. He didn't ride it a lot. And probably didn't get going too fast before he fell off.
Not a lot of exciting stuff to report. I'm waiting for the replacement spring cup (that I managed to lose) to show up so I can assemble the front end and have a rolling frame. In the mean time, I've finished rebuilding the front brakes, including flushing out the hoses in preparation of the DOT 5 brake fluid. After discussions here, I've decided that it will work just fine. Actually, I'm daring it not to and fingers are crossed. I think of it as a challenge to my stubbornness. :BangHead:
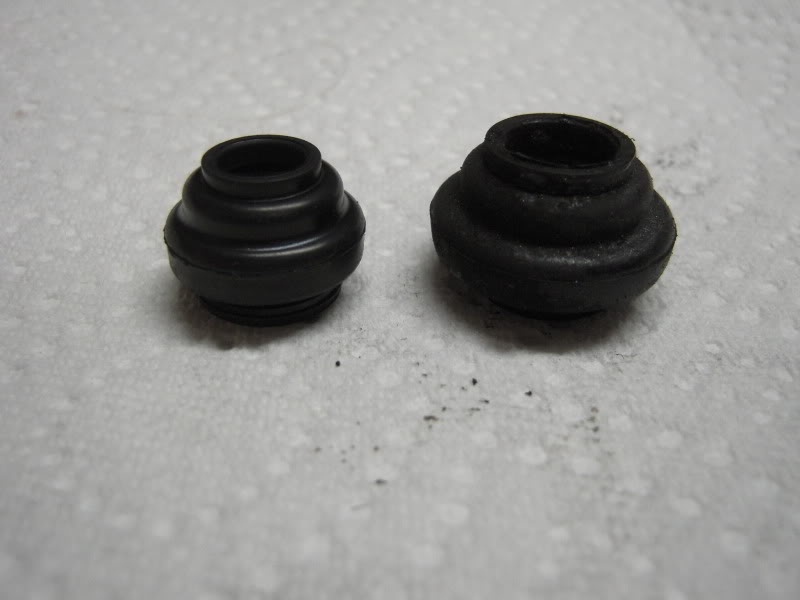
The first thing I did was pull out the pistons and rubber boots on the wheel cylinders. If you look at the old boots, you'll notice that they are swollen and substantially larger than the new pieces. They are a lot squishier too. It's something that isn't apparent until you have them out on the bench to do a side by side comparison. Definitely needed to be replaced.
Then I fished the seals out of the bores. These can be kind of tricky to get out because there's no room to get behind them and if you go "DRUNK MONKEY" on them with a screw driver there's a good possibility of slipping and gouging the bore. That would be bad. As in throw away the wheel cylinder. I found the best tool to use is a dental pick. Easy smeezy.
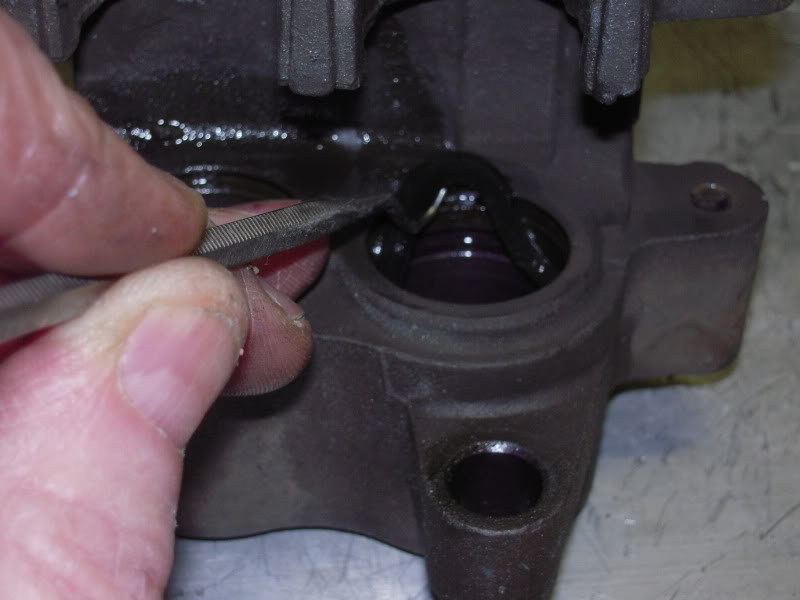
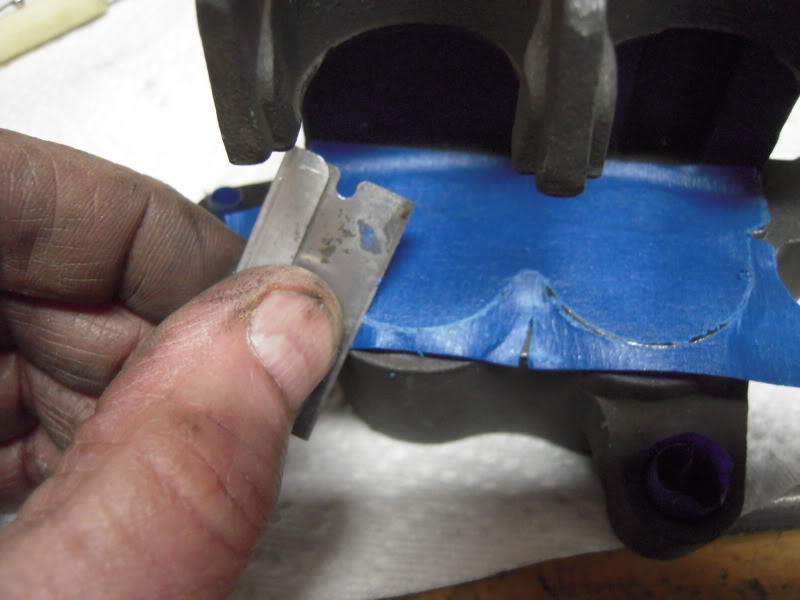
Then you scrub the hell out of them with a steel wire brush and hose them down with brake cleaner. Follow that up with masking off all the parts you don't want paint on. The best way to accurately mask off those areas is using the flat side of a razor. Just press it along the parting edge and it will cleanly cut the tape. For the threaded holes, I roll up some masking tape, sticky side out and poke it in the hole. Then using a small screw driver in the middle of the rolled up tape, I unwind the tape until it's tightly sticking to the inside of the threaded hole.
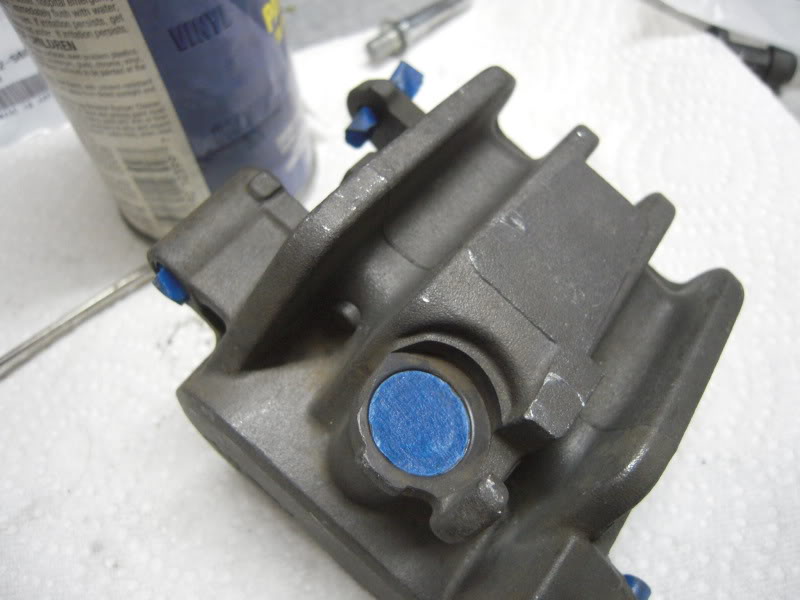
Once you have everything taped off, use some Bulldog Adhesion Promoter. This stuff is great. Paint will stick to whatever you prep with it. A paint guy once told me they used it on a beach ball, then painted it. It worked too.
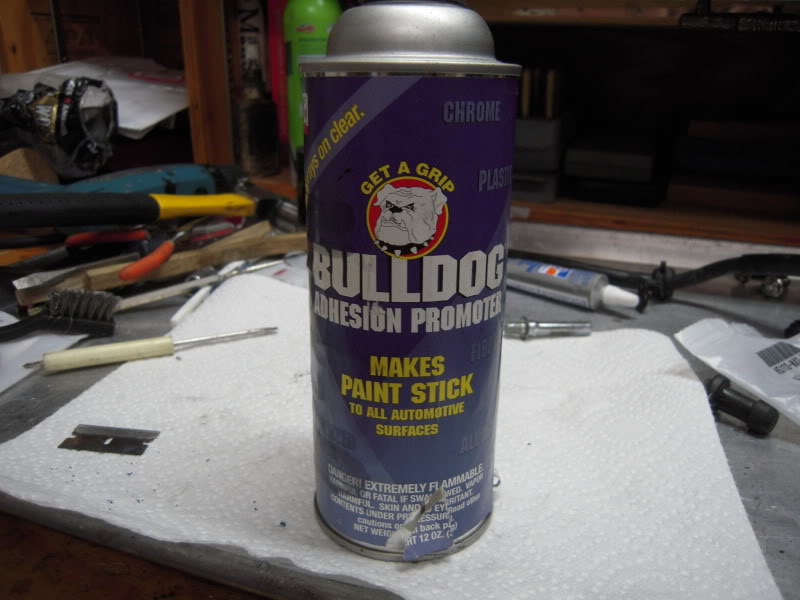
I followed the Bulldog with some VHT caliper paint.
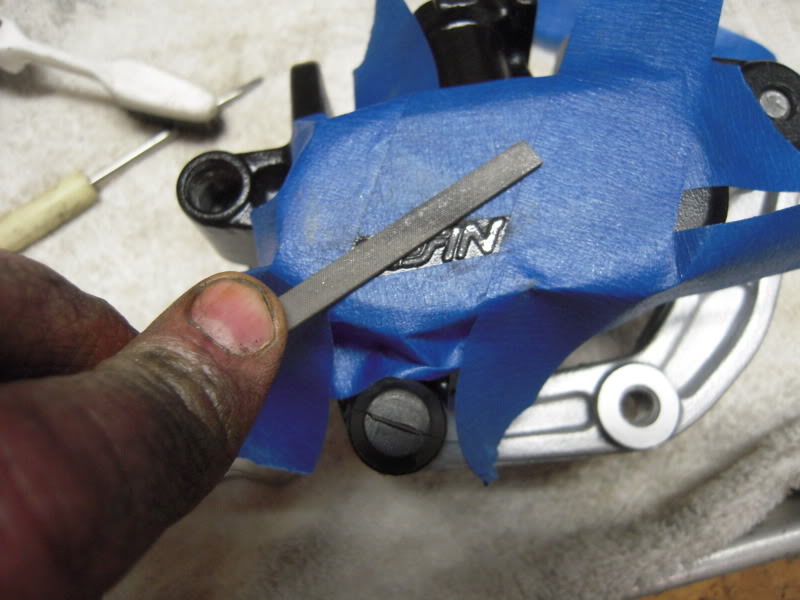
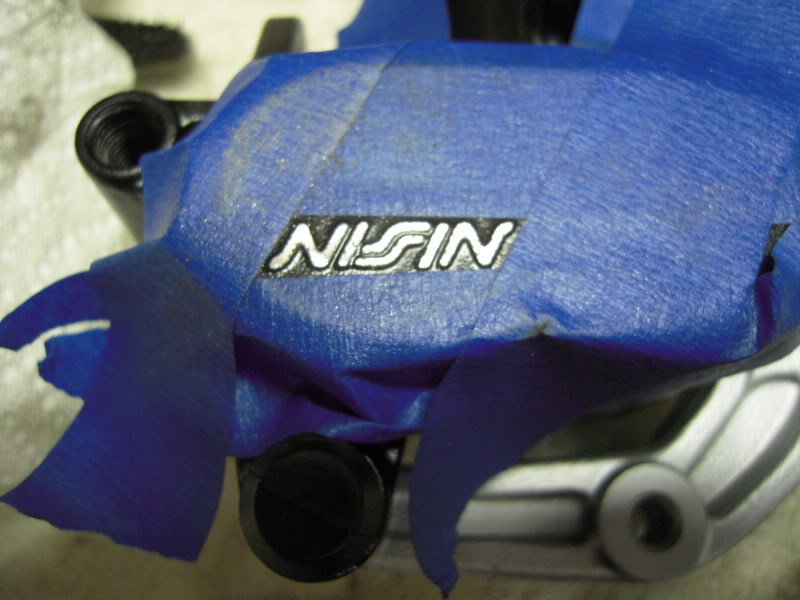
To highlight the NISSIN logo, I just tape off the paint surrounding it and hit it with a miniature file. The tape is there in case I get all spastic and prevents me from goobering up the surrounding area.
One down, one to go!
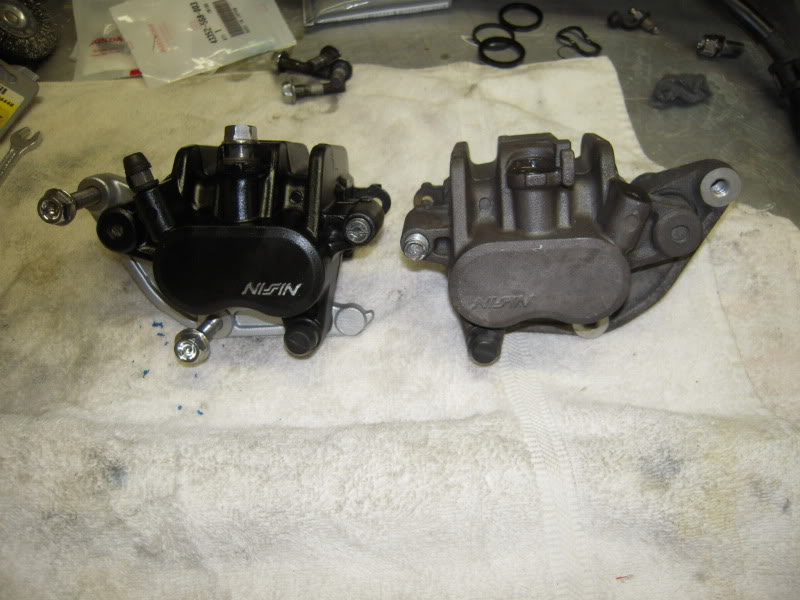
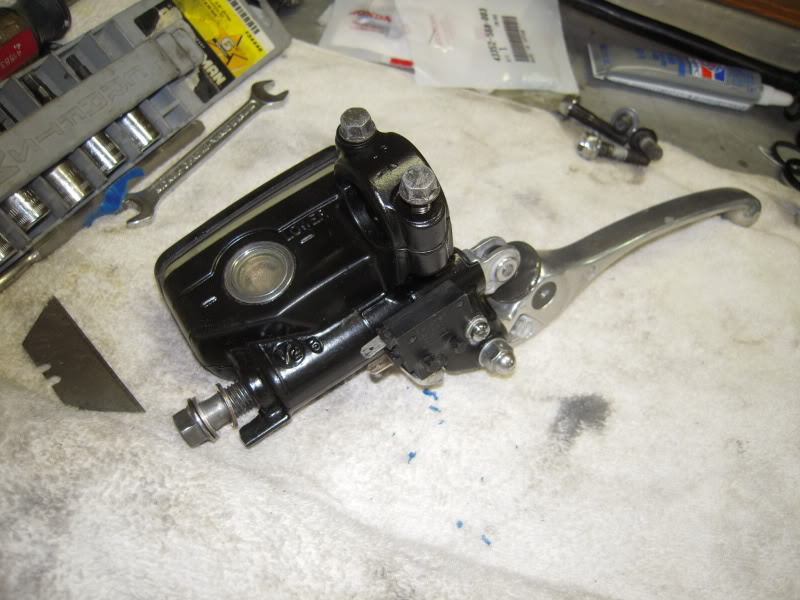
The master cylinder got the rebuild treatment as well.
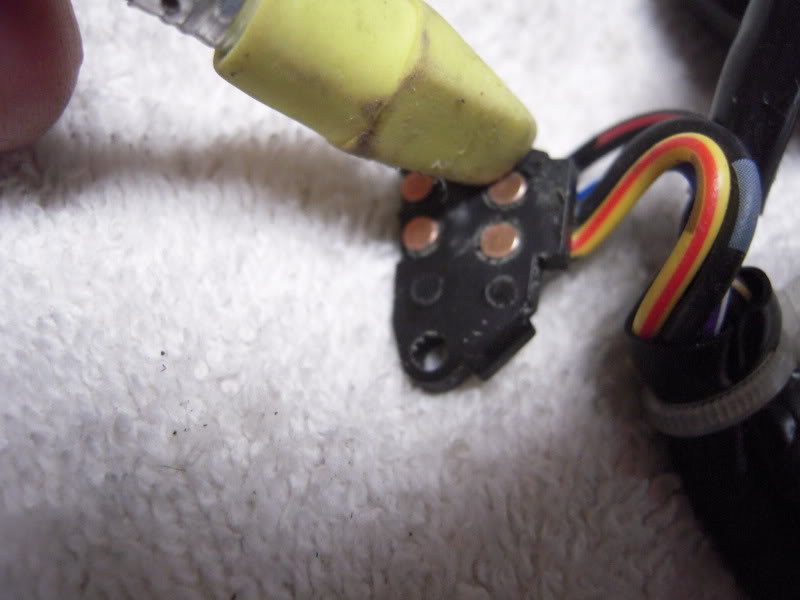
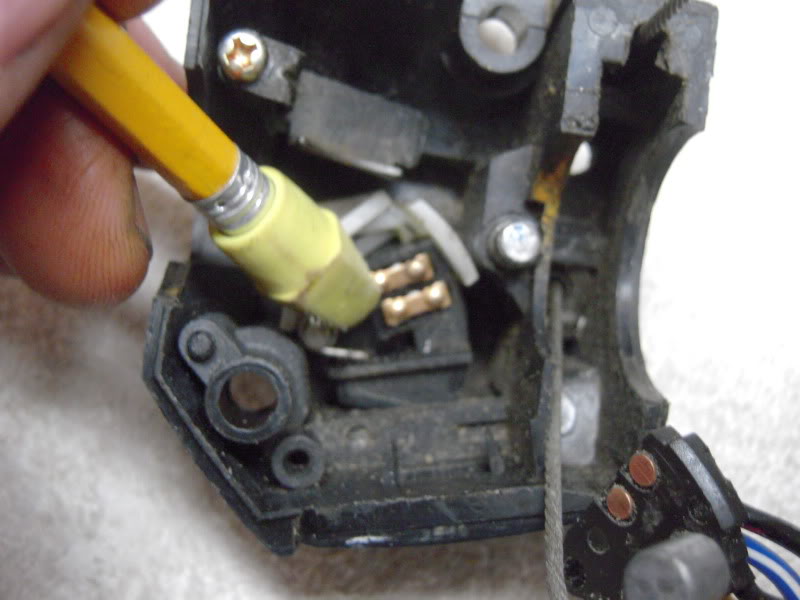
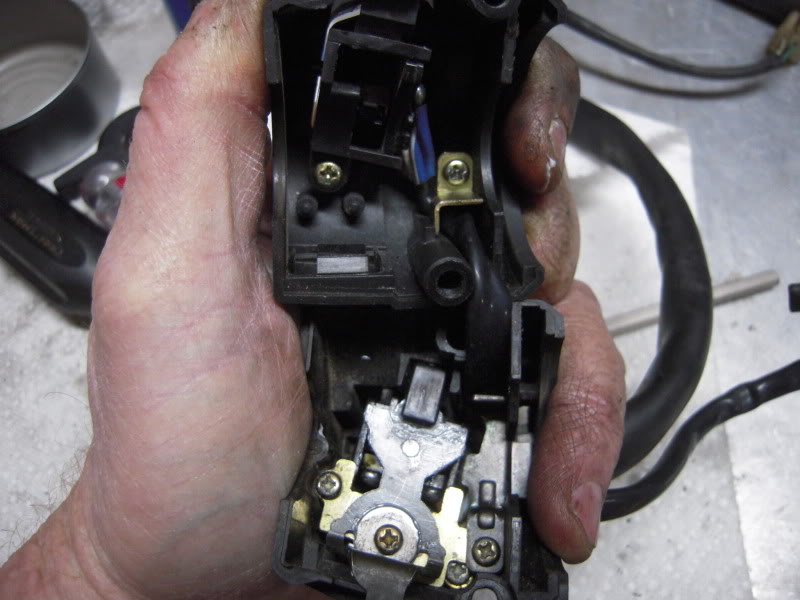
Next up was disassembling the switches. They were pretty hard to move and after I opened the pods, I understood why. Spider webs, dirt and dried "stuff".
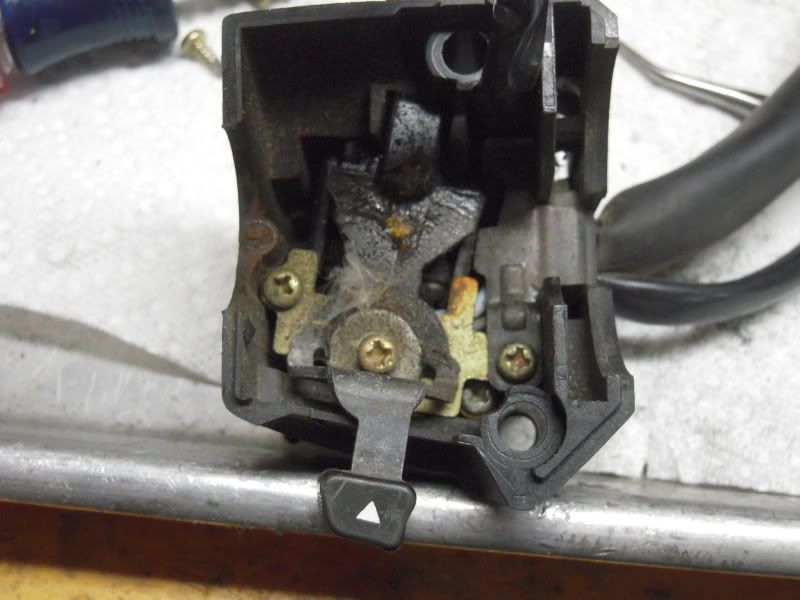
I took plenty of pictures to document how they came apart. Micro-puzzles, they are.
I took them apart, cleaned them and applied white grease to the slidy pieces and using a trick I learned many moons ago in the army, I burnished the electrical contacts on the starter button with a pencil eraser.
I even managed to get the things reassembled!
All these little projects seem like they are taking a life time. But, I really think it will be worth it in the end. Hopefully, I won't have a lot of ****ling little annoying problems when I get this POS reassembled.
I've been puttering around getting a little of this and a little of that done on the 600.
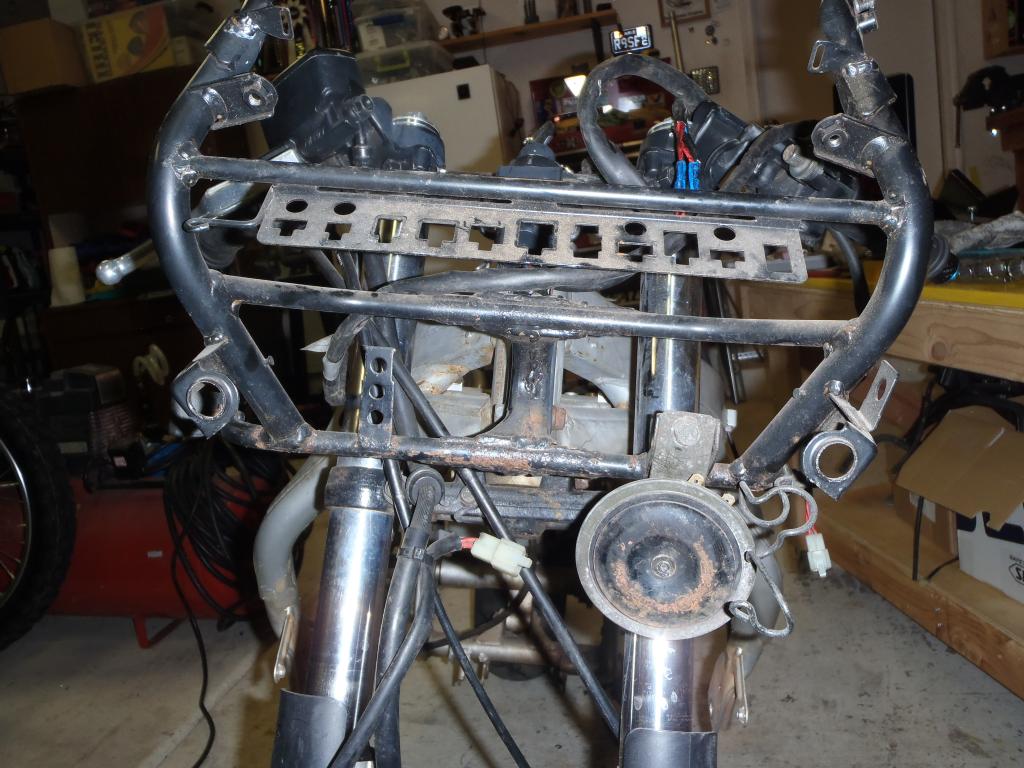
The biggest milestone I've reached is...wait for it...waaaait for it...TaaDaa! It's a roller! I finally got the forks together and put them in the triple tree. Now I can at least roll the thing out of the middle of the floor.
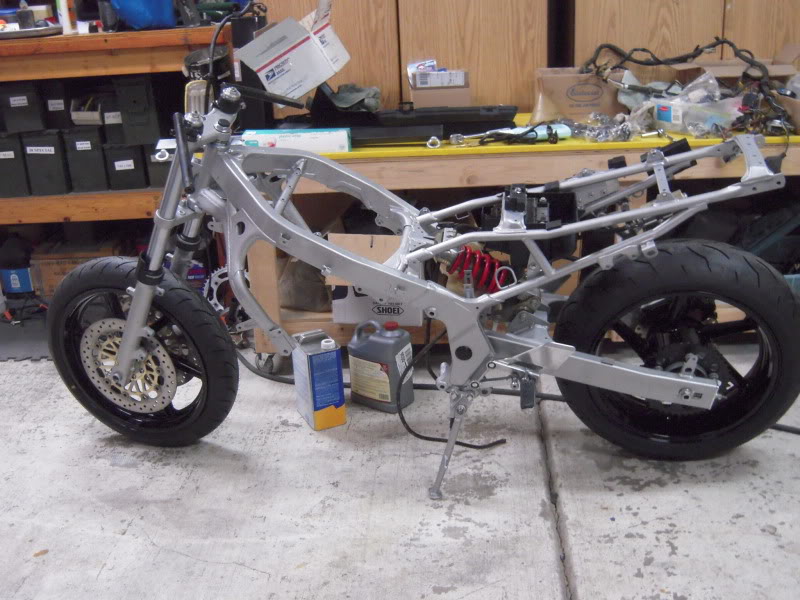
After that, I thought I would paint the chain guard for the 3rd time. (Don't ask.) I painted it the same color as the frame. It sits on the top of the swing arm and looks like it's part of the swing arm. Looks kinda MotoGPish. Originally, it was black and looked like a piece of plastic sitting on top of the box tube swing arm. I have to mount the engine and install the chain before it gets bolted on.
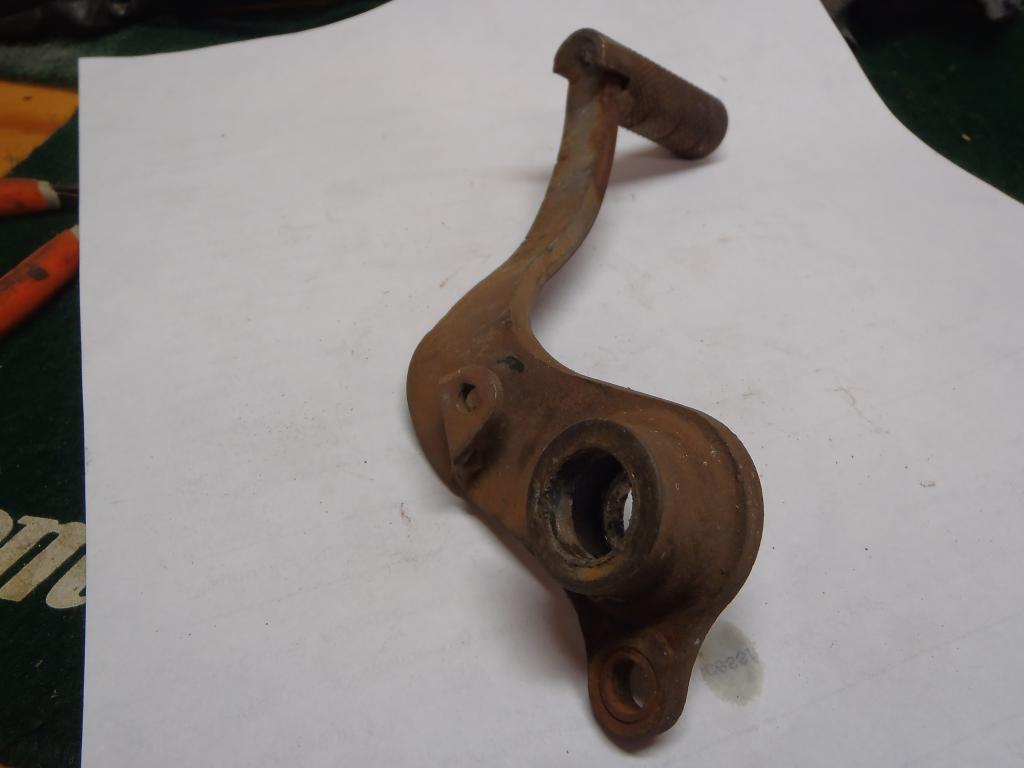
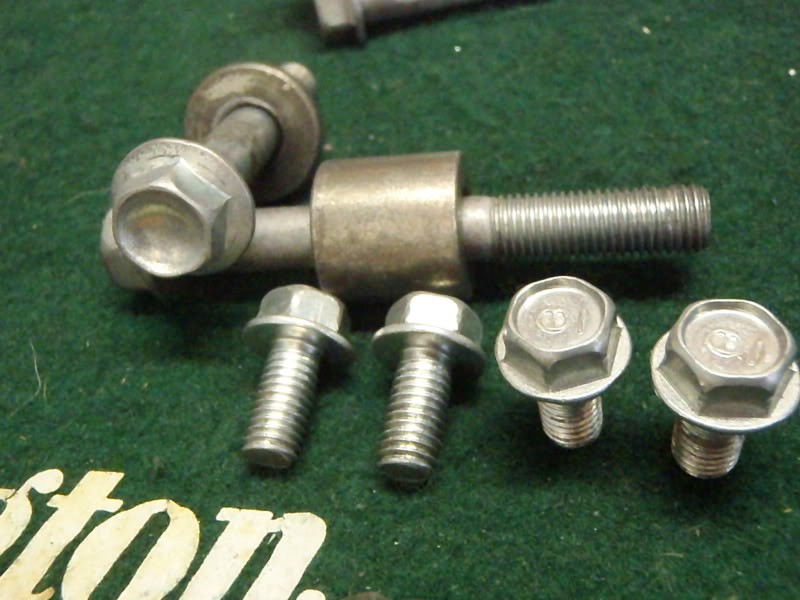
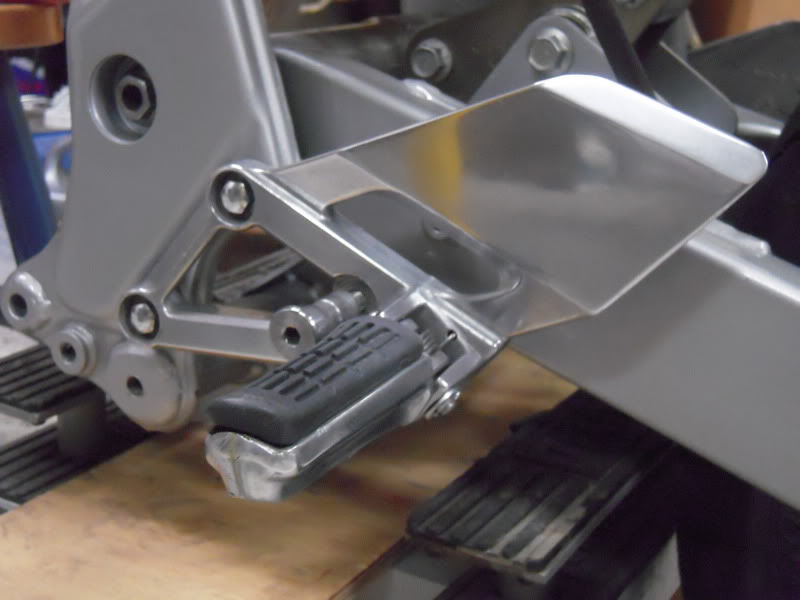
I spiffed up and mounted the left side foot peg and bracket. The shifter was also installed but I neglected to get a pic of that.
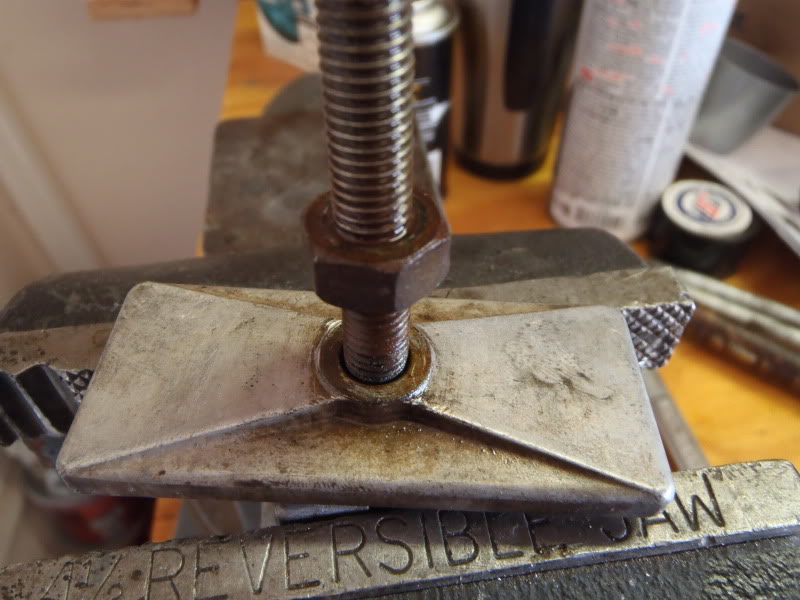
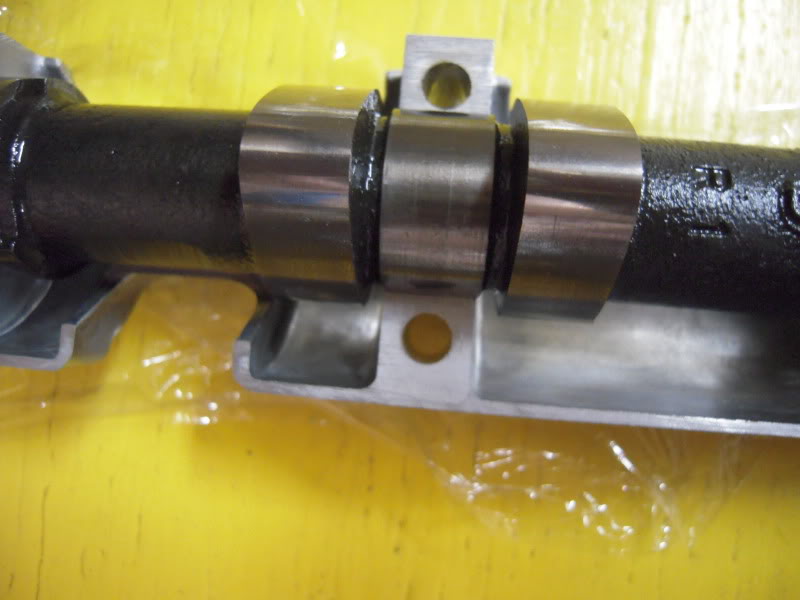
I figured it was about time to put the cams back in. I'd been avoiding it because I didn't want to look around for some material to build a tool to wind up the spring in cam chain tensioner. Ya gotta do that to get enough slack in the cam chain to get the cam sprockets back on. Well, I looked high and low and was about to give up when I came across a hack saw blade. It was the perfect thickness for the job. The manual has a drawing of the tool with the dimensions. I printed the page and measured the diagram with my calipers. It was almost perfectly sized. So I cut it out with a razor blade and taped it to the hack saw blade.
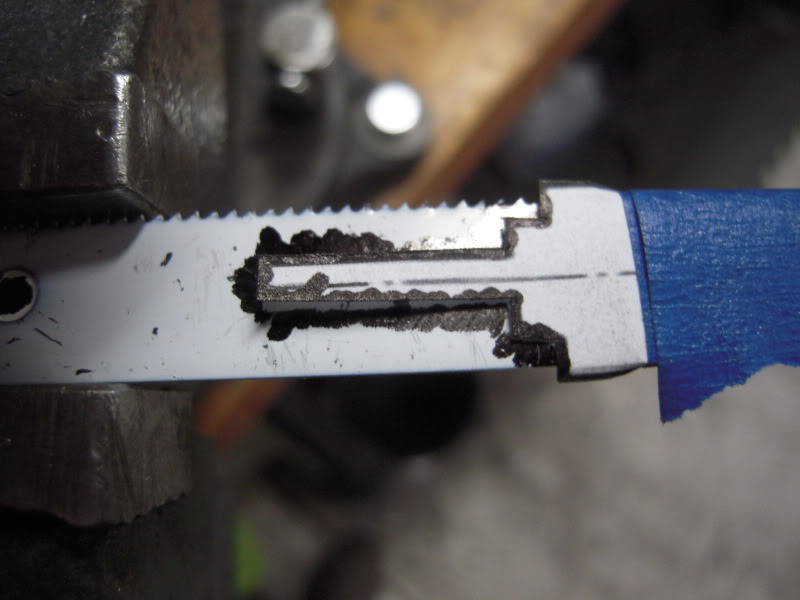
Then, because I'm a lazy bastage, I used a Sharpie marker to make a pattern on the blade.
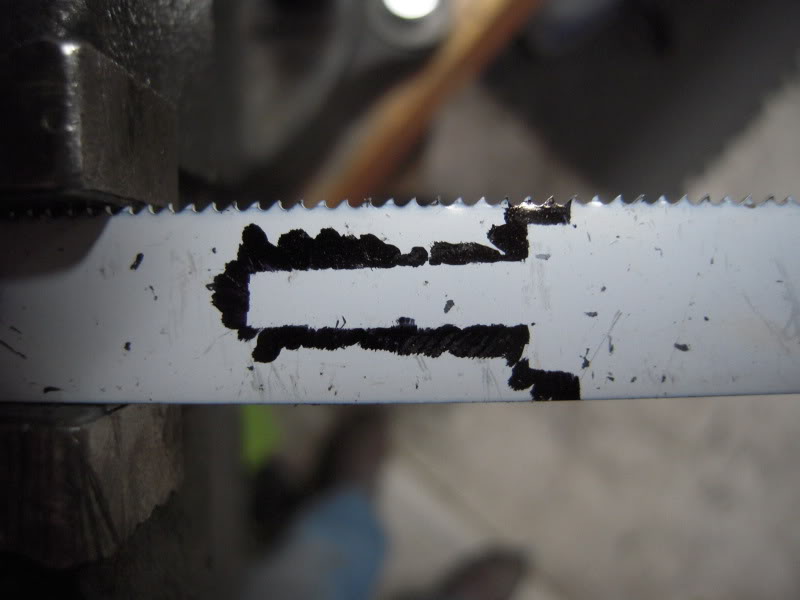
I used my Dremel to cut it out.
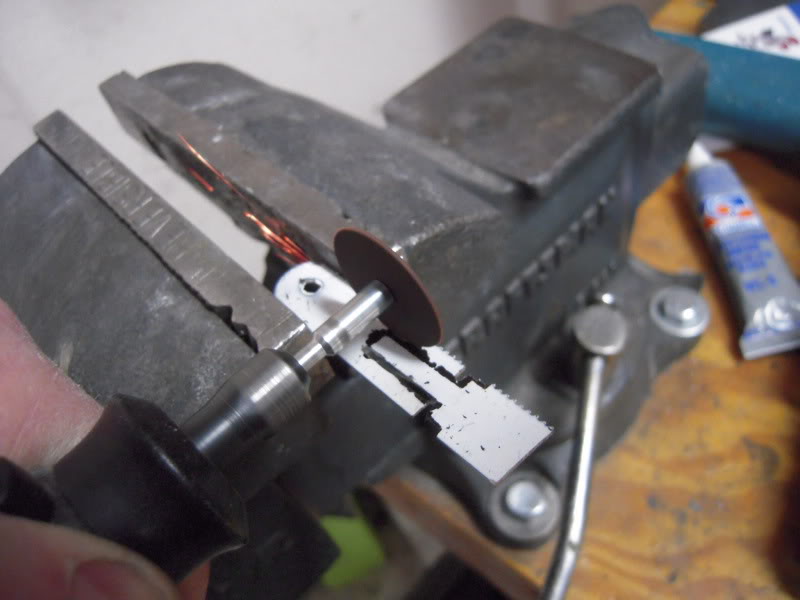
It worked perfectly.
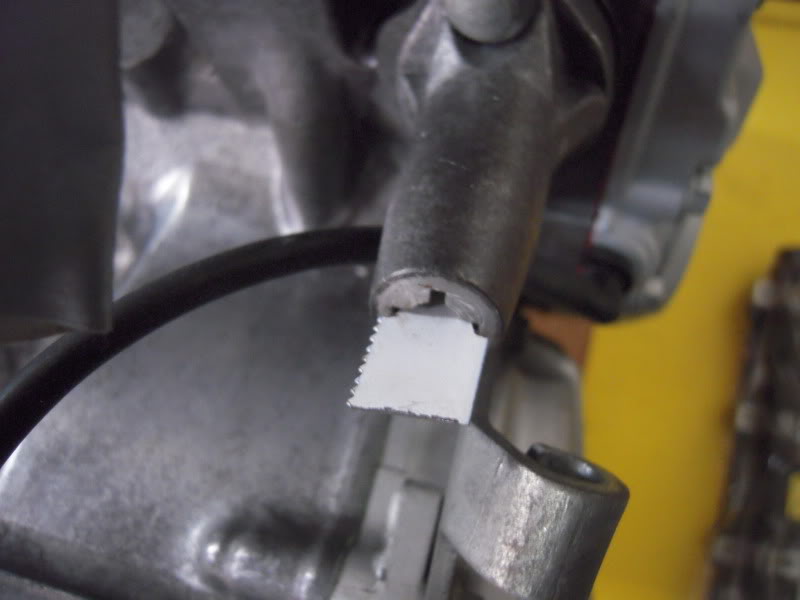
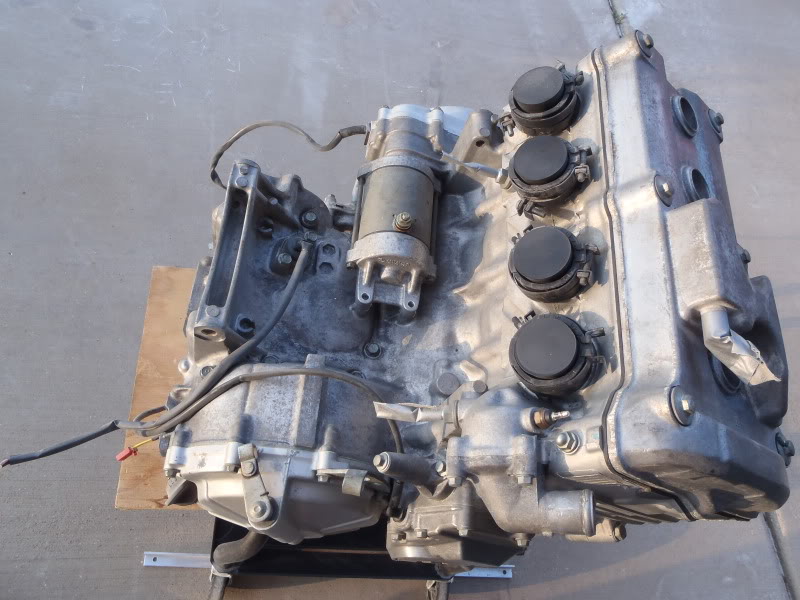
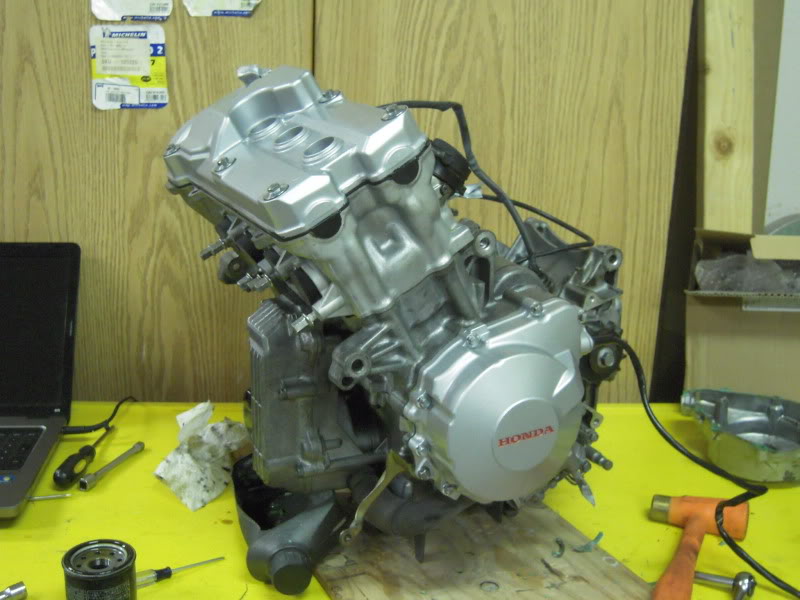
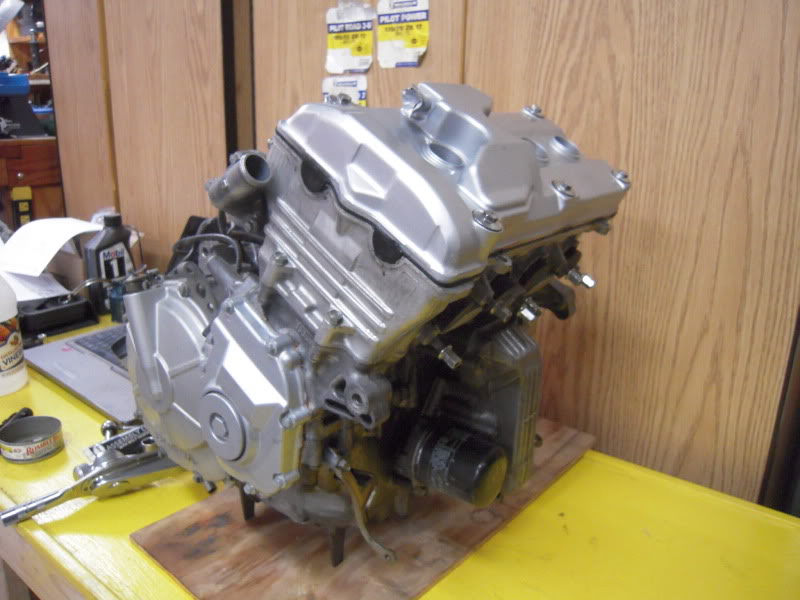
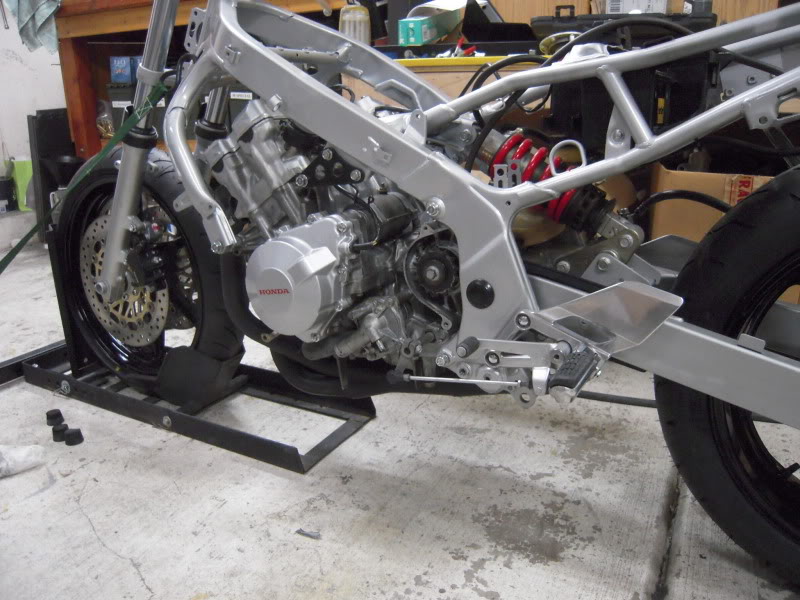
After the cams were in (It took me 2.5 tries before I got it right :help: ) I put the cam cover on and installed the new stator cover complete with custom Red painted Honda logo. I think that may be good for about 2 or 3 HP. I even remembered to put a new oil filter on it. I usually wait until I have put headers and radiators on so I have to stand on my head and grow a 2nd wrist to get the old filter off and the new one on. :laughing7:
Remember this?
A few weeks ago I asked a buddy to come over and help me put the motor back in the frame when it came time. After spending the weekend with my gal that just got her 2nd bionic knee upgrade 2 weeks ago, I was itching to get something done in the garage when I arrived at mi casa. I thought about it a little over the past couple of days and decided that I could put the motor in myself. All I had to do was get the perpetually wobbling about lump under the frame, jack it up and align a half a dozen bolts up with their respective holes and then get the bolts to go through said holes. Oh yeah, without having it all come crashing to the floor. Hey, what could go wrong, right?
What I decided to do was secure the front end in a wheel chock, then jack the rear wheel up as high as I could get it using a floor jack. The motor went onto the motorcycle jack with a piece of 1/4" plywood between the two. I taped up the parts that I thought had the highest probability of getting dinged up and then proceeded with my plan. A little voice in mt head told me "Hey stupid! You better put your cell phone in your pocket so you can call 911 when you get trapped under this thing."
Dead lifting 136 lbs around is not fun, but I seem to be doing a lot of it lately. So I put the motor on the jack and surprisingly enough, I survived and so did the motor.
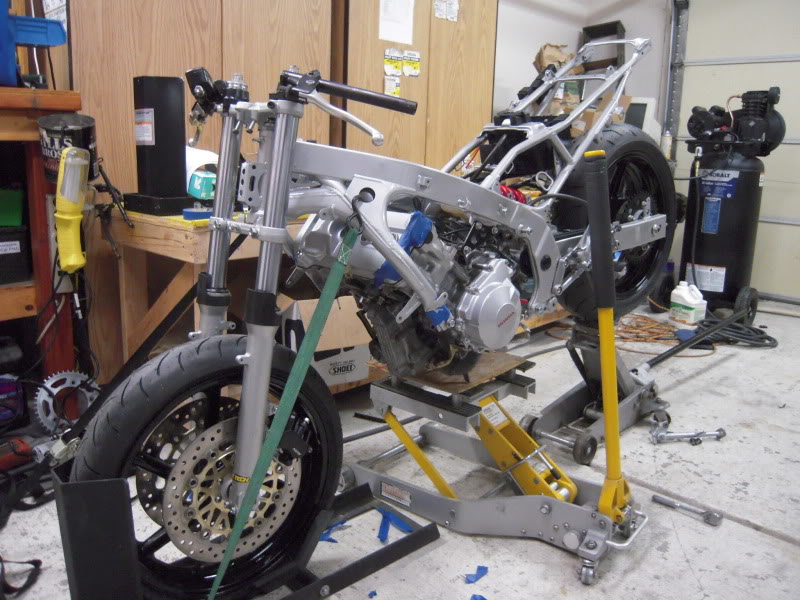
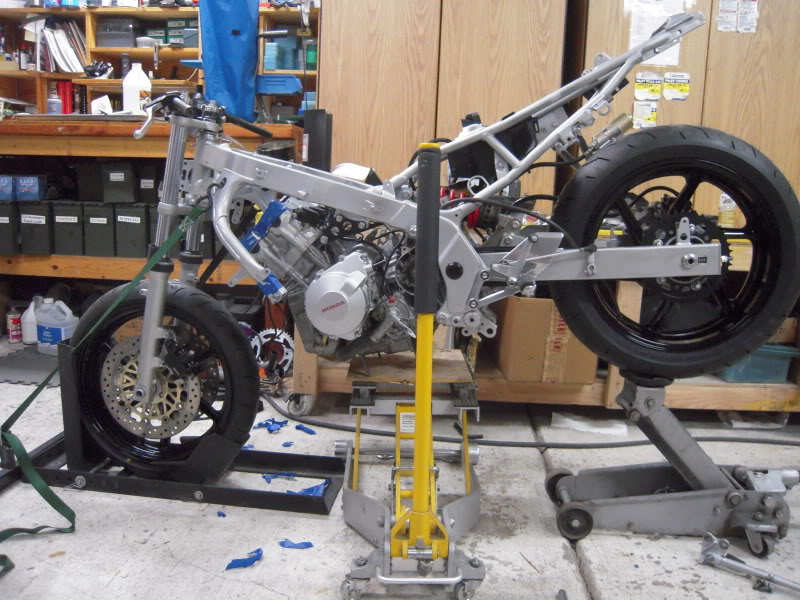
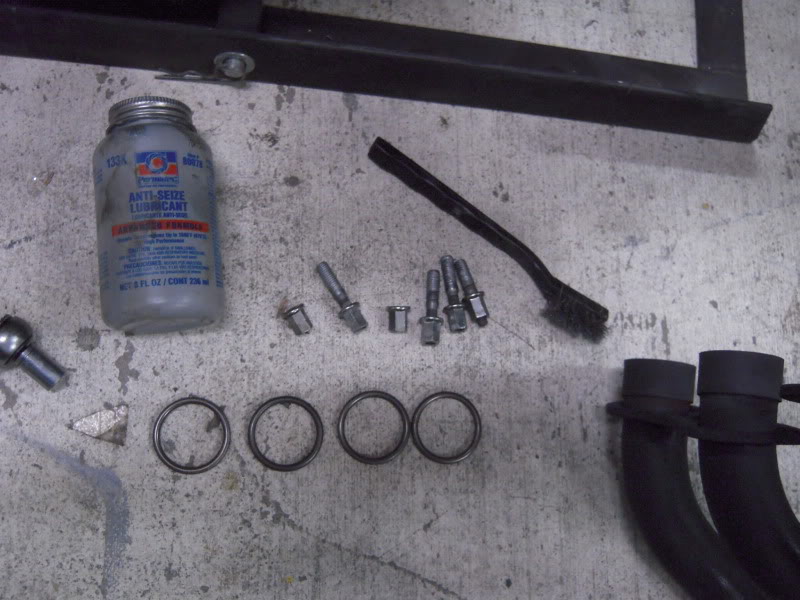
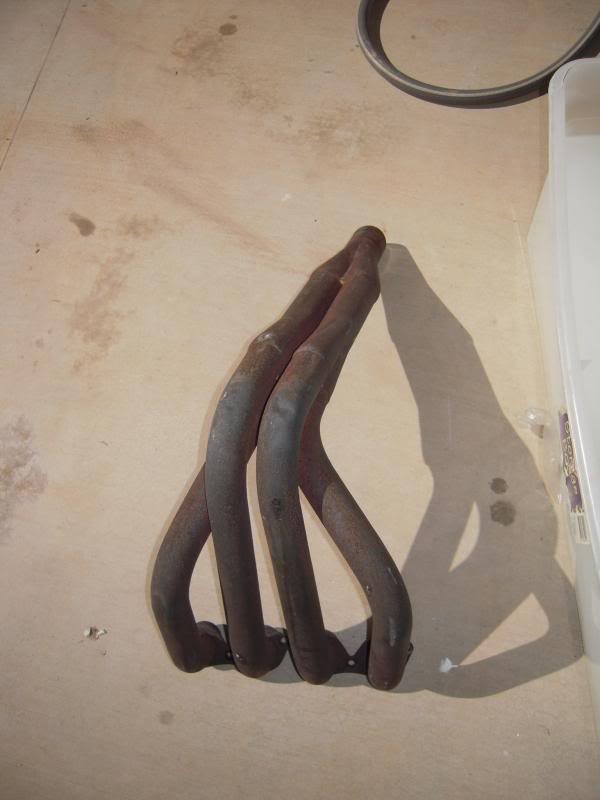
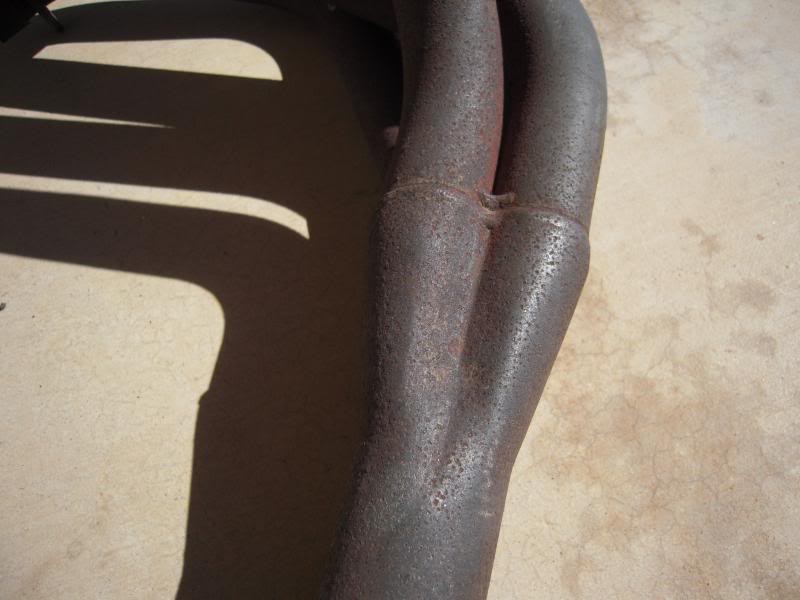
I threw the headers on too, just because I was having such a good time. A little anti-seize lube and new exhaust gaskets and the deed was done. Hint: Put a glob of grease on the exhaust gaskets to hold them into place while you get the headers bolted up.
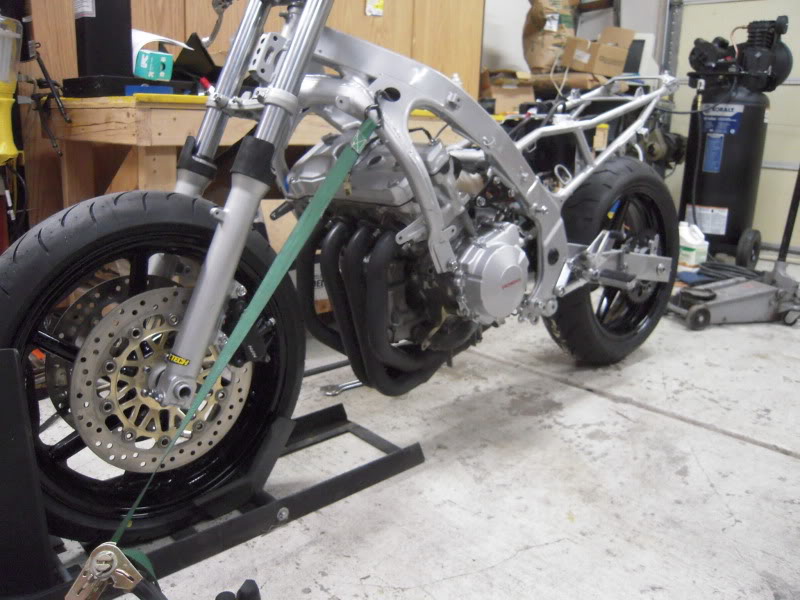
And there, my friends is proof positive that the Good Lord looks out for puppy dogs and idiots. :drool:
I found one air box gasket missing. 6 airbox screws missing. All the float bowl gaskets are hard as stone and need to be replaced.
One slow jet was broken off.
I used some penetrating oil and a little tapping on it, followed with some propane torch heat on the carb body next to it. A twist of the needle nose pliers and it came right out. It's a little unnerving when you first see these things. It's always a possible garbage can moment.
The carbs were kind of grungy, so I thought it would be a good time to see if the Pine Sol soak I heard about would do the job. I poured two large bottles of that nasty smelling stuff in a tub. Then after removing the jets, floats, throttle position sensor, air valve and vacuum diaphragms and caps, I dunked them in the juice for 24 hours.
Don't use plastic drink cups to hold the small parts. They wilt pretty badly. Live and learn.
They came out looking pretty good. I put them in the kitchen sink and sprayed them off. Then followed up with compressed air to blow everything out. As soon as I order the parts, I think they are ready to go back into service. The best thing is Pine Sol doesn't attack rubber like carb cleaner does. And...they smell really, really fresh.

I had the day off, so I thought I would drop my wheels off at the local sickle emporium and have them lovingly caress the new tires onto my freshly painted wheels.
So I ran some errands and headed home with my spiffy new hoops. Nason base coat/clear coat in 1953 GM black with Bridgestone BT016 tire for those that need to know the details.
Of course my 16 year old Sears compressor gave up 1/2 through the clear coat, so it was spray 3 seconds-wait 3 seconds-spray 3 seconds-wait 3 seconds. I managed to hang draperies on the front wheel with all the squirt and wait stuff going on. Kinda hard to get a good rhythm going when you're swearing and praying at the same time. Good thing the brake disks are big.
Dragged the frame out to the garage and fitted the swing arm and shock just so I could feel like I am accomplishing something.
I decided I better do something about the nasty looking cam cover, so I pulled it off, sanded it down and painted it.
While the cam cover was off, I decided to pull the cams and take a peek at the wear. As you know the bike was not treated well by it's past owners and although it only had 12K miles on the clock, I wondered how many of those were at red line with no oil. I ran the bike a little when I got it, and it wasn't blowing smoke or rattling, so I made an uninformed decision that the motor was probably in good shape. Just as I suspected! The upper end was pristine. Not a mark on any of the cam lobes or bearing surfaces. :hello2: It seems Ricky Racer just fell off a lot. He didn't ride it a lot. And probably didn't get going too fast before he fell off.

Not a lot of exciting stuff to report. I'm waiting for the replacement spring cup (that I managed to lose) to show up so I can assemble the front end and have a rolling frame. In the mean time, I've finished rebuilding the front brakes, including flushing out the hoses in preparation of the DOT 5 brake fluid. After discussions here, I've decided that it will work just fine. Actually, I'm daring it not to and fingers are crossed. I think of it as a challenge to my stubbornness. :BangHead:
The first thing I did was pull out the pistons and rubber boots on the wheel cylinders. If you look at the old boots, you'll notice that they are swollen and substantially larger than the new pieces. They are a lot squishier too. It's something that isn't apparent until you have them out on the bench to do a side by side comparison. Definitely needed to be replaced.
Then I fished the seals out of the bores. These can be kind of tricky to get out because there's no room to get behind them and if you go "DRUNK MONKEY" on them with a screw driver there's a good possibility of slipping and gouging the bore. That would be bad. As in throw away the wheel cylinder. I found the best tool to use is a dental pick. Easy smeezy.
Then you scrub the hell out of them with a steel wire brush and hose them down with brake cleaner. Follow that up with masking off all the parts you don't want paint on. The best way to accurately mask off those areas is using the flat side of a razor. Just press it along the parting edge and it will cleanly cut the tape. For the threaded holes, I roll up some masking tape, sticky side out and poke it in the hole. Then using a small screw driver in the middle of the rolled up tape, I unwind the tape until it's tightly sticking to the inside of the threaded hole.
Once you have everything taped off, use some Bulldog Adhesion Promoter. This stuff is great. Paint will stick to whatever you prep with it. A paint guy once told me they used it on a beach ball, then painted it. It worked too.
I followed the Bulldog with some VHT caliper paint.
To highlight the NISSIN logo, I just tape off the paint surrounding it and hit it with a miniature file. The tape is there in case I get all spastic and prevents me from goobering up the surrounding area.
One down, one to go!
The master cylinder got the rebuild treatment as well.
Next up was disassembling the switches. They were pretty hard to move and after I opened the pods, I understood why. Spider webs, dirt and dried "stuff".
I took plenty of pictures to document how they came apart. Micro-puzzles, they are.
I took them apart, cleaned them and applied white grease to the slidy pieces and using a trick I learned many moons ago in the army, I burnished the electrical contacts on the starter button with a pencil eraser.
I even managed to get the things reassembled!
All these little projects seem like they are taking a life time. But, I really think it will be worth it in the end. Hopefully, I won't have a lot of ****ling little annoying problems when I get this POS reassembled.
I've been puttering around getting a little of this and a little of that done on the 600.
The biggest milestone I've reached is...wait for it...waaaait for it...TaaDaa! It's a roller! I finally got the forks together and put them in the triple tree. Now I can at least roll the thing out of the middle of the floor.
After that, I thought I would paint the chain guard for the 3rd time. (Don't ask.) I painted it the same color as the frame. It sits on the top of the swing arm and looks like it's part of the swing arm. Looks kinda MotoGPish. Originally, it was black and looked like a piece of plastic sitting on top of the box tube swing arm. I have to mount the engine and install the chain before it gets bolted on.
I spiffed up and mounted the left side foot peg and bracket. The shifter was also installed but I neglected to get a pic of that.
I figured it was about time to put the cams back in. I'd been avoiding it because I didn't want to look around for some material to build a tool to wind up the spring in cam chain tensioner. Ya gotta do that to get enough slack in the cam chain to get the cam sprockets back on. Well, I looked high and low and was about to give up when I came across a hack saw blade. It was the perfect thickness for the job. The manual has a drawing of the tool with the dimensions. I printed the page and measured the diagram with my calipers. It was almost perfectly sized. So I cut it out with a razor blade and taped it to the hack saw blade.
Then, because I'm a lazy bastage, I used a Sharpie marker to make a pattern on the blade.
I used my Dremel to cut it out.
It worked perfectly.
After the cams were in (It took me 2.5 tries before I got it right :help: ) I put the cam cover on and installed the new stator cover complete with custom Red painted Honda logo. I think that may be good for about 2 or 3 HP. I even remembered to put a new oil filter on it. I usually wait until I have put headers and radiators on so I have to stand on my head and grow a 2nd wrist to get the old filter off and the new one on. :laughing7:
Remember this?
A few weeks ago I asked a buddy to come over and help me put the motor back in the frame when it came time. After spending the weekend with my gal that just got her 2nd bionic knee upgrade 2 weeks ago, I was itching to get something done in the garage when I arrived at mi casa. I thought about it a little over the past couple of days and decided that I could put the motor in myself. All I had to do was get the perpetually wobbling about lump under the frame, jack it up and align a half a dozen bolts up with their respective holes and then get the bolts to go through said holes. Oh yeah, without having it all come crashing to the floor. Hey, what could go wrong, right?
What I decided to do was secure the front end in a wheel chock, then jack the rear wheel up as high as I could get it using a floor jack. The motor went onto the motorcycle jack with a piece of 1/4" plywood between the two. I taped up the parts that I thought had the highest probability of getting dinged up and then proceeded with my plan. A little voice in mt head told me "Hey stupid! You better put your cell phone in your pocket so you can call 911 when you get trapped under this thing."
Dead lifting 136 lbs around is not fun, but I seem to be doing a lot of it lately. So I put the motor on the jack and surprisingly enough, I survived and so did the motor.
I threw the headers on too, just because I was having such a good time. A little anti-seize lube and new exhaust gaskets and the deed was done. Hint: Put a glob of grease on the exhaust gaskets to hold them into place while you get the headers bolted up.
And there, my friends is proof positive that the Good Lord looks out for puppy dogs and idiots. :drool:
Last edited by LARRYTHEPIRATE; Jun 2, 2013 at 05:26 PM.


Thread Starter
|
Junior Member
Joined: Oct 2012
Posts: 21
Likes: 0
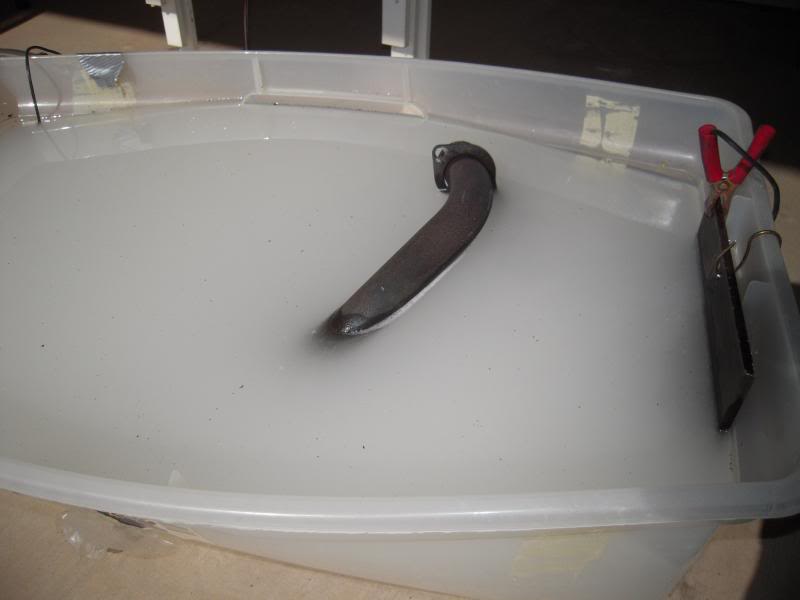
Here's what was in the tub after all the rust was pulled off of the header

Last edited by LARRYTHEPIRATE; Jun 2, 2013 at 02:47 PM.

Thread Starter
|
Junior Member
Joined: Oct 2012
Posts: 21
Likes: 0


