'93 600 Fighter project
#51
 07-21-2010, 04:20 PM


Senior Member
Join Date: Feb 2010
Location: Florida
Posts: 197
Likes: 0
Received 0 Likes
on
0 Posts
Might be from your oil cooler o-rings are dry rotted and letting the oil into the coolant?
That would be my main guess. I'd do that before i do a total top end rebuild, thats pricey. Gasket kits alone are going to cost ya a pretty penny.
If you do though, I would love to see it. I have a whole f2 engine that i wont be using in my build anymore, so if you need any engine parts i should have a few.
Count yourself lucky with the tank, My tank I used a can of paint stripper on, That took off about 4-5 layers of paint/other crap that the guy put on there. And i still had another couple layers of paint and then the factory paint...It must have had 10 pounds of paint on it. Plus, I had a nice big baseball size dent in about the same spot yours is, That i filled in with an epoxy so its nice and hard. Sands down pretty well too. I've put my tank on hold though until i get some of the more important things done (IE the frame, engine, etc)
I bought a clean unbent titled frame and the guy welded 6 steel tabs on the sub frame, and two bars under the frame, and one big 2 inch wide bar to the top of it....All of which has to be cut off and grinded smooth, And its been taking me FOREVER. The welds kill dremel cutoff wheels, Reciprocating saw blades, and i have a huge hand held electric grinder with a 6 inch grinding stone on it, and its wore that down to about 4 inches wide now...Its ridiculous!
Enough with my rant, On with the build! lol
#52
07-22-2010, 09:18 AM
I took the oil cooler off and it was super nasty in there.. so it very well might be the o-rings. i have the entire upper and lower gasket sets as well as the carb set (ti came with the bike) the gasket sets were $50 on ebay.. so i really don't see any reason not to just dig right in. gonna clean and lub and replace what i can. i'll take as many pictures as i can.
have you tried using a cut-off wheel to cut the tabs off? do you have a progress thread? i would love to see.
thanks!
~Chris
have you tried using a cut-off wheel to cut the tabs off? do you have a progress thread? i would love to see.
thanks!
~Chris
#53
07-22-2010, 04:42 PM
Senior Member
Join Date: Feb 2010
Location: Florida
Posts: 197
Likes: 0
Received 0 Likes
on
0 Posts
You got a head and base gasket for $50?? Thats an awesome price. Cheapest head gasket i've seen has been $70.
I'm going to start one here, I dont have much progress, I Just painted my frame today. I painted my engine last week, rearsets, pegs, forks, triples, rims, etc are painted. I have some clear coat left. And the gas tank to paint.
I'll be re-assembling everything in the next few days hopefully.
Right now as my frame dries im trying to figure out my gauges, I took the OEM cluster apart and "borrowed" the RPM and speedo gauge, I'm going to try and make a small container to put them in and mount them to the triple somehow.
I'll post a build thread here now.
#54
07-26-2010, 09:37 AM
You got a head and base gasket for $50?? Thats an awesome price. Cheapest head gasket i've seen has been $70.
I'm going to start one here, I dont have much progress, I Just painted my frame today. I painted my engine last week, rearsets, pegs, forks, triples, rims, etc are painted. I have some clear coat left. And the gas tank to paint.
I'll be re-assembling everything in the next few days hopefully.
Right now as my frame dries im trying to figure out my gauges, I took the OEM cluster apart and "borrowed" the RPM and speedo gauge, I'm going to try and make a small container to put them in and mount them to the triple somehow.
I'll post a build thread here now.
I'm going to start one here, I dont have much progress, I Just painted my frame today. I painted my engine last week, rearsets, pegs, forks, triples, rims, etc are painted. I have some clear coat left. And the gas tank to paint.
I'll be re-assembling everything in the next few days hopefully.
Right now as my frame dries im trying to figure out my gauges, I took the OEM cluster apart and "borrowed" the RPM and speedo gauge, I'm going to try and make a small container to put them in and mount them to the triple somehow.
I'll post a build thread here now.
As you tell it, it would seem you have a good bit more progress than i do. i would love to see a build. as soon as you get one up, please let me know.
~Chris
#56
08-02-2010, 08:16 AM
okay.... been off the grid for a while, but i was working some... i promise!
First off, i cleaned up the tank and fixed the dents:
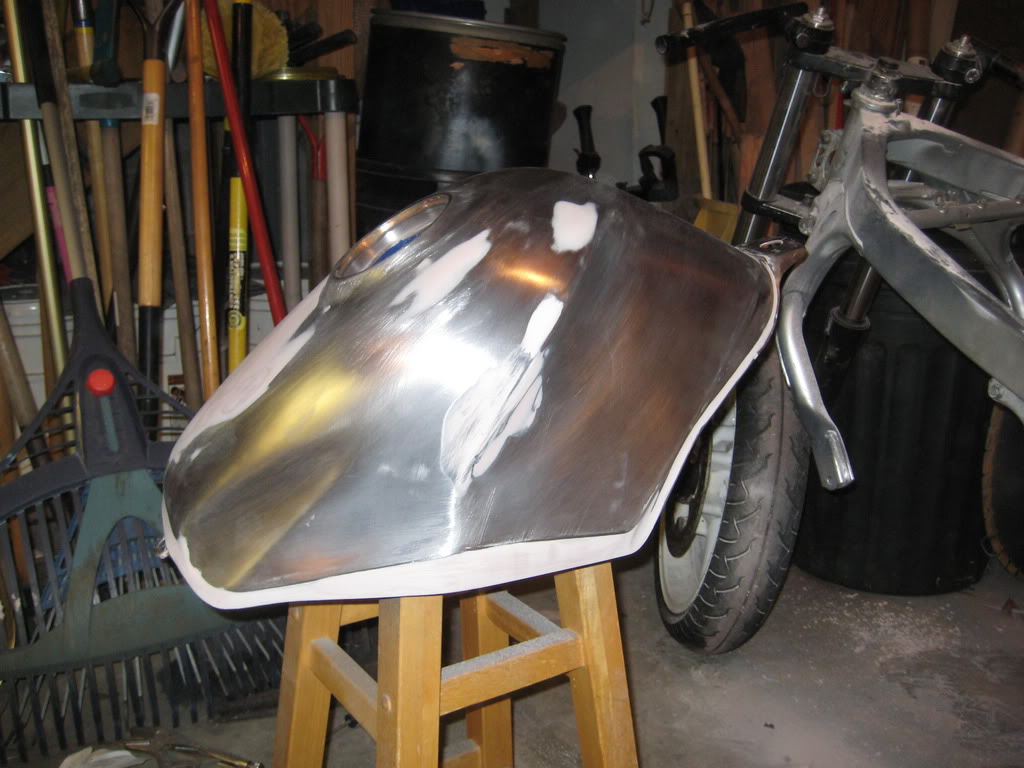
Then, primer, then sanding, then bondo, then more sanding.. and so on Ad Infinium. and there is more to come, though i am less concerned with the tank since it is going to be wrapped.
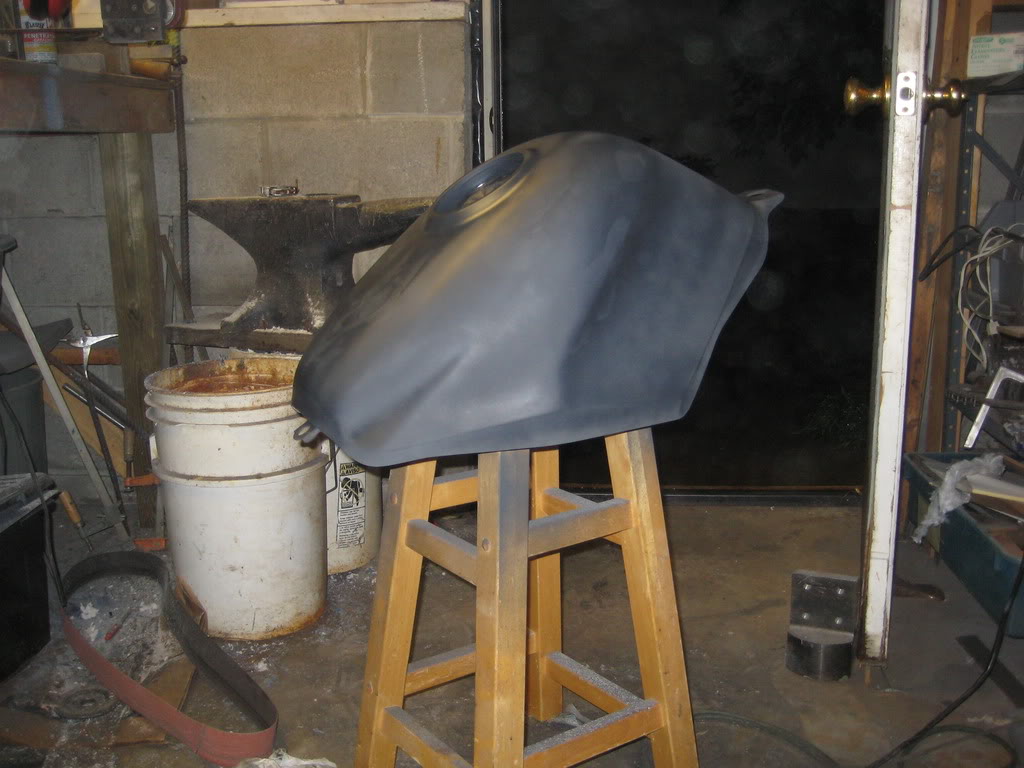
look mom! no dents!
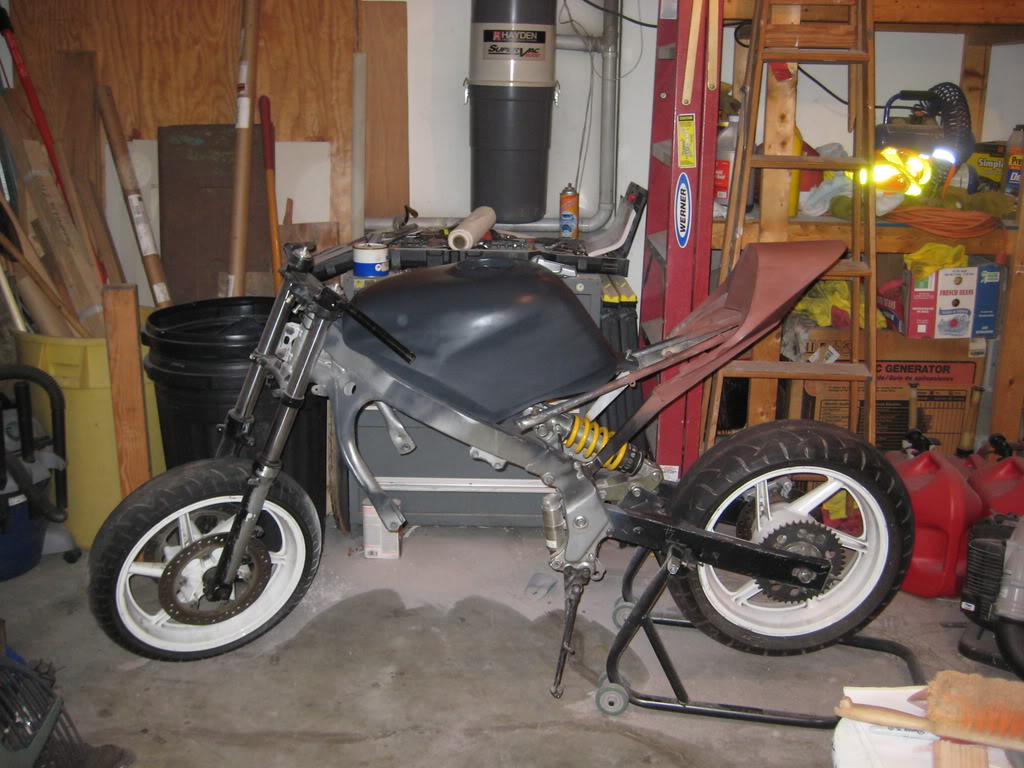
then, cause i needed them, i fabbed up some rear-set adapter plates. Prototype first to see if it clear everything:
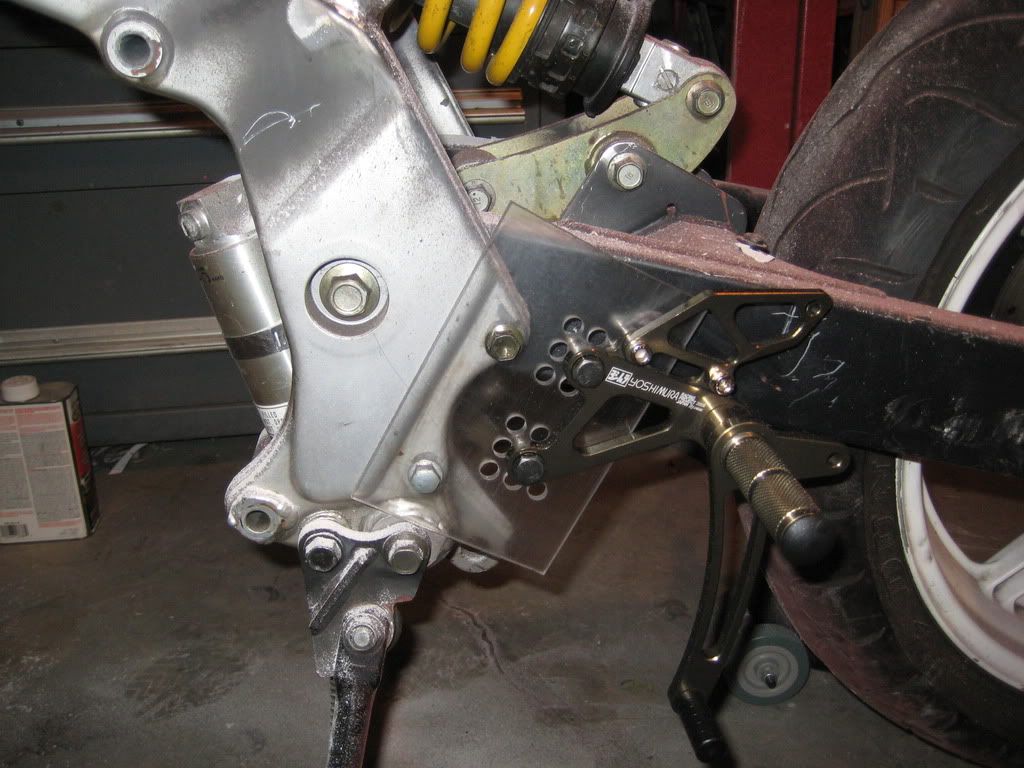
yes it works, but needed to be tweaked a bit, then made in 5160 steel, with some lovely countersinking...
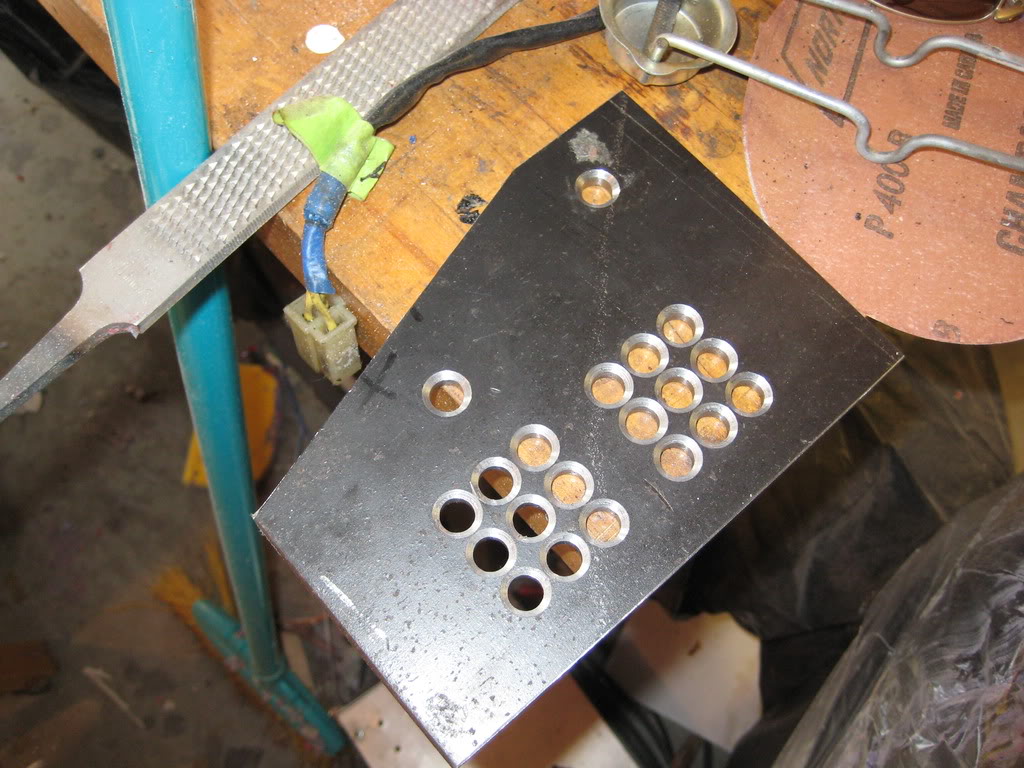
a little grinder work, and viola!
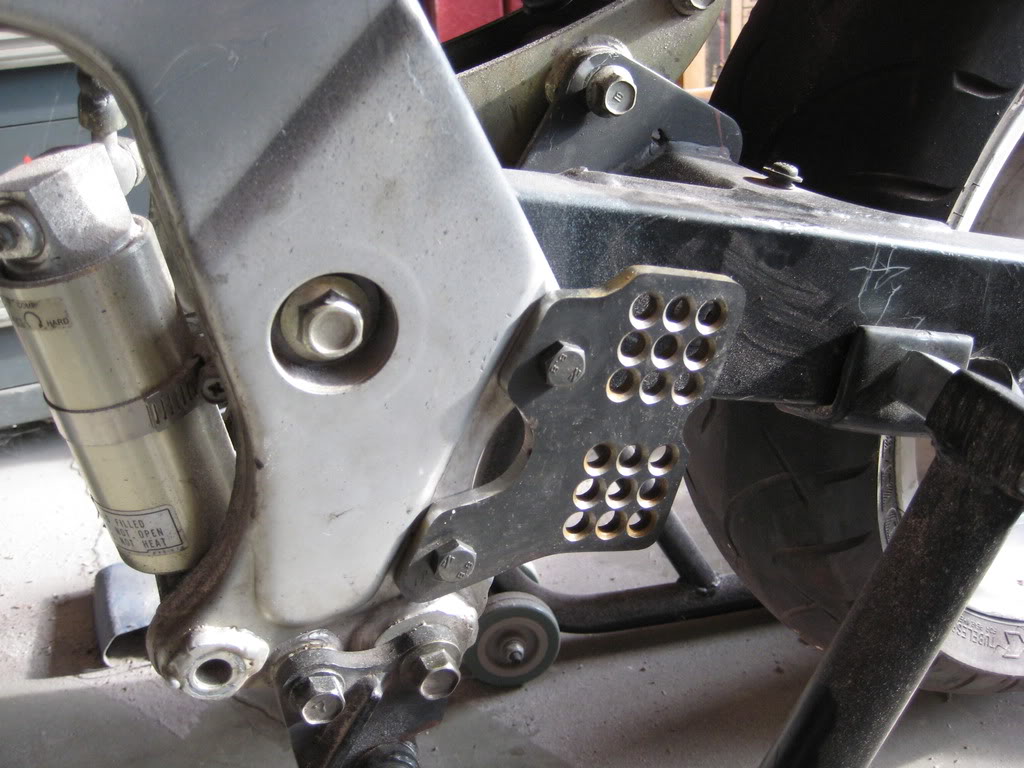
Now with the rearset:

and i pulled this off a 06 cbr600rr:
and some gratuitous glamor shots, cause thats how i roll yo!
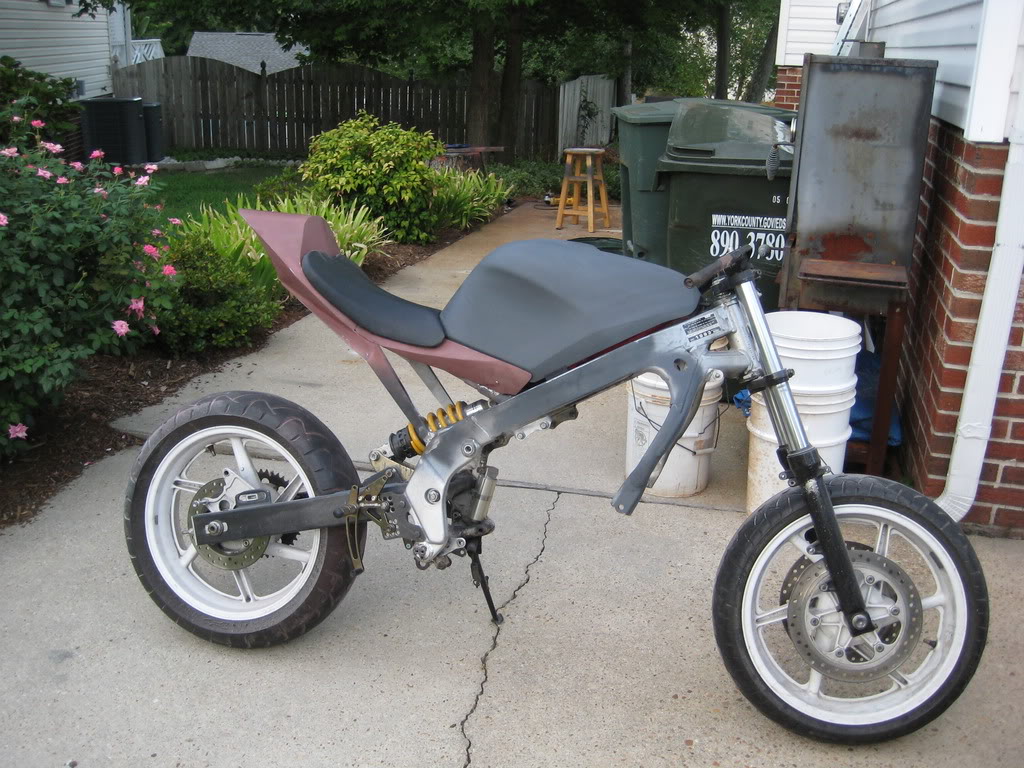
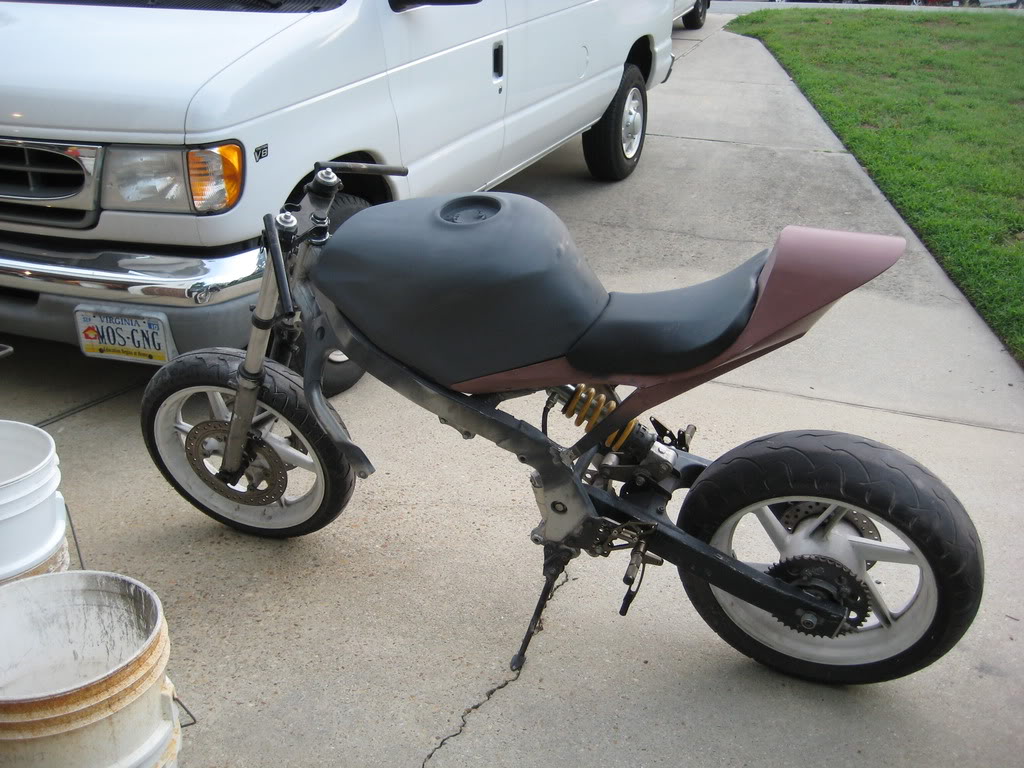
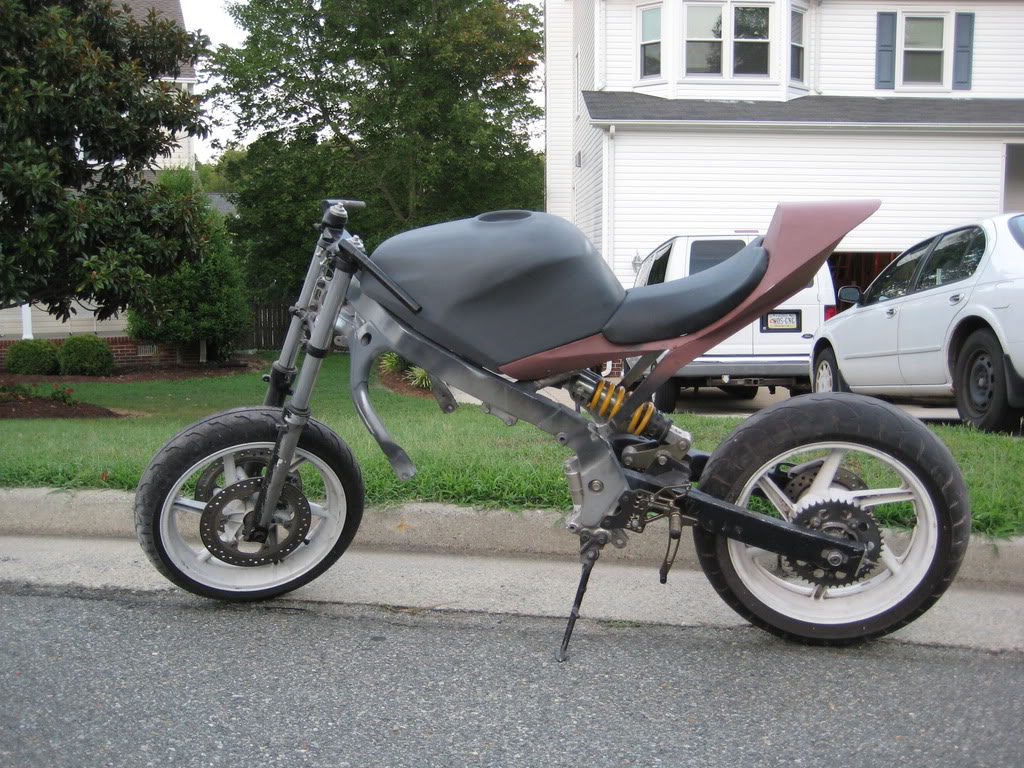
I also got my fender in. gonna be working with a chrome 84 magna front fender. gonna mod it to fit and then duplicate it. i like the shape, and it is steel so it will be shortened and beautified
next; engine rebuild!
First off, i cleaned up the tank and fixed the dents:
Then, primer, then sanding, then bondo, then more sanding.. and so on Ad Infinium. and there is more to come, though i am less concerned with the tank since it is going to be wrapped.
look mom! no dents!
then, cause i needed them, i fabbed up some rear-set adapter plates. Prototype first to see if it clear everything:
yes it works, but needed to be tweaked a bit, then made in 5160 steel, with some lovely countersinking...
a little grinder work, and viola!
Now with the rearset:
and i pulled this off a 06 cbr600rr:
and some gratuitous glamor shots, cause thats how i roll yo!
I also got my fender in. gonna be working with a chrome 84 magna front fender. gonna mod it to fit and then duplicate it. i like the shape, and it is steel so it will be shortened and beautified
next; engine rebuild!
#57
08-02-2010, 08:55 AM
okay!
now that the current body work is done and ready for carbon fiber, i am going to rebuild the engine. that way i can mount it in the frame and do any welding necessary on the frame
(radiator and exhaust mounts at least) so that i can then paint the frame and engine.
Now, i will say this up front, i do not know what wear looks like, so if you see something that should be fixed or replaced PLEASE shout it out. i need you engine gurus to help me out here. thanks!
Here we go:
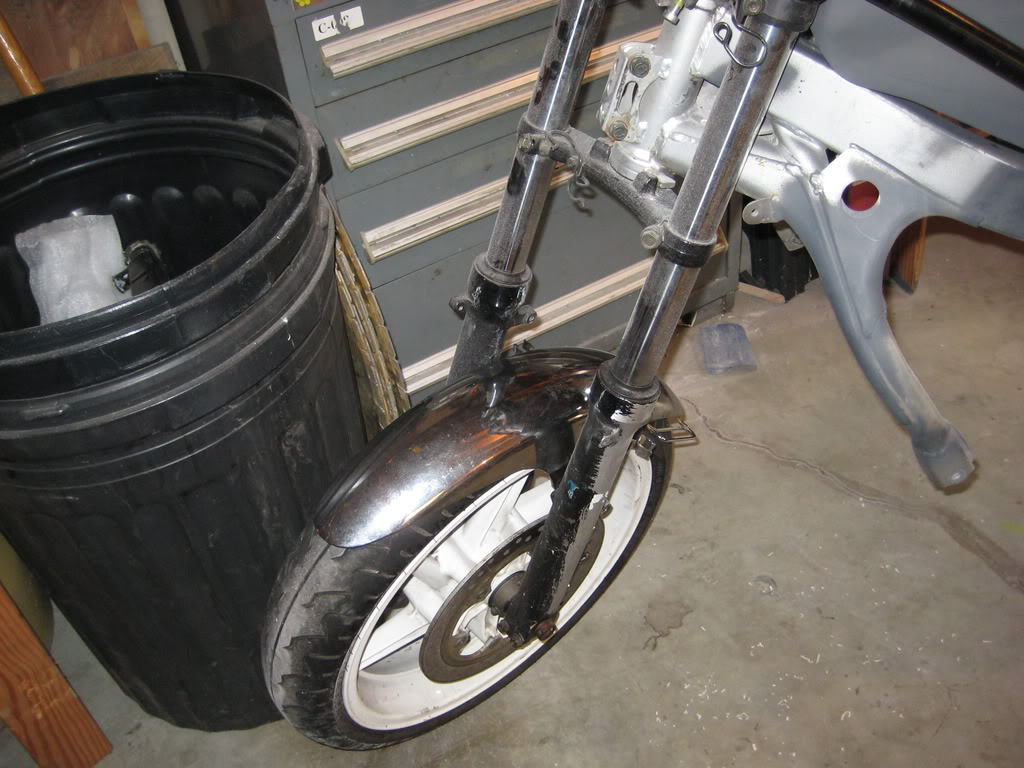
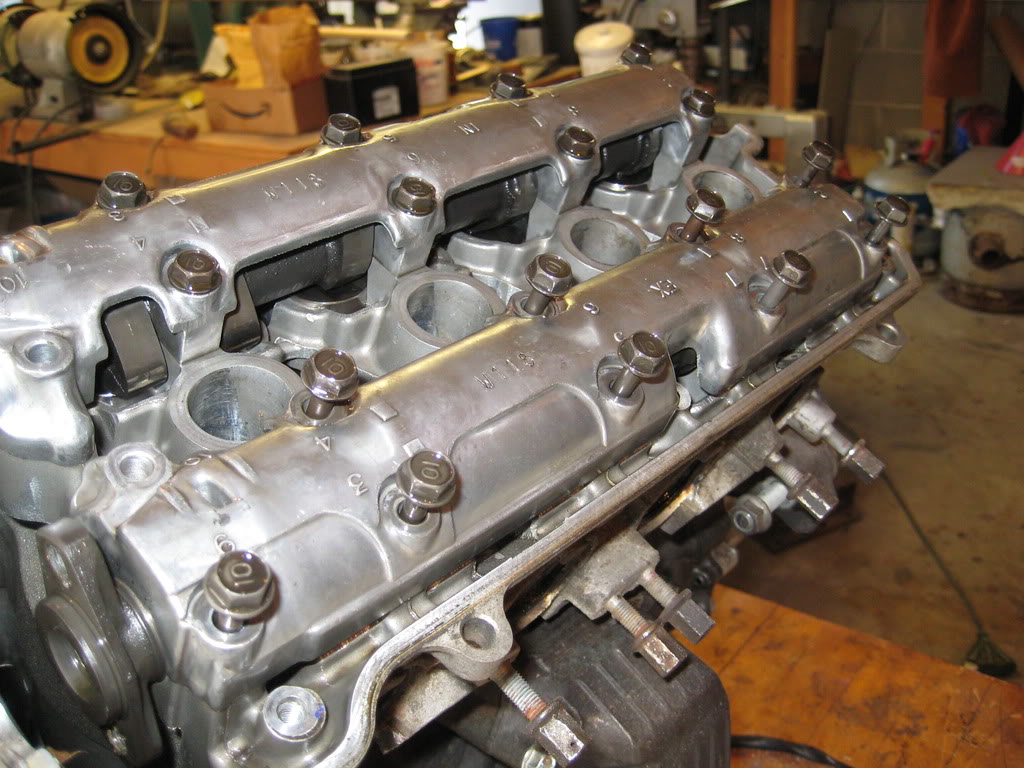
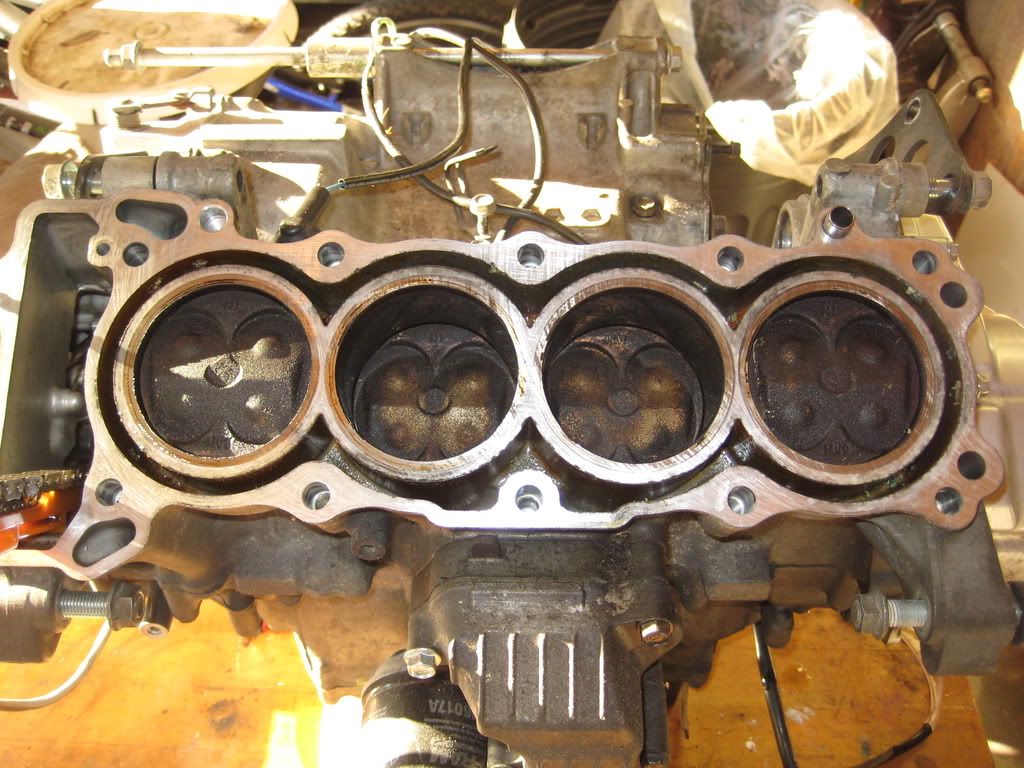
Valve cover removed, i didnt figure you needed a picture of the valve cover on....
Now, loosen the bold in reverse numerical order to allow the covers to de-compress evenly (dont worry... they are numbered)
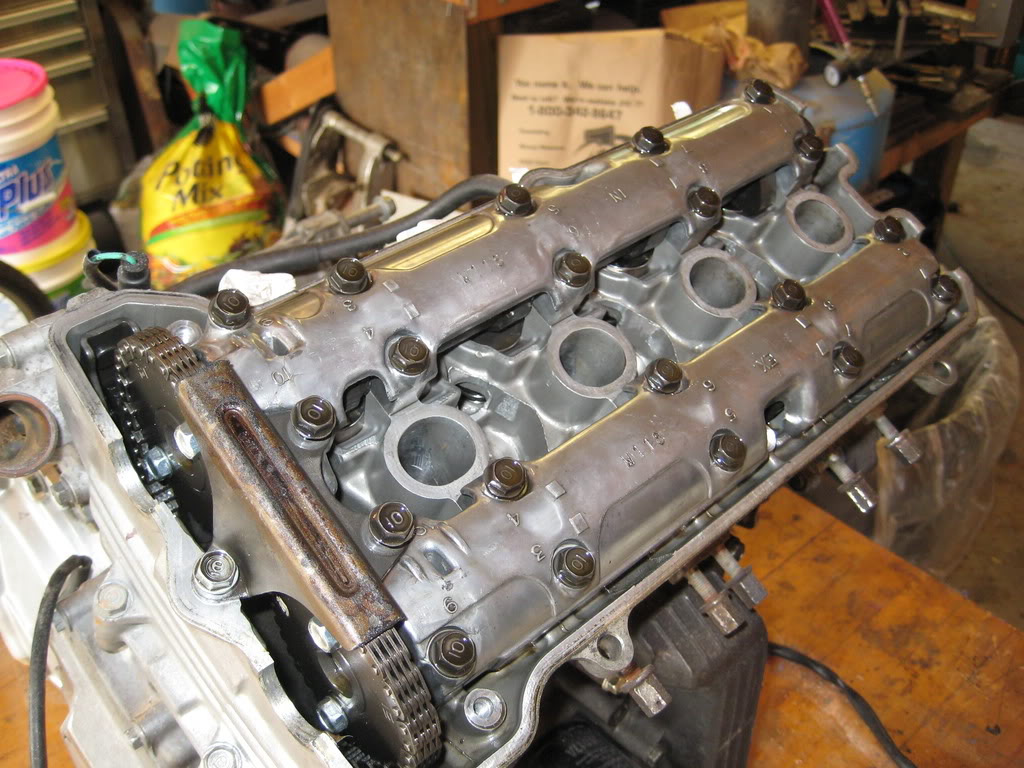
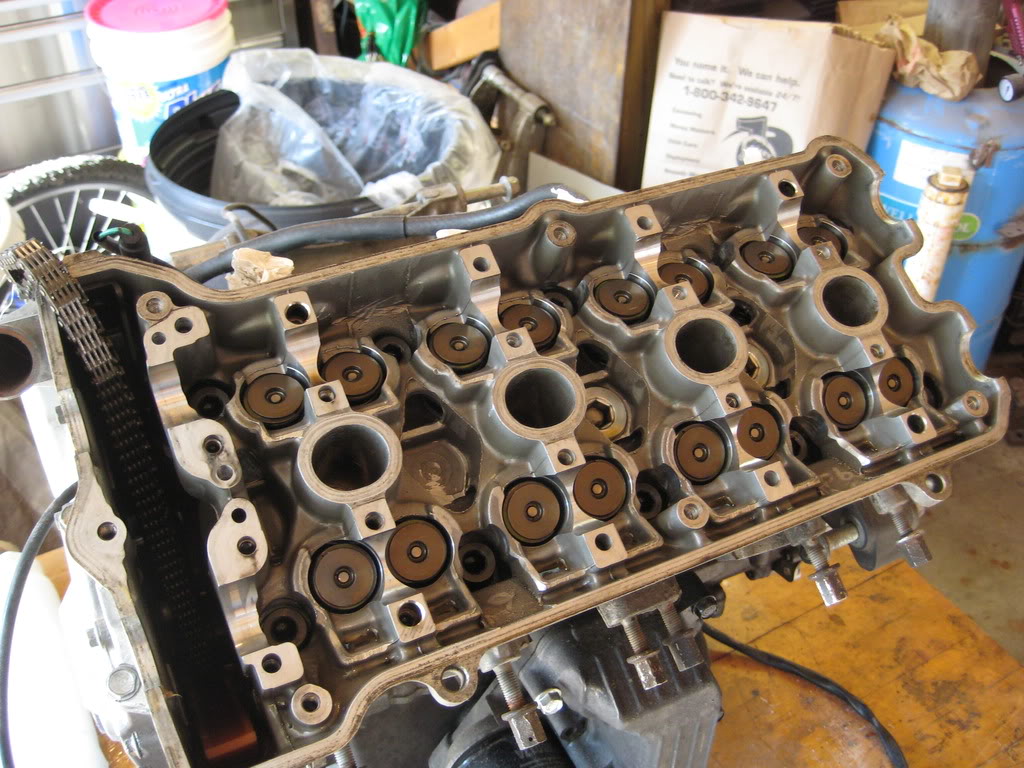
i guess i should post pics of the cams to check for abnormal wear or damage...
valve followers numbered for removal:
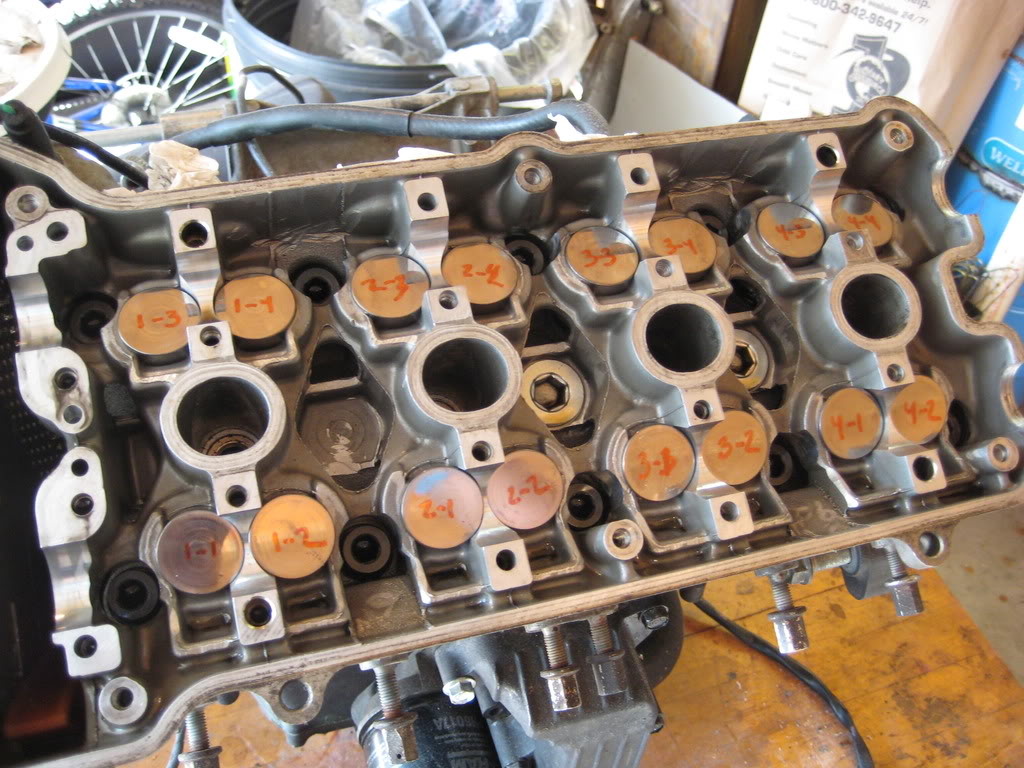
valve followers and shims removed
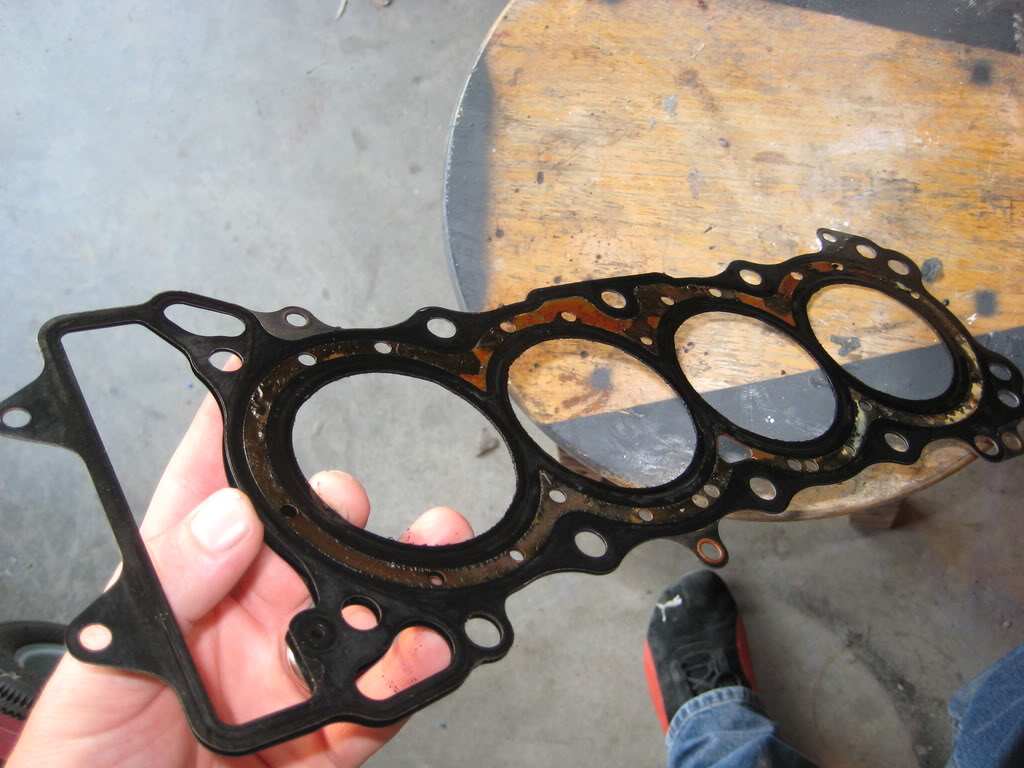
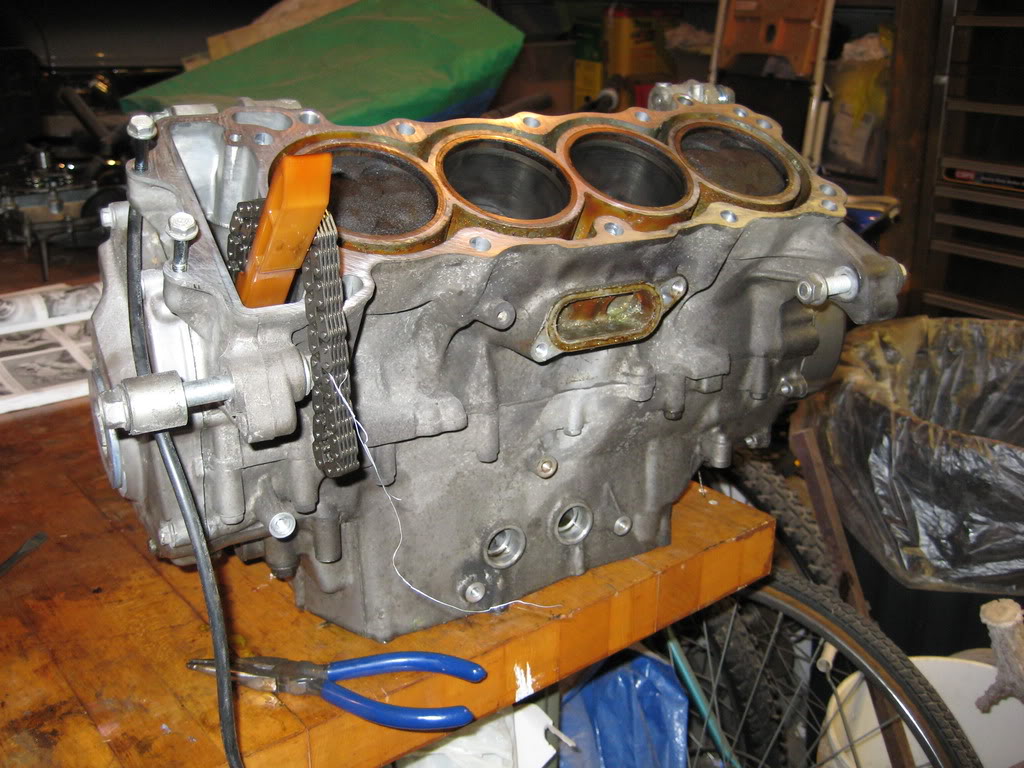
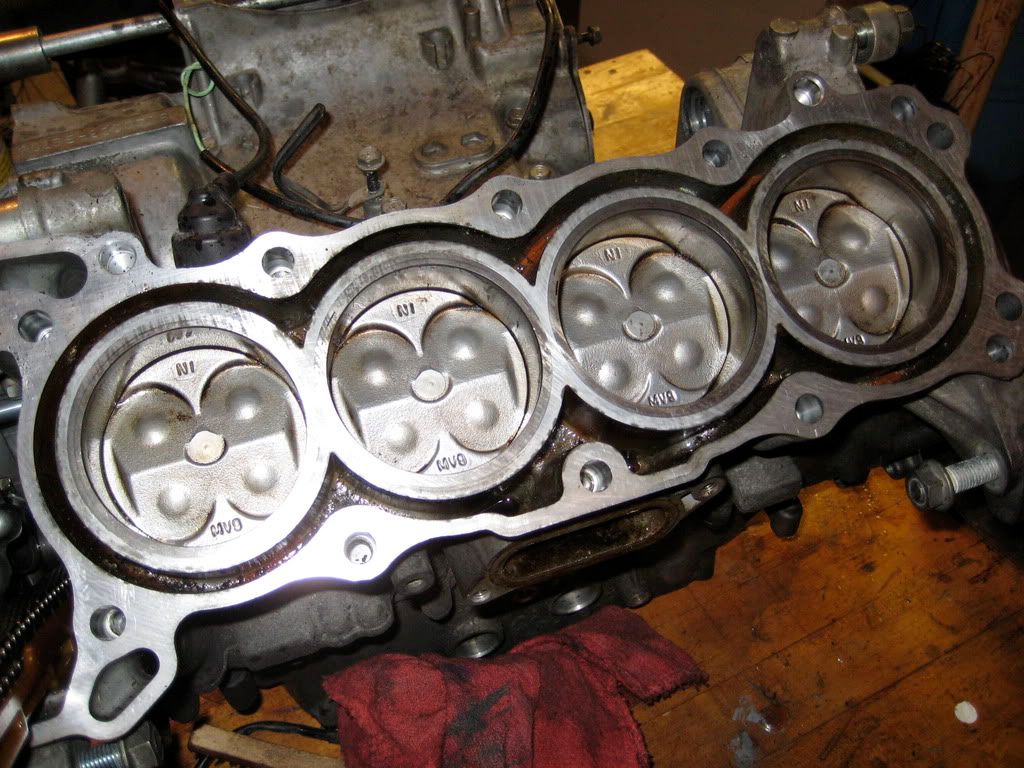
head removed: look at the water where the head gasket was...
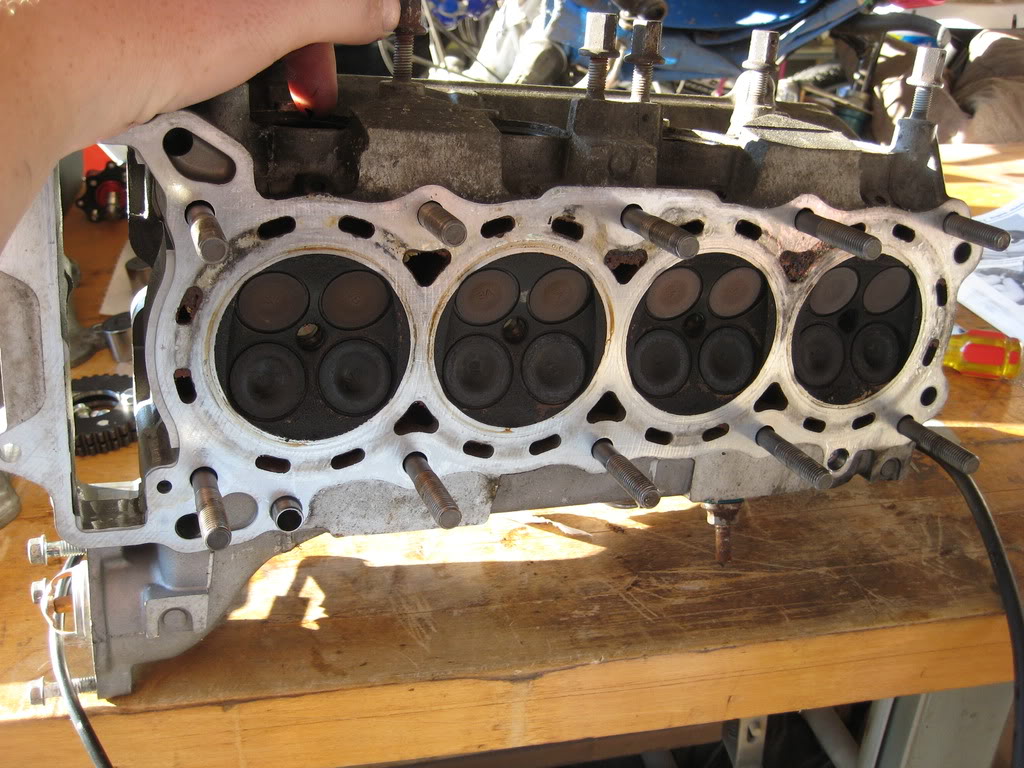
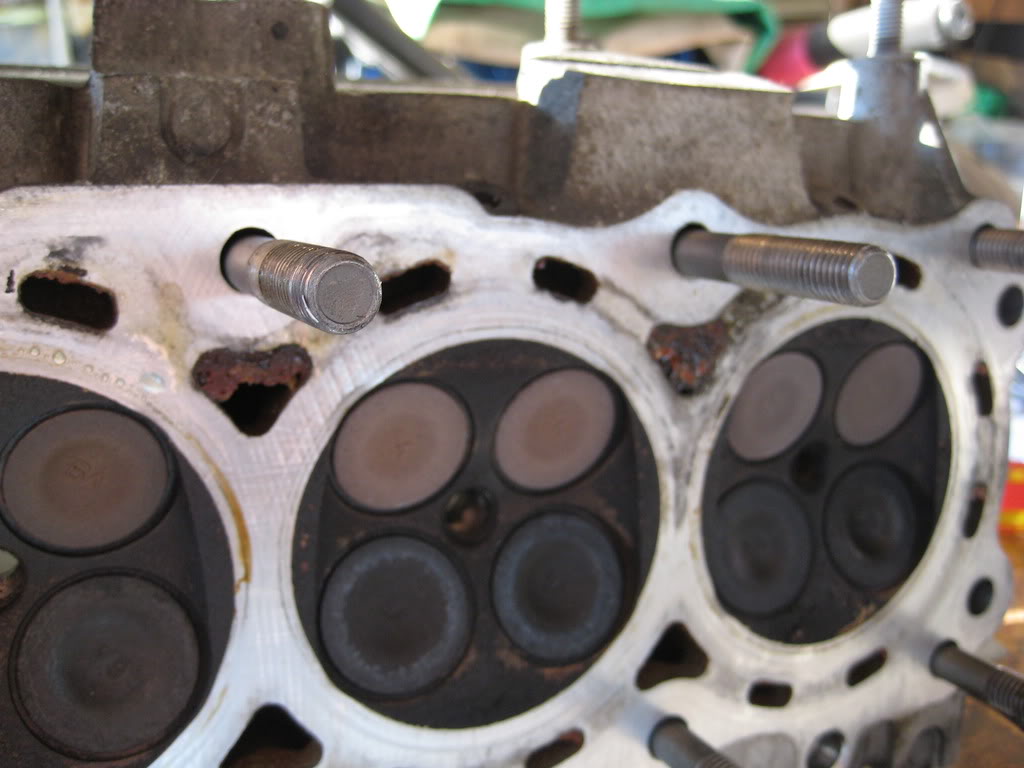
Blown head gasket...now, the $5 million question is... is the head warped?
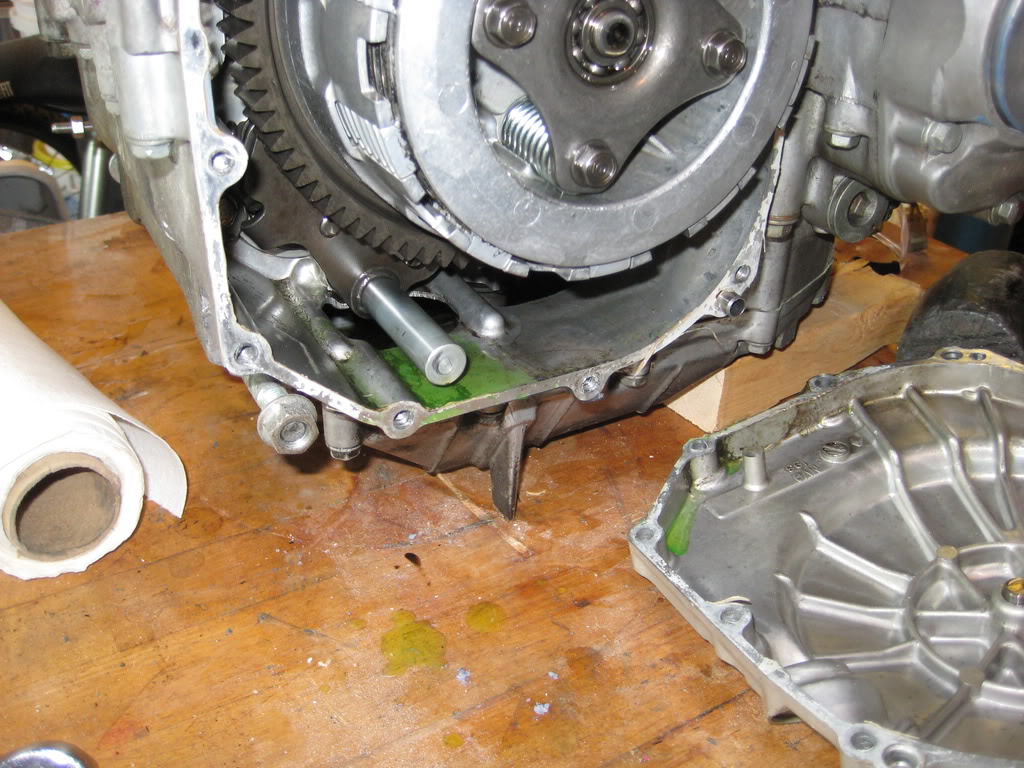
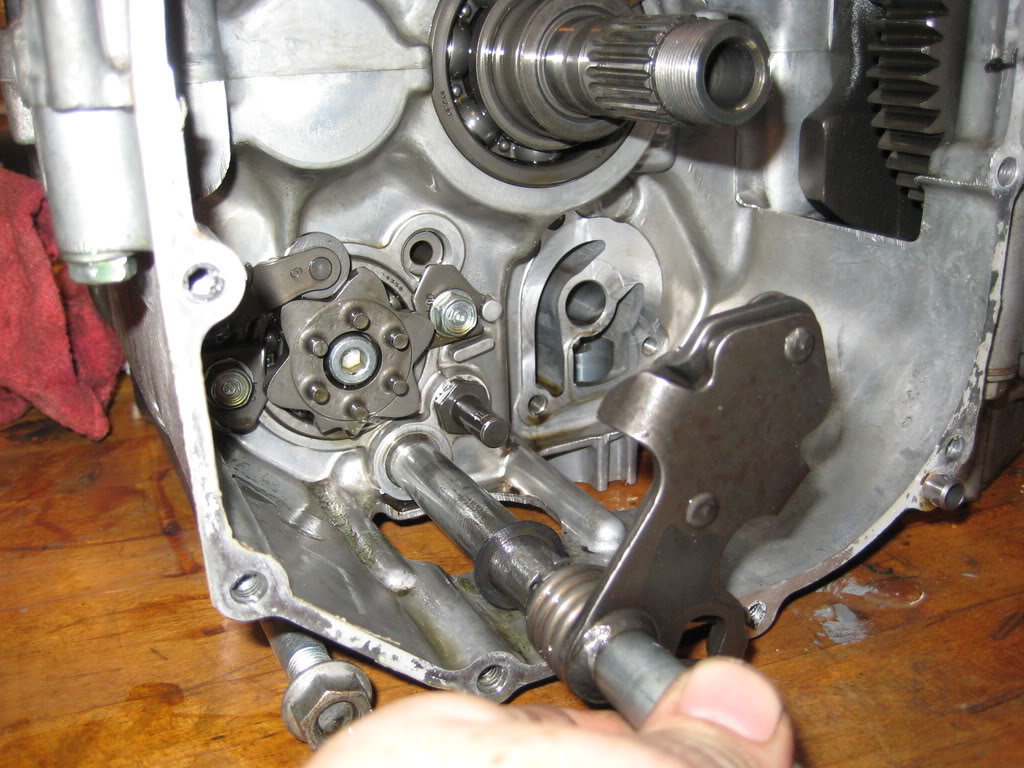
Clutch cover removed... and why is there coolant in here?
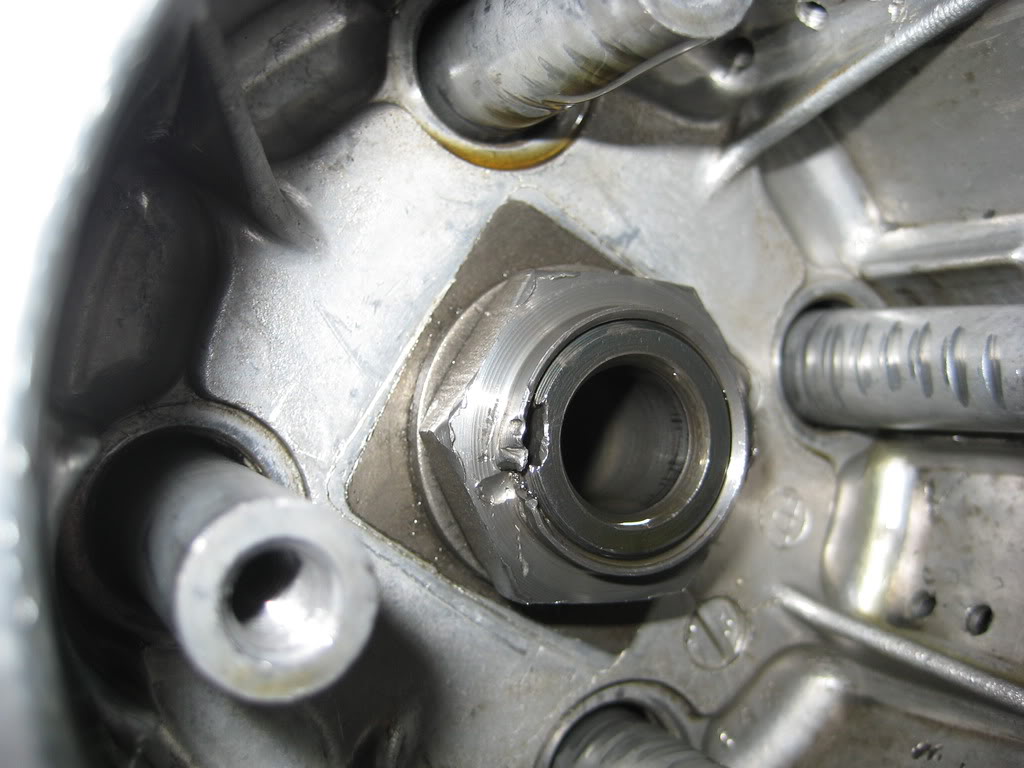
it would appear that someone has been here before me... (and the put on the washer that says "outside" on one side... the wrong way around...) FAIL! new nut ordered...
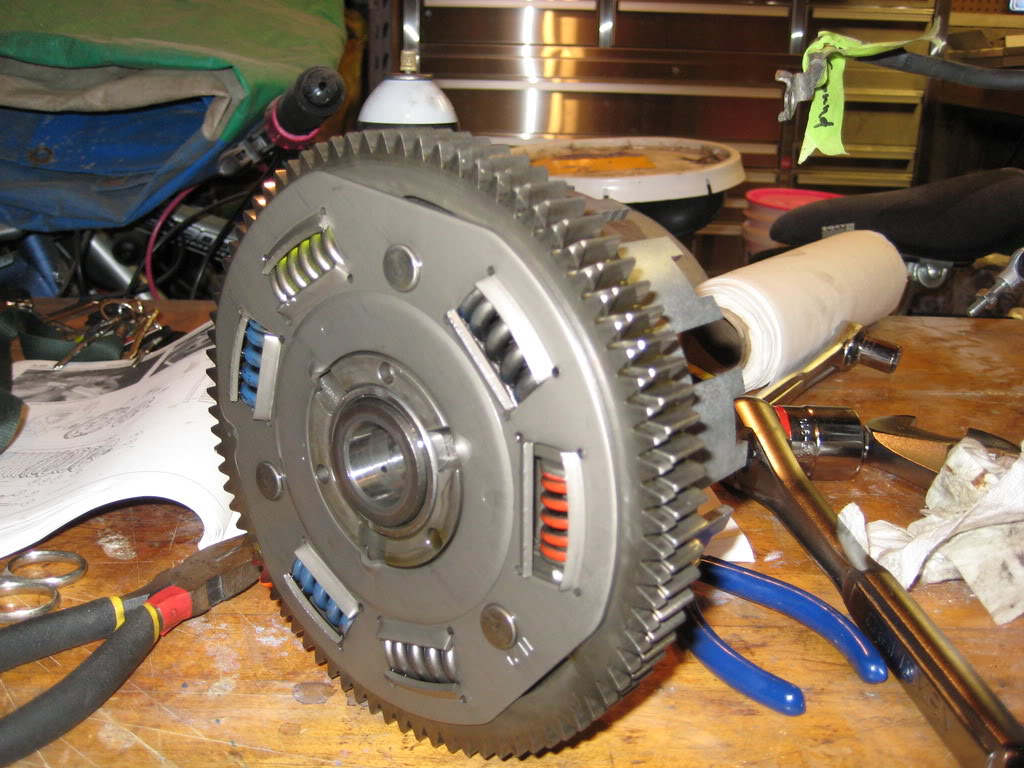
is this stock?! i know one of the POs used this as a race bike...
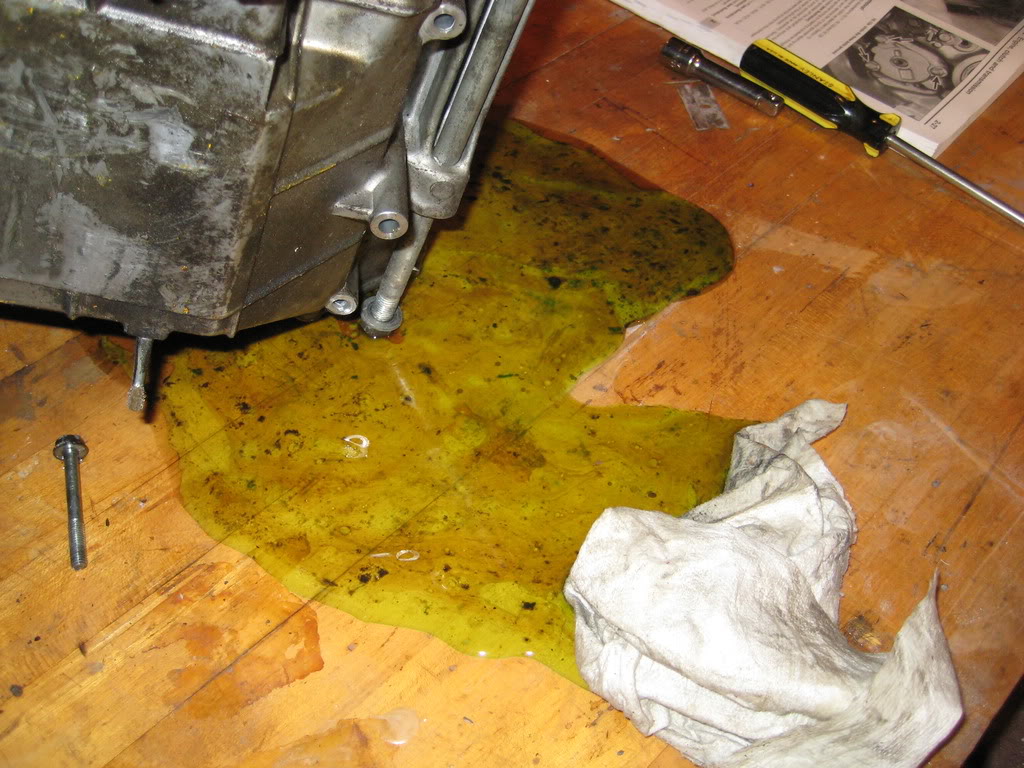
removing the oil pan... EW! at least it isnt milky right? could all this have leaked through the head gasket? this seems like alot of "leakage"
oil cooler...
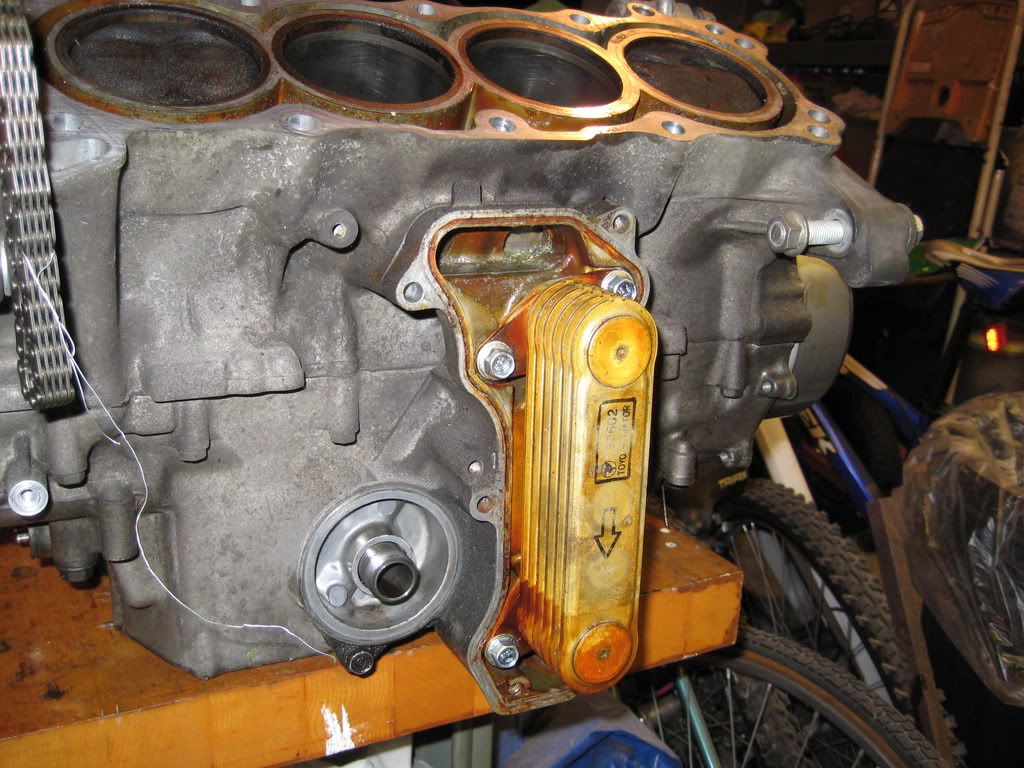
oil cooler GONE!
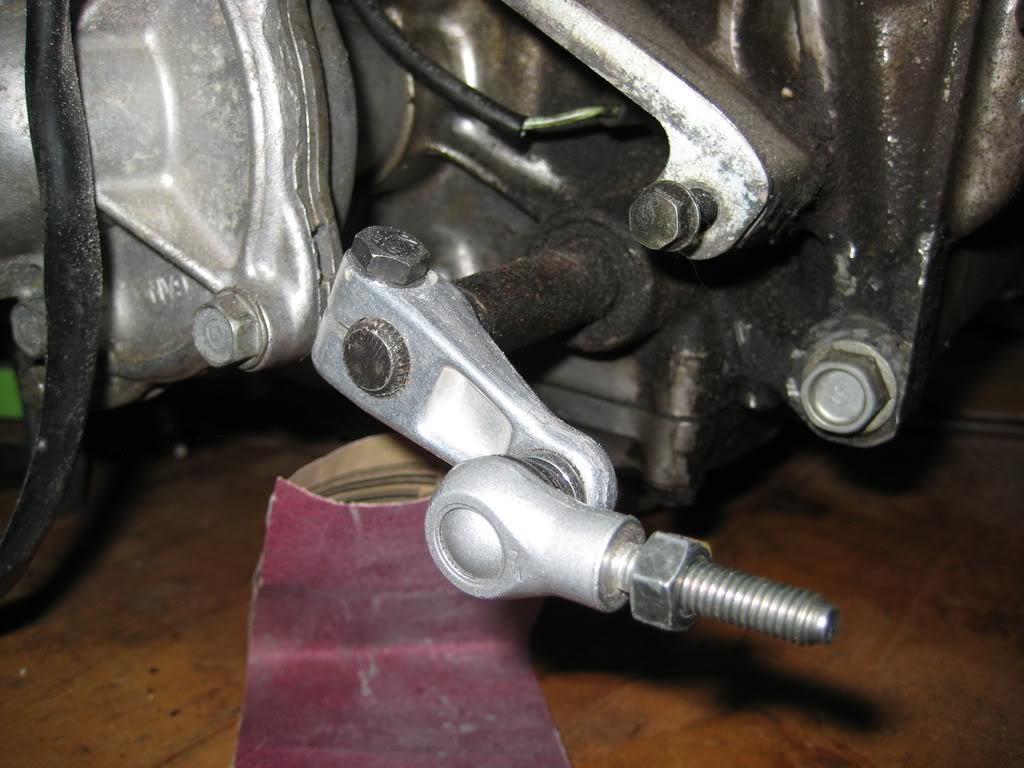
removing the gear shift mechanism
used a wire brush on the piston heads... cleaned up real nice!
stator cover removed:
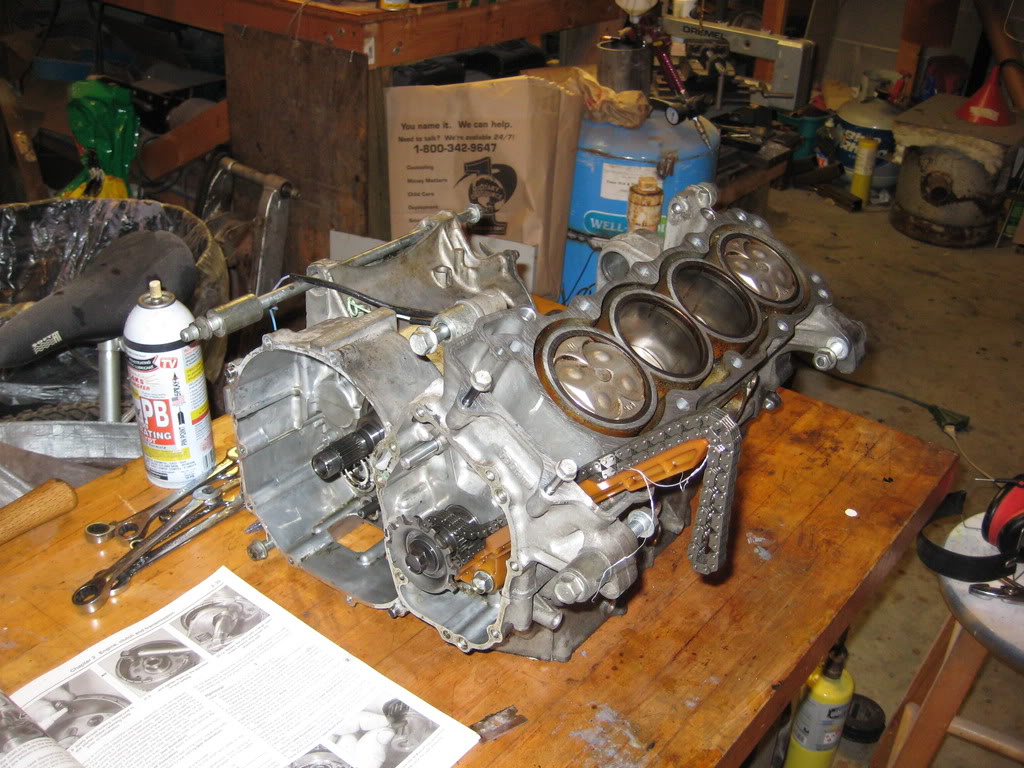
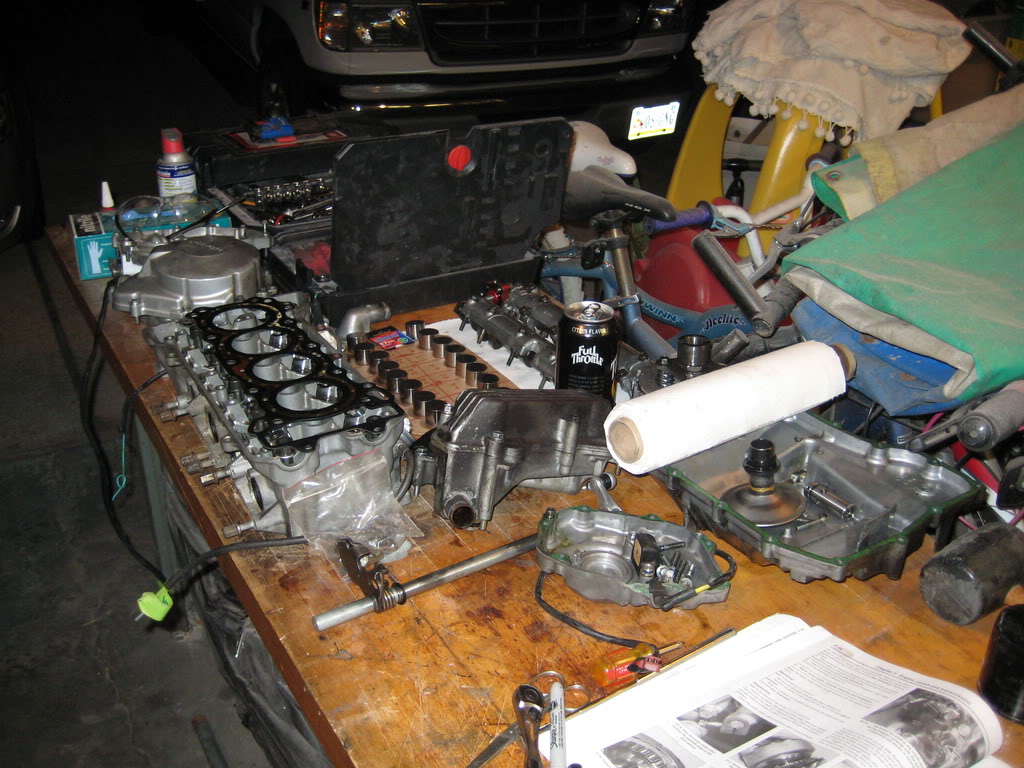
Pile of parts on the bench...
I am kinda stuck cause i need a "honda service too" to remove the magneto as well as a funky torx, so i have to find something that works, or find a tool. any info on that? after that comes off i will be able to split the cases and double check that there isnt a hole the coolant is leaking out of, then everything will get cleaned and re-assembled with new gaskets and seals... i am gonna do a valve job for sure, but not till i get everything else back on.
anything else i should do while i have it open?
thanks for looking!
~Chris
now that the current body work is done and ready for carbon fiber, i am going to rebuild the engine. that way i can mount it in the frame and do any welding necessary on the frame
(radiator and exhaust mounts at least) so that i can then paint the frame and engine.
Now, i will say this up front, i do not know what wear looks like, so if you see something that should be fixed or replaced PLEASE shout it out. i need you engine gurus to help me out here. thanks!
Here we go:
Valve cover removed, i didnt figure you needed a picture of the valve cover on....
Now, loosen the bold in reverse numerical order to allow the covers to de-compress evenly (dont worry... they are numbered)
i guess i should post pics of the cams to check for abnormal wear or damage...
valve followers numbered for removal:
valve followers and shims removed
head removed: look at the water where the head gasket was...
Blown head gasket...now, the $5 million question is... is the head warped?
Clutch cover removed... and why is there coolant in here?
it would appear that someone has been here before me... (and the put on the washer that says "outside" on one side... the wrong way around...) FAIL! new nut ordered...
is this stock?! i know one of the POs used this as a race bike...
removing the oil pan... EW! at least it isnt milky right? could all this have leaked through the head gasket? this seems like alot of "leakage"
oil cooler...
oil cooler GONE!
removing the gear shift mechanism
used a wire brush on the piston heads... cleaned up real nice!
stator cover removed:
Pile of parts on the bench...
I am kinda stuck cause i need a "honda service too" to remove the magneto as well as a funky torx, so i have to find something that works, or find a tool. any info on that? after that comes off i will be able to split the cases and double check that there isnt a hole the coolant is leaking out of, then everything will get cleaned and re-assembled with new gaskets and seals... i am gonna do a valve job for sure, but not till i get everything else back on.
anything else i should do while i have it open?
thanks for looking!
~Chris

#59
08-02-2010, 12:22 PM

Senior Member
Join Date: Jun 2010
Location: Oregon / 503
Posts: 743
Likes: 0
Received 0 Likes
on
0 Posts
#60
08-02-2010, 01:02 PM
Senior Member
Join Date: Feb 2010
Location: Florida
Posts: 197
Likes: 0
Received 0 Likes
on
0 Posts