
Fuel tap leaking


Thread Starter
|
Senior Member
Joined: Apr 2010
Posts: 257
Likes: 1
From: Waitahanui, New Zealand
Has anyone taken a fuel tap apart and replaced the seals? Mine is leaking pretty bad when in the on position and not so bad in reserve!!! Seems to be leaking out the front where the shaft comes out.
Thanks for any help.
Thanks for any help.

I haven't had to do one on my 1000F, but plenty of people here have.
They sell rebuild kits on ebay that have the o-rings, seal, new diaphragm.
If you don't need to ride the bike, I'd just pull it apart and see what's leaking. You may be able to just replace an o-ring or something. But even if you need more than that, the rebuild kits are available. Usually between $10-20US.
 Like So
Thread Starter
|
Senior Member
Joined: Apr 2010
Posts: 257
Likes: 1
From: Waitahanui, New Zealand
I haven't had to do one on my 1000F, but plenty of people here have.
They sell rebuild kits on ebay that have the o-rings, seal, new diaphragm.
If you don't need to ride the bike, I'd just pull it apart and see what's leaking. You may be able to just replace an o-ring or something. But even if you need more than that, the rebuild kits are available. Usually between $10-20US.
They sell rebuild kits on ebay that have the o-rings, seal, new diaphragm.
If you don't need to ride the bike, I'd just pull it apart and see what's leaking. You may be able to just replace an o-ring or something. But even if you need more than that, the rebuild kits are available. Usually between $10-20US.

Administrator, MVN / ROTM NOV 2012
Joined: Aug 2008
Posts: 11,003
Likes: 3
From: Republic of Boon Island
either that or a whole used unit , but I'd say it could be done easily enough
taking your time and all , keep a tube of gasket maker handy for the outer
part and around the rivet holes.
Take some pics and post a how to if successful !
Good luck with it , keep us in the loop on how it's going
taking your time and all , keep a tube of gasket maker handy for the outer
part and around the rivet holes.
Take some pics and post a how to if successful !
Good luck with it , keep us in the loop on how it's going

Senior Member
Joined: Jun 2006
Posts: 4,237
Likes: 15
From: Bir Tawil
Exactly! Too many projects without final outcome, weather good or bad results. The DOs and DON'Ts are an important part of the forum.
Thread Starter
|
Senior Member
Joined: Apr 2010
Posts: 257
Likes: 1
From: Waitahanui, New Zealand
Cheers,
R
Thread Starter
|
Senior Member
Joined: Apr 2010
Posts: 257
Likes: 1
From: Waitahanui, New Zealand
Hi Guys,
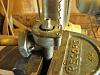
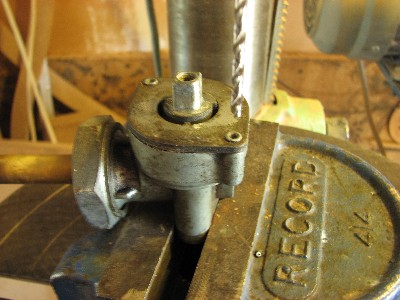
I drilled 3mm holes then filed off the top of the rivet head, which is part of the body. I didn't use lube while drilling the first hole and the drill bit picked up in the hole, so the first hole is a little larger (turps or kerosene is good). By using a 3mm drill bit you retain part of the rivet, which acts as a locator. I used Stainless steel screws and nuts to hold together.
It's back together but not with the correct O ring as I'm trying to sores one here. Can't get a kit for it here in NZ. The rubber gate washer (don't know the proper name!) was OK but turned it over, it's the same on the other side. It's not leaking but will replace the O ring if I can get one. The cost to fix it so fare is about $4. God knows what it would cost for a new tap!!
I hope this helps anyone who wants to do this.
Last edited by robbiebgraham; Nov 11, 2010 at 09:34 PM.