GSXR 600 K5 tail conversion


Thread Starter
|
Member
Joined: Dec 2008
Posts: 67
Likes: 0
From:
Hi guys, thought you might like to follow my RR-R tail conversion.
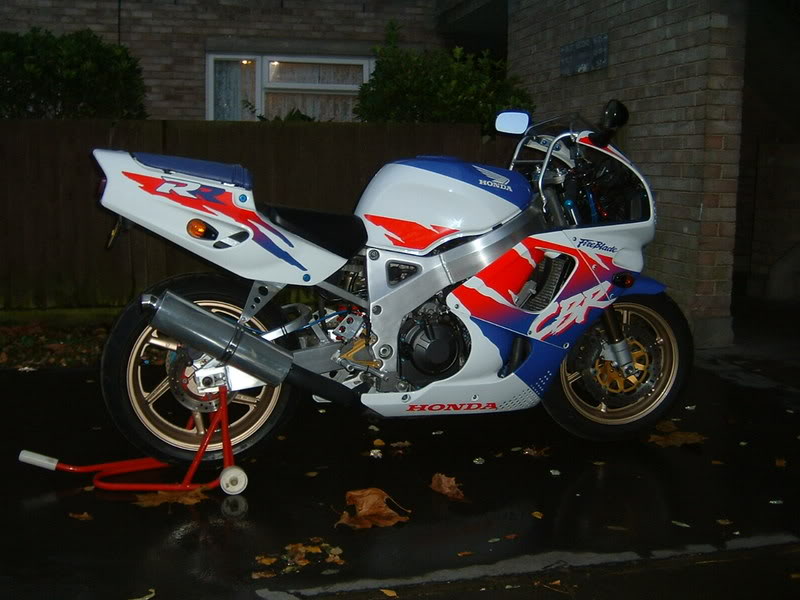
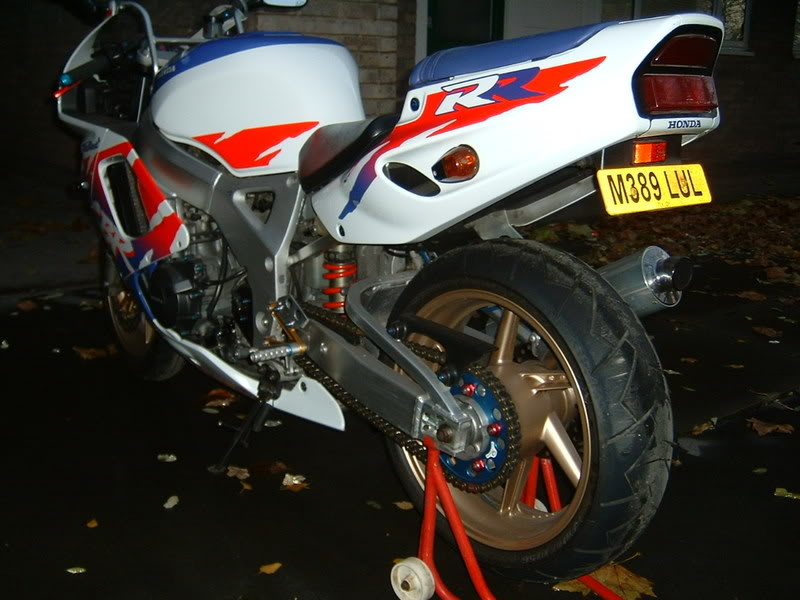
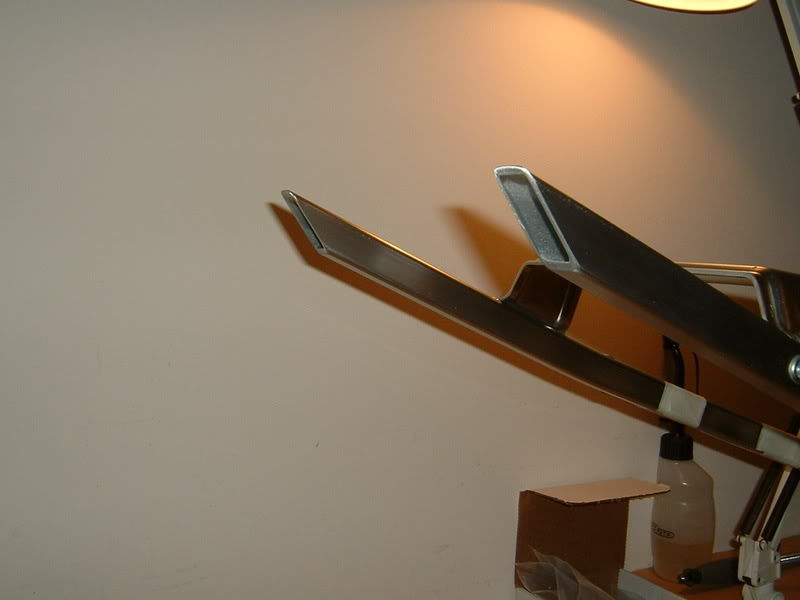
Here's my 94 RRR blade
After 1 hour
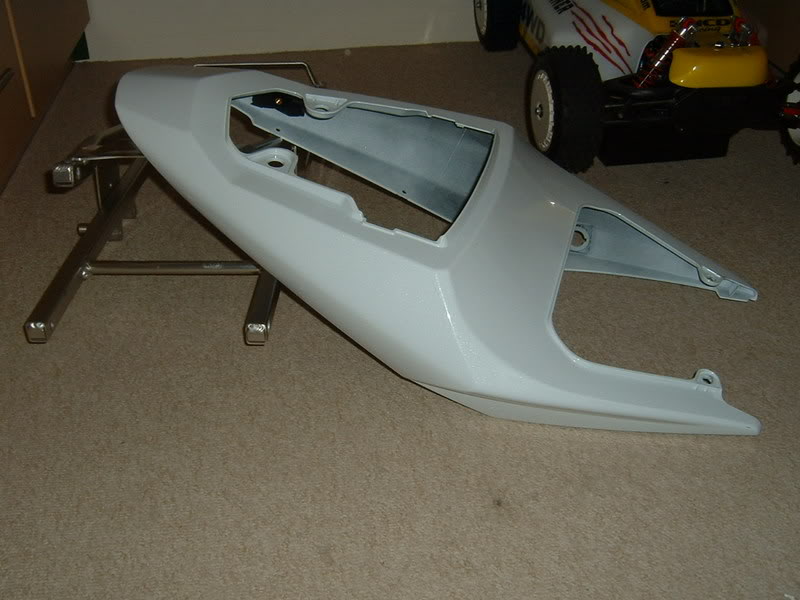
Here's the new gsxr 600 tail unit
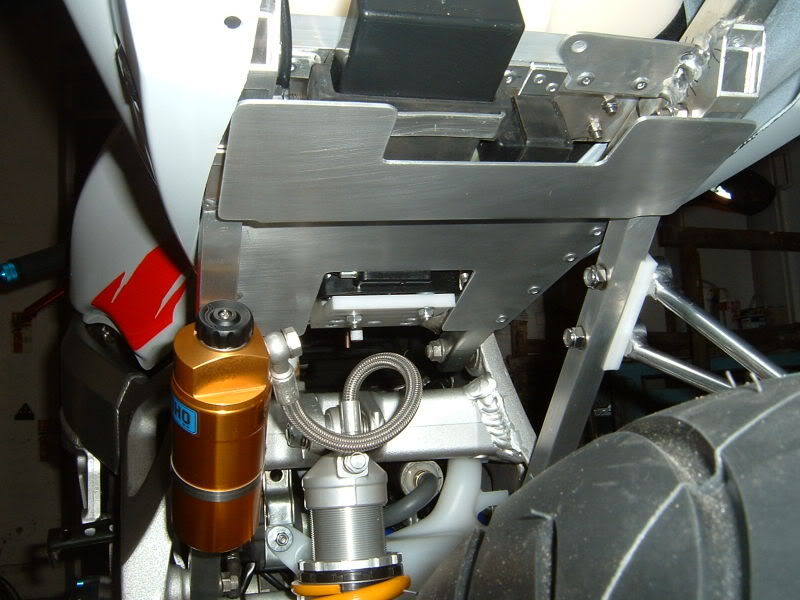
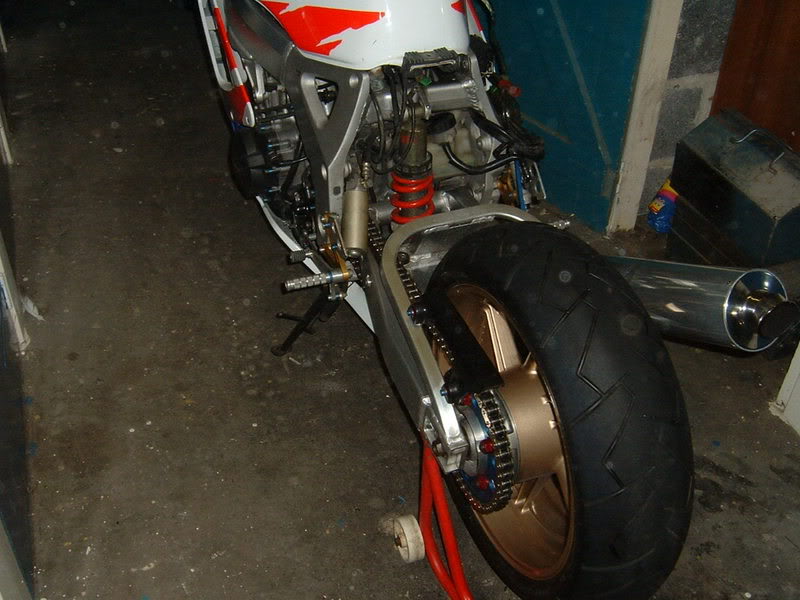
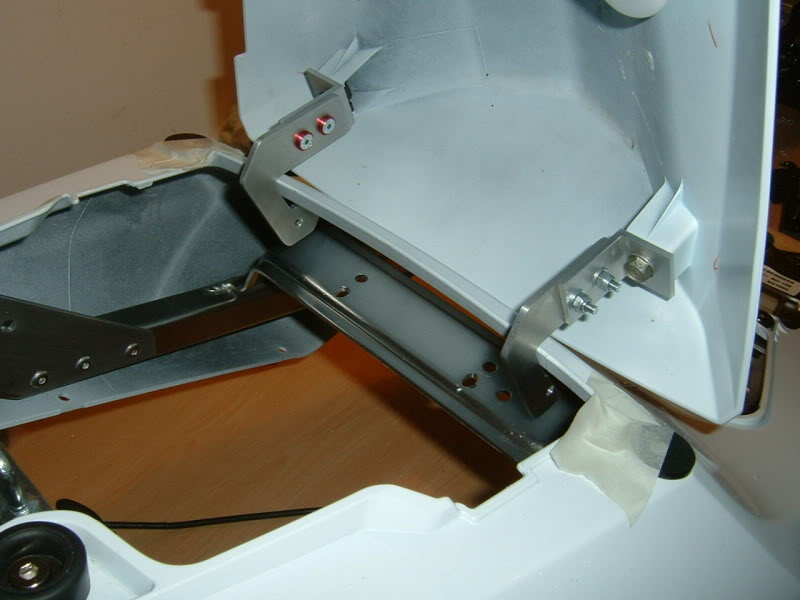
Started the subframe work, I cut the two sections apart and shortened the top so the tail will fit

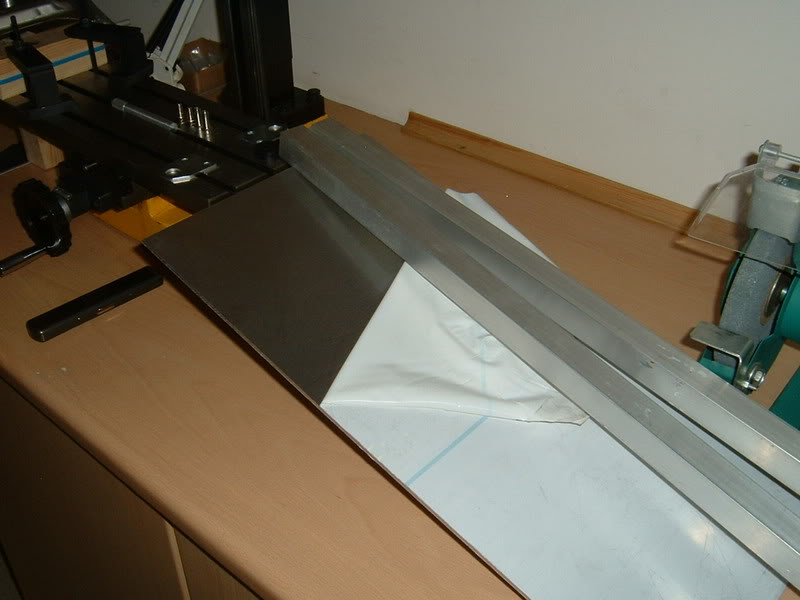
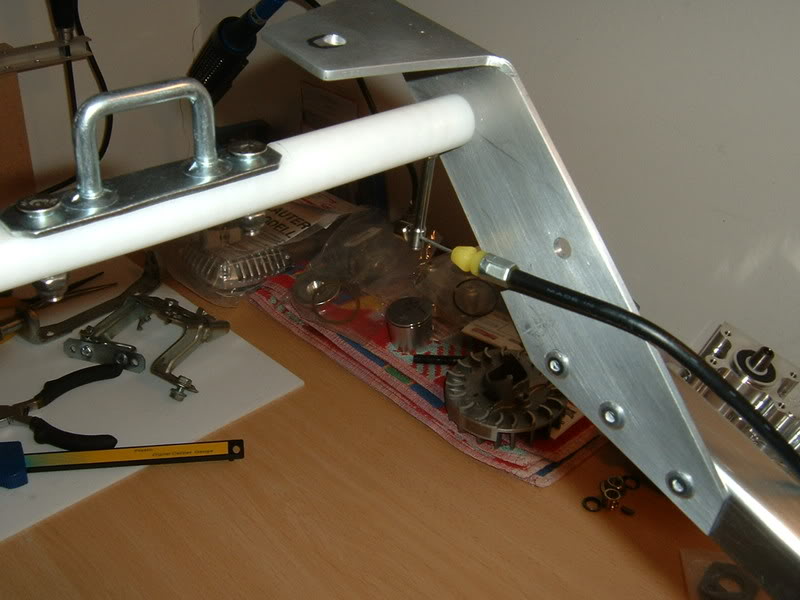
Got a sheet of 3mm alloy and some 22mm square bar
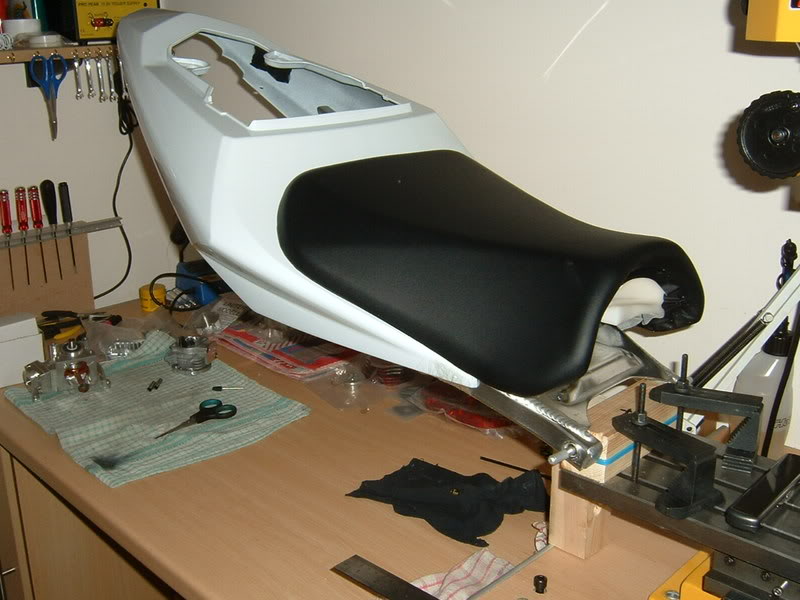
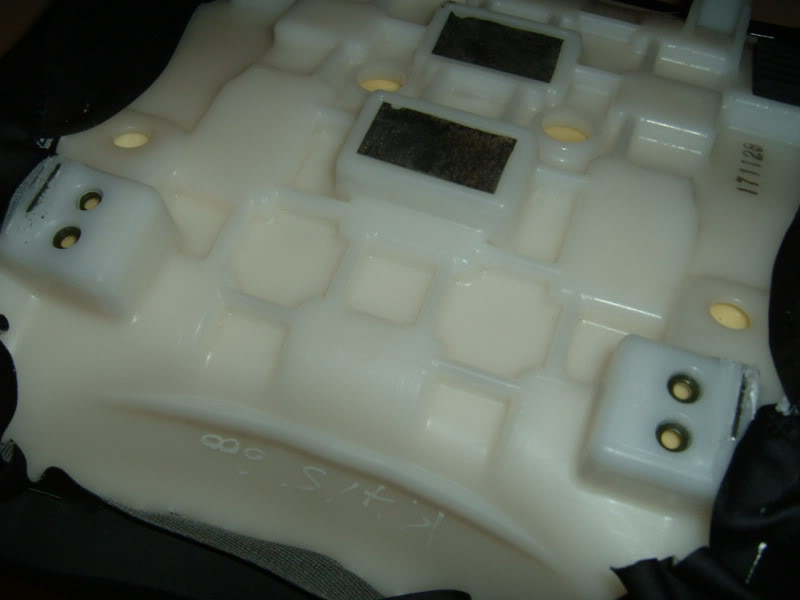
The gsxr 600 K5 seat arrived and looks 100% better than the blade seat, I had to cut both front mounting lugs off though so work will be needed making new fixing points etc (no big deal)
There will be a little more subframe showing but I can live with that.

Now I know the tail unit's final position I can start making the mounting points
I'm going to pop rivet all the new fixings to the frame and when I'm happy with it I'll get it all welded up.
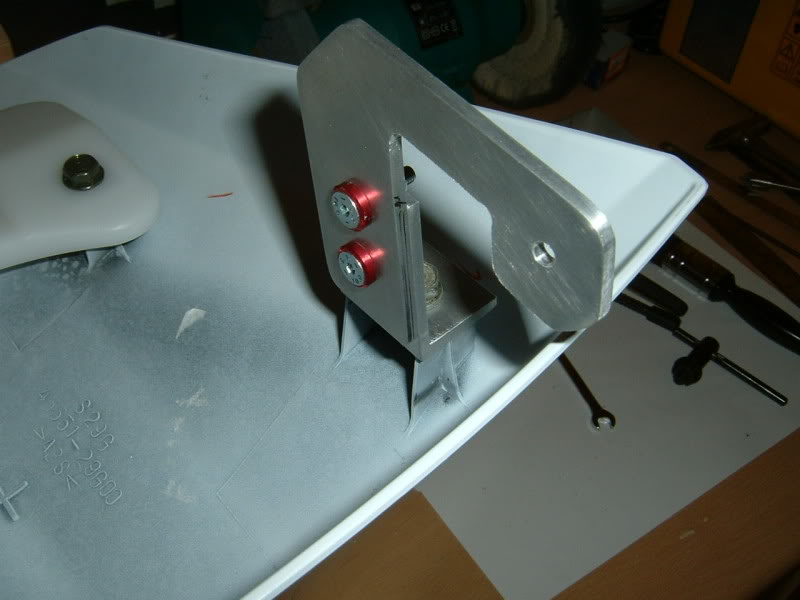
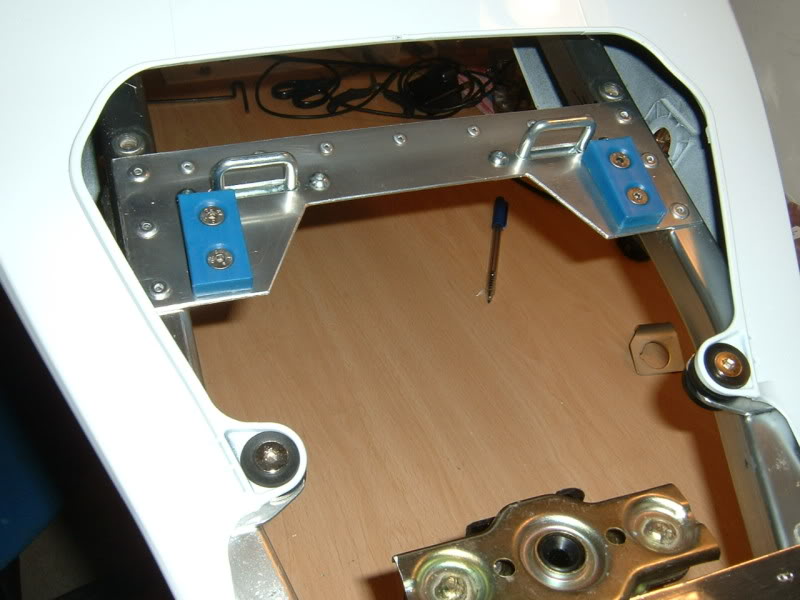
I fitted the front cowl brackets with 5mm rivets (I'll get them welded later)
I used proper body mounting fixings.
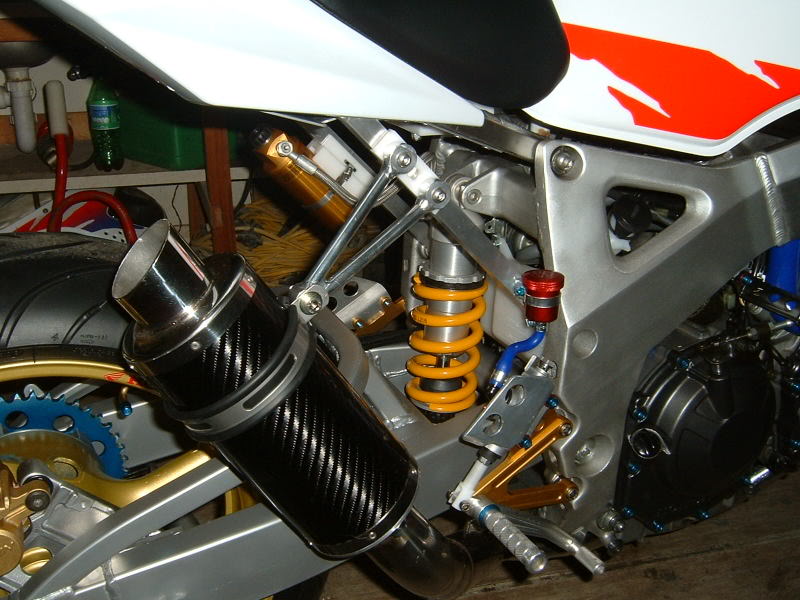
I'm going to use the blade hinge from the old seat (don't like the hump being taken off, it gets scratched etc) Should be a simple case of two small plates.
Here's my 94 RRR blade
After 1 hour
Here's the new gsxr 600 tail unit
Started the subframe work, I cut the two sections apart and shortened the top so the tail will fit
Got a sheet of 3mm alloy and some 22mm square bar
The gsxr 600 K5 seat arrived and looks 100% better than the blade seat, I had to cut both front mounting lugs off though so work will be needed making new fixing points etc (no big deal)
There will be a little more subframe showing but I can live with that.
Now I know the tail unit's final position I can start making the mounting points
I'm going to pop rivet all the new fixings to the frame and when I'm happy with it I'll get it all welded up.
I fitted the front cowl brackets with 5mm rivets (I'll get them welded later)
I used proper body mounting fixings.
I'm going to use the blade hinge from the old seat (don't like the hump being taken off, it gets scratched etc) Should be a simple case of two small plates.
Thread Starter
|
Member
Joined: Dec 2008
Posts: 67
Likes: 0
From:
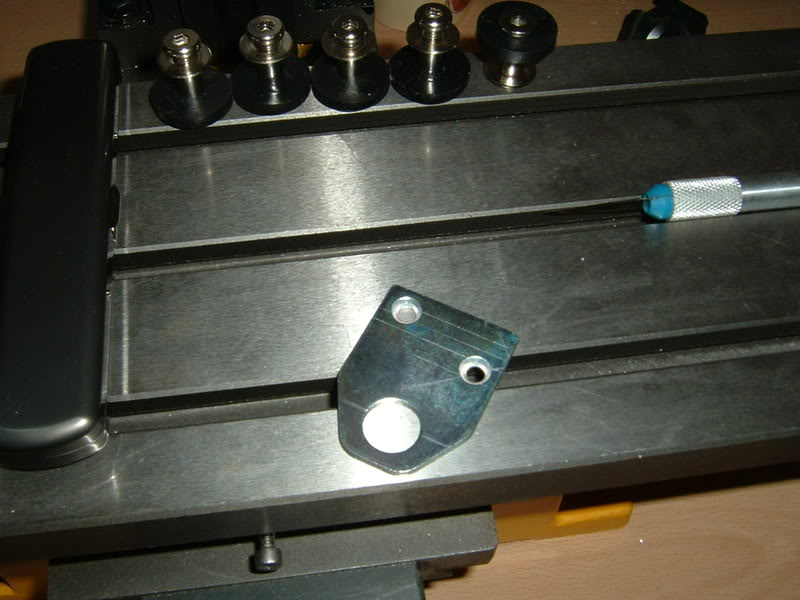
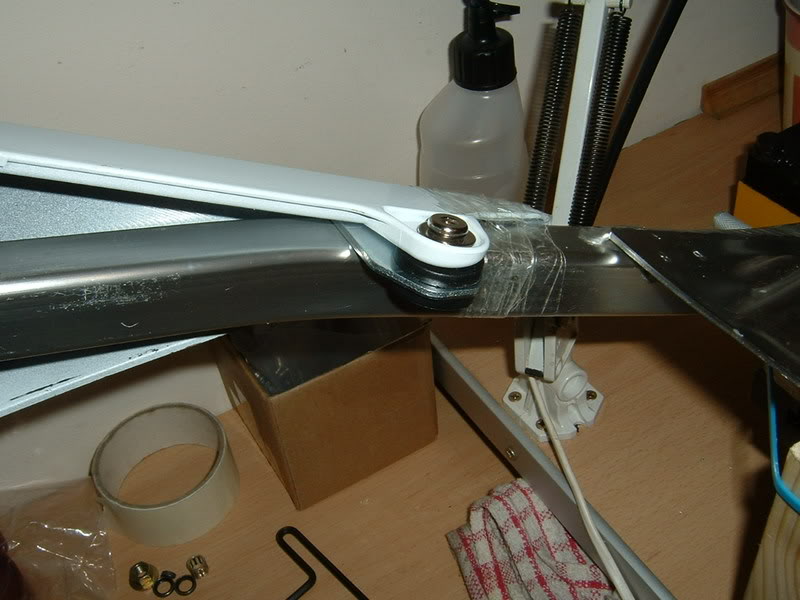
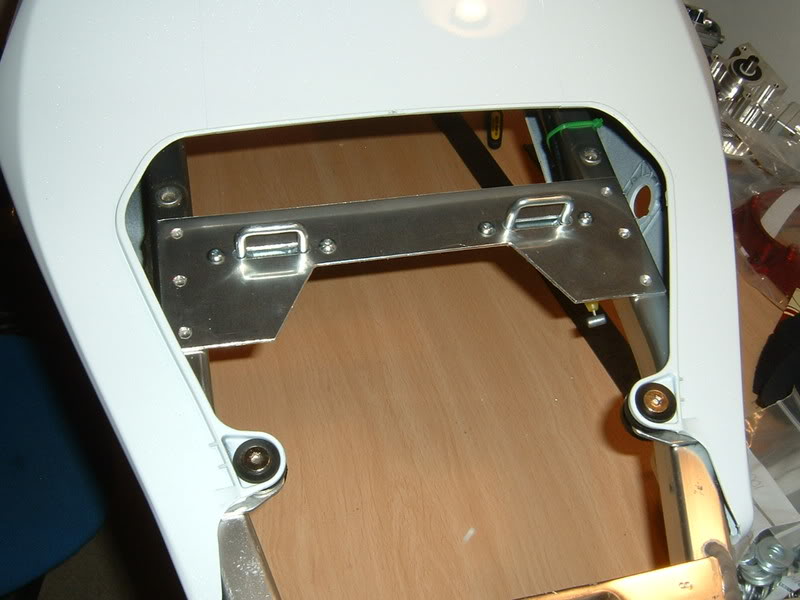
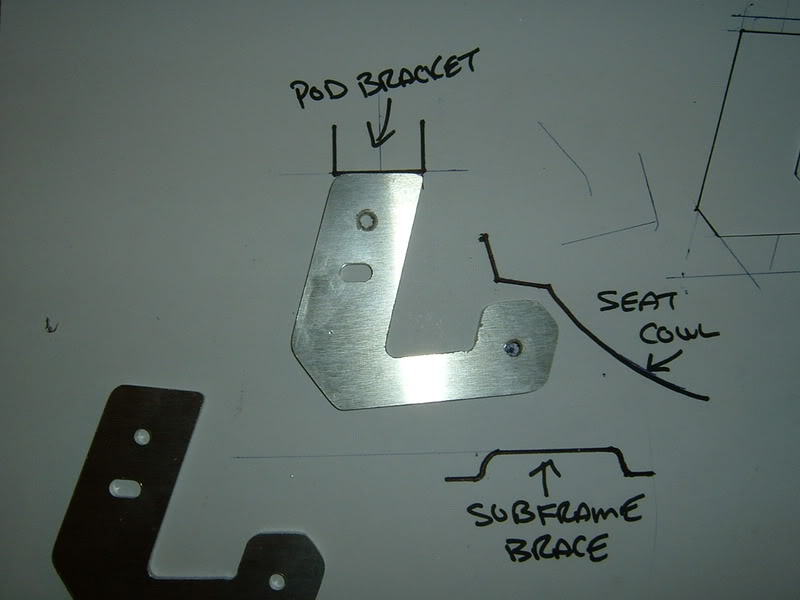
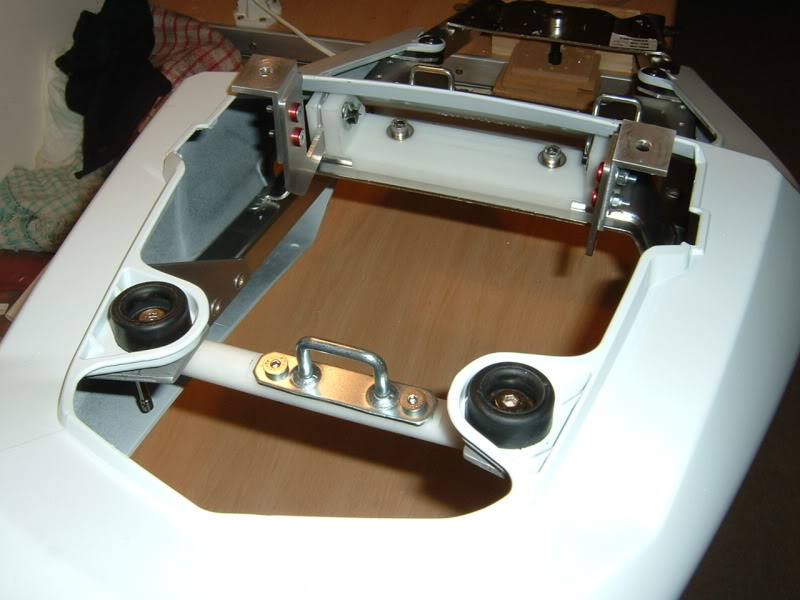
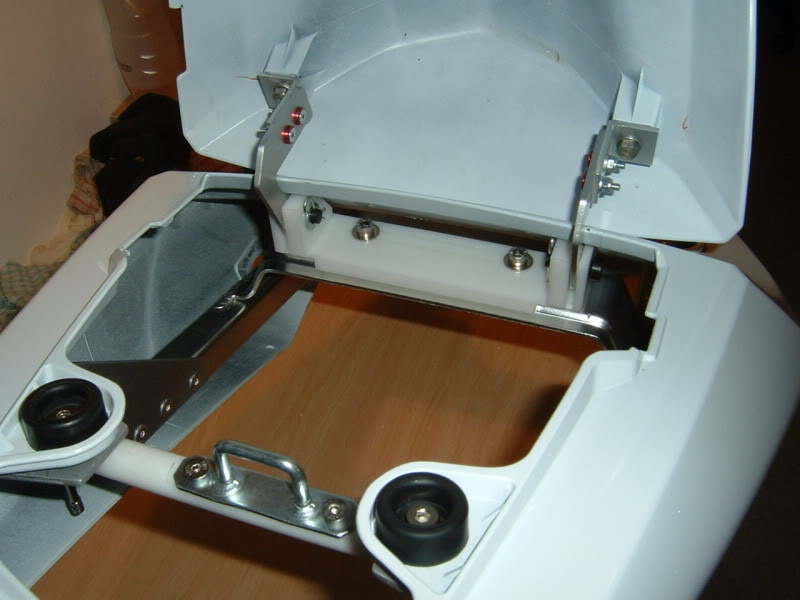
Next job is the rear cowl supports.
I find making a cardboard template the easyiest way to fabricate parts like this
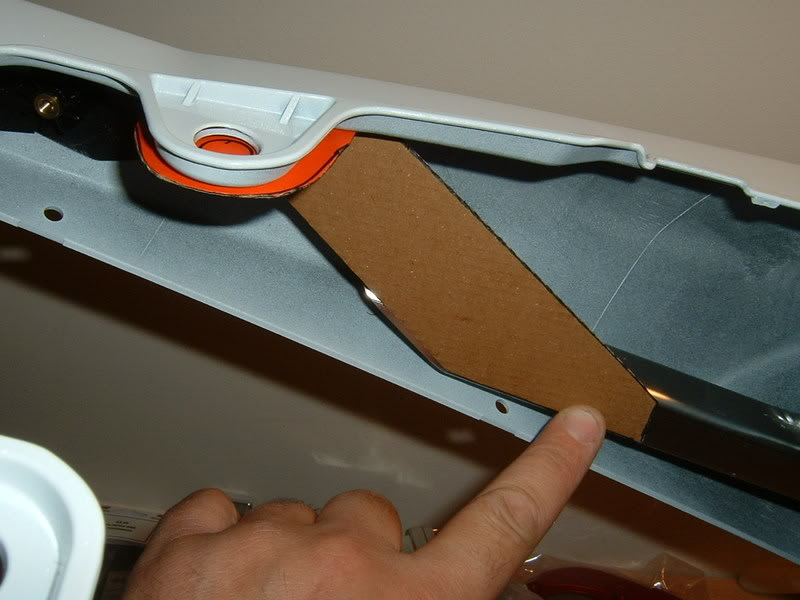
Then just lay it flat on the material and mark out the shape,

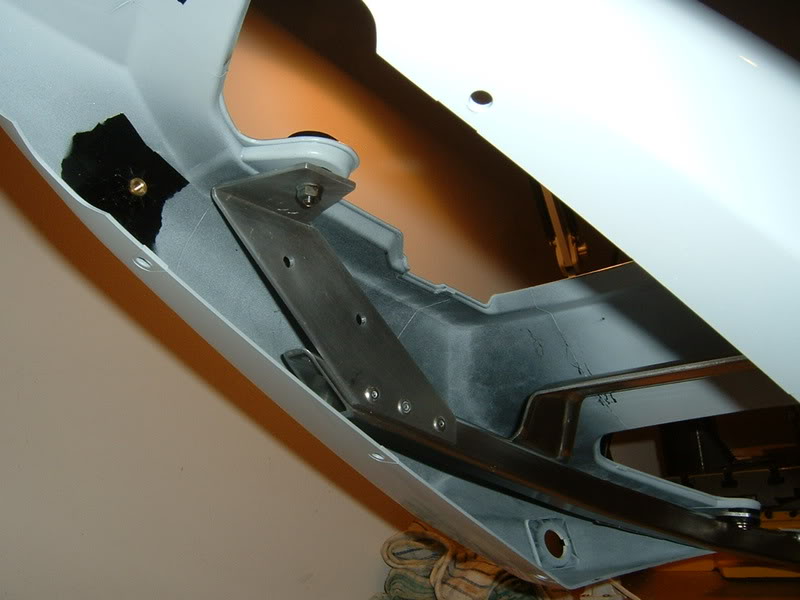
I got the rear mounts cut and fitted today, these will be tig welded later


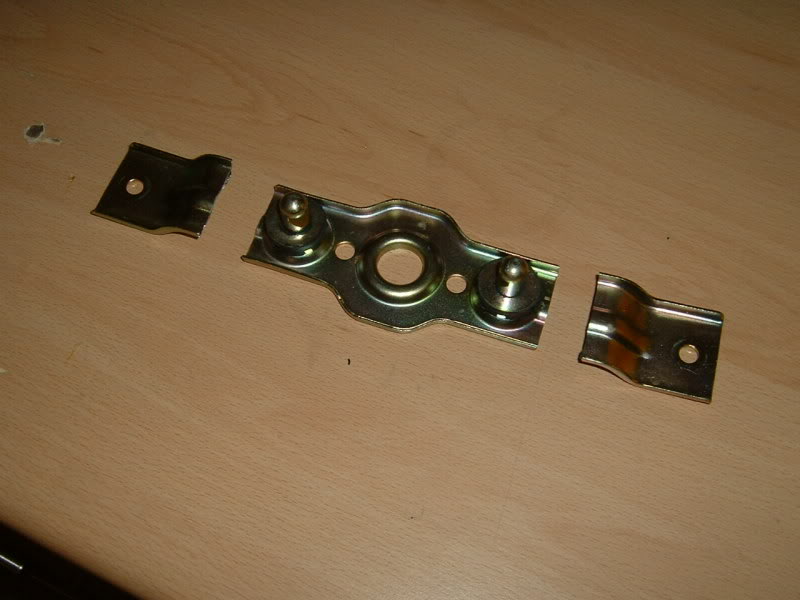
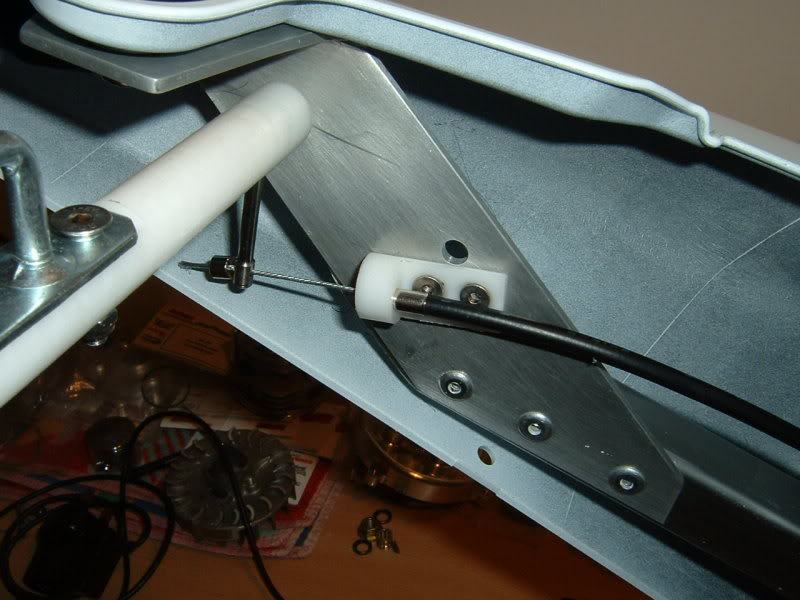
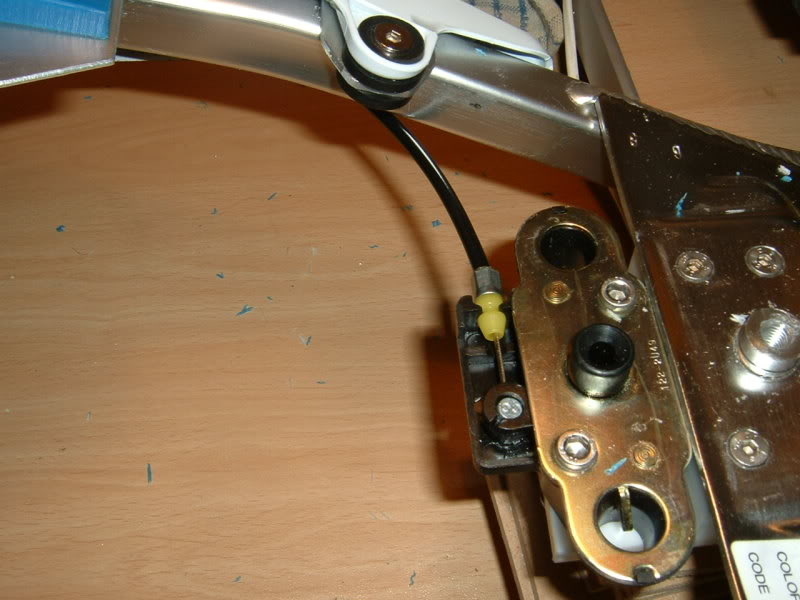
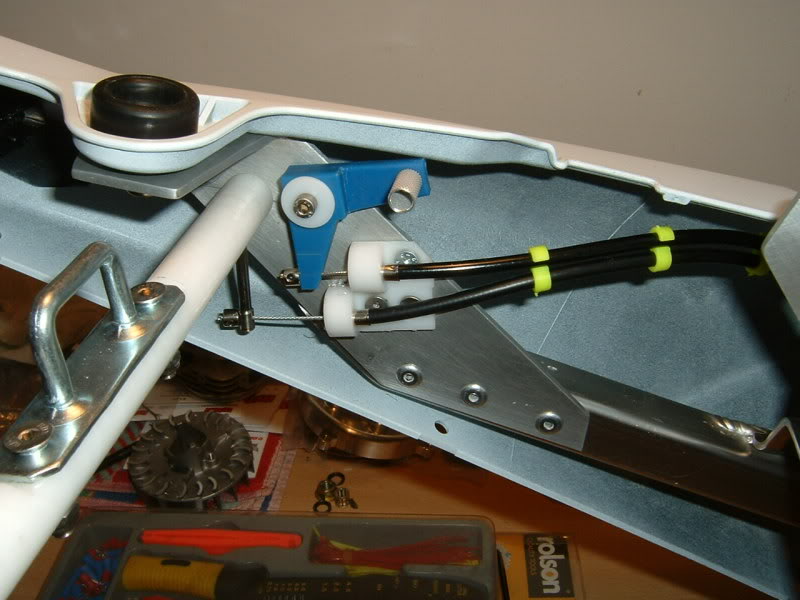
Next up is the seat catch:
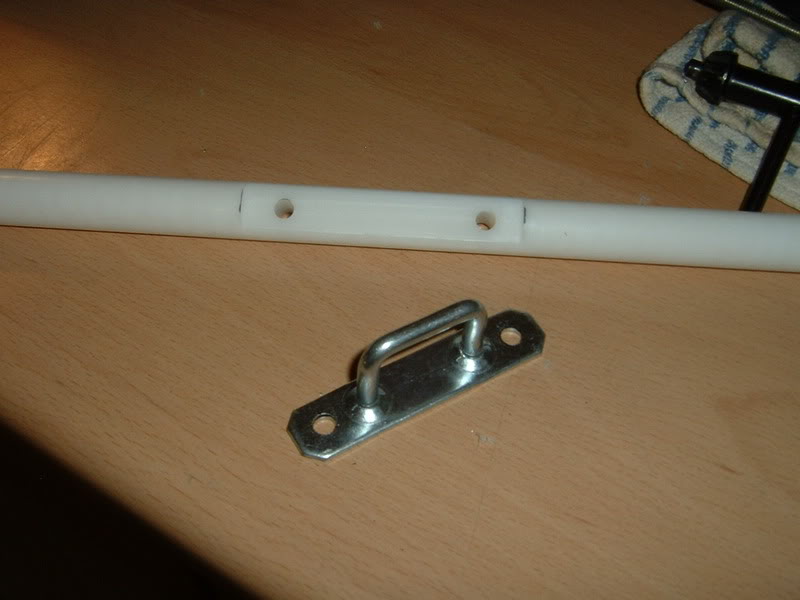
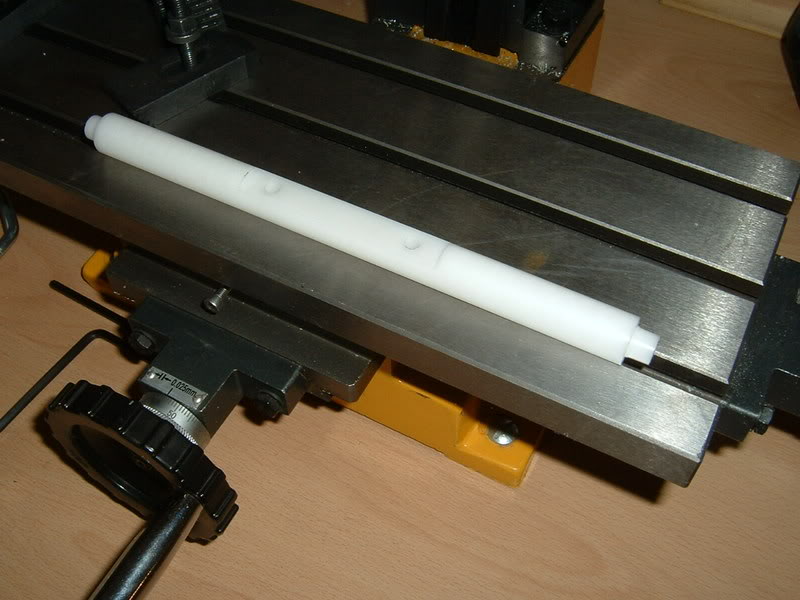
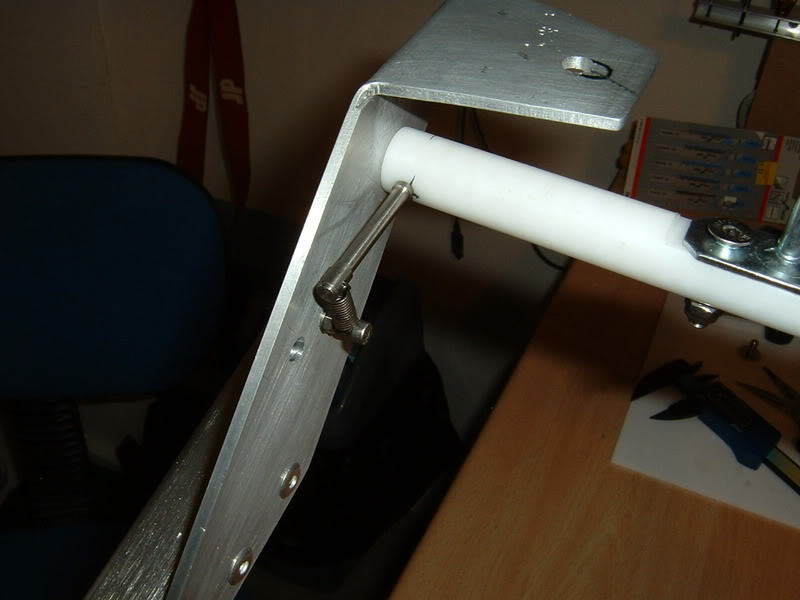
I'm using a nylon rod, I cut a flat in the rod and found a trailer strap anchor loop on eBay.
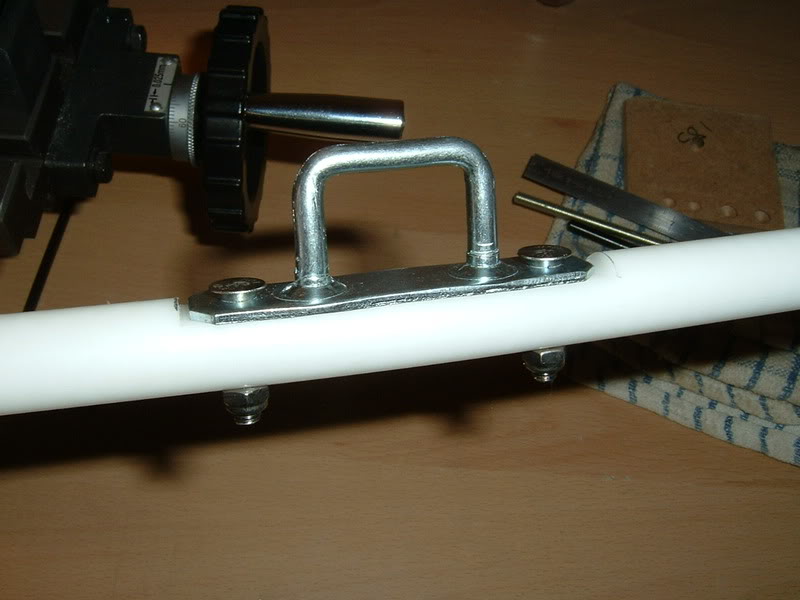
Next I turned down the ends to fit the hole in the cowl brackets
I made two small levers for the spring and cable
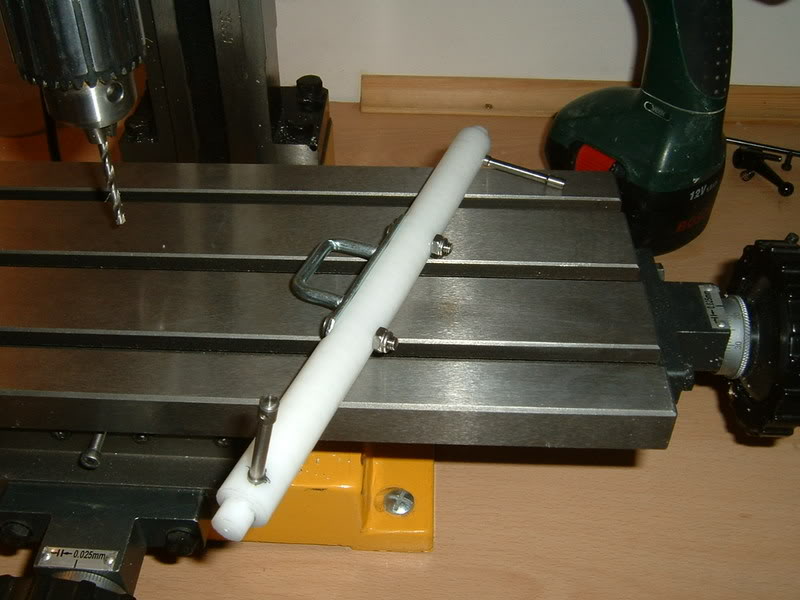
Here's the catch fitted, just need to make a cable holder
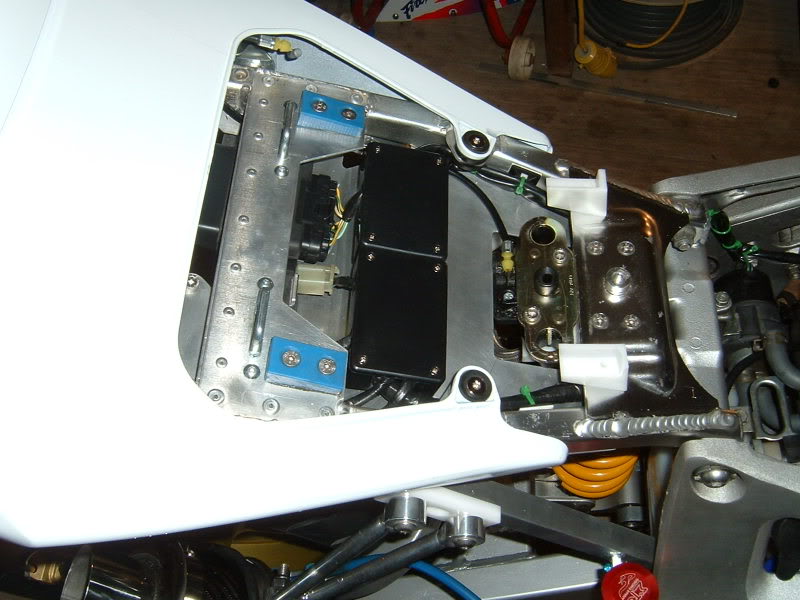
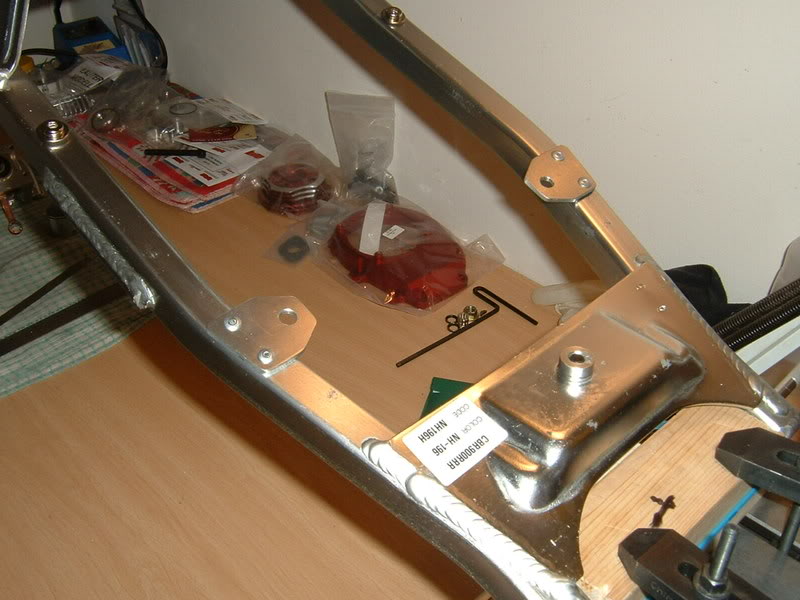
Didn't get much time to play tonight so only managed to start the seat back plate.
I've also ordered some nylon block to make a new hump hinge, I don't like this set up, no one will be sitting on the hump so I don't need this heavy steel item.

I find making a cardboard template the easyiest way to fabricate parts like this
Then just lay it flat on the material and mark out the shape,
I got the rear mounts cut and fitted today, these will be tig welded later
Next up is the seat catch:
I'm using a nylon rod, I cut a flat in the rod and found a trailer strap anchor loop on eBay.
Next I turned down the ends to fit the hole in the cowl brackets
I made two small levers for the spring and cable
Here's the catch fitted, just need to make a cable holder
Didn't get much time to play tonight so only managed to start the seat back plate.
I've also ordered some nylon block to make a new hump hinge, I don't like this set up, no one will be sitting on the hump so I don't need this heavy steel item.
Thread Starter
|
Member
Joined: Dec 2008
Posts: 67
Likes: 0
From:
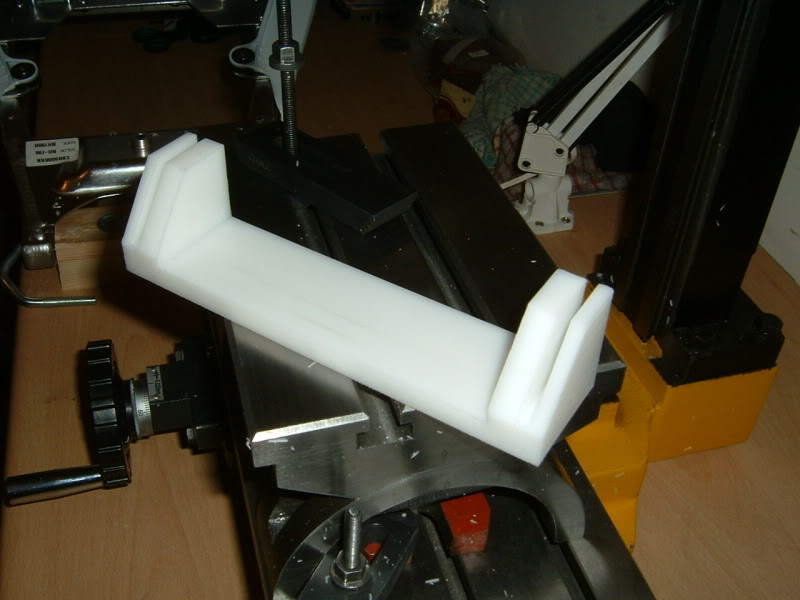
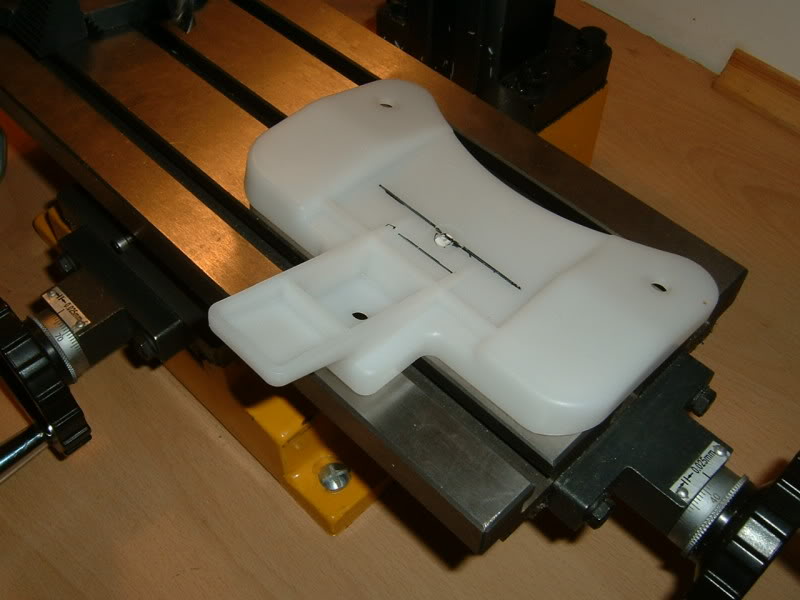
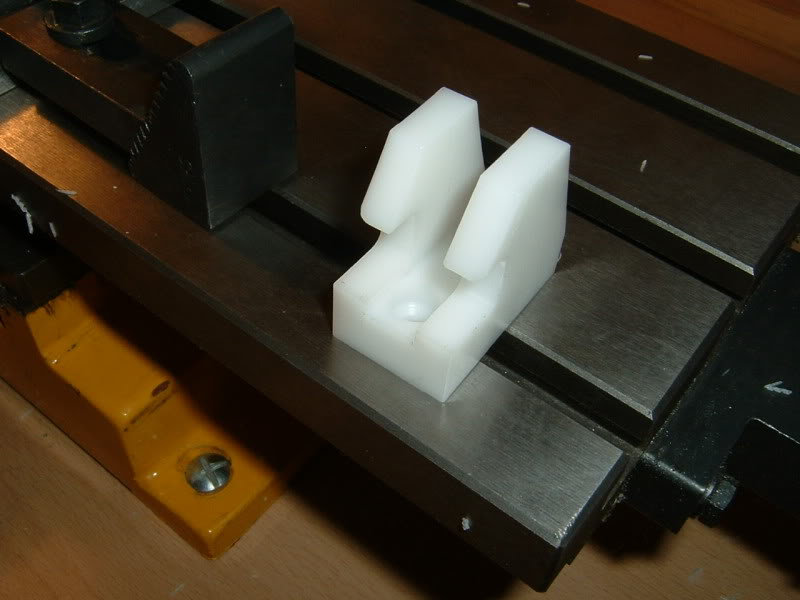
Made a start on the new hinge, best way to do a job like this is transfer all dimensions to paper and cut out cardboard parts till they fit
Hinge closed
And open

Now I have the hinge bracket size I can improve the shape and cut two out

Closed
And open, I can always make some adjustments if needed later.

I finished the levers
All looking good, might need a little alloy removed?
Started cutting the hinge bracket, I'll finish this tomorrow, it's a bit late to be milling, lol
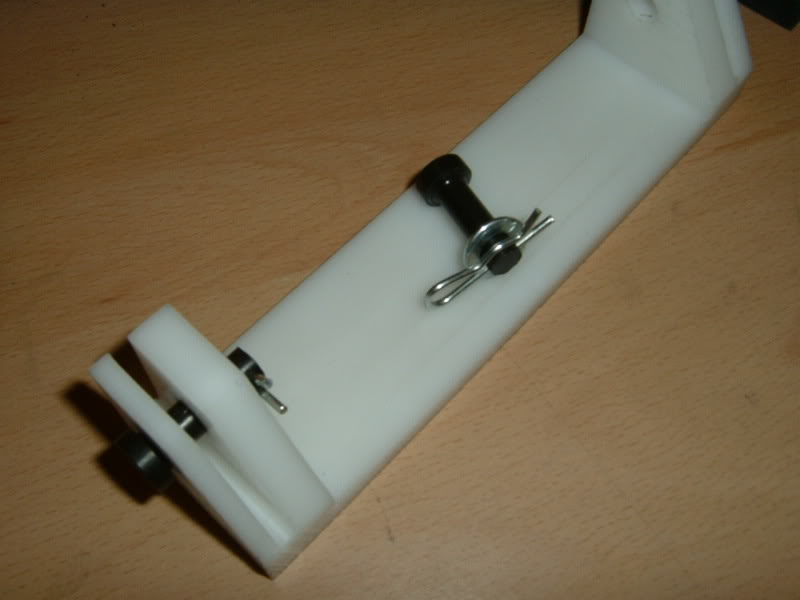
I got the hinge bracket cut, still needs mounting and pivot pin holes drilling.
Seams to be a good fit

Made the pins from delrin bar, a washer and R clip to fix in place
What do you think about these to go on the tail section?
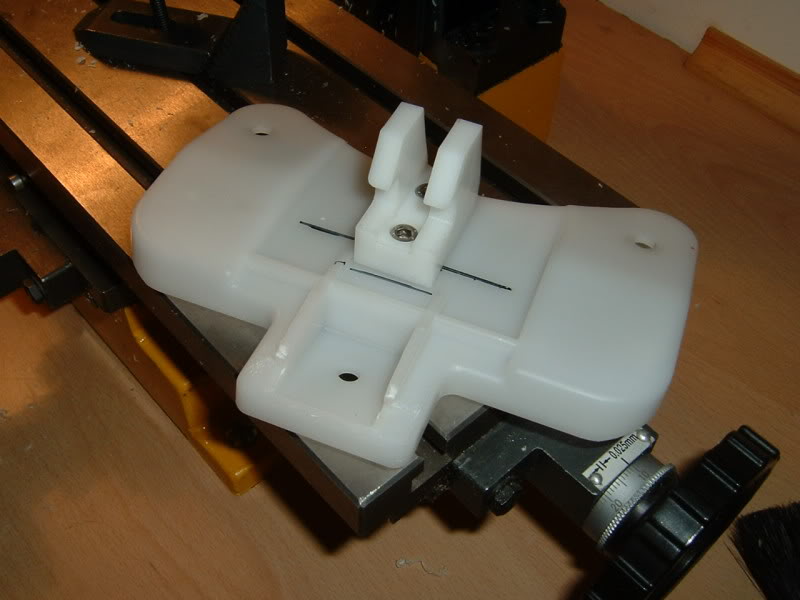
So, here's the finished hinge unit
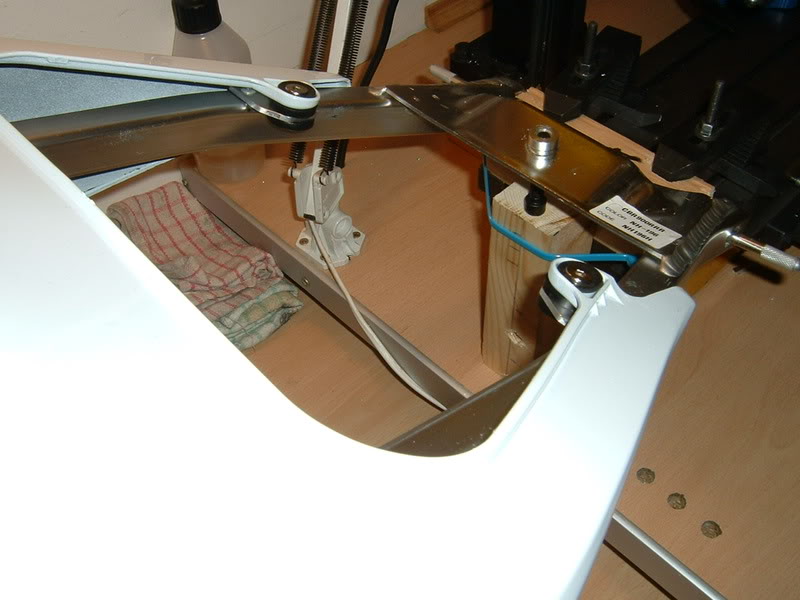
Mounted to the subframe to check for correct clearance etc
Pod fitted.
And here's the pod closed, perfect fit, i'll make the catch tomorrow

Hinge closed
And open
Now I have the hinge bracket size I can improve the shape and cut two out
Closed
And open, I can always make some adjustments if needed later.
I finished the levers
All looking good, might need a little alloy removed?
Started cutting the hinge bracket, I'll finish this tomorrow, it's a bit late to be milling, lol
I got the hinge bracket cut, still needs mounting and pivot pin holes drilling.
Seams to be a good fit
Made the pins from delrin bar, a washer and R clip to fix in place
What do you think about these to go on the tail section?
So, here's the finished hinge unit
Mounted to the subframe to check for correct clearance etc
Pod fitted.
And here's the pod closed, perfect fit, i'll make the catch tomorrow
Thread Starter
|
Member
Joined: Dec 2008
Posts: 67
Likes: 0
From:
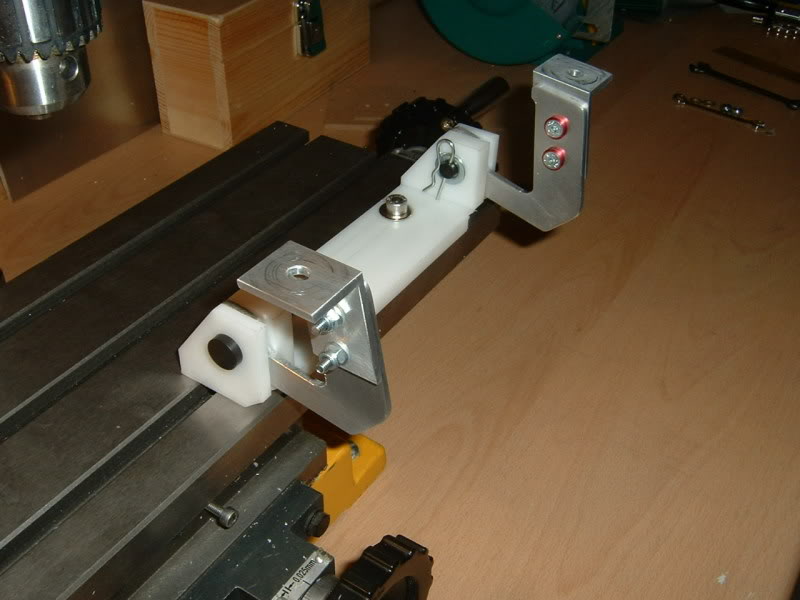
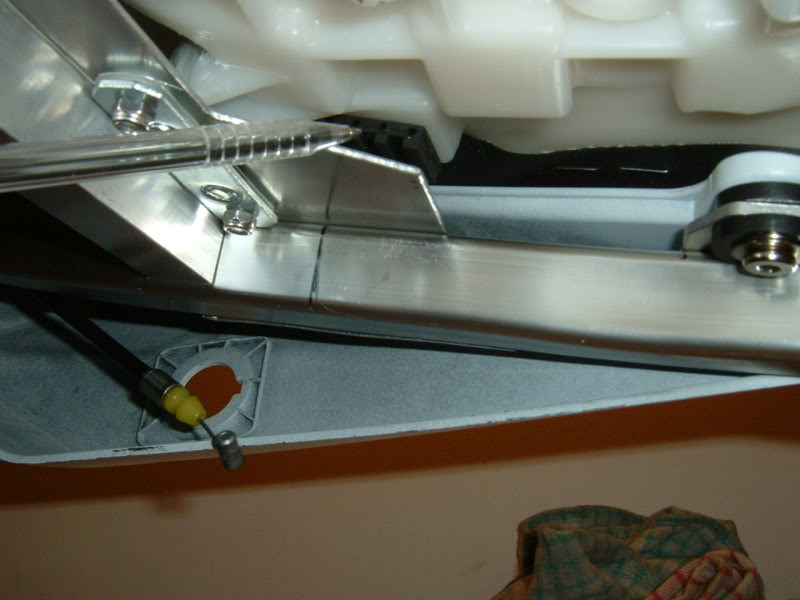
Next I drilled and fitted a 3mm nut & bolt to each hinge arm to limit the opening, don't want to scratch the nice new cowl now do we, lol.
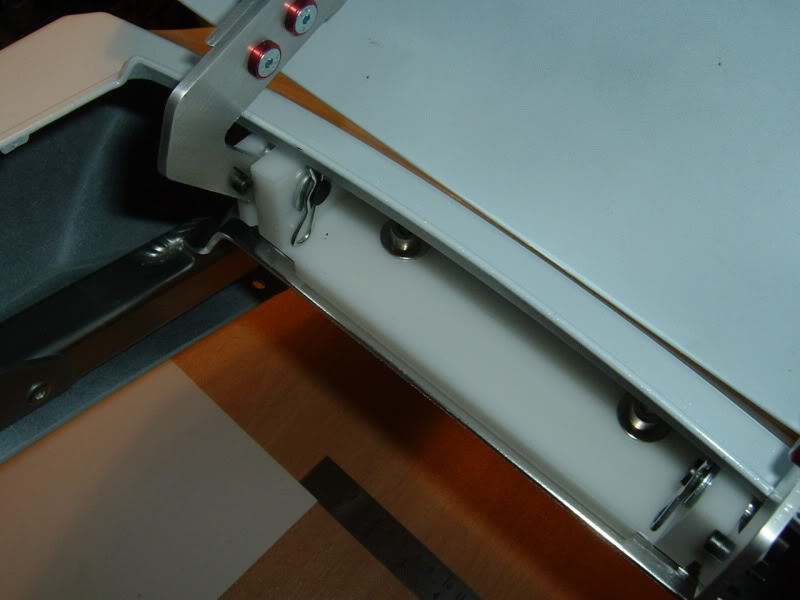
Here's the pod inner piece
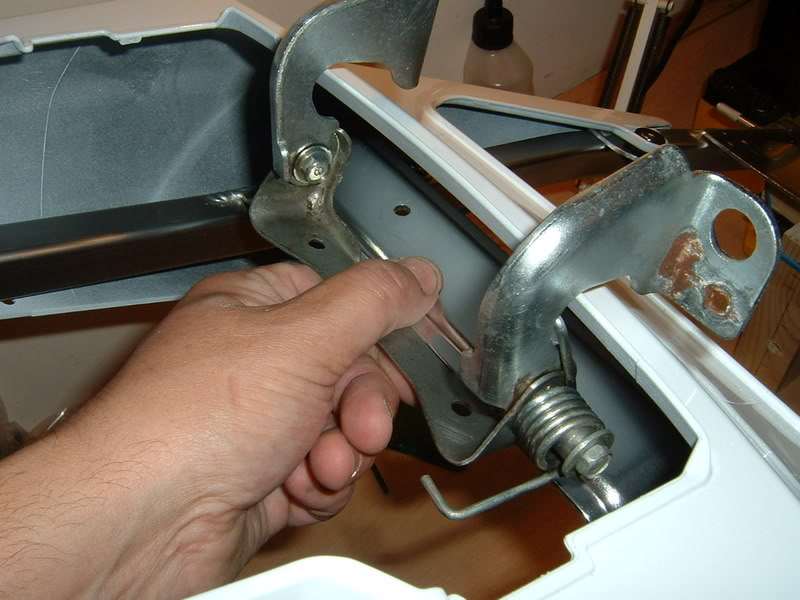
And here's the latch I made
And here's the latch bolted to the modded pod inner piece
IT WORKS, lol a little pressure and it click shut and when the latch is released it pops open an inch, nice

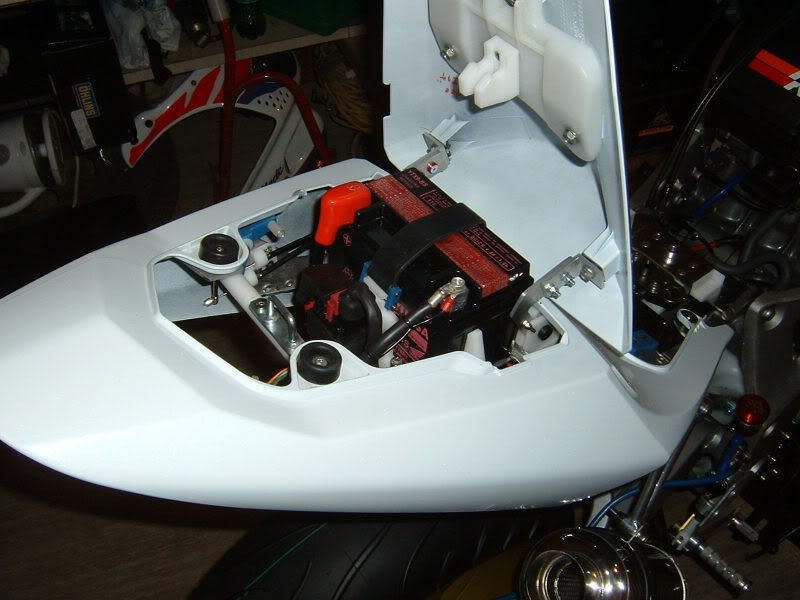
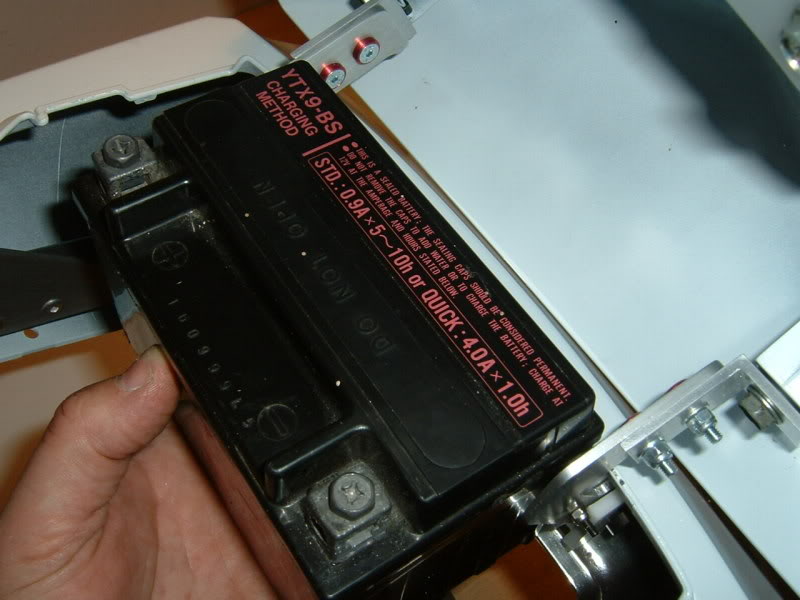
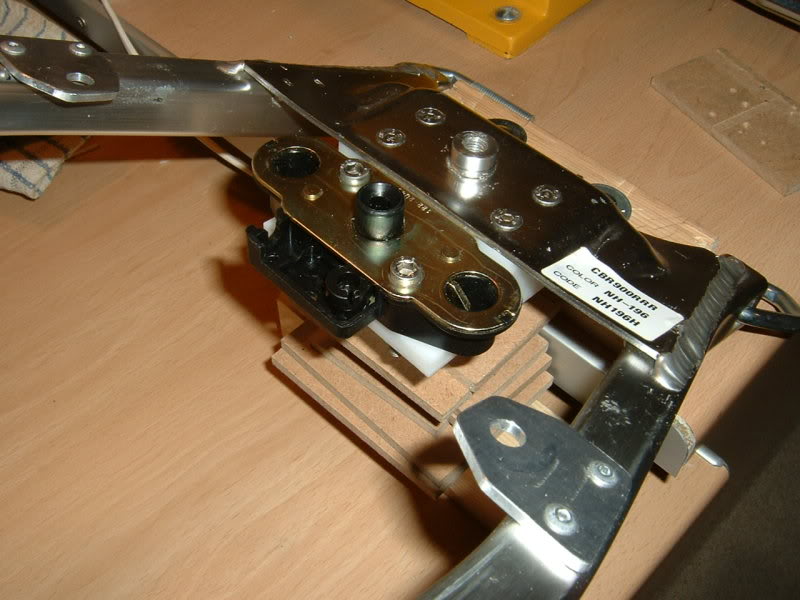
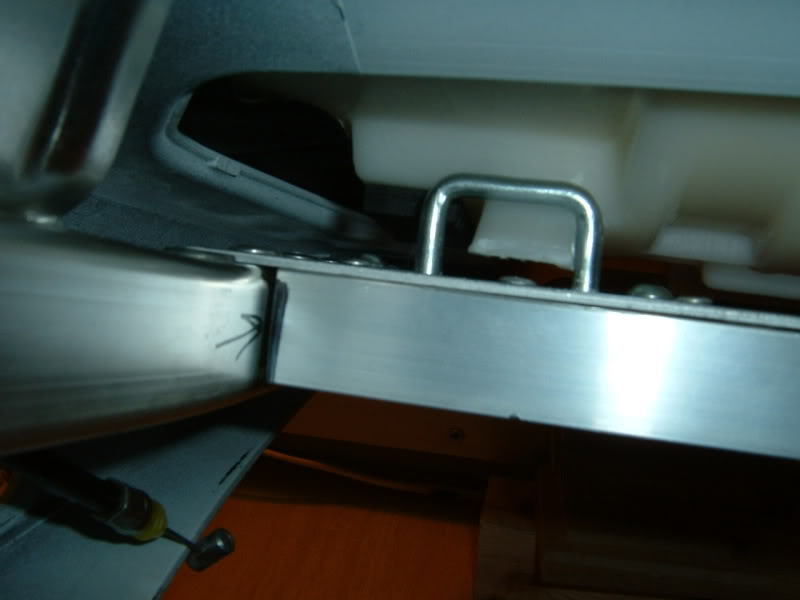
This is the other reason I made a new hinge, I needed it wider to fit the battery between the arms, next job is mounting the battery.
Next up is the front seat fixing, I'm using the rear seat latch thing, I need to mount it about here
Here's what I'll cut out to mount it
Finished cutting the mounting
Drilled and countersunk the subframe
Fixed mounting to subframe
Fixed latch thing to mounting
Made latch cable shorter
Fixed the rear seat mount

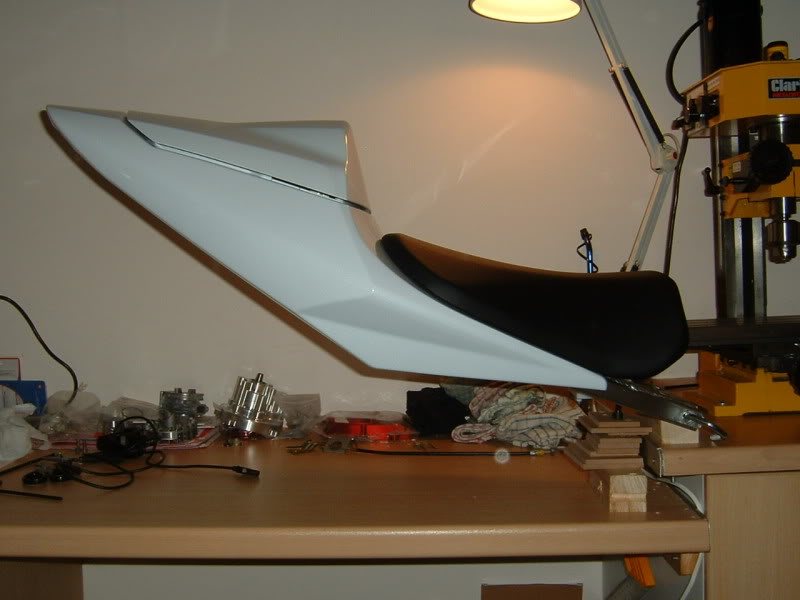
With the cowl on

With the seat in it's fixed location, I bolted the subframe to the tank and it looks ok, there is a slight gap so a small triangle piece might be needed or lengthen the seat.
I cut down the latch thing
Just need to mount it under the seat now, Any ideas how?
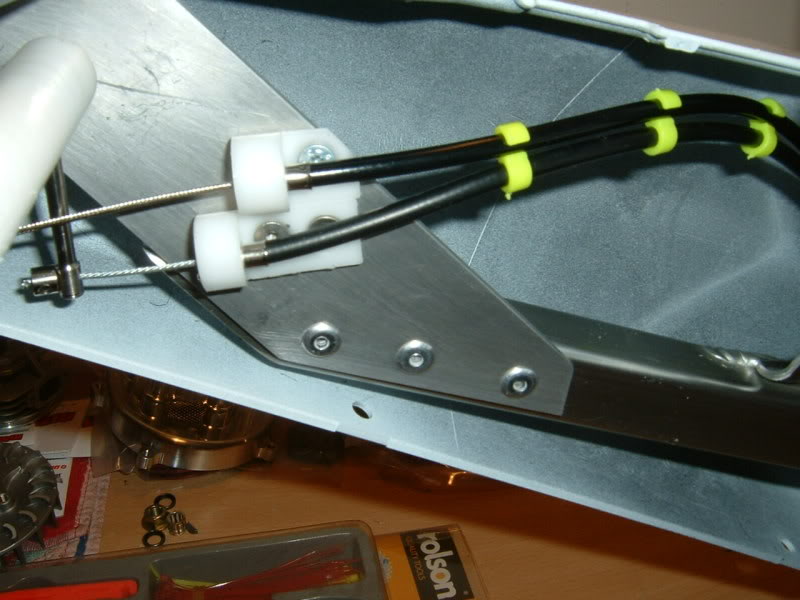
Made a cable holder from 16mm nylon round bar
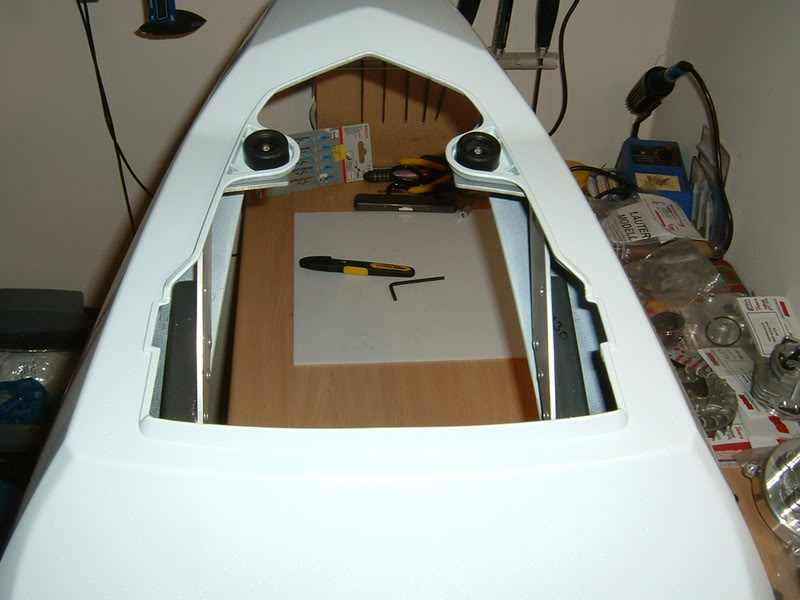
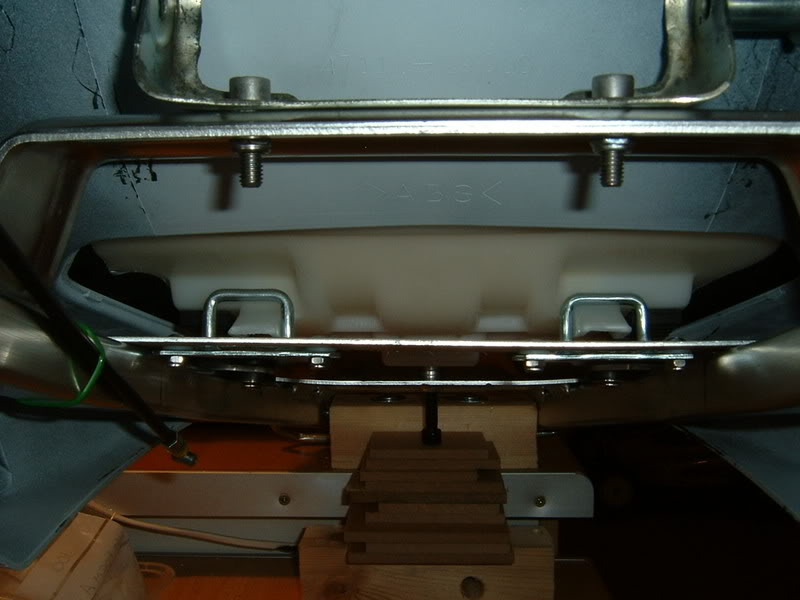
Next job is making some support blocks for the seat, the seat would have sat on the gsxr subframe but not on the blade subframe
I needed to make the blocks a wedge shape too, I was sent some free blue stuff so thought it would do for this job
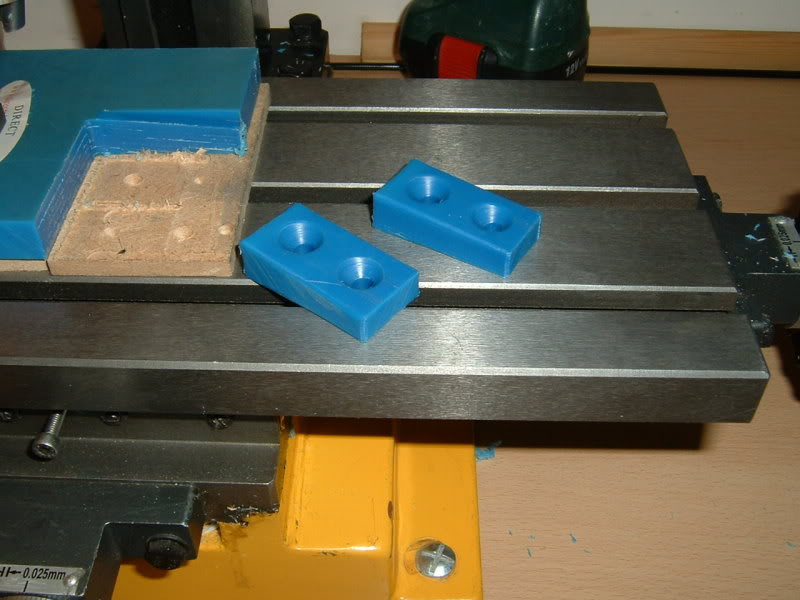
Here's the seat support blocks fitted
Here's the pod inner piece
And here's the latch I made
And here's the latch bolted to the modded pod inner piece
IT WORKS, lol a little pressure and it click shut and when the latch is released it pops open an inch, nice
This is the other reason I made a new hinge, I needed it wider to fit the battery between the arms, next job is mounting the battery.
Next up is the front seat fixing, I'm using the rear seat latch thing, I need to mount it about here
Here's what I'll cut out to mount it
Finished cutting the mounting
Drilled and countersunk the subframe
Fixed mounting to subframe
Fixed latch thing to mounting
Made latch cable shorter
Fixed the rear seat mount
With the cowl on
With the seat in it's fixed location, I bolted the subframe to the tank and it looks ok, there is a slight gap so a small triangle piece might be needed or lengthen the seat.
I cut down the latch thing
Just need to mount it under the seat now, Any ideas how?
Made a cable holder from 16mm nylon round bar
Next job is making some support blocks for the seat, the seat would have sat on the gsxr subframe but not on the blade subframe
I needed to make the blocks a wedge shape too, I was sent some free blue stuff so thought it would do for this job
Here's the seat support blocks fitted

Thread Starter
|
Member
Joined: Dec 2008
Posts: 67
Likes: 0
From:
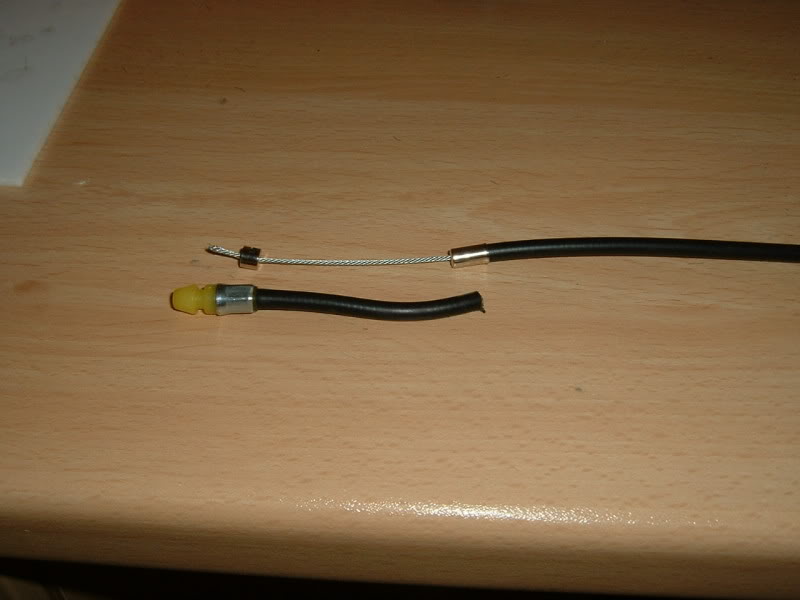
Next job is installing the front seat release cable etc, I made up a cable the right length
I made another cable holder
Next I made a small thumb lever and pivot

All fitted and working
I made another cable holder
Next I made a small thumb lever and pivot
All fitted and working

Thread Starter
|
Member
Joined: Dec 2008
Posts: 67
Likes: 0
From:
Didn't get any time to play with the tail unit this weekend
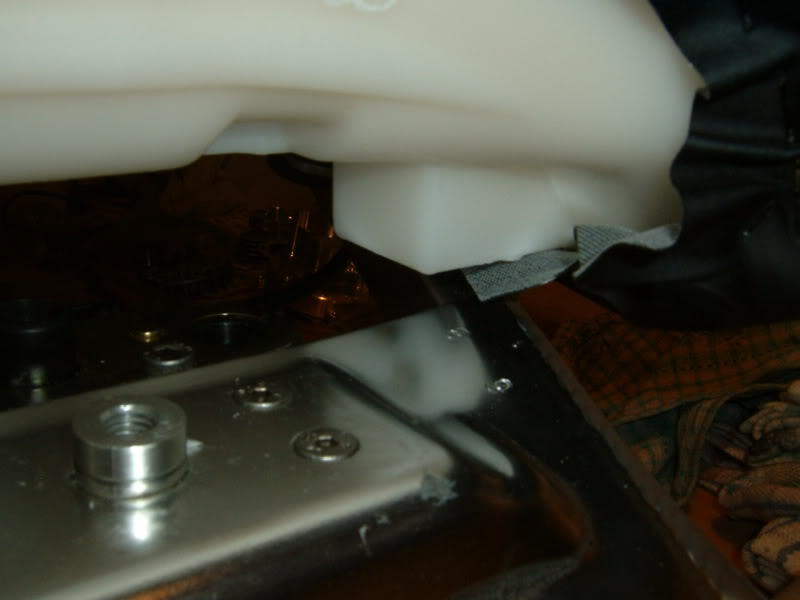
Next the seat needs two support blocks at the front, there is a latch being fitted but this won't be strong enough to stop side and up/down movements,
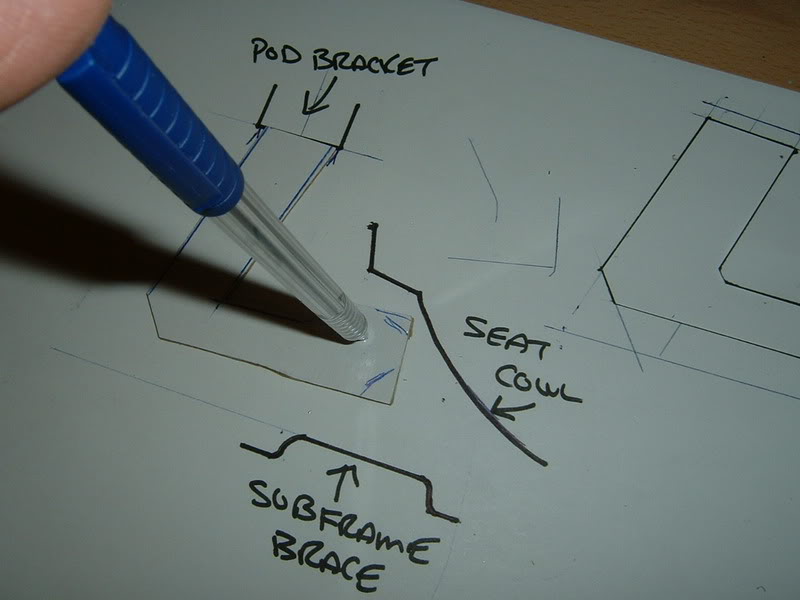
Here's the area need to the bridged
Again I find fabrication parts like this best done with card
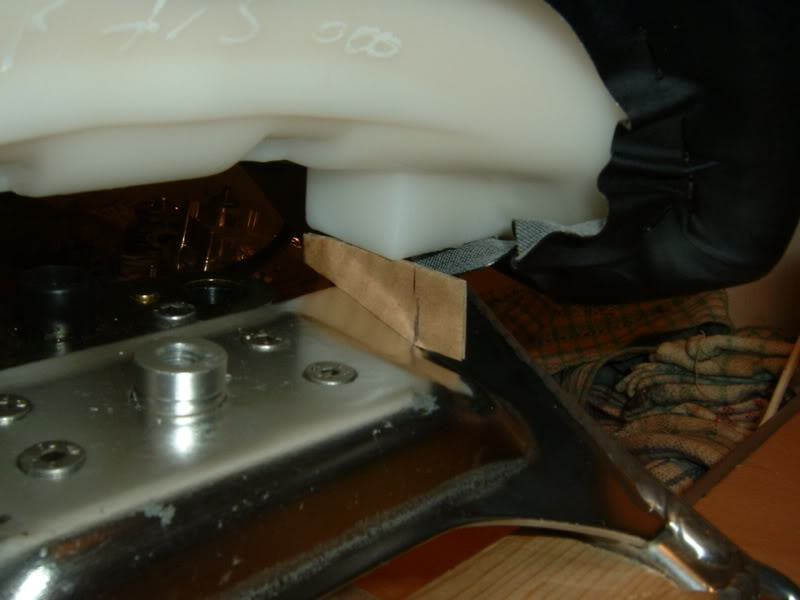
Once all the dimensions are known you can transfer them to the material being used, I'll get this cut tomorrow and fitted