'91 CBR 600 F2 Build
#1
 02-02-2012, 10:36 AM


Join Date: Feb 2012
Posts: 83
Likes: 0
Received 0 Likes
on
0 Posts
Hey everyone. I just joined up and thought I'd start a build thread for my CBR.
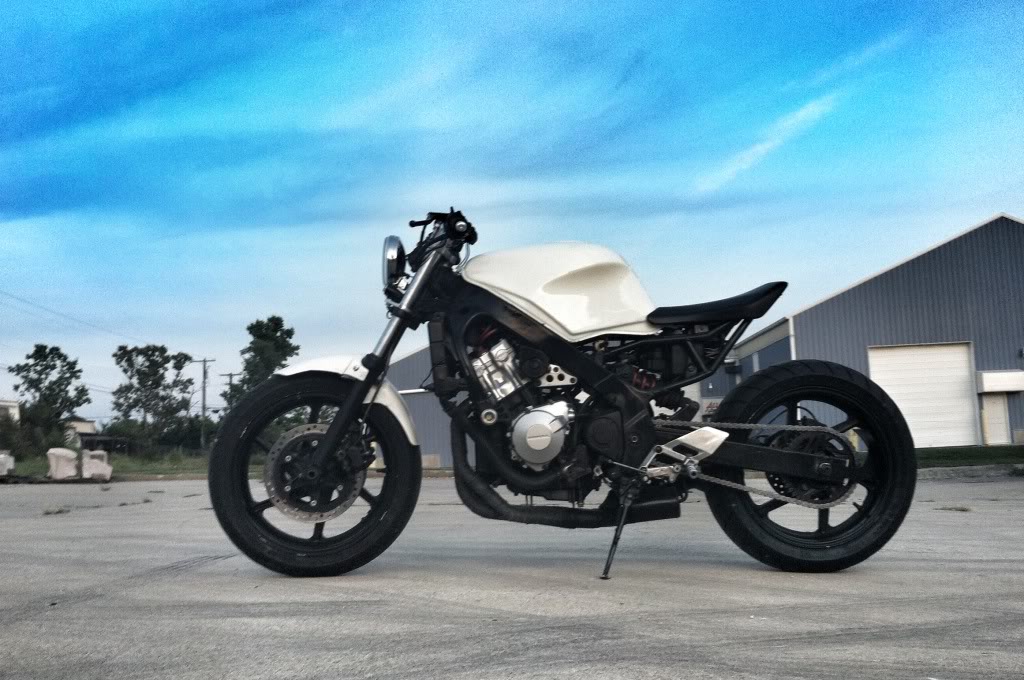
I picked up a '91 CBR 600 at the end of the summer last year. It was hammered from stunting and didn't run. After a new battery and about 20 mins of me and my buddy tinkering, we had it running and riding. Even though it didn't run that well, the size of the rear sprocket let the thing stand up like it was nothing.
This is how she sat the day I picked her up for $300 with no Title.
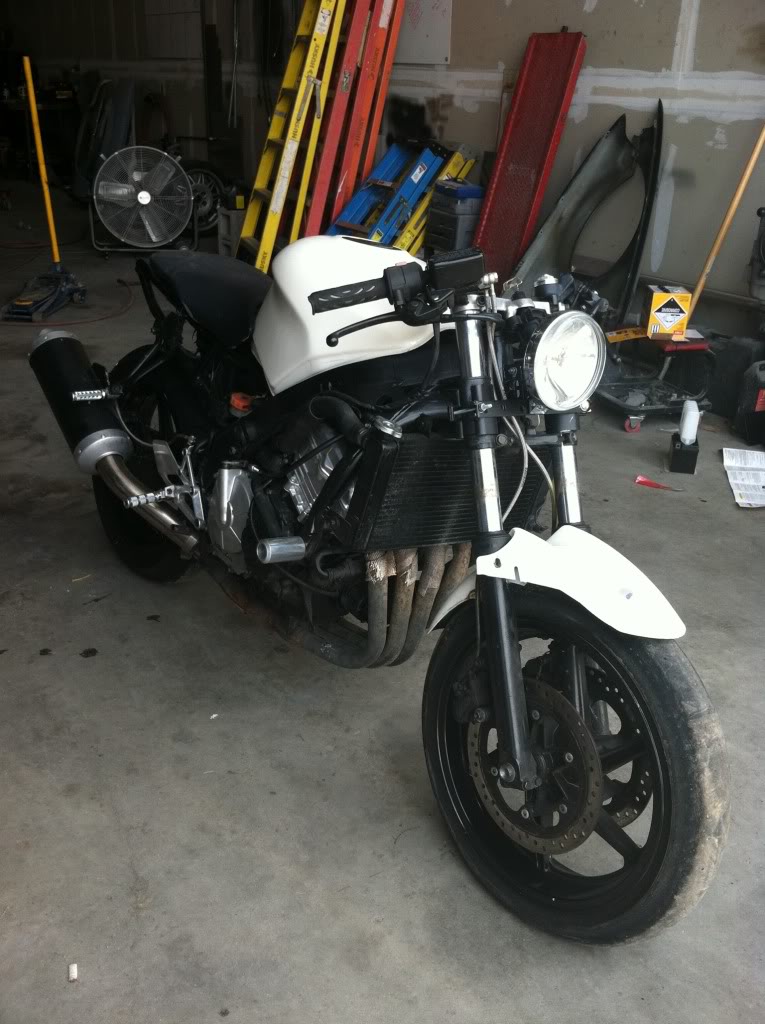
I immediately started to tear her down and get rid of the really crappy stunt mods. Took off the tank and started to clean the carbs.
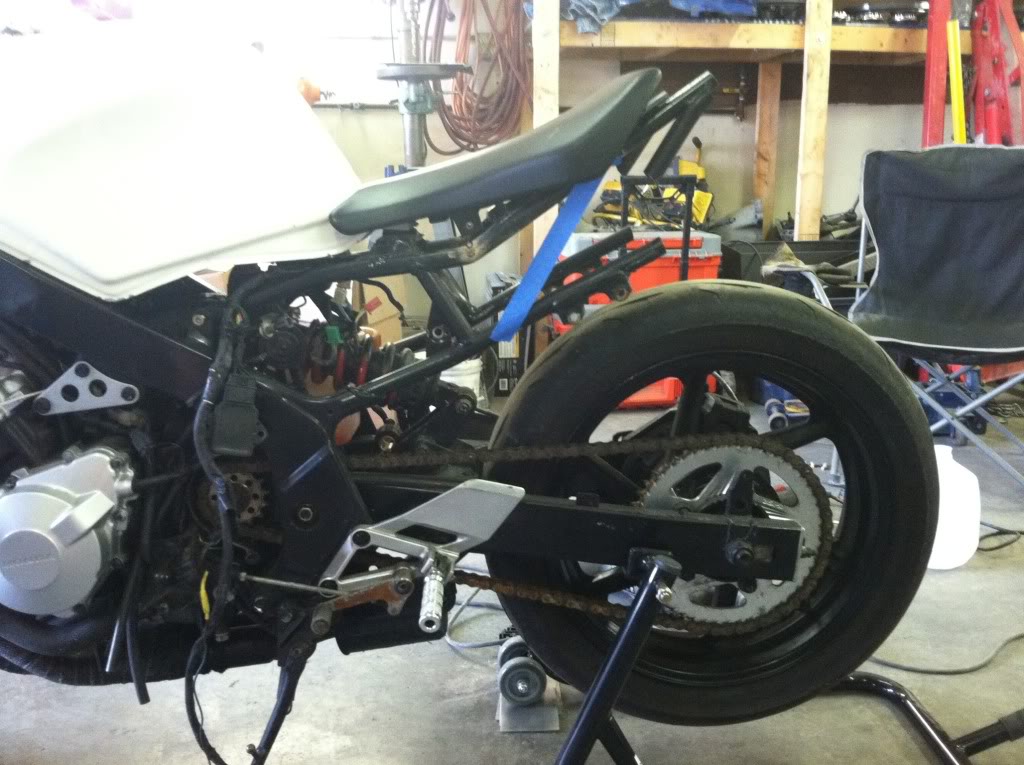
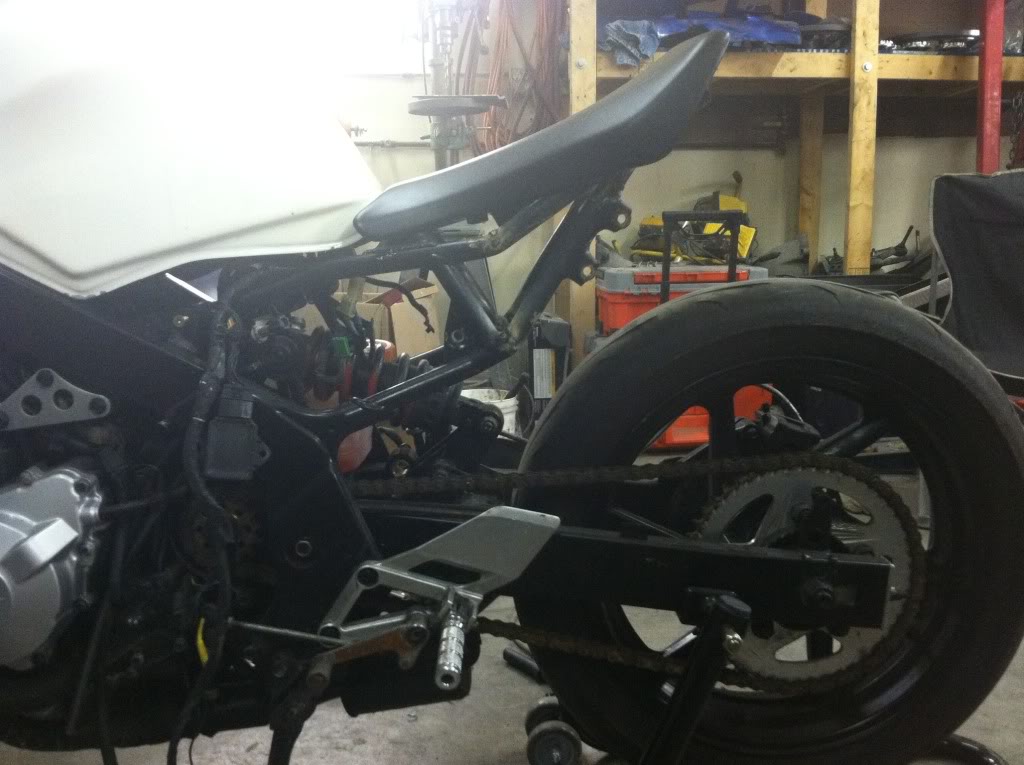
The subframe was already chopped a little bit, so I decided to keep going down that road, but make it look much better. So I picked up a Fireblade seat and started chopping. With the help of my buddy, he welded up the subframe to how it sits. We plan on rebuilding to clean it up, but I like the look and that fact that its the original subframe, just tweaked
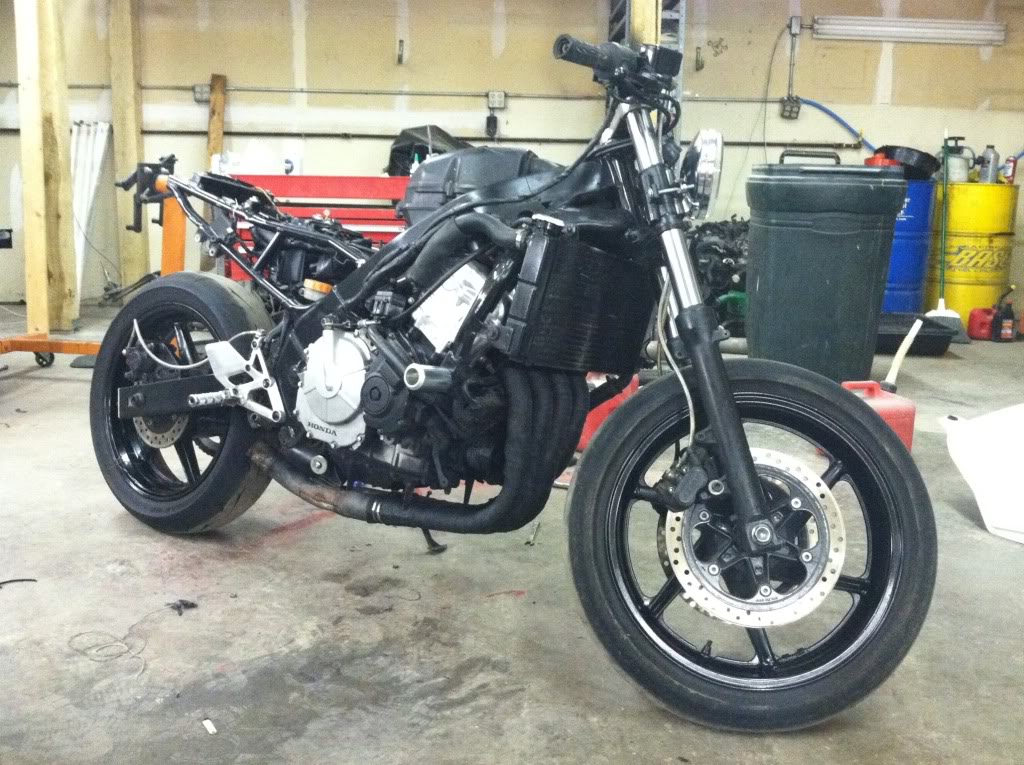
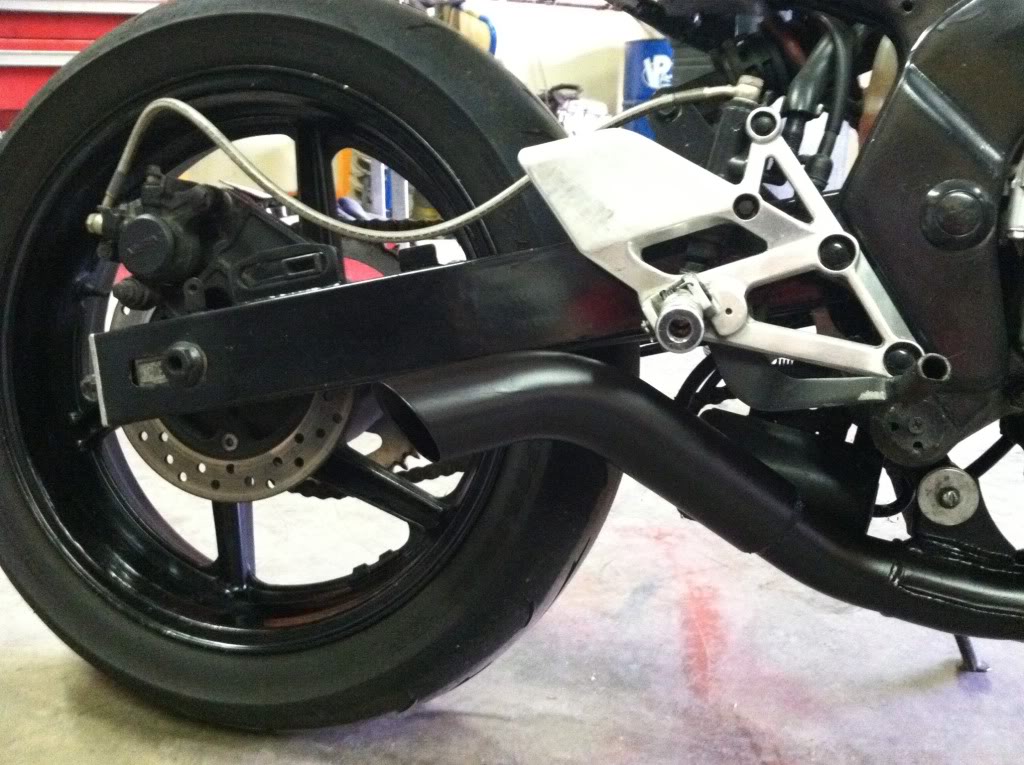
I decided that hideous looking exhaust that came on it had to go. The header pipes were looking pretty bad too so after I took them off to get rid of the exhaust/muffler, I wrapped the headers in black wrap. I wasn't sure what to do for a muffler, so I decided not to have one My buddy had some scrap pipe and we cut this section to how I thought would look good and he welded it on. Sprayed it with some high temp and now she sits like the pic.
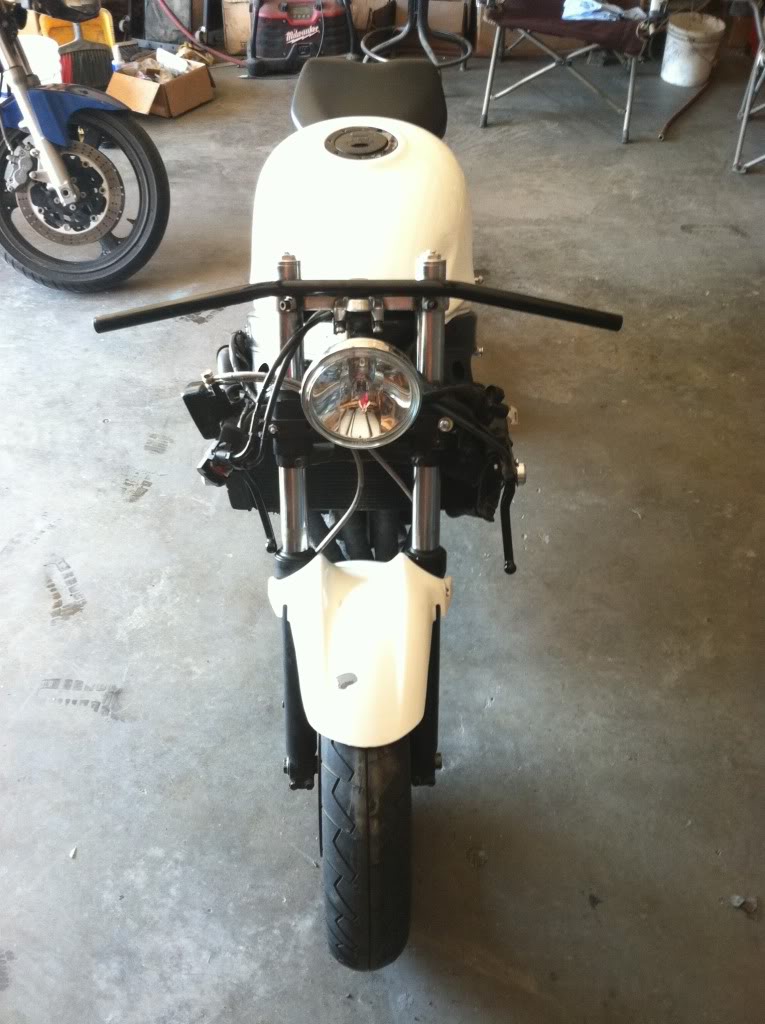
The clip-ons were next to get the axe. I wanted to go with straight bars. I found some chrome risers (not pictured) and mounted the drag bar and all controls. I loved the feel, but hated the look of the risers. So I've scrapped them and found some black MX risers that I've since mounted to the top plate. They look so much better.
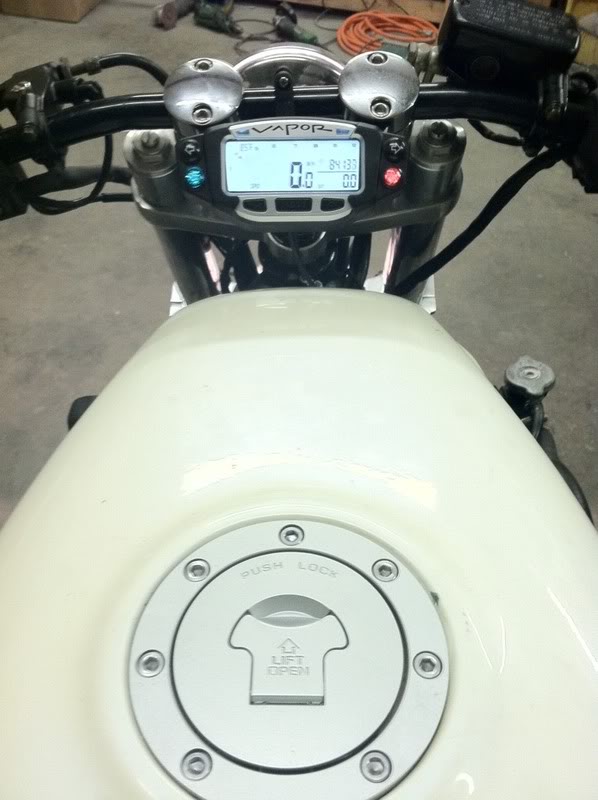
I went back and forth on what instruments/gauges I was going to use, but settled on going with the Vapor from Trail Tech. It mounts perfectly to the bars and is in great viewing position to sneak a peak while riding. The tach is still a little sporadic, so I'm working on that.
To make the rear end legal, I needed a brake light and turn signals. But I didn't like anything I was finding...until I saw this LED strip with integrated turns from Custom Dynamics. It doesn't stick out and is really BRIGHT!

With the help of my buddy again, we shortened the harness to fit in the smaller footprint and tucked everything. This is how she looked at the beginning of December last year.
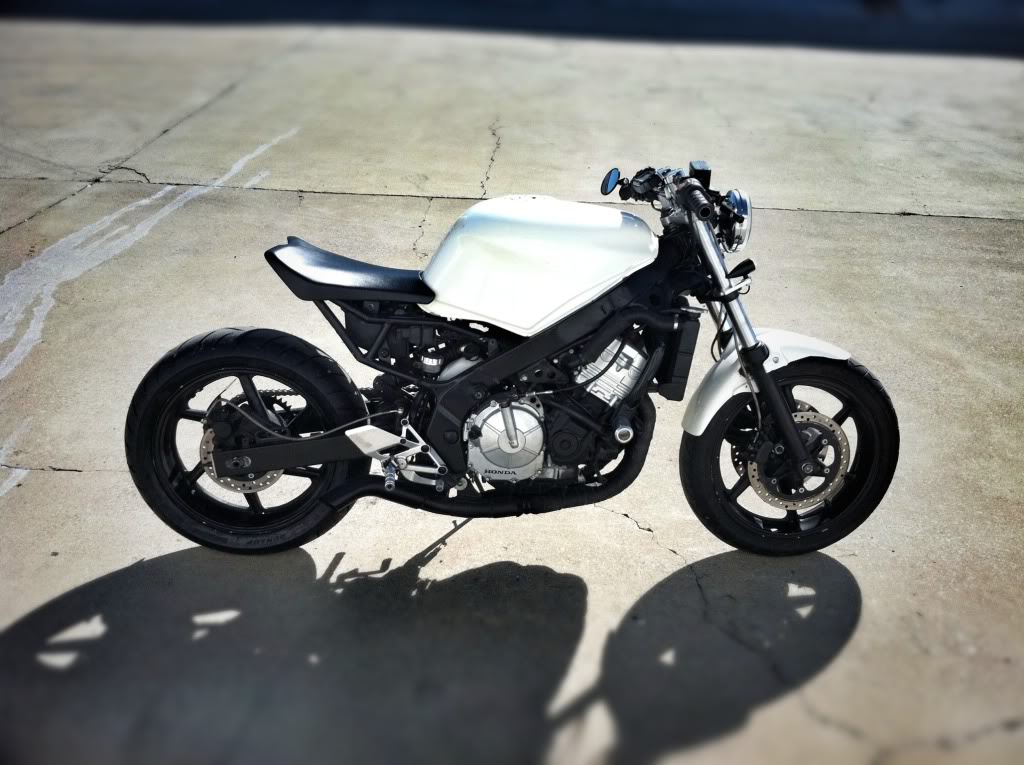
Once it was too cold to ride, and since she's still not road legal or have a title, I tore her down again. I stripped the tank down to the metal (8 layers of paint!!!) and it's now in primer waiting on the wheels to get back from the powder coaters so we can match the whites. Here's a list of new items going on the bike for this season:
-fresh white paint on the tank, front fender (f3 fender)
-powder coat wheels white
-knock off wave rotors, front & back
-new brake pads
-woodcraft rear sets
-lsl urban headlight
-relocate ignition barrel
It's been quite the learning experience, but it's been a fun one. I come from the VW world so turning a wrench is nothing foreign. I'll keep updating this thread as I get parts in and installed. Thanks for looking and I'd love to hear any advice anyone may have. Thanks!
I picked up a '91 CBR 600 at the end of the summer last year. It was hammered from stunting and didn't run. After a new battery and about 20 mins of me and my buddy tinkering, we had it running and riding. Even though it didn't run that well, the size of the rear sprocket let the thing stand up like it was nothing.
This is how she sat the day I picked her up for $300 with no Title.
I immediately started to tear her down and get rid of the really crappy stunt mods. Took off the tank and started to clean the carbs.
The subframe was already chopped a little bit, so I decided to keep going down that road, but make it look much better. So I picked up a Fireblade seat and started chopping. With the help of my buddy, he welded up the subframe to how it sits. We plan on rebuilding to clean it up, but I like the look and that fact that its the original subframe, just tweaked
I decided that hideous looking exhaust that came on it had to go. The header pipes were looking pretty bad too so after I took them off to get rid of the exhaust/muffler, I wrapped the headers in black wrap. I wasn't sure what to do for a muffler, so I decided not to have one
The clip-ons were next to get the axe. I wanted to go with straight bars. I found some chrome risers (not pictured) and mounted the drag bar and all controls. I loved the feel, but hated the look of the risers. So I've scrapped them and found some black MX risers that I've since mounted to the top plate. They look so much better.
I went back and forth on what instruments/gauges I was going to use, but settled on going with the Vapor from Trail Tech. It mounts perfectly to the bars and is in great viewing position to sneak a peak while riding. The tach is still a little sporadic, so I'm working on that.
To make the rear end legal, I needed a brake light and turn signals. But I didn't like anything I was finding...until I saw this LED strip with integrated turns from Custom Dynamics. It doesn't stick out and is really BRIGHT!
With the help of my buddy again, we shortened the harness to fit in the smaller footprint and tucked everything. This is how she looked at the beginning of December last year.
Once it was too cold to ride, and since she's still not road legal or have a title, I tore her down again. I stripped the tank down to the metal (8 layers of paint!!!) and it's now in primer waiting on the wheels to get back from the powder coaters so we can match the whites. Here's a list of new items going on the bike for this season:
-fresh white paint on the tank, front fender (f3 fender)
-powder coat wheels white
-knock off wave rotors, front & back
-new brake pads
-woodcraft rear sets
-lsl urban headlight
-relocate ignition barrel
It's been quite the learning experience, but it's been a fun one. I come from the VW world so turning a wrench is nothing foreign. I'll keep updating this thread as I get parts in and installed. Thanks for looking and I'd love to hear any advice anyone may have. Thanks!

#3
02-02-2012, 01:33 PM

Looks great, i really like the white and black.
If you want to fix your vaypor tach you need to wire in a resistor in the tach lead as close to the unit as possible to filter out interference in the line . I gotta look and see which one i used but i have 4 extra if you want one, i had to buy a 5pk at radio shack. My vaypor tach is smooth as butter and accurate too after doing this. I just used the factory tach wire which runs right to the #1 coils + terminal.
If you want to fix your vaypor tach you need to wire in a resistor in the tach lead as close to the unit as possible to filter out interference in the line . I gotta look and see which one i used but i have 4 extra if you want one, i had to buy a 5pk at radio shack. My vaypor tach is smooth as butter and accurate too after doing this. I just used the factory tach wire which runs right to the #1 coils + terminal.
#4
02-02-2012, 01:42 PM
Join Date: Feb 2012
Posts: 83
Likes: 0
Received 0 Likes
on
0 Posts
Looks great, i really like the white and black.
If you want to fix your vaypor tach you need to wire in a resistor in the tach lead as close to the unit as possible to filter out interference in the line . I gotta look and see which one i used but i have 4 extra if you want one, i had to buy a 5pk at radio shack. My vaypor tach is smooth as butter and accurate too after doing this. I just used the factory tach wire which runs right to the #1 coils + terminal.
If you want to fix your vaypor tach you need to wire in a resistor in the tach lead as close to the unit as possible to filter out interference in the line . I gotta look and see which one i used but i have 4 extra if you want one, i had to buy a 5pk at radio shack. My vaypor tach is smooth as butter and accurate too after doing this. I just used the factory tach wire which runs right to the #1 coils + terminal.
#5
02-02-2012, 04:39 PM

wow, that's beautiful. REALLY good. have you thought about updating the front end all together? USD forks, radial brakes, etc?
i've got a question for you. its about your rear light. how does it mount? how durable is it? i found one similar, but all it mounts with is 3m tape - and i'm not a huge fan of that. i want something that'll last me a lil while - and can't fall off.
i've got a question for you. its about your rear light. how does it mount? how durable is it? i found one similar, but all it mounts with is 3m tape - and i'm not a huge fan of that. i want something that'll last me a lil while - and can't fall off.
#6
02-02-2012, 07:18 PM

#7
02-02-2012, 09:35 PM
Join Date: Feb 2012
Posts: 83
Likes: 0
Received 0 Likes
on
0 Posts
wow, that's beautiful. REALLY good. have you thought about updating the front end all together? USD forks, radial brakes, etc?
i've got a question for you. its about your rear light. how does it mount? how durable is it? i found one similar, but all it mounts with is 3m tape - and i'm not a huge fan of that. i want something that'll last me a lil while - and can't fall off.
i've got a question for you. its about your rear light. how does it mount? how durable is it? i found one similar, but all it mounts with is 3m tape - and i'm not a huge fan of that. i want something that'll last me a lil while - and can't fall off.
The integrated tail light is mounted to the subframe. I just drilled the right size holes and tapped them for the screws that came with it. All the wiring is run through the tubing and comes out to the harness under the seat. It's a really durable light, it's gonna last the lifetime of the bike for sure.
Thanks!
#8
02-03-2012, 12:07 PM
Thanks! It's a shame I don't have any better photos than from my iPhone...especially since I'm a pro Photographer haha
Thanks! I've got a resistor inline, I just don't think it's getting a clean enough signal. I'm going to try some better shielded wire and see what happens. It's not too far off, but at idle it's pretty jumpy. I'll let you know if I get it sorted.
Thanks! I've got a resistor inline, I just don't think it's getting a clean enough signal. I'm going to try some better shielded wire and see what happens. It's not too far off, but at idle it's pretty jumpy. I'll let you know if I get it sorted.
#9
02-03-2012, 03:52 PM
The integrated tail light is mounted to the subframe. I just drilled the right size holes and tapped them for the screws that came with it. All the wiring is run through the tubing and comes out to the harness under the seat. It's a really durable light, it's gonna last the lifetime of the bike for sure.
thank god... that's the kind of thing i'm looking for
#10
02-03-2012, 05:46 PM
Join Date: Feb 2012
Posts: 83
Likes: 0
Received 0 Likes
on
0 Posts
Then look no further... Motorcycle LED Light Bar

