
Boxdgm's F1 fighter build log
#1
 03-27-2012, 01:31 AM


Im finally getting around to making a build log to keep all the progress in one place. Ive been trying to do what i can on a limited budget. Traded a ps3 for the bike last july and have been doing what i can to make it my own. Now on with the pics.
When i got her: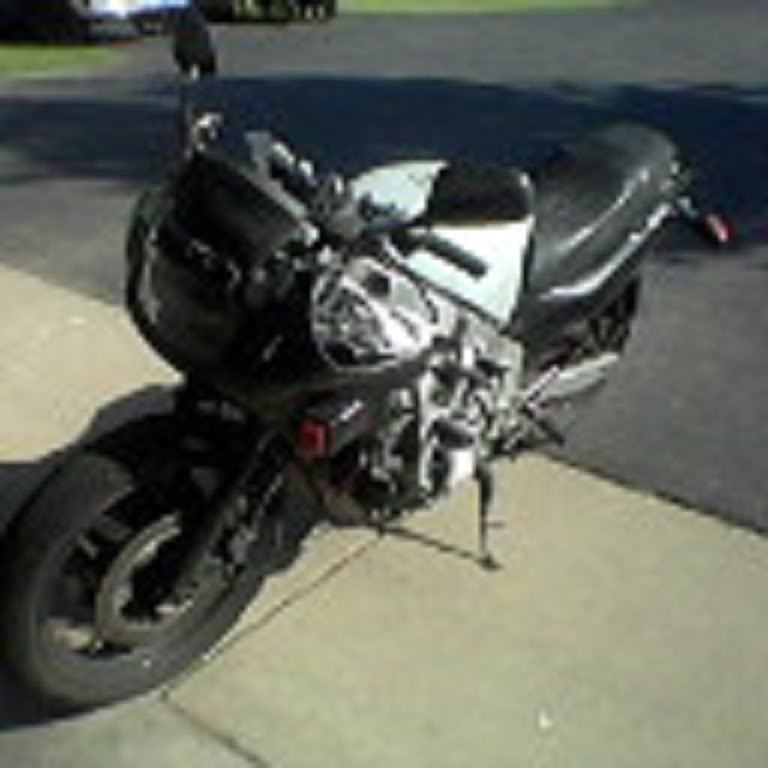
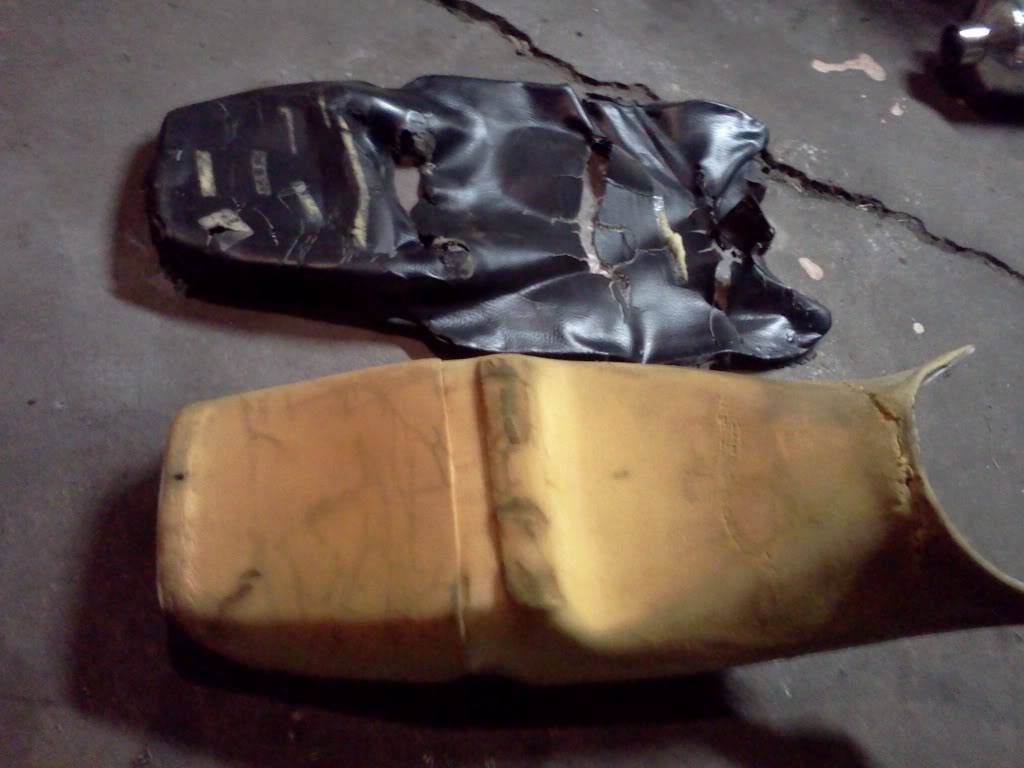
cant tell from the pic how crappy she was. Wouldnt idle, wouldnt start without pushing it, seat was destroyed, gas tank was rusty and petcock was mostly clogged up. most of the plastics were gone and what was left was in rough shape mostly the upper piece. Got it home and started tearing it down within 15 mins.

rebuilt the carbs, changed plugs, kreemed the tank and sprayed some rattlecan primer on her.
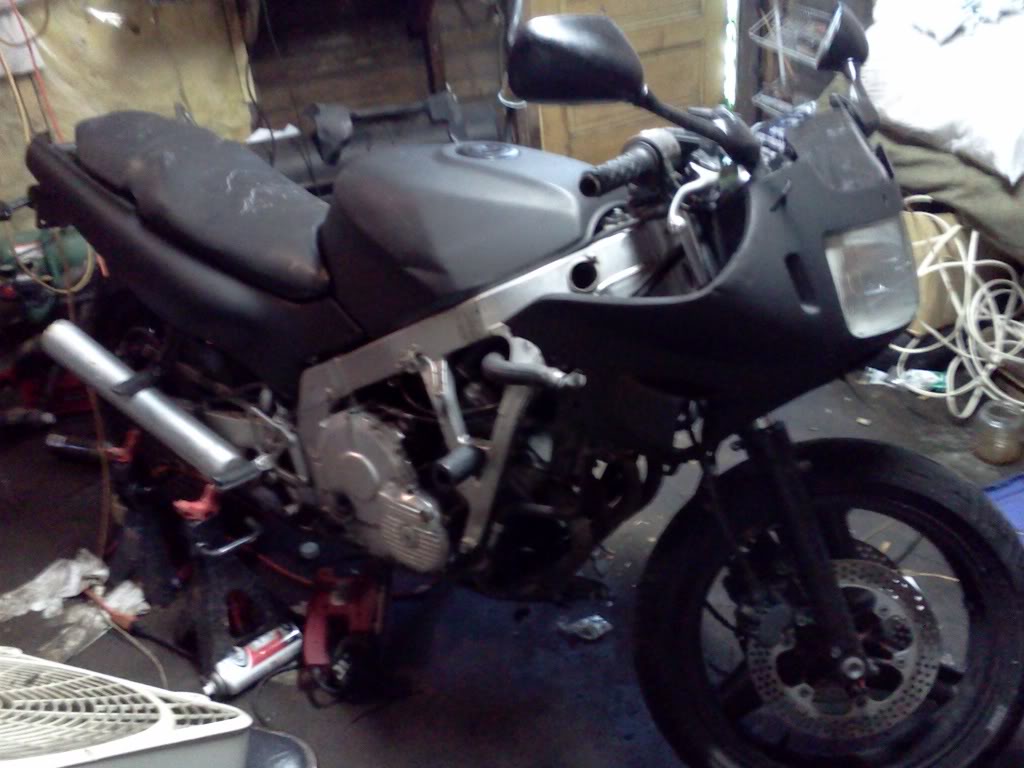
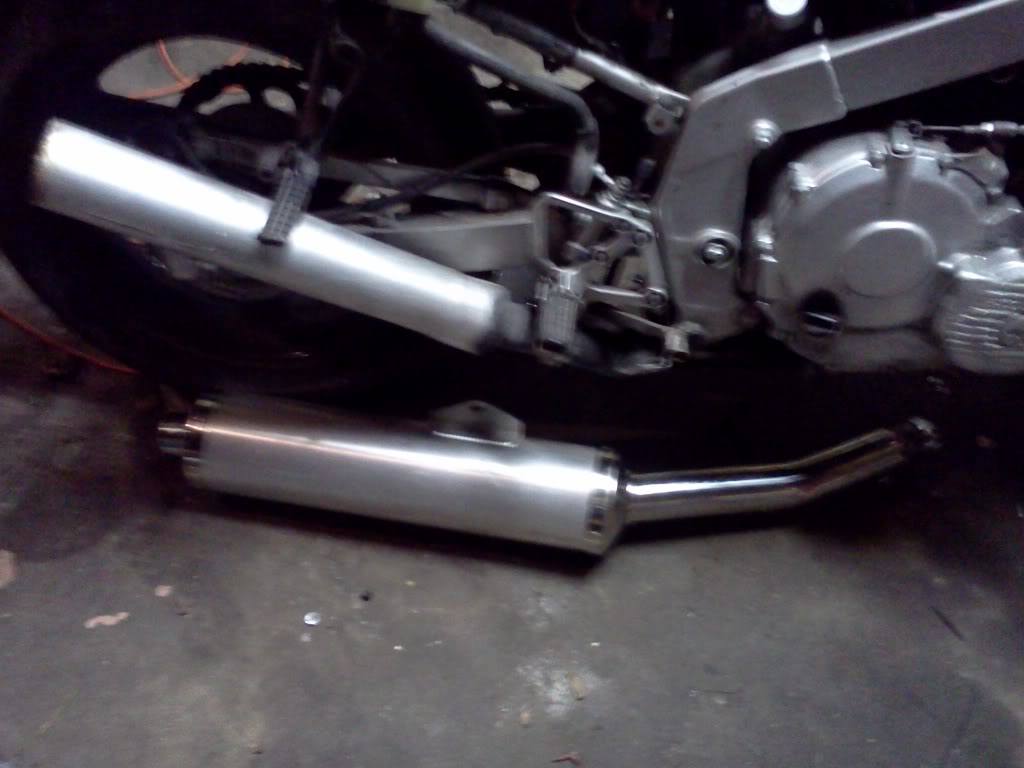
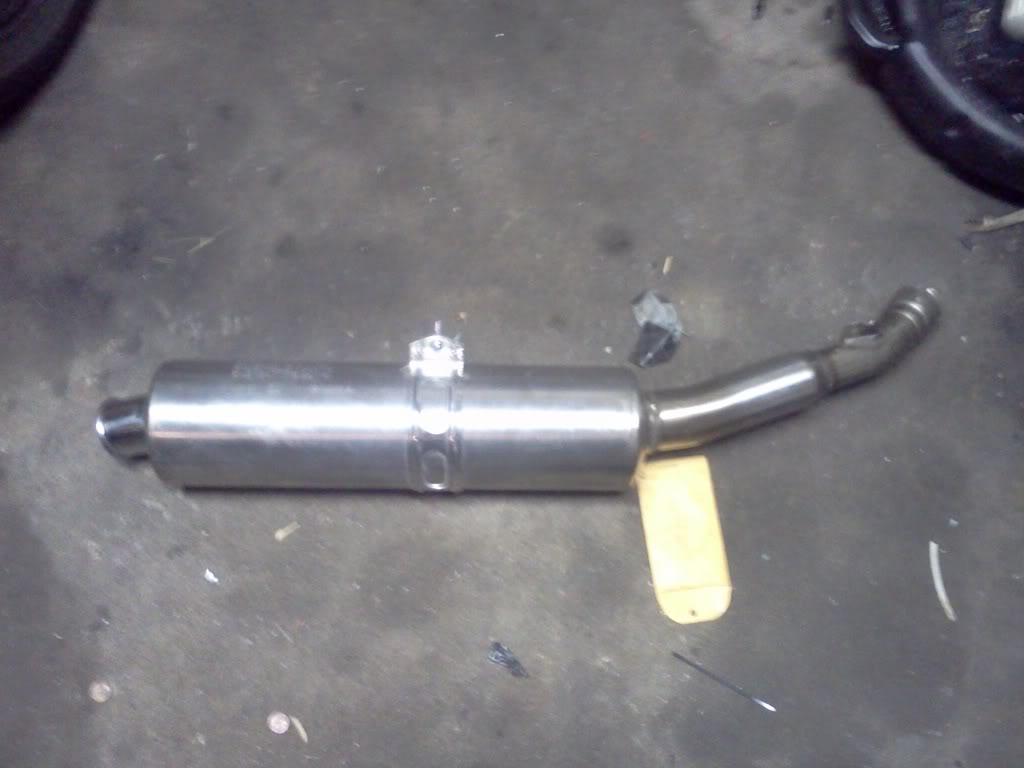
it had a nasty looking glasspack type car muffler welded on, that had to go and got replaced with a different header and rc51 pipe for now (came with my parts bike) The middle one was an r6 pipe but i didnt end up using it.
re-covered the seat with marine flex vinyl from joann fabrics, cost under 10 bucks.

after that i just wanted to ride it during the nicest parts of the summer so not alot of progess for a little bit.
A friend had some paint lefto over from painting a mustang and offered to paint it dirt cheap so i took him up on the offer
while i was waiting for the parts back i decided to bedliner the frame because i couldnt stand the weathered silver with rust showing thru.

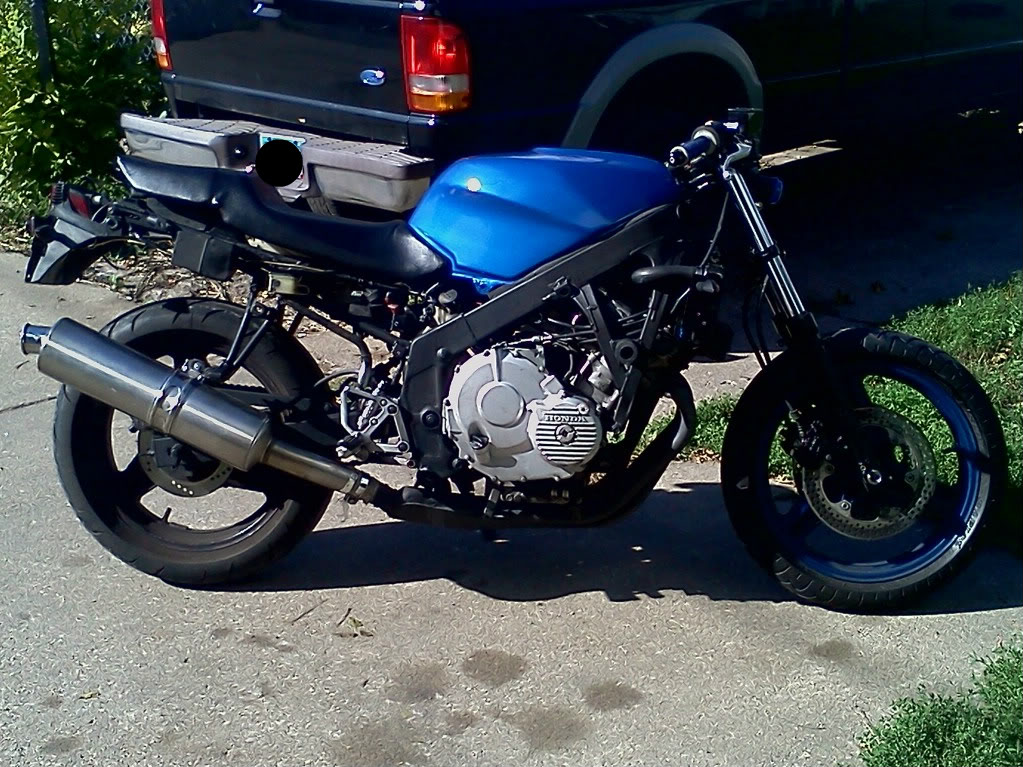
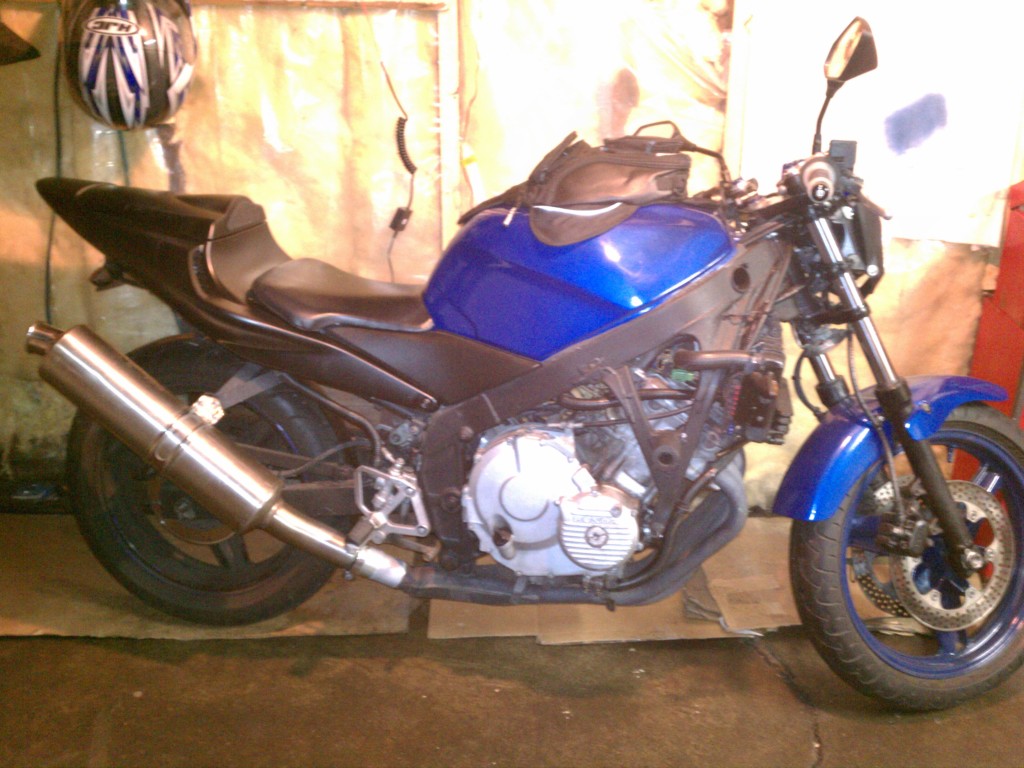
Starting to look like a motorcycle again
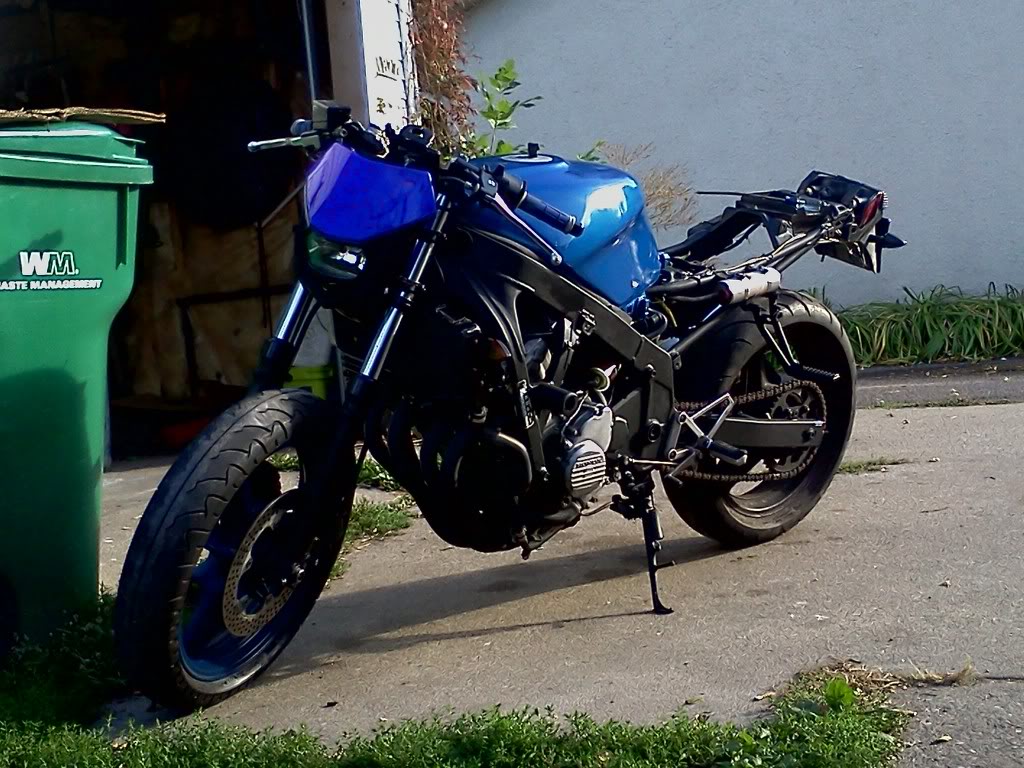
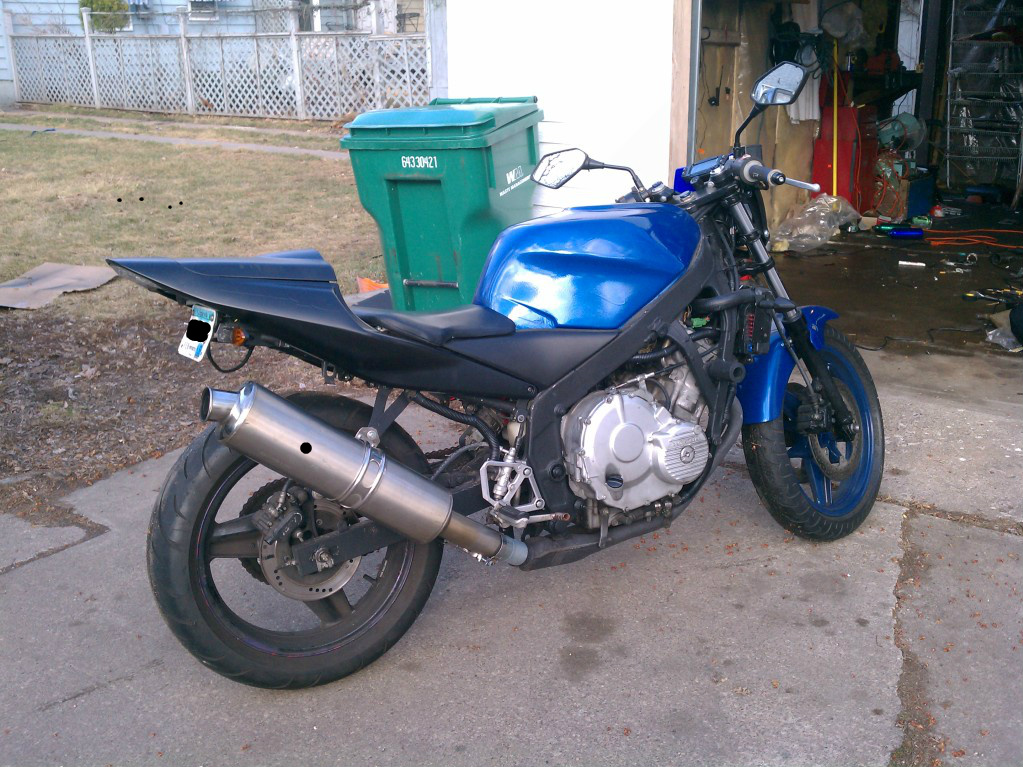
went with a polisport h4 halo headlight and im pretty happy with it.
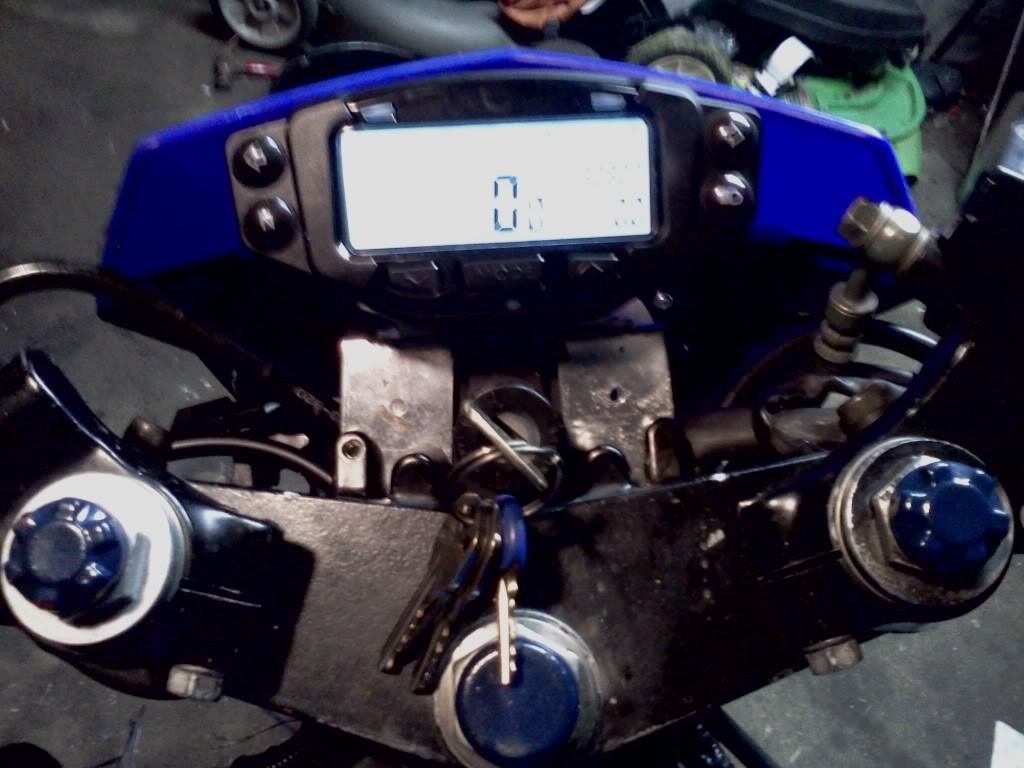
installed a trail tech vapor to relieve my cell phone from its speedometer duties
added some amazon 10mm mirrors to her using 09 suzuki dl1000 mirror mounts
And then it was more riding time so mods will wait until winter.
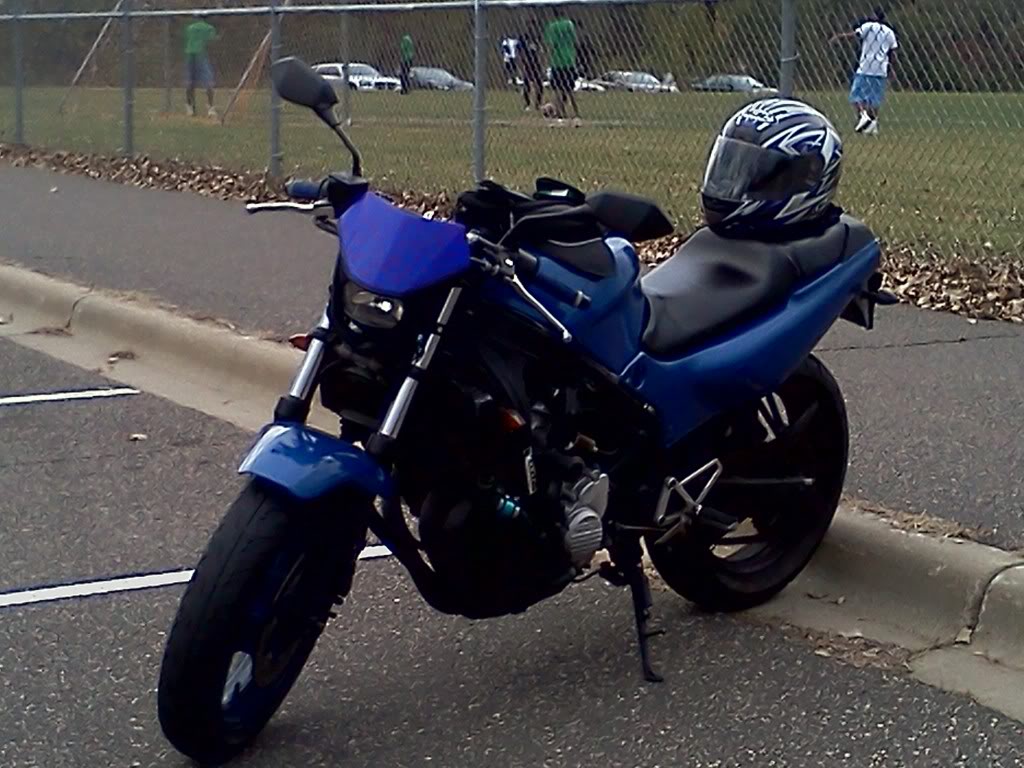
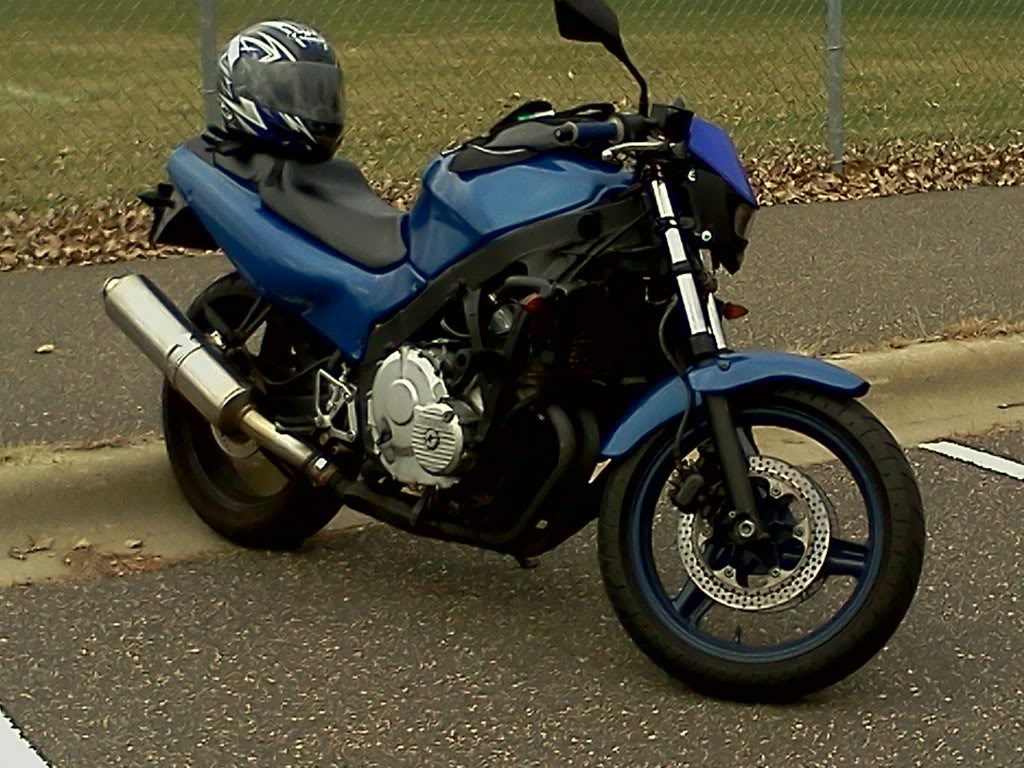
but heres some semi finished pic of how she looks now.
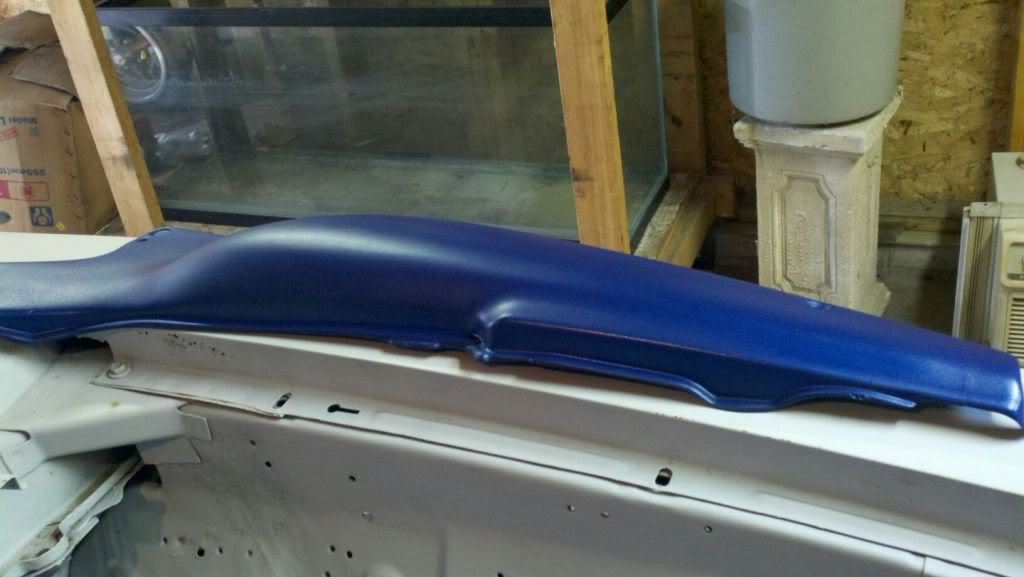
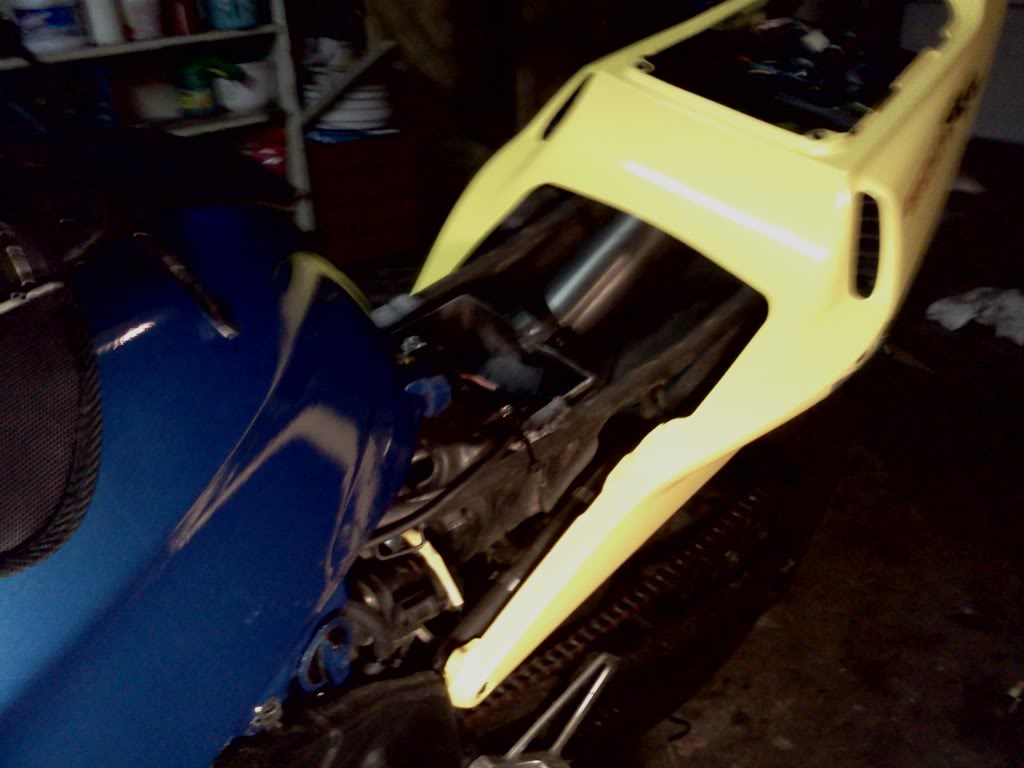
Now that winters getting close im looking to stay busy so i ordered a 600rr tail. Came in the mail today so i had to mock it up

When i got her:
cant tell from the pic how crappy she was. Wouldnt idle, wouldnt start without pushing it, seat was destroyed, gas tank was rusty and petcock was mostly clogged up. most of the plastics were gone and what was left was in rough shape mostly the upper piece. Got it home and started tearing it down within 15 mins.
rebuilt the carbs, changed plugs, kreemed the tank and sprayed some rattlecan primer on her.
it had a nasty looking glasspack type car muffler welded on, that had to go and got replaced with a different header and rc51 pipe for now (came with my parts bike) The middle one was an r6 pipe but i didnt end up using it.
re-covered the seat with marine flex vinyl from joann fabrics, cost under 10 bucks.
after that i just wanted to ride it during the nicest parts of the summer so not alot of progess for a little bit.
A friend had some paint lefto over from painting a mustang and offered to paint it dirt cheap so i took him up on the offer
while i was waiting for the parts back i decided to bedliner the frame because i couldnt stand the weathered silver with rust showing thru.
Starting to look like a motorcycle again
went with a polisport h4 halo headlight and im pretty happy with it.
installed a trail tech vapor to relieve my cell phone from its speedometer duties
added some amazon 10mm mirrors to her using 09 suzuki dl1000 mirror mounts
And then it was more riding time so mods will wait until winter.
but heres some semi finished pic of how she looks now.
Now that winters getting close im looking to stay busy so i ordered a 600rr tail. Came in the mail today so i had to mock it up
Last edited by Boxdgm; 03-31-2012 at 01:50 AM.
#2
03-27-2012, 01:32 AM
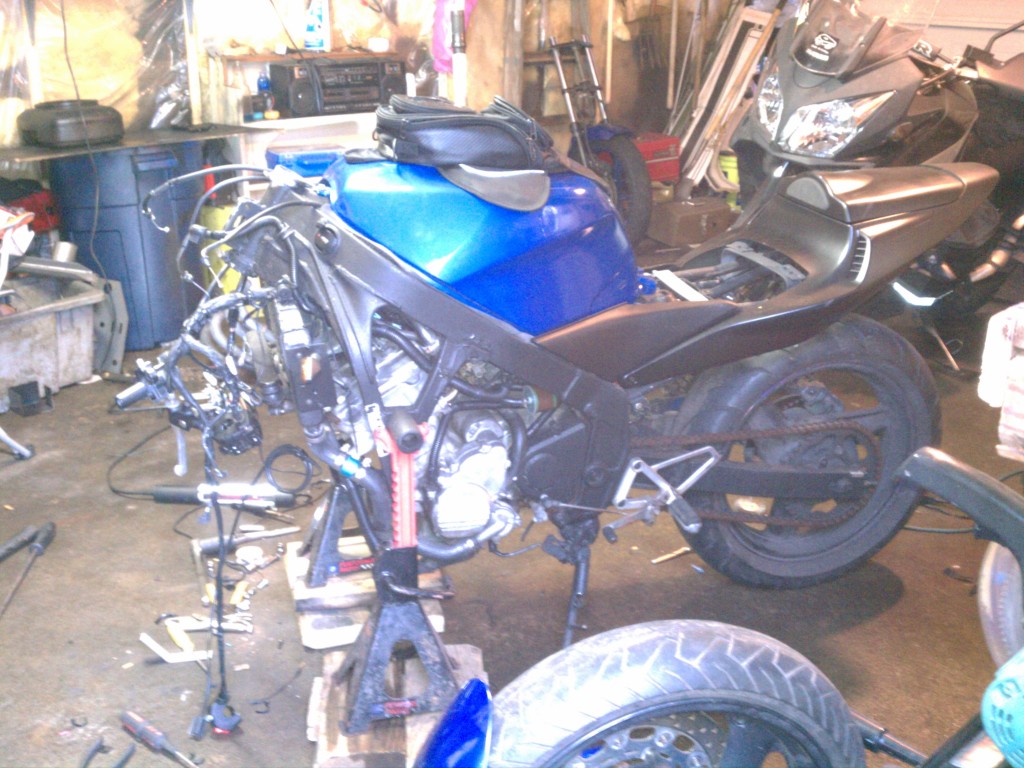
Finally some progress to share, I got the 600rr tail mounted and primered for now till its warm enough to paint.

I know its not the front end i was looking for but for 100$ i couldnt pass it up:
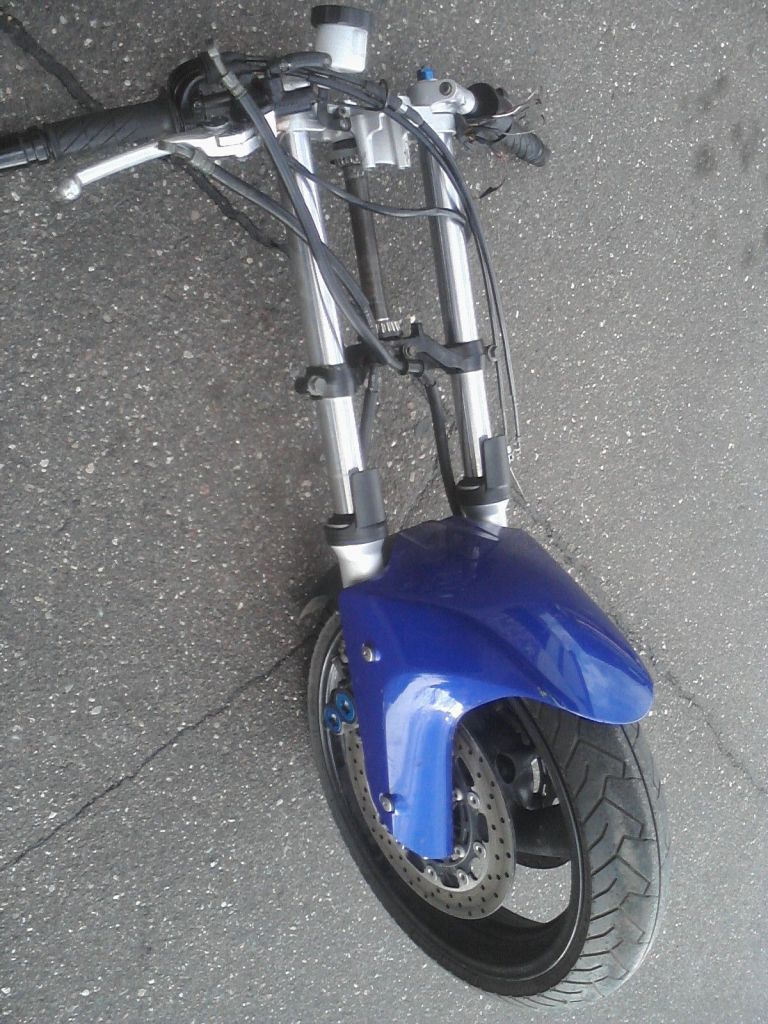

Waiting on the bearings but i got the old front end out and got the new controls wired up to the cbr, Bye bye faded black (gray) and orange 80's style controls.
Ordered a rk 530 rx ring chain and sunstar sprockets, new exhaust gasket for the rc51 pipe, latch for seat cowl and a double banjo bolt for the front brakes so i just gotta wait for everything to show up so i can get this back on the road.
I know its not the front end i was looking for but for 100$ i couldnt pass it up:
Waiting on the bearings but i got the old front end out and got the new controls wired up to the cbr, Bye bye faded black (gray) and orange 80's style controls.
Ordered a rk 530 rx ring chain and sunstar sprockets, new exhaust gasket for the rc51 pipe, latch for seat cowl and a double banjo bolt for the front brakes so i just gotta wait for everything to show up so i can get this back on the road.
#3
03-27-2012, 01:44 AM
I was browsing cl and found a good deal on a xentec hid kit so i had to pick it up. Came with 2 slim ballasts, an h4,h7 and h8 bulbs all brand new for $20.
Too bad all the bulbs are 10,000k so they are a little too blue for me but i still cant complain. Even with how blue the bulbs are the light output is a much welcomed change.
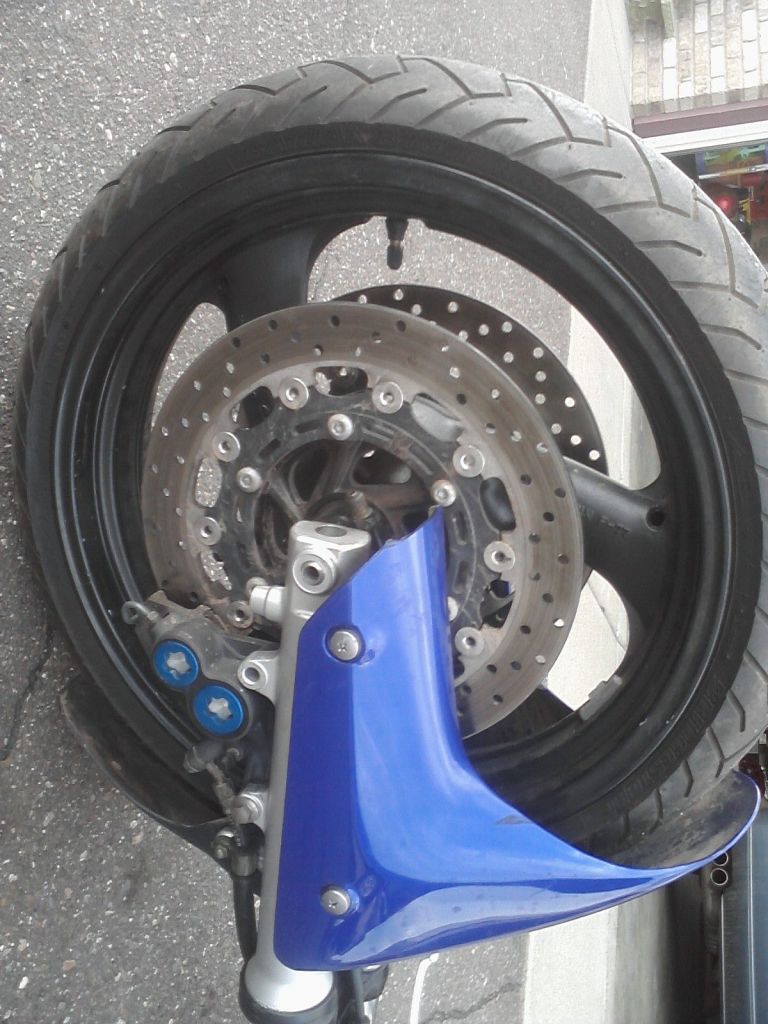
Got the chain and sprockets in the mail just waiting till i get the front end in so i can use the jackstands to hold up the rear of the bike. I plan on painting the rear wheel while i have it off since it looks pretty rough. Its black spray paint on top of purple on top of red compliments of the previous owner.
Got the races in the frame for the steering stem bearings. Put them in the freezer for a few days and they went in without a fight. The lower bearing on the triple sure put up a fight though. Have to run and get a new disc for the cut off wheel tommorow so i can remove it. Should have some progress pics of the new front end installed tommorow if all goes well.
Too bad all the bulbs are 10,000k so they are a little too blue for me but i still cant complain. Even with how blue the bulbs are the light output is a much welcomed change.
Got the chain and sprockets in the mail just waiting till i get the front end in so i can use the jackstands to hold up the rear of the bike. I plan on painting the rear wheel while i have it off since it looks pretty rough. Its black spray paint on top of purple on top of red compliments of the previous owner.
Got the races in the frame for the steering stem bearings. Put them in the freezer for a few days and they went in without a fight. The lower bearing on the triple sure put up a fight though. Have to run and get a new disc for the cut off wheel tommorow so i can remove it. Should have some progress pics of the new front end installed tommorow if all goes well.
#4
03-27-2012, 07:26 AM

Member
she's looking good!
my speedo/gauges look to be just as big as your stock ones, i'm leaning more and more into paying out for the vapor gauges.
side note, in my cage i use my cell from my speedo too lol. it quit on me and the phone was only suppose to be temporary. all i can say is i love my Evo phone hehe
hehe
my speedo/gauges look to be just as big as your stock ones, i'm leaning more and more into paying out for the vapor gauges.
side note, in my cage i use my cell from my speedo too lol. it quit on me and the phone was only suppose to be temporary. all i can say is i love my Evo phone
hehe


#7
03-29-2012, 12:40 AM
Wish i had more progress to share but thanks everybody for the compliments and encouragement.
I got the lower race off the steering stem and put the new dust seal on and drove the new bearing on, went to bolt it together and realized i have about 2mm of vertical play with the preload spanner nut at the bottom of the threads so needless to say it all had to come out. I went and picked up some spacers to go below the lower bearing to make up the length difference but i f'd up the dust seal getting the new bearing off so gotta see if allballs will sell me another seal or ill have to make one.
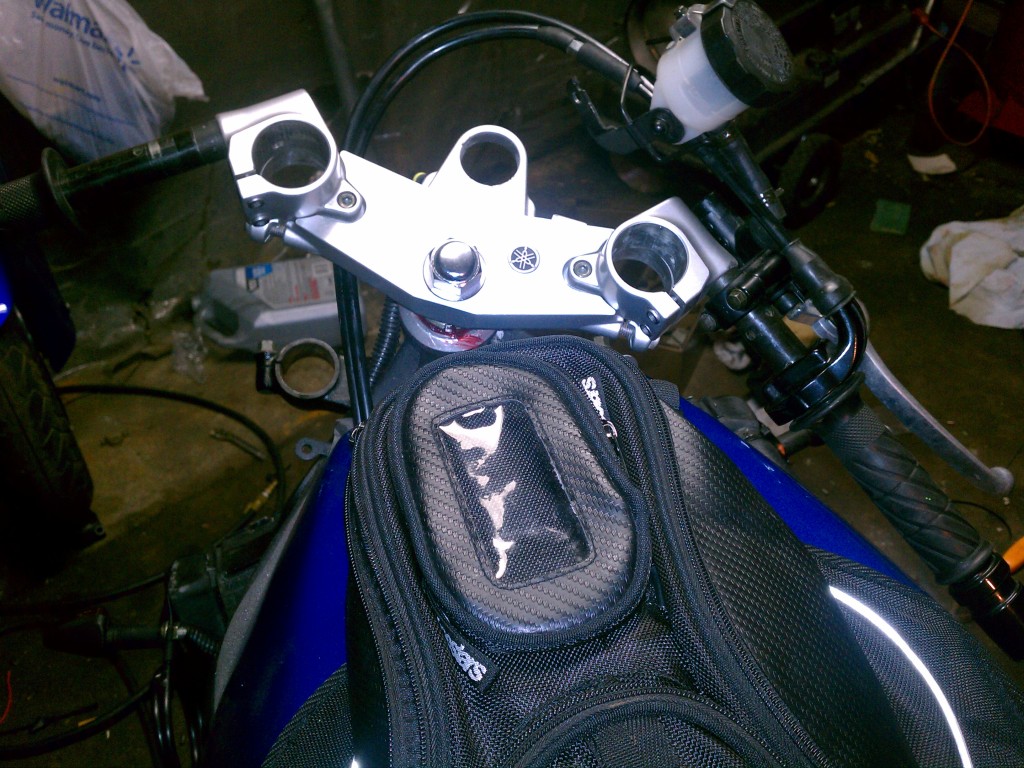
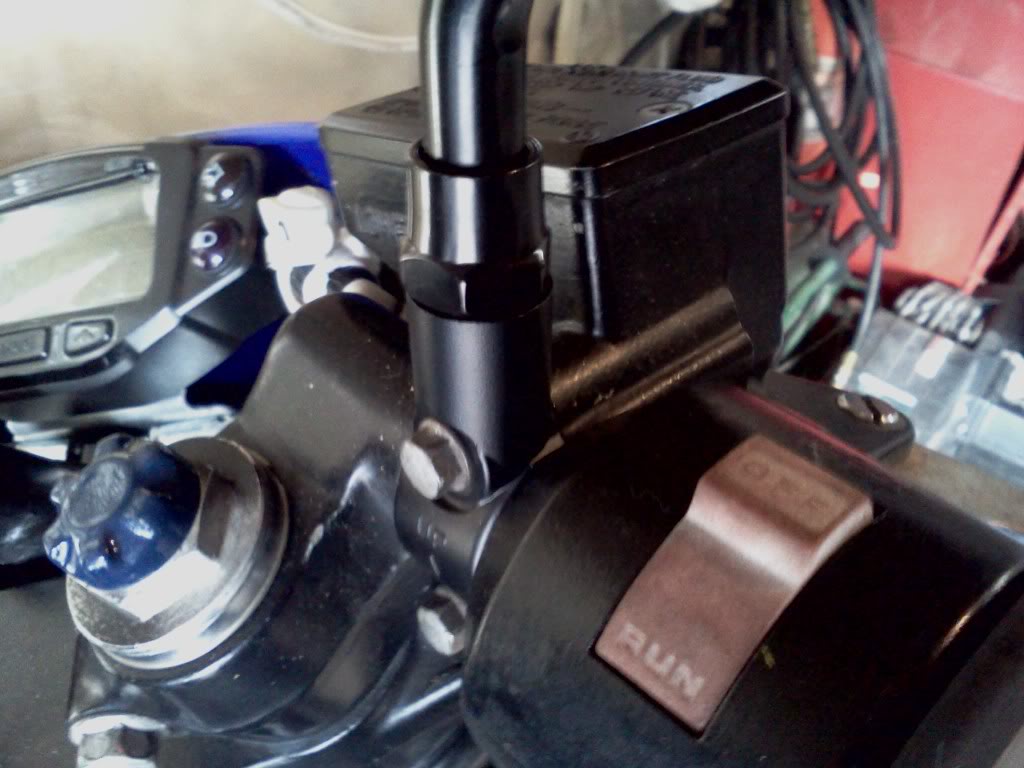
had to reroute the cables as you can see there was way to much extra running them the stock way between the tank and frame. Stock cables were too short and i wanted to use the yamaha controls so i had to use the yzf600's cables but everything works nice and smooth now.
Still have a few small things to finish up like drilling and tapping the new top triple for the cbr ignition, the steering stops are in the right spot where the forks dont touch anything and the bars dont hit the tank but after i space the lower bearing upwards the lower triple will be to low to hit the stops. Ill have to cut out a piece of steel the same shape and size as the factory stop and weld it below it to make it reach. Sorry i dont have more pics to share but its too messy trying to use the phone when my hands were covered in bearing grease.
I got the lower race off the steering stem and put the new dust seal on and drove the new bearing on, went to bolt it together and realized i have about 2mm of vertical play with the preload spanner nut at the bottom of the threads so needless to say it all had to come out. I went and picked up some spacers to go below the lower bearing to make up the length difference but i f'd up the dust seal getting the new bearing off so gotta see if allballs will sell me another seal or ill have to make one.
had to reroute the cables as you can see there was way to much extra running them the stock way between the tank and frame. Stock cables were too short and i wanted to use the yamaha controls so i had to use the yzf600's cables but everything works nice and smooth now.
Still have a few small things to finish up like drilling and tapping the new top triple for the cbr ignition, the steering stops are in the right spot where the forks dont touch anything and the bars dont hit the tank but after i space the lower bearing upwards the lower triple will be to low to hit the stops. Ill have to cut out a piece of steel the same shape and size as the factory stop and weld it below it to make it reach. Sorry i dont have more pics to share but its too messy trying to use the phone when my hands were covered in bearing grease.

#9
03-30-2012, 02:42 AM
Not a big update but progress none the less. Called up allballs and they were very helpful and understanding. I thought id end up having to buy a new bearing just to get another seal but he offered to send me out a new dust seal and wouldnt even let me pay them for it. Great company to deal with.
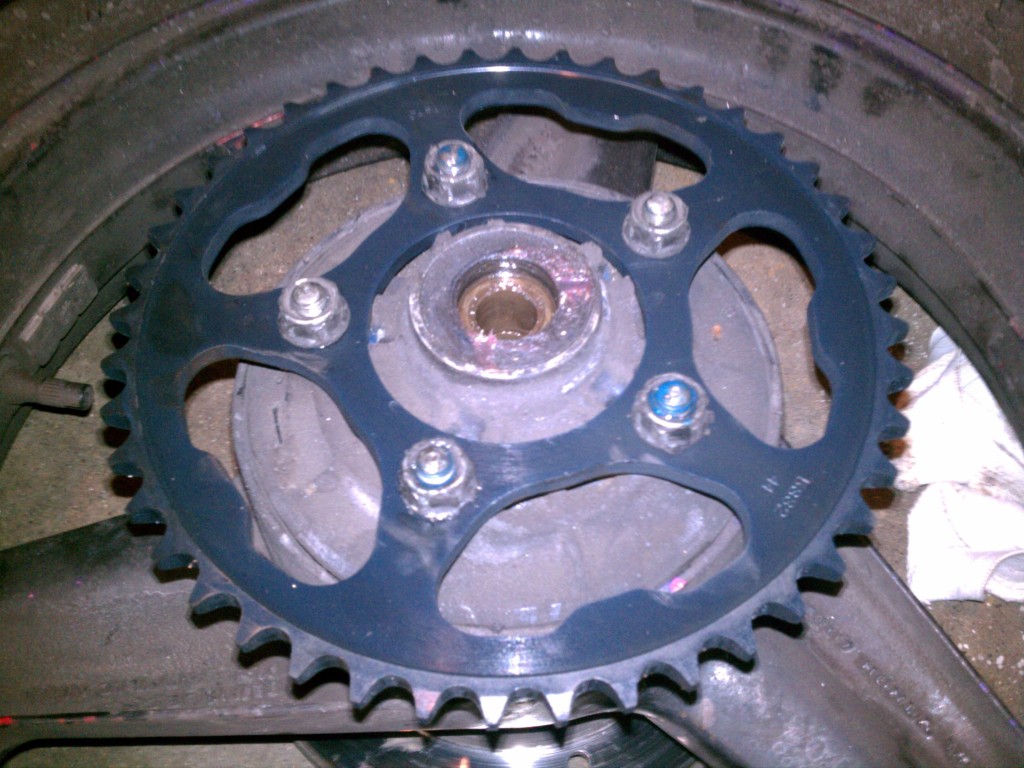
Installed the new chain and sprockets while im waiting for the last couple pieces i need to come in the mail.
After i took the pic i sanded all the coats of paint of the rear wheel and hit it with some primer. im going to finish it by painting it black tommorow just to match the front wheel.
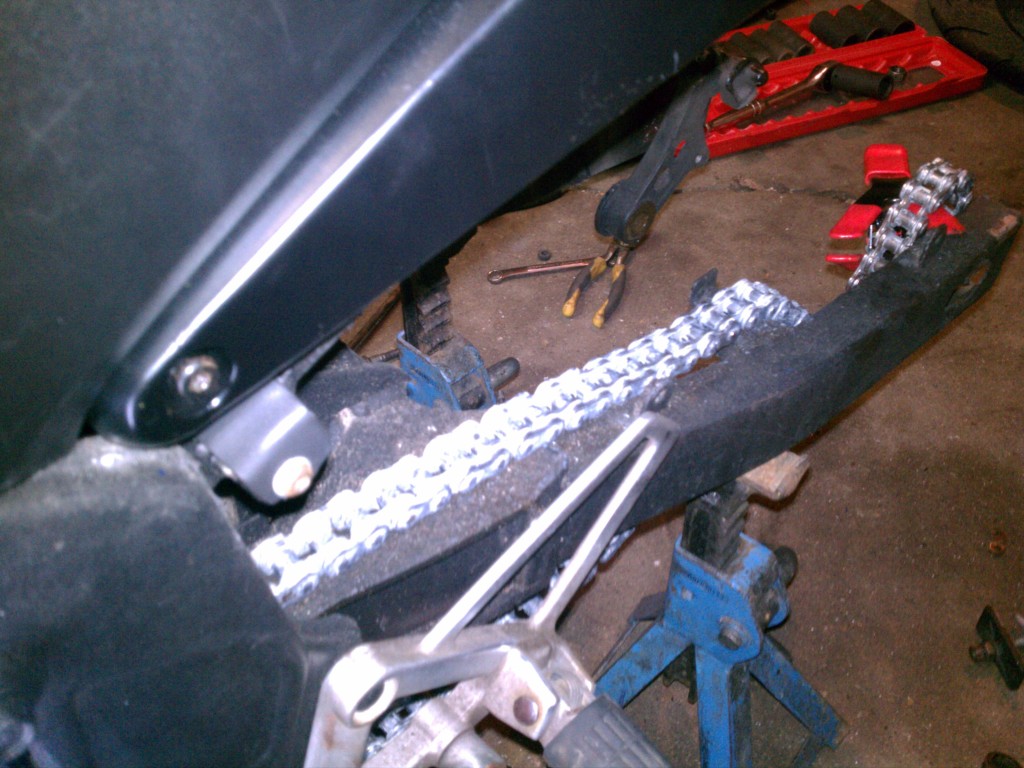
Went with stock gearing sunstar steel sprockets and an RK x ring 530 chain. I lucked out on the rear sprocket and found a brand new one on ebay for 13$. Took a little longer than normal to receive because the seller misplaced it and had to order another one for me but still charged me the same even though he ended up losing about 30 bucks having to order another one.
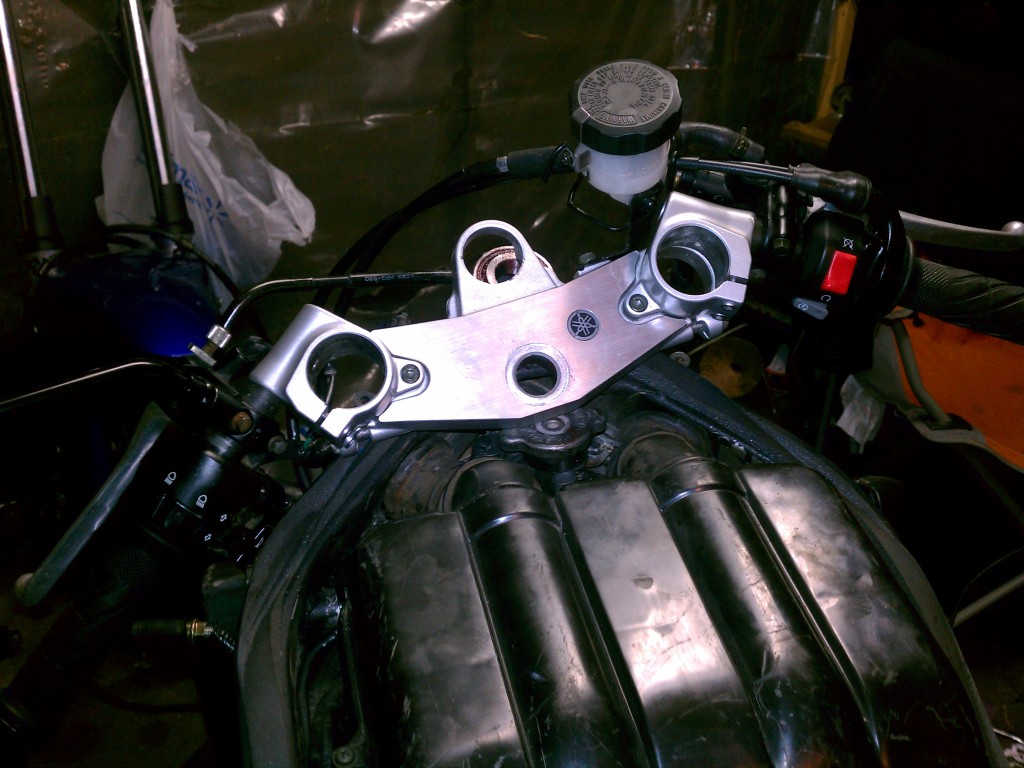
Heres another shot of how the throttle cables sit now without all the extra length. Got all the controls mounted and working and wow do they look better than the stock ones. These dont have a choke cable but im going to go with a 900rr cable with the pull **** instead and just mount it to the frame.
As soon as i get the rest of the pieces i need i should have some solid updates for you guys.
Installed the new chain and sprockets while im waiting for the last couple pieces i need to come in the mail.
After i took the pic i sanded all the coats of paint of the rear wheel and hit it with some primer. im going to finish it by painting it black tommorow just to match the front wheel.
Went with stock gearing sunstar steel sprockets and an RK x ring 530 chain. I lucked out on the rear sprocket and found a brand new one on ebay for 13$. Took a little longer than normal to receive because the seller misplaced it and had to order another one for me but still charged me the same even though he ended up losing about 30 bucks having to order another one.
Heres another shot of how the throttle cables sit now without all the extra length. Got all the controls mounted and working and wow do they look better than the stock ones. These dont have a choke cable but im going to go with a 900rr cable with the pull **** instead and just mount it to the frame.
As soon as i get the rest of the pieces i need i should have some solid updates for you guys.
#10
03-30-2012, 04:05 PM
