When you click on links to various merchants on this site and make a purchase, this can result in this site earning a commission. Affiliate programs and affiliations include, but are not limited to, the eBay Partner Network.
How To: Stick Coil Modification for the Honda CBR1000F - Picture Intensive
NOTE: Edited 05/07/2013 to correct minor wiring error.
This modification of the CBR1000F is replacing the OEM coil set up with stick coils from a suitable donor bike.
Now this mod is not going to give you a great boost in horsepower but will give you potentially less problems than the stock coil/lead setup with HT leads and ropey connections. It's also lighter than the OEM setup by about 750g.
(There is a disclaimer for this as well: This is not a recommendation or potentially correct upgrade for your bike - undertake at your OWN risk!!)
So, first identify and purchase the correct stick coils. I had two choices, stick coils from a CBR100rr or those from a Suzuki GSX-R600. The important factor is the resistance (Ω) of the stick coil. Also source a loom with the correct connectors for the stick coils of your choice.
To measure this, set your voltmeter to the lowest Ohms Ω setting. Then touch the two probes together and read the resistance of the voltmeter. Note this base value of the leads down.
The coils must be 1.0 to 1.3 ohms each - measure this with a Volt/Ohm Ω meter - and check the Ohms of the connected probes before measuring the Ohms of the coils - a probe on each coil connector (+ and -) then subtract the base ohms of the leads and you have the ohms of the coil. This is important because we are going to wire the coils up in series and total Ohms should be between 2.0 and 2.6 Ohms for a pair of stick coils. This equates to the Ohms of the OEM set-up.
Primary resistance of the CBR1000F OEM Honda coil for 2 plugs is 2.0 to 2.6 Ohms (Ω) . That means that pairs of stick coils must be in this range - or single stick coils 1.0 Ohms to 1.3 Ohms.
The CBR stick coils checked out at 1.1 Ohms each and the GSX-R stick coils at 1.2 Ohms.
So, we are going to change all this……………………………………..
To this
Via this.............
So, if you you have your coils and loom, you will also need some type of connector to connect the loom into the OEM wiring, some solder and a soldering iron, electrical tape, heat shrink and some corrugated plastic covering for the wires (if you are a pedant like me). Also have the above wiring diagram handy for reference. Have every thing ready for the ‘off’………
I made up a cardboard template of the head with centre spacings of 80mm for plugs 1 and 2 and 3 and 4 but 150mm for the gap between plugs 2 and 3. Punch a hole in this and site your stick coils in them.
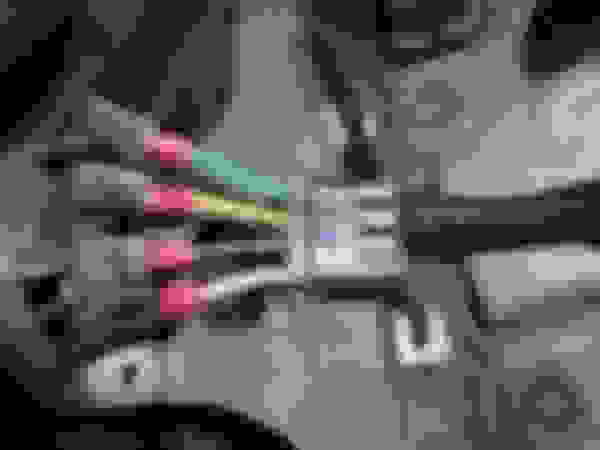
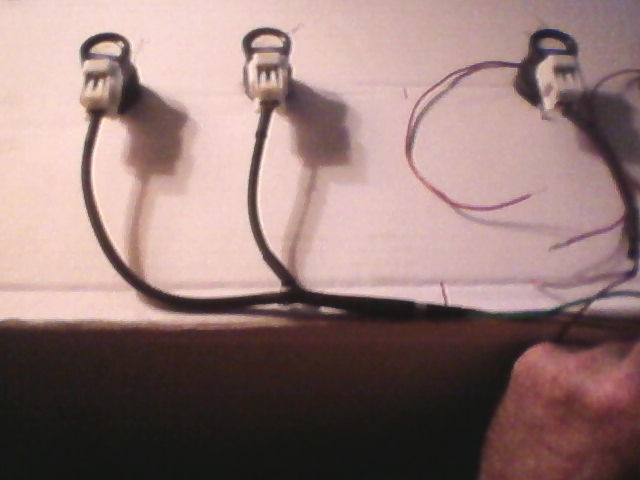
Your next choice occurs now, you can have the stick coils facing forward or backward, and make up the loom accordingly. I cjose to have the coils facing the rear of the bike with a slightly longer loom that I could place towards the back of the head behind the fuel tank stay. Plug in the loom, unwrap the electrical tape and clip off the wires from the plug leaving about 3-4 cm or wire on each plug. You may note that the Honda CBR100rr harness has 5 wires – one is a common earth which we will not be using. Just the two wires from each of the stick coil plugs. Follow the wiring diagram above and lay out your wires for soldering.
Place heat shrink near where it is to be used, solder up all the joints, and sit back and marvel at your work. Once everything is in place and tidy, I use very small cable ties and electrical tape to get everything exactly in position.
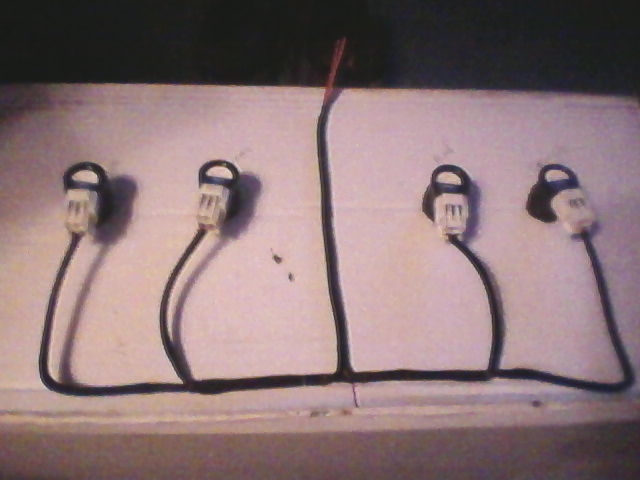
Then I wrap the lot with corrugated plastic tubing for yet more protection.
The loom is now ready to install in your bike. The next practicality is ensuring the plugs and stick coils are waterproofed. I cut the grommets off the old coil set-up because I know I won’t be going back to the OEM coil setup J.
Bend to top grommet/cover back and cut carefully around the plug post. Cut as evenly as you can because this will become the seal against the stick coil. Alternatively you can find some other rubber protection that seals the plug well when the stick coil is in place.
Original cover cut off……………and fitted. You want the centre hole large enough that you don’t get too much of a “Chinaman’s Hat “ as this puts upwards pressure on the stick coil and may pull it off the plug. A bit of trial and error will see the stick coils seated and the cover grommets sitting flat on the valve gear cover.
Now we’re set to put the stick coils and loom in the bike and do the final connections to the original loom.
So, proceed to your bike, remove the seat, undo the two 8 mm bolts at the front of the tank and lift your tank and set it on the stay. There is no need to remove your tank.
There are 4 x 10 mm bolts that need to be undone that fix the OEM coil set up to the frame – just behind the head stock. Remove the original plug tubes from the wells/spark plugs – this is if they were not removed before for cover ‘salvage’ operations! Carefully undo the 4 spade connectors to the original loom.
Sitting on the bike from left to right the spade connectors will fire the plugs in: Cylinder 1 Cylinder 4 Cylinder 2 Cylinder 3
I made up a small joing loom to allow me to easily unclip one connector if I have to remove the loom for any reason. Small connector loom clipped in to original harness.
You can see under the connector a cable tie that I ran through the holes where the OEM coils were located. I passed the cable tie through and pulled it tight as a guide to locate and protect the new loom/connector.
Check all connectors are tight, your stick coils are seated correctly, the cover grommets sitting flat over the top of the spark plug wells. Check that all tools are out from under the tank, drop the tank and start the bike.
Hopefully, there should be no problems and your bike should now start easier, idle smoother and generally provide a better spark than the decade(s) old system you have just replaced. While doing this mod – it may be worth investing in new spark plugs as well.
If you would like you can PM me with an email address and I will send a PDF of this How To and a printable wiring diagram. Hope this clarifies the procedure. Cheers, SB
Note: Edited 11/03/20 to replace all photos after the Photobucket debacle
Last edited by Sebastionbear1; 03-10-2020 at 06:54 PM.
Reason: Update corrections to wiring diagram
Great write up! Maybe people could also list here the types of stick coils they have used successfully to make chasing a set up a bit more easy than having to get a set and then check ohms.
WHAT PITA the only heat shrink I could find was a size too small so I had to stretch each piece! I should have just gone and bought more but I'm stuck in the chair anyway for the day. Well at least till I gotta drag a bucket of water from the Waterbed to the tub!
Sorry about the lousy quality pics but all I got is a crappy phone.
 06-30-2012, 06:09 PM