Clutch slave/master cylinder rebuild
#1
 10-22-2012, 07:07 AM


Guys,
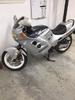
Rebuilding the clutch master and slave cylinder is a very easy job and can be done in a couple of hours or less. The parts are readily available on Fleabay and fit fine. I'm not totally across how to put pics and a description in here so I'll do the step by step first and attach the pics at the end.
Tools you will need :
Socket set, phillips/flat screwdrivers, inward grabbing circlip pliers ( fine pointed ), Mighty Vac ( not essential but far easier than normal bleeding ), plenty of rag, small shifting spanner.
1. First off with the side fairings so you can get to the slave cylinder. Bleed the system entirely of all fluid. I used the Mighty Vac which did it in seconds with little mess.
2. Remove the slave cylinder by undoing the three bolts. Then take out the bleed nipple and undo the banjo bolt making the slave free form the bike.
3. Using a flat screwdriver ease out the rubber seal that sits in the middle of the piston. Then bang the slave on your other hand until the piston comes free. Mine came out pretty easily. You will then be left with the piston, spring and seal still on the piston. replace all parts with the new ones. Give the piston a clean and sit to one side ( with the new seal on it ).
4. Now take the slave cylinder and clean it thoroughly getting all the old deposits of fluid out of there. Scrape the old gasket of the slave as well as the surface the gasket rests on the bike.
5. Put some teflon tape or plumbers tape around the thread of the bleed nipple and screw it back into the slave. This stops any air getting in there during the refill stage ( Thanks Sprock for that tip ).
6. I then reassembled the slave by putting the piston and spring back in and the rubber seal in the centre of the piston. Then reattach the slave to the bike using a new gasket. Tighten up the bolts and also re attach the clutch line with the old banjo bolts and washers. I didn't need to put new ones on but if you want to that's up to you.
7. I then went to the master cylinder and removed it from the bar. Take off the lever as well. Don't drop the little rod that goes from the lever to the piston. Also undo the banjo bolt and retain the washer if your not replacing them.
8. Using your fingers or long nose pliers pull the rubber boot from the master cylinder. Then using fine pointed inward working circlip pliers ease out the circlip. You can use the long nose pliers to pull out the piston and spring from the master. Once all parts are out, thoroughly clean the master cylinder. Mine had a large amount of deposit/gunk in one end of it that would have amounted to almost half the capacity of the fluid reservoir. I was surprised at what was in there. Using cotton tips get all the deposits out of there and clean the sight glass as well. See my pics for how clean they can be.
9. I then went into the area where the piston sits and thoroughly cleaned in there. Looking into it you will see a small hole up the end. Make sure that is clean and all deposits are out of the piston bore. Replace all parts and reassemble the piston into the master using the new circlip that comes in the kit.
10. Clean the banjo bolts and the connection on the end of the clutch line making sure no old deposits remain in there. Re attach the lever and actuate it making sure its all working fine.
12. Refill the system with fresh fluid. Again I used my Mighty Vac which had it up and running in about one minute. Really if you are doing this job or any bleeding job with out a Mighty Vac or similar product you are doing yourself a diservice. Very little mess and gets every bit of air out of the line.
13. Re attach the master to the bar and operate the lever making sure it all working fine. Its amazing how some new springs and fresh fluid can make a tired system new again.
This really is an easy DIY job that with the right tools is made even easier. Good luck guys !


#6
04-14-2013, 01:28 AM

Good job Bordo, I was inspired to give it a go myself, and yes it is an easy job, don't think I even swore once. I was a bit hesitant to shell out $170 odd for the mighty vac though, I did it the ol fashioned way(pulling lever and nipping up bleed valve) it only took a couple of extra minutes. I would say the mighty vac was hardly worth using on this job as gravity gets rid of most of the air bubbles for you, but bleeding something like a linked brake system would be a different story, it would be worth it's weight in gold then!
#7
04-14-2013, 02:18 AM

June 2013 ROTM
#8
11-21-2017, 04:18 PM

#9
12-12-2017, 11:43 AM