How-To: Garage Door Opener Using High Beam Switch
#1
 03-15-2008, 07:20 PM


Join Date: Oct 2005
Location:
Posts: 792
Likes: 0
Received 0 Likes
on
0 Posts
Ok guys, here is how to wire most garage door openers to work with most bikes using the high beam switch to activate the opener. Here is what you need:
-Garage door opener (obviously)
-Regular 12v relay (one that can be soldered to a circuit board) LINK
-16g or so wire
-Pre-punched circuit board LINK
-1K uf capacitor LINK
-3 10K resistors LINK
-Soldering iron and solder
-Wire cutters and strippers
-Heat shrink or electric tape
Ok, so the way this works is pretty simple. We build a momentary relay, so that when you turn your high beams on it activates your garage door opener for a second. This way, when you are riding around with your high beam on, your garage door opener is not constantly being pushed down and wasting battery. Im not going to go into specifics on how to actually solder and make circuits, but rather just show you how to set up this circuit. If you have any more questions, feel free to ask here or PM me. Oh yea, and I'm not responsible for any damage you do to your bike. If you don't feel comfortable soldering, you might want to skip this.
To start, make sure everything will be compatible with your bike and opener. With the opener, you have to take the case off and find the button on the circuit board that opens your door. We solder 2 wires to each side of the button contacts so that we can activate the opener by touching the two wires together. If you can get this far, you should be good to go.
Now, your bike has to have a switched 12v for the high beams in order for it to work correctly. It should work with all F4is, and any other bike with a switched 12v high beam wire. On the F4i, you will need to take off your headlight to solder in an extra wire to use. On the wiring harness on the bike (make sure you solder to the one on the bike, not on the headlights), right where the headlight connects with that big grey plug, you will need to find the WHITE wire, which is the switched 12v for the high beam (this will probably be different on other bikes, so check in your service manual to find out what color yours is). Now be careful here, because you have to cut this wire a few inches from the harness, and if you mess up you won't be able to turn on your high beams any more. Strip both ends of the cut part about 1/4 of an inch, and solder them back together with another wire soldered to the joint (don't forget heatshrink if youre gonna use it). So, you should have your wire back together where you cut it, with the addition of another wire soldered to the same joint. Make sure you use a wire that is long enough to reach wherever you want to mount your opener (I put it under the seat). Finish it with heatshrink or electrical tape and put your headlight back on.
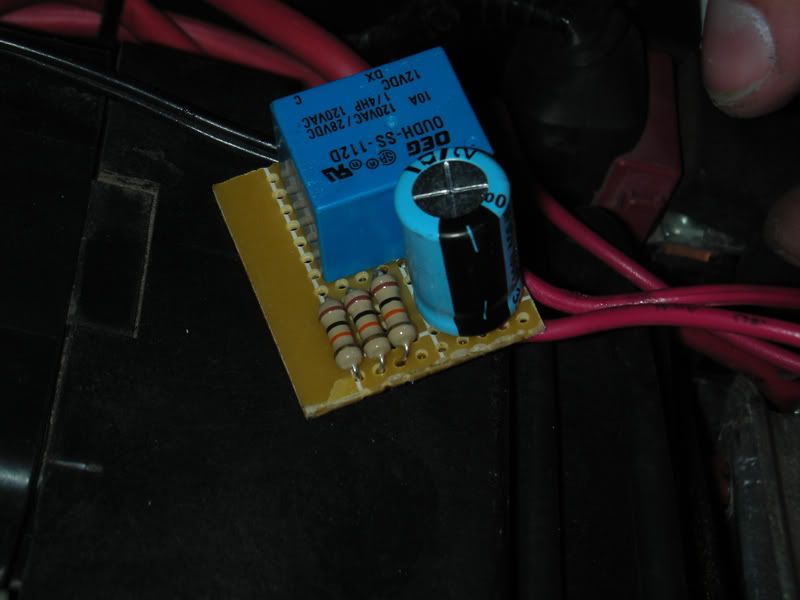
Now we build the circuit. I got the following diagram from http://www.the12volt.com/relays/page5.asp:
(If you dont know what a relay does or how it works, read about them HERE)
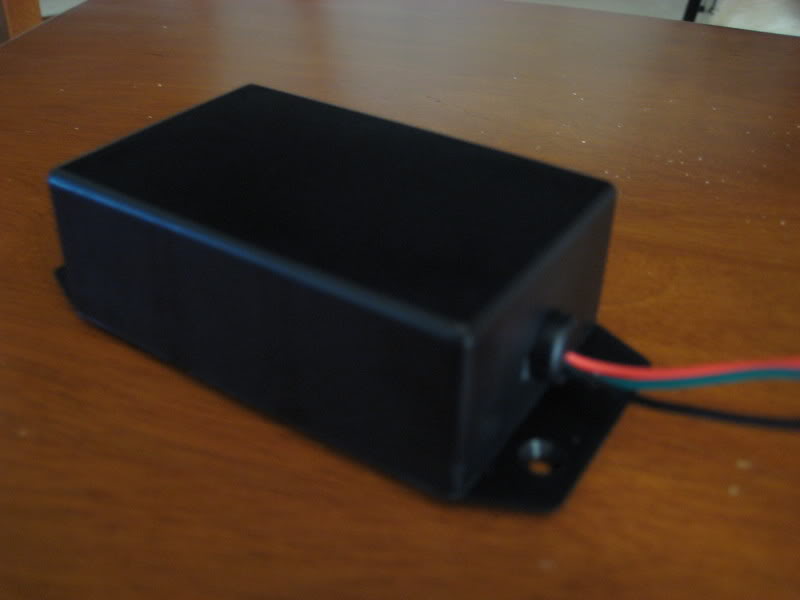
Now, the only change that i made was that i used 3 10k resistors in parallel instead of just 1. This gave me about 1 second that the garage door opener would be on. Here is what mine looks like:
-Garage door opener (obviously)
-Regular 12v relay (one that can be soldered to a circuit board) LINK
-16g or so wire
-Pre-punched circuit board LINK
-1K uf capacitor LINK
-3 10K resistors LINK
-Soldering iron and solder
-Wire cutters and strippers
-Heat shrink or electric tape
Ok, so the way this works is pretty simple. We build a momentary relay, so that when you turn your high beams on it activates your garage door opener for a second. This way, when you are riding around with your high beam on, your garage door opener is not constantly being pushed down and wasting battery. Im not going to go into specifics on how to actually solder and make circuits, but rather just show you how to set up this circuit. If you have any more questions, feel free to ask here or PM me. Oh yea, and I'm not responsible for any damage you do to your bike. If you don't feel comfortable soldering, you might want to skip this.
To start, make sure everything will be compatible with your bike and opener. With the opener, you have to take the case off and find the button on the circuit board that opens your door. We solder 2 wires to each side of the button contacts so that we can activate the opener by touching the two wires together. If you can get this far, you should be good to go.
Now, your bike has to have a switched 12v for the high beams in order for it to work correctly. It should work with all F4is, and any other bike with a switched 12v high beam wire. On the F4i, you will need to take off your headlight to solder in an extra wire to use. On the wiring harness on the bike (make sure you solder to the one on the bike, not on the headlights), right where the headlight connects with that big grey plug, you will need to find the WHITE wire, which is the switched 12v for the high beam (this will probably be different on other bikes, so check in your service manual to find out what color yours is). Now be careful here, because you have to cut this wire a few inches from the harness, and if you mess up you won't be able to turn on your high beams any more. Strip both ends of the cut part about 1/4 of an inch, and solder them back together with another wire soldered to the joint (don't forget heatshrink if youre gonna use it). So, you should have your wire back together where you cut it, with the addition of another wire soldered to the same joint. Make sure you use a wire that is long enough to reach wherever you want to mount your opener (I put it under the seat). Finish it with heatshrink or electrical tape and put your headlight back on.
Now we build the circuit. I got the following diagram from http://www.the12volt.com/relays/page5.asp:
(If you dont know what a relay does or how it works, read about them HERE)
Now, the only change that i made was that i used 3 10k resistors in parallel instead of just 1. This gave me about 1 second that the garage door opener would be on. Here is what mine looks like:
Last edited by axsys; 12-18-2014 at 09:20 AM.
#2
03-15-2008, 07:46 PM

AXSYS,
Really good writeup. I like the use of the light switch. I have mine in my inside pillar, but your location and use of the headlight switch is a clever idea. I was wondering when I did mine if you could use the blinker push button to do this same thing, I didnt do alot of research, just found it easier to use a MOM push button in the pillar. Just wondering if you gave any thought to other switches?
Cletus
#3
03-15-2008, 08:21 PM
Join Date: Oct 2005
Location:
Posts: 792
Likes: 0
Received 0 Likes
on
0 Posts
Cletus,
I originally wanted to use the signal cancel button as the switch for my opener, but found out that the turn signal switch is more mechanical than electrical. When you turn on a signal, a little plate inside the switch is moved either left or right depending on which signal you turned on. When you cancel the signal, it just puts the plate back in the middle so that neither left or right are selected. It doesn't push a switch or anything, and therefore there is no wire or switch in the turn signal housing for when you push the button in.
As far as other buttons go, the only options were the kill switch and the starter switch (both ideas are bad for obvious reasons) or the horn switch. I didn't want to be honking my horn when I come home late at night, so thats why I chose the high beam switch. You could wire it to the horn if you wanted to, all you would have to do is cut a different wire on the harness.
Last edited by axsys; 12-18-2014 at 09:20 AM.
#4
03-20-2008, 04:11 PM

Senior Member
Join Date: Apr 2007
Location:
Posts: 322
Likes: 0
Received 0 Likes
on
0 Posts
#5
03-21-2008, 06:50 PM

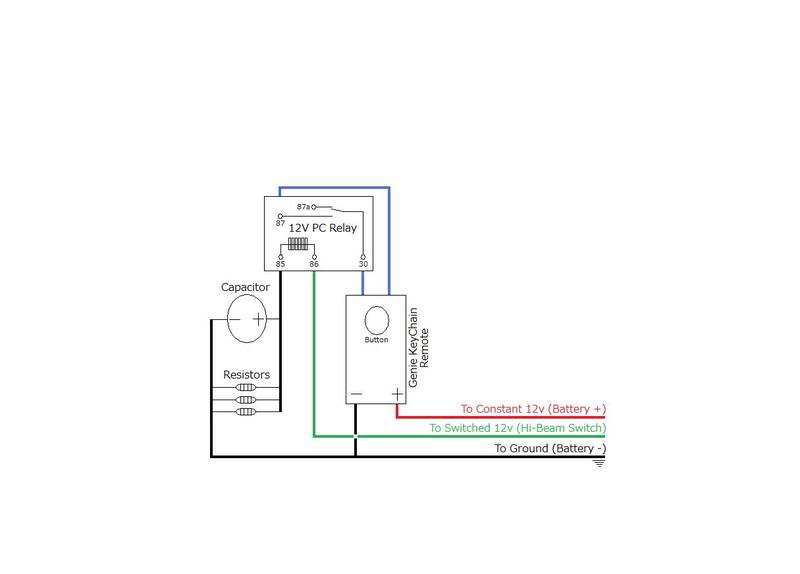
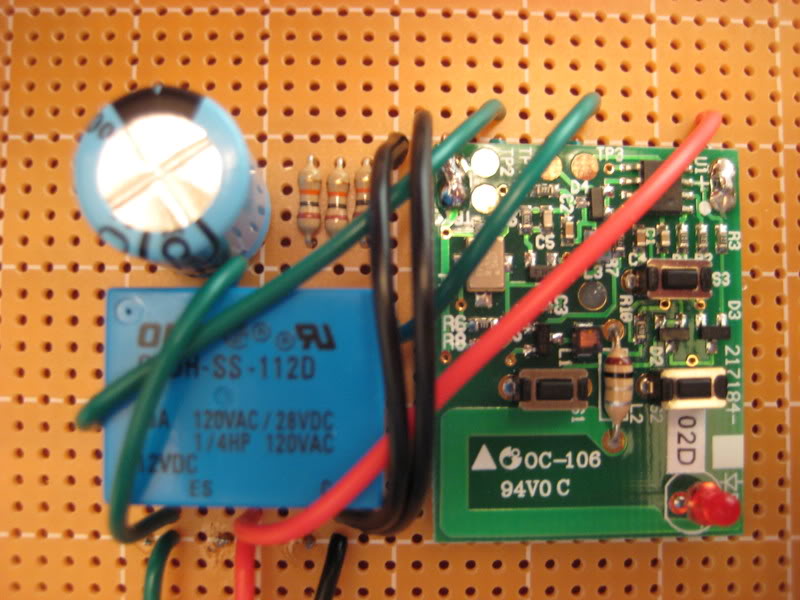
Thanks for taking the time to write this how-to. The solderable relay doesn't look like the one in the diagram so I took a few minutes to draw a diagram of what I did. Instead of worrying about my remote battery going dead I placedthe opened remoteon the same board as my project and wired it directly to the battery on my bike. I now never have to worry about changing the battery. In the interest of saving room on the board it's not exactly like the diagram but the diagram shows how I wired everything. Here are a few pictures... let me know what you think.
1st Photo - Diagram
2nd Photo - Board Front
3rd Photo - Completed Project
=
1st Photo - Diagram
2nd Photo - Board Front
3rd Photo - Completed Project
=
#6
03-22-2008, 01:22 PM
Join Date: Oct 2005
Location:
Posts: 792
Likes: 0
Received 0 Likes
on
0 Posts
wjerlinger, that looks really good! you're lucky that your opener uses a 12v battery so that you don't have to be worried about the battery dying. also, your wiring diagram looks nice as well and will definitely help some people. thanks for adding to this thread!
#7
03-25-2008, 07:33 PM

Senior Member
Join Date: Aug 2006
Location:
Posts: 1,284
Likes: 0
Received 0 Likes
on
0 Posts

#9
03-28-2008, 03:26 PM
Join Date: Oct 2005
Location:
Posts: 792
Likes: 0
Received 0 Likes
on
0 Posts
#10
03-29-2008, 11:58 PM
Yeah, mine acts the same way. If i turn the high beams on and off fast, then the garage door opener only goes off once. If I turn thehigh beamson and let it sit for 3 secs or more and then turn the high beams off, the garage door opener goes of 2 times, opening and closing.
I'm thinking this has something todo with the capcitor,when you pull the switched 12v line high andthe capacitor charging up to 12v within the xamount of time, your garage door opener will go off, then when you turn the high beams off and pulling the switch 12v line low, the relay sees 12v applied again(since the capacitor is at 12v), and will once again flip the relay and telling the garage door opener to go off again...
I'm thinking this has something todo with the capcitor,when you pull the switched 12v line high andthe capacitor charging up to 12v within the xamount of time, your garage door opener will go off, then when you turn the high beams off and pulling the switch 12v line low, the relay sees 12v applied again(since the capacitor is at 12v), and will once again flip the relay and telling the garage door opener to go off again...

