How To: Clean your carbs
#61
 03-04-2011, 01:10 PM


The carb bank is a major pita to pull them off. I used a crowbar and a couple of pieces of wood to very carefully leverage them off. Getting them back on is near equally difficult.
In the bowls there are three protusions into the fuel. The main and pilot jets, and this third piece that I couldn't remove that had a small hole in the bottom of it. Not sure what its for, maybe the enricher circuit. Clean everything best you can and just be slow and methodical.
After running some in-the-tank carb cleaner the bike seemed to idle a little better on its own. There is still a bad stumble before the bike fully warms up that if I crank the throttle from idle the bike will stall. I haven't put the body work back on yet because I want to see how it gets in some warmer weather and after I run it a few more times. If this doesn't clear up I'll have to take it apart again.
#62
07-08-2011, 02:14 PM

The write up is nice and I've been able to basically get to where I'm looking at the carbs, all of the clamps and hoses disconnected or loosened, however I am unable to find these band screws that you are supposed to access through the hole in the side of the frame?
Anyone have a pic of the band/screws? I have a long screwdriver that is more than capable of reaching but don't know what Im looking for.
Help is much appreciated. I wanna ride so bad
Anyone have a pic of the band/screws? I have a long screwdriver that is more than capable of reaching but don't know what Im looking for.
Help is much appreciated. I wanna ride so bad
#63
07-30-2012, 02:44 PM

****HOW TO CLEAN THE IDLE JET** Bike not idling, only idles with choke on, LOW RPM sucks, with no power at low RPM
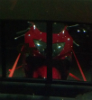
On the picture above, looking down into the float bowl. Those 3 little brass things, 2 of which have slots for a screwdriver, take a very well matched screw driver to the little one, apply some downward pressure, they are in there a little tight. Take it out and try to look through it. you should see a hole a little bigger than a fishing line, if it is really small, or you cant see through, it needs to be cleaned. Take some carb cleaner, and that jet, and soak it in a pool of cleaner for about 15 mins. Take it out of the cleaner, and get some fishing line, push it through the jet, through that tiny hole, then ones its all the way through spin it on the line to get all the junk loose. Take the line out and put the jet back into the cleaner. swirl it around, take it out and wipe it down, apply more cleaner. re-install, pushing down on the screwdriver to not strip it. Then just reassemble, and your good to go.
If your bike is only not running well on idle, and low rpms, you only have to clean this!!
[IMG]local://upfiles/19490/A1D901927F3B434CA2AFD5CD3BF2C620.jpg[/IMG]
Craig
#64
08-02-2012, 10:01 AM

First off NEVER clean jets with wire !
Use a piece of nylon or you will scratch the inside of the jets.
I think you're referring to the "emulsion tubes" which have jet holes down the sides, and no you can't look straight through them and see light. The fuel is pushed in through the small spray holes which if blocked will cause lumpy idling and other issues.
#65
08-10-2012, 09:18 AM

#66
08-10-2012, 04:13 PM

Member
Join Date: Aug 2012
Location: atlanta
Posts: 54
Likes: 0
Received 0 Likes
on
0 Posts
#67
03-23-2013, 04:57 PM
Member
Join Date: Aug 2012
Location: Baltimore, MD
Posts: 87
Likes: 0
Received 0 Likes
on
0 Posts
I bought a big crowbar to pry off the carbs once I had the 4 clamps loosened. They are on there very snug. Rub some pb blaster or wd-40 on the inner lips of the rubber isolators before you try putting the carbs back on the engine. It helps get them back on.
I took these two pics to help show how to access and loosen the 4 band clamps.
I took these two pics to help show how to access and loosen the 4 band clamps.
#68
05-21-2013, 10:06 AM

Junior Member
Join Date: May 2013
Location: Sycamore, IL
Posts: 23
Likes: 0
Received 0 Likes
on
0 Posts
Is the Slow Jet the same as the Idle Jet or the Pilot Jet mentioned in this thread (I've seen it mentioned both ways)? The Service Manual labels a Pilot Screw located BELOW the 3 protrusions. Is this the same as the Pilot Jet? If so, it sounds as though a special tool is required to remove this, and it's important to count the number of turns until it seats lightly to use as reference for reinstallation.
It sounds as though the Pilot Jet is the most important one to be cleaned. When I cleaned my carbs, I didn't remove the Pilot Screw because I only saw the 3 protrusions mentioned here. Now that I've looked at the Service Manual, I'm thinking that maybe I missed a critical step.
Edit: I was sent a great link by another member here that answers a few of my questions... figured I'd pass it along...
http://www.weeksmotorcycle.com/carb-jets.html
Last edited by dja1980; 05-21-2013 at 01:53 PM.
#69
05-26-2013, 10:16 PM
Junior Member
As for the actual cleaning and what to use...
I have been reading about the use of lemon juice to clean the carb bodies, float bowls and brass. It is said in many if the places I found commentary that it is works very well if done carefully. The general method is to put the parts into a pot of a diluted solution of boiling lemon juice and water for some time and then to rinse with clear cold water. It was mentioned that some polishing to exterior was done for appearances sake.
I have not used this method but may do so on the next set needed cleaning.
