When you click on links to various merchants on this site and make a purchase, this can result in this site earning a commission. Affiliate programs and affiliations include, but are not limited to, the eBay Partner Network.
CBR125R high compression piston/cam set review and other modifications
How-To: MechanicalThis section is ONLY for sharing step-by-step instructions on how you did a project. Please post tech related questions in "General Tech". Adherence to this policy will be strictly enforced by the staff ...
CBR125R high compression piston/cam set review and other modifications
CBR125R high compression piston/cam set review and other modifications
Hello everyone,
Let me start off by saying, I love my little CBR125R, and by giving a little history.
I am 28 years old now, and have been riding bikes since I was 10. bigger bikes, and smaller bikes. I have a keen interest in engineering, and as a result, am drawn to anything inherently "efficient". That being said, these little motors, particularly the fuel injected versions are great little motors in that respect.
I do not claim to be an engineer, however, I do have a decent knowledge of how engine components work, and, with a lean running condition, relatively good compression stock, decent cam timing and good ignition timing, these little motors make a pretty good amount of power for their size.
I am a big condemmer of those who jump on posts, particularly on social media, condemning people who are looking for more power from these engines, shouting dribble like “it’s a 125 don’t waste your time” etc, or “make it faster by passing your test and getting a bigger bike”.
To be fair, they have a point. One of the biggest pitfalls of this little motor is its two valve head, which really holds it back at the top end, however, these bikes give plenty of warrant for those of us who want to tune them. And cheaply too. For less than 500 dollars, you can take these bikes from being a highway hinderance, to being able to easily overtake without stressing about having an opening half a mile long.
QUICK DISCLAIMER:
I am not someone who has a lot of money to spend on my bike. As someone who grew up tinkering things, I would rather do a hack job myself then pay someone to do something “properly”. As a result, some of my feedback here should be taken with a grain of salt, and these are meerly my observations and experiences.
Before we continue, I must stress the importance of ensuring that no matter what modification you do, you take careful note of how lean the engine is getting prior to giving it the “stirling moss”. Do so by taking the bike for a quick ride at reasonable load (not too much though) and then checking the plug for a general scope of the mixture levels (plenty of guides on google on reading plugs).
It is always best to tune more to the rich end than the lean end.
As mentioned earlier, these bikes have a lacking in top end power. As a result, this was the main area that I focussed on, as well as making the bike over all, more efficient.
As with any engine, its ability to breathe freely will dramatically effect the efficiency, and power of the engine. Lowering exhaust backpressure is a surefire way to improve top end power, while losing some torque down low, as will reducing intake vacuum.
A quick removal of the air intake snorkel, and a quick cut open with an angle grinder and welder to dig out the catalytic converter will net a slight gain to top end power, while sacrificing small amounts of torque down low. Again, ensure the engine does not run lean due to these changes. A performance exhaust is a good option, though expensive. I managed to pick up a muffler from a ktm 250 from a local dumpster. It was in good condition and looks good on the bike, and gives a nice throaty sound. This, coupled with the cat delete, was the best option for me.This effectively solves our breathing problems to the best we can without porting or replacing the head. Though this is an option, fueling changes would need to be made, which is not an easy process on a fuel injected model.
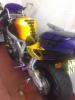
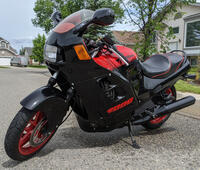
ktm exhaust on a honda. time for a paint job.
My next step was a little more complicated.
Having done 30k miles, my bike was ready for a top end rebuild (though not necessary in most cases, my engine had quite a lot of lost compression)
I decided to go for a high compression piston, and aggressive cam setup sold by this ebay listing.The kit arrived within 2 weeks, and came ready to go, with all the seals, gaskets and parts needed to strip down my motor, and replace its parts with “gofastbits”. I also ordered a new bore, in the event that mine was scored.
We removed the engine (relatively easy process), cracked open the head, and removed the bore. Taking careful steps to ensure the engine was at top dead center, and not to drop the timing chain nto the crank case. We set up the new piston with rings, replaced the gaskets and bore, and begun re assembling the engine. Once the bore and piston where back in position, we took work to the head. Hitting it with a mild caustic soda solution (not too strong as to damage the head) and wire brush. Once the valve surfaces were clean, we removed the cam holder, valve springs, and lapped the valves using a drill. These steps are not strictly necessary, however, with the knowhow (and this is not a difficult task) and the time, we thought it best to completely renew the engine.
We then replaced the camshaft. Its important to note that you will need access to a machine shop with a hydraulic press in order to get the cam baseplate off, as well as the cam bearings. We had a local machine shop who did the whole process for around 30 dollars US.
After having the bearings and faceplate put on the new cam, we installed the new camshaft, and re assembled the engine.
An important step after replacing the cam is to re-gap your valve rockers to spec. we vowed for a slightly higher gap than stock. This will cause a bit more tapping, but could save the engine if it ever overheated in future.
We reinstalled the head, and torqued it to spec, plus an extra 2 percent torque to compensate for the increase in cylinder head pressure.
After turning the engine over by hand to ensure the valves do not interfere with the piston (this is bad!) and went forth and reinstalled the engine.
After reinstalling the engine, we removed the spark plug and ran the engine on the starter for 5 or so minutes in 30 second intervals to remove some of the material from the new rings and bore. This is an important step, as trying to start the engine right away will not yield you much luck, as the internal resistances will be too great for the engine to maintain a stable idle, or even run at all, and you will likely damage your starter or at the very least, flatten the battery.
We then checked our oil for large chunks, and reconnected the spark plug.
After some trial with the throttle, and a bit of extra back pressure, we got the engine running. Keeping the engine running was no small feat, but after a few minutes, it began to start and run much easier and eventually began to idle.
We let the engine idle for 15 minutes before changing the oil and letting it cool down. On the second set of running, the engine started and ran much easier. We repeated the process, this time varying RPM, and rode the bike around the yard for 5 minutes or so under low and varying load.
We then changed the oil again (glitter!) and took the bike for a 15 minute ride around the town before changing the oil again.
On the third oil change, the engine was idling happily, and was easy to ride. With the aggressive cam, low end torque was down (the high comp piston compensated for this though, so it felt much the same) however, above 6k RPM is when the engine really comes alive. The engine now happily produces power right up to the limiter now, which is in stark contrast to how it used to behave, running out of puff at around 10k rpm.
We expected a substantial increase in power, and probably expected too much, however, we were definitely not disappointed. This process is less about increase in power, and more about taking from the bottom end and shifting to the top where it belongs. the bike will now comfortably pick up for the overtake easily, and is a hell of a lot of fun to take to the limiter. We have also increased top speed by about 7 mph. I expect to have gained around 15% in total power, and Fuel efficiency Is also up, however, this is countered by the need to run 98 ron.
This, coupled with the intake and exhaust mods has netted roughly what feels like 30% more power. the bike now comfortably cruises at 70 as if it was at 60, and easily gets to its top speed of 85, this, and dropping a tooth on the front sprocket, has netted us a quick little bike fast enough to rival the better halves of the single cylinder 250s out there, all whilst keeping the bike light, and fun as ever around the corners and on the track.
I cannot recommend these modifications more for those of you looking for a bit more poke without breaking the bank. These bikes are amazing little feats of engineering for the price, and with a bit of money, can easily compete with those with engines twice their capacity.
I hope you enjoyed reading about my experiences as much as I enjoyed writing about them.
Last edited by violets_are_blue; 09-05-2018 at 05:58 PM.
What gas mileage did you get when stock and after all those kids were made? I was in an mpg contest with my yzf600r/fzr400 hybrid, and noticed that it can get as many as 5 more miles per gallon running 91 octane instead of 89. (And leaning it out will make mpg jump 13 at high speed and as much as 15 at low speed.)
Well done mate. Nobody can have a go at you for trying and keep going.
Anyone can just get their bike out, get on and ride. Getting oil on your hands and the spanner’s out will prove invaluable to you in the future.
Hope your crank and con rod hold up !
Best of luck mate
 09-02-2018, 07:27 PM


 not sure why but I can't edit the post to fix the photos.