F4i rear shock complete rebuild (with pics)
#1
 09-18-2018, 11:05 AM


Join Date: May 2016
Posts: 2
Likes: 0
Received 0 Likes
on
0 Posts
Long time reader, first time caller here.
There are two problems with the rear shock on your F4i. First, the spring rate is so soft that it must have been designed for a rider weighing about 130 lbs. Second, the oil has broken down and most all of the nitrogen has probably leaked out over the past -- geez, a decade and a half. Now I feel old.
There's a few options available to fix this. You can drop more than $1000 on a custom built rear shock from Penske or Race Tech. They'll still build them for the F4i, as far as I can tell. Ohlins used to, but doesn't anymore; you might find one on eBay (again, pushing $1000, even used). If I had that kind of money to throw around I probably wouldn't be riding a fifteen year old sportbike. Need what they call the "80/50" solution, 80% of the performance for 50% of the cost. Besides, what's the fun in bolting on already-built parts? Sounds boring.
So, the plan is, replace the spring with a new, stiffer one, and rebuild the shock internals. (There was a thread somewhere on here once where someone just replaced the spring, but the date on that thread is a decade ago. You probably need to rebuild the shock now too).
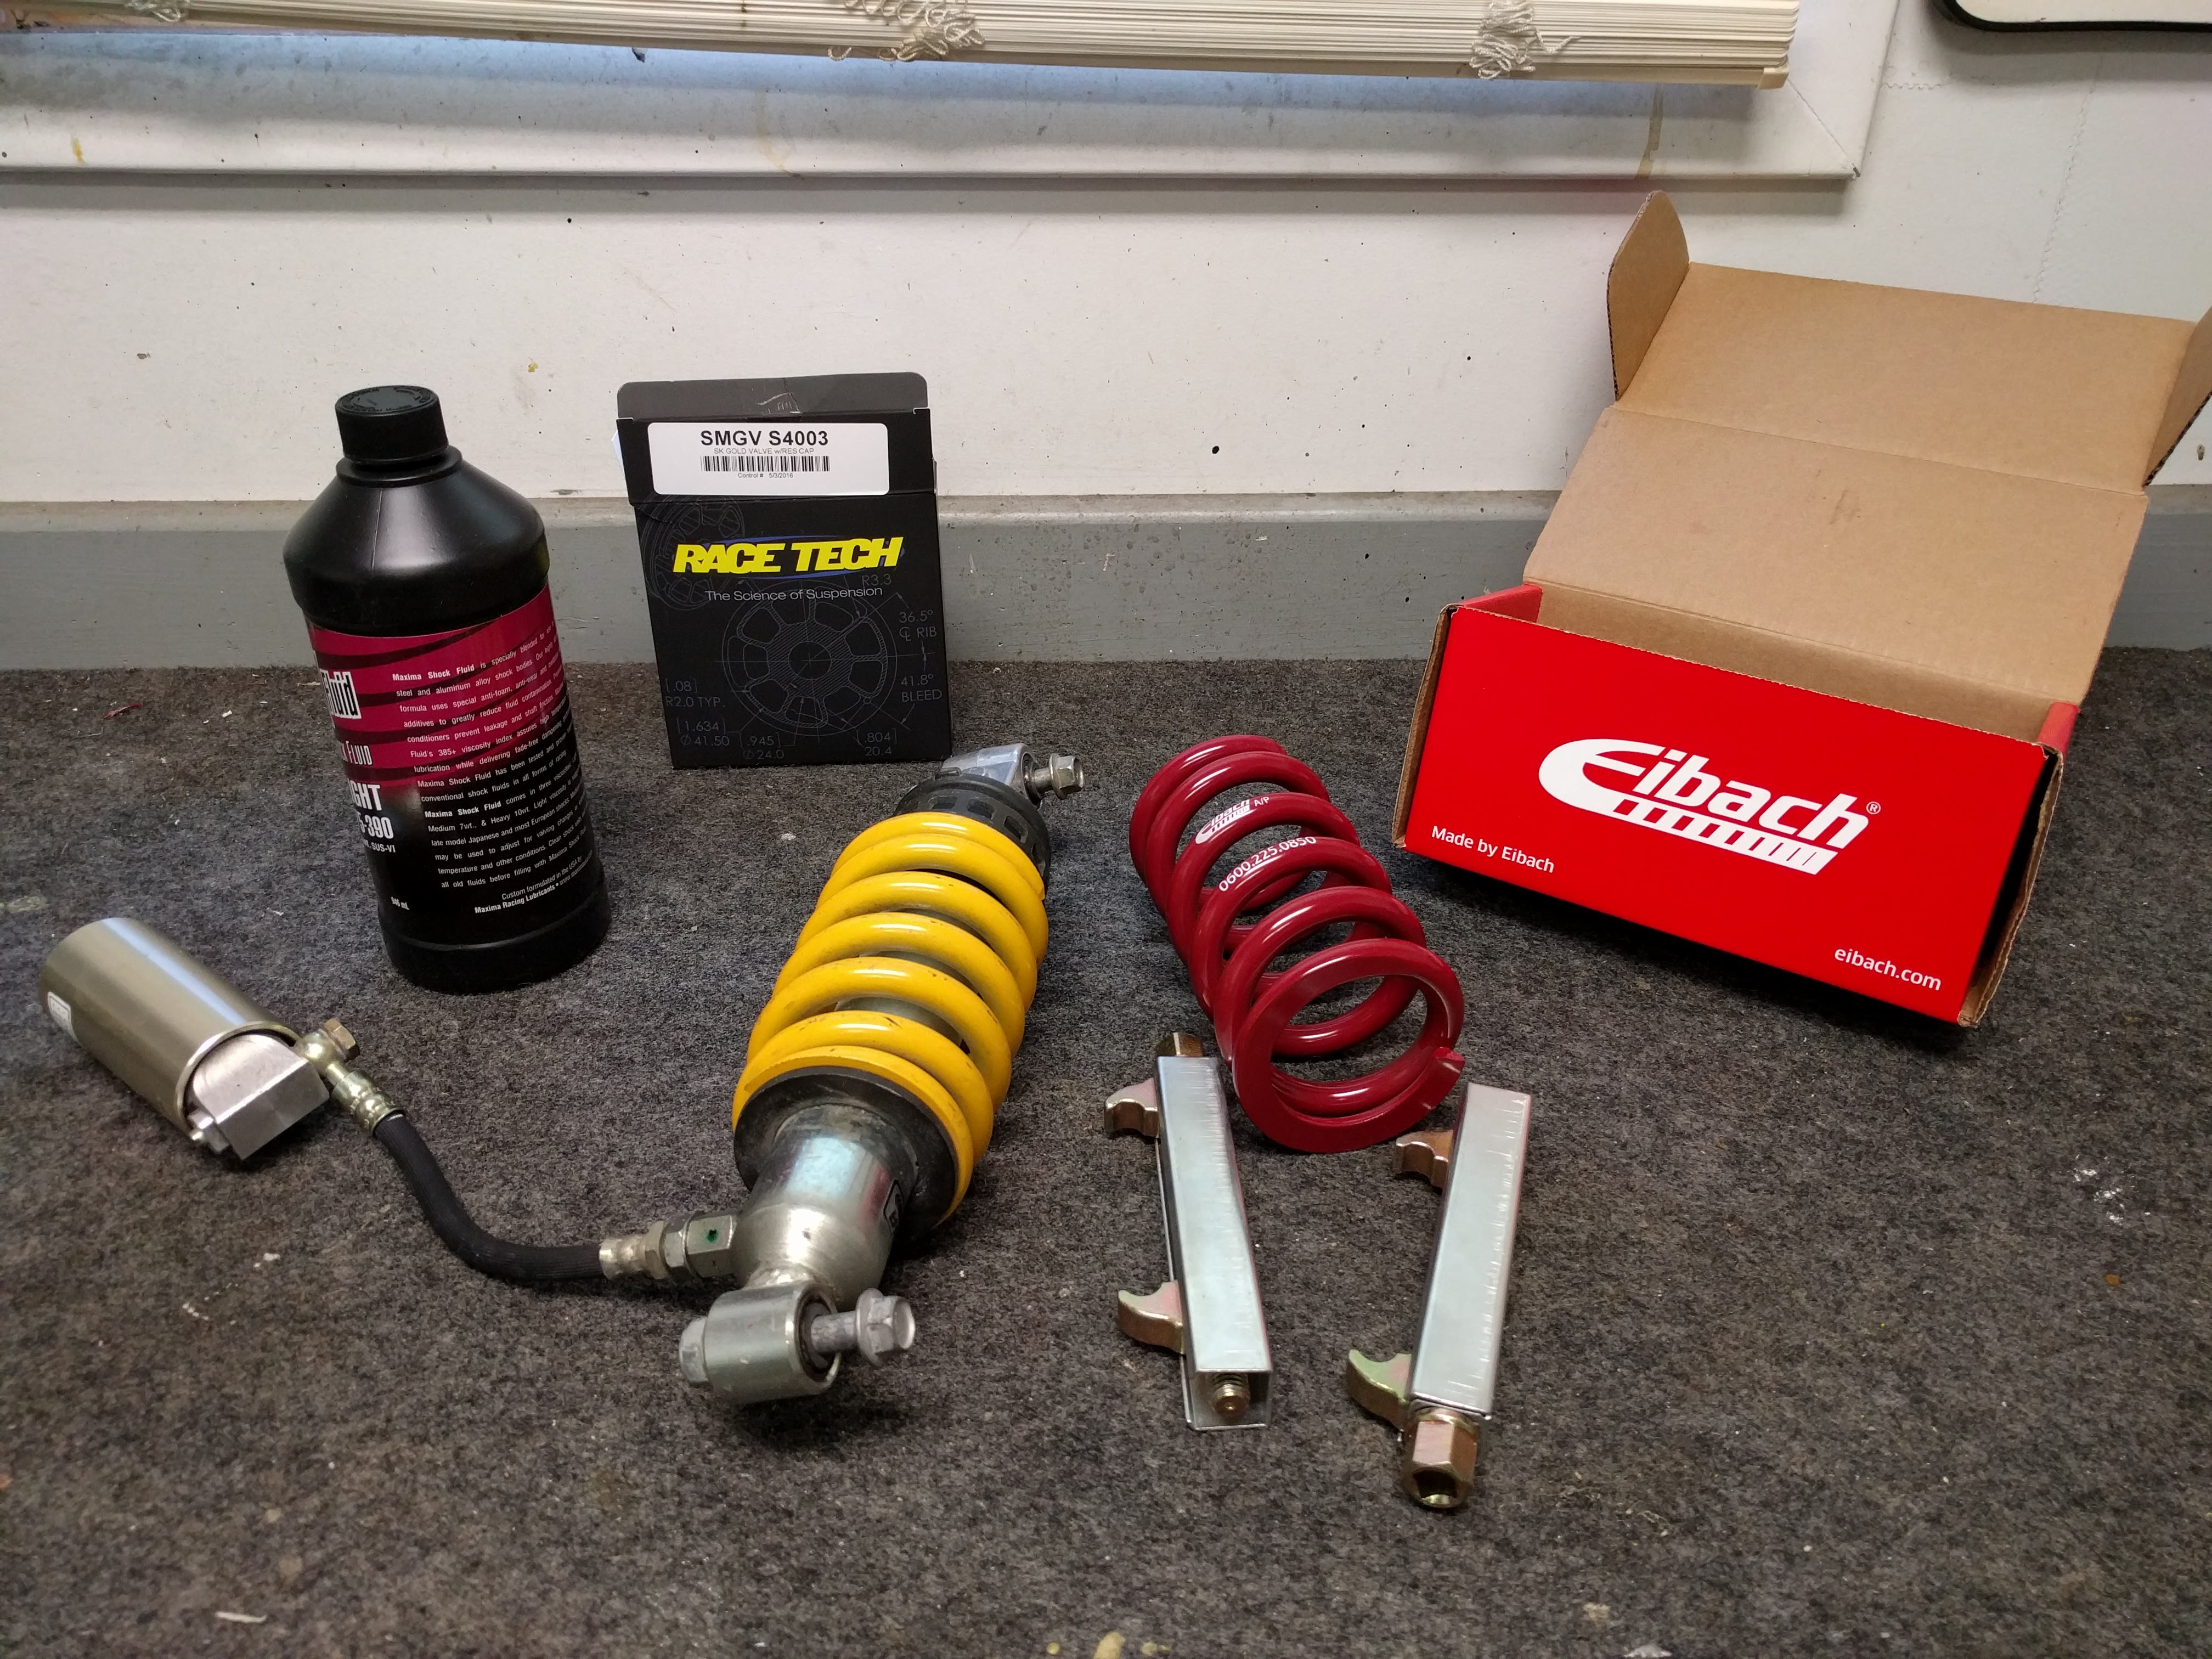
You will need:
PARTS:
* The OEM Showa rear shock
* A new spring
* Adapter collars so the spring fits
* Shock fluid
* New reservoir cap with a valve in it
* New seals
* New copper crush washers
* Optionally: Gold Valve Kit
* Very Optionally: new custom shock oil line from the reservoir to the shock body
TOOLS:
Air compressor, motorcycle spring compressor, circlip tool, vise, drift punch and hammer, dremel, file, yadda yadda yadda. Your basic garage workshop setup, in other words. Make sure you have an absolute ton of paper towels on hand.
First get your spring rate. There's a calculator here: http://racetech.com/ProductSearch/12/Honda/CBR600F4i/2001-06[/url[
For my weight, it recommends 15 kg/mm. (or, in freedom units, 840 lbs/in). Then it recommends a bunch of expensive springs, some custom Race Tech builds and some from SK at what must be a 3x markup. Springs for coilover shocks (which is what this part basically is) are commodity items, folks. You want one with 2.25 inches inner diameter and 6 inches free (uncompressed) height, and that has your desired spring rate. I got one from Eibach, which has the convenient item code 0600.225.0850 (i.e. length, diameter, and spring rate). They have it at Summit Racing here, I guess people use them for coilovers on Miatas or whatever. https://www.summitracing.com/parts/eib-06002250850 You can also get one from Hyperco, they have a different numbering scheme where the part number will be 186Annnn where nnnn is the spring rate in pounds per inch. There are probably other manufacturers, but these are the easiest to find retail. Notice that the stock spring has a weird taper to it; every replacement will be straight instead, so you'll need an adaptor to make it fit.
You will need some parts from Race Tech: You need the spring adaptor collars (SPSC B5855N and SPSC B5552N) to make a non-tapered spring fit on the shock. You need either the reservoir cap (SMRC 40501) or the gold valve kit that includes it (SMGV S4005). I went with the gold valve because I'm rebuilding the shock anyway, but if I'm honest, noticing the difference is above my skill level; you can just go with the cap. You might as well buy new seals and bushings while you're there; this isn't a job you'll want to do twice. If you look on eBay you might find these parts cheaper from a reseller; it's funny how that works.
And you need new shock oil. I don't recommend you buy it from Race Tech. RT is rebranding somebody else's oil and I don't know whose. I got a quart of Maxima 3wt Shock Fluid for fifteen bucks. (A quart is more than enough.) There isn't a lot of standardization about what "3 Weight" means for suspension oil, but here's a chart that somebody put together, I don't know where he gets his info or how accurate it is, but it's as good info as any: Suspension fluids | Peter Verdone Designs
I got myself an F4i shock from a salvage bike so I could still ride while I worked on this. This is optional but will only cost you like $25.
(I had a new reservoir line custom-built by Galfer to match my red SS brake lines, this was ridiculously excessive and you can just reuse the stock one. If you do get one built, it's 8 inches in length, with a D148 fitting on one end and a D1130 fitting on the other end with a D008A banjo bolt)
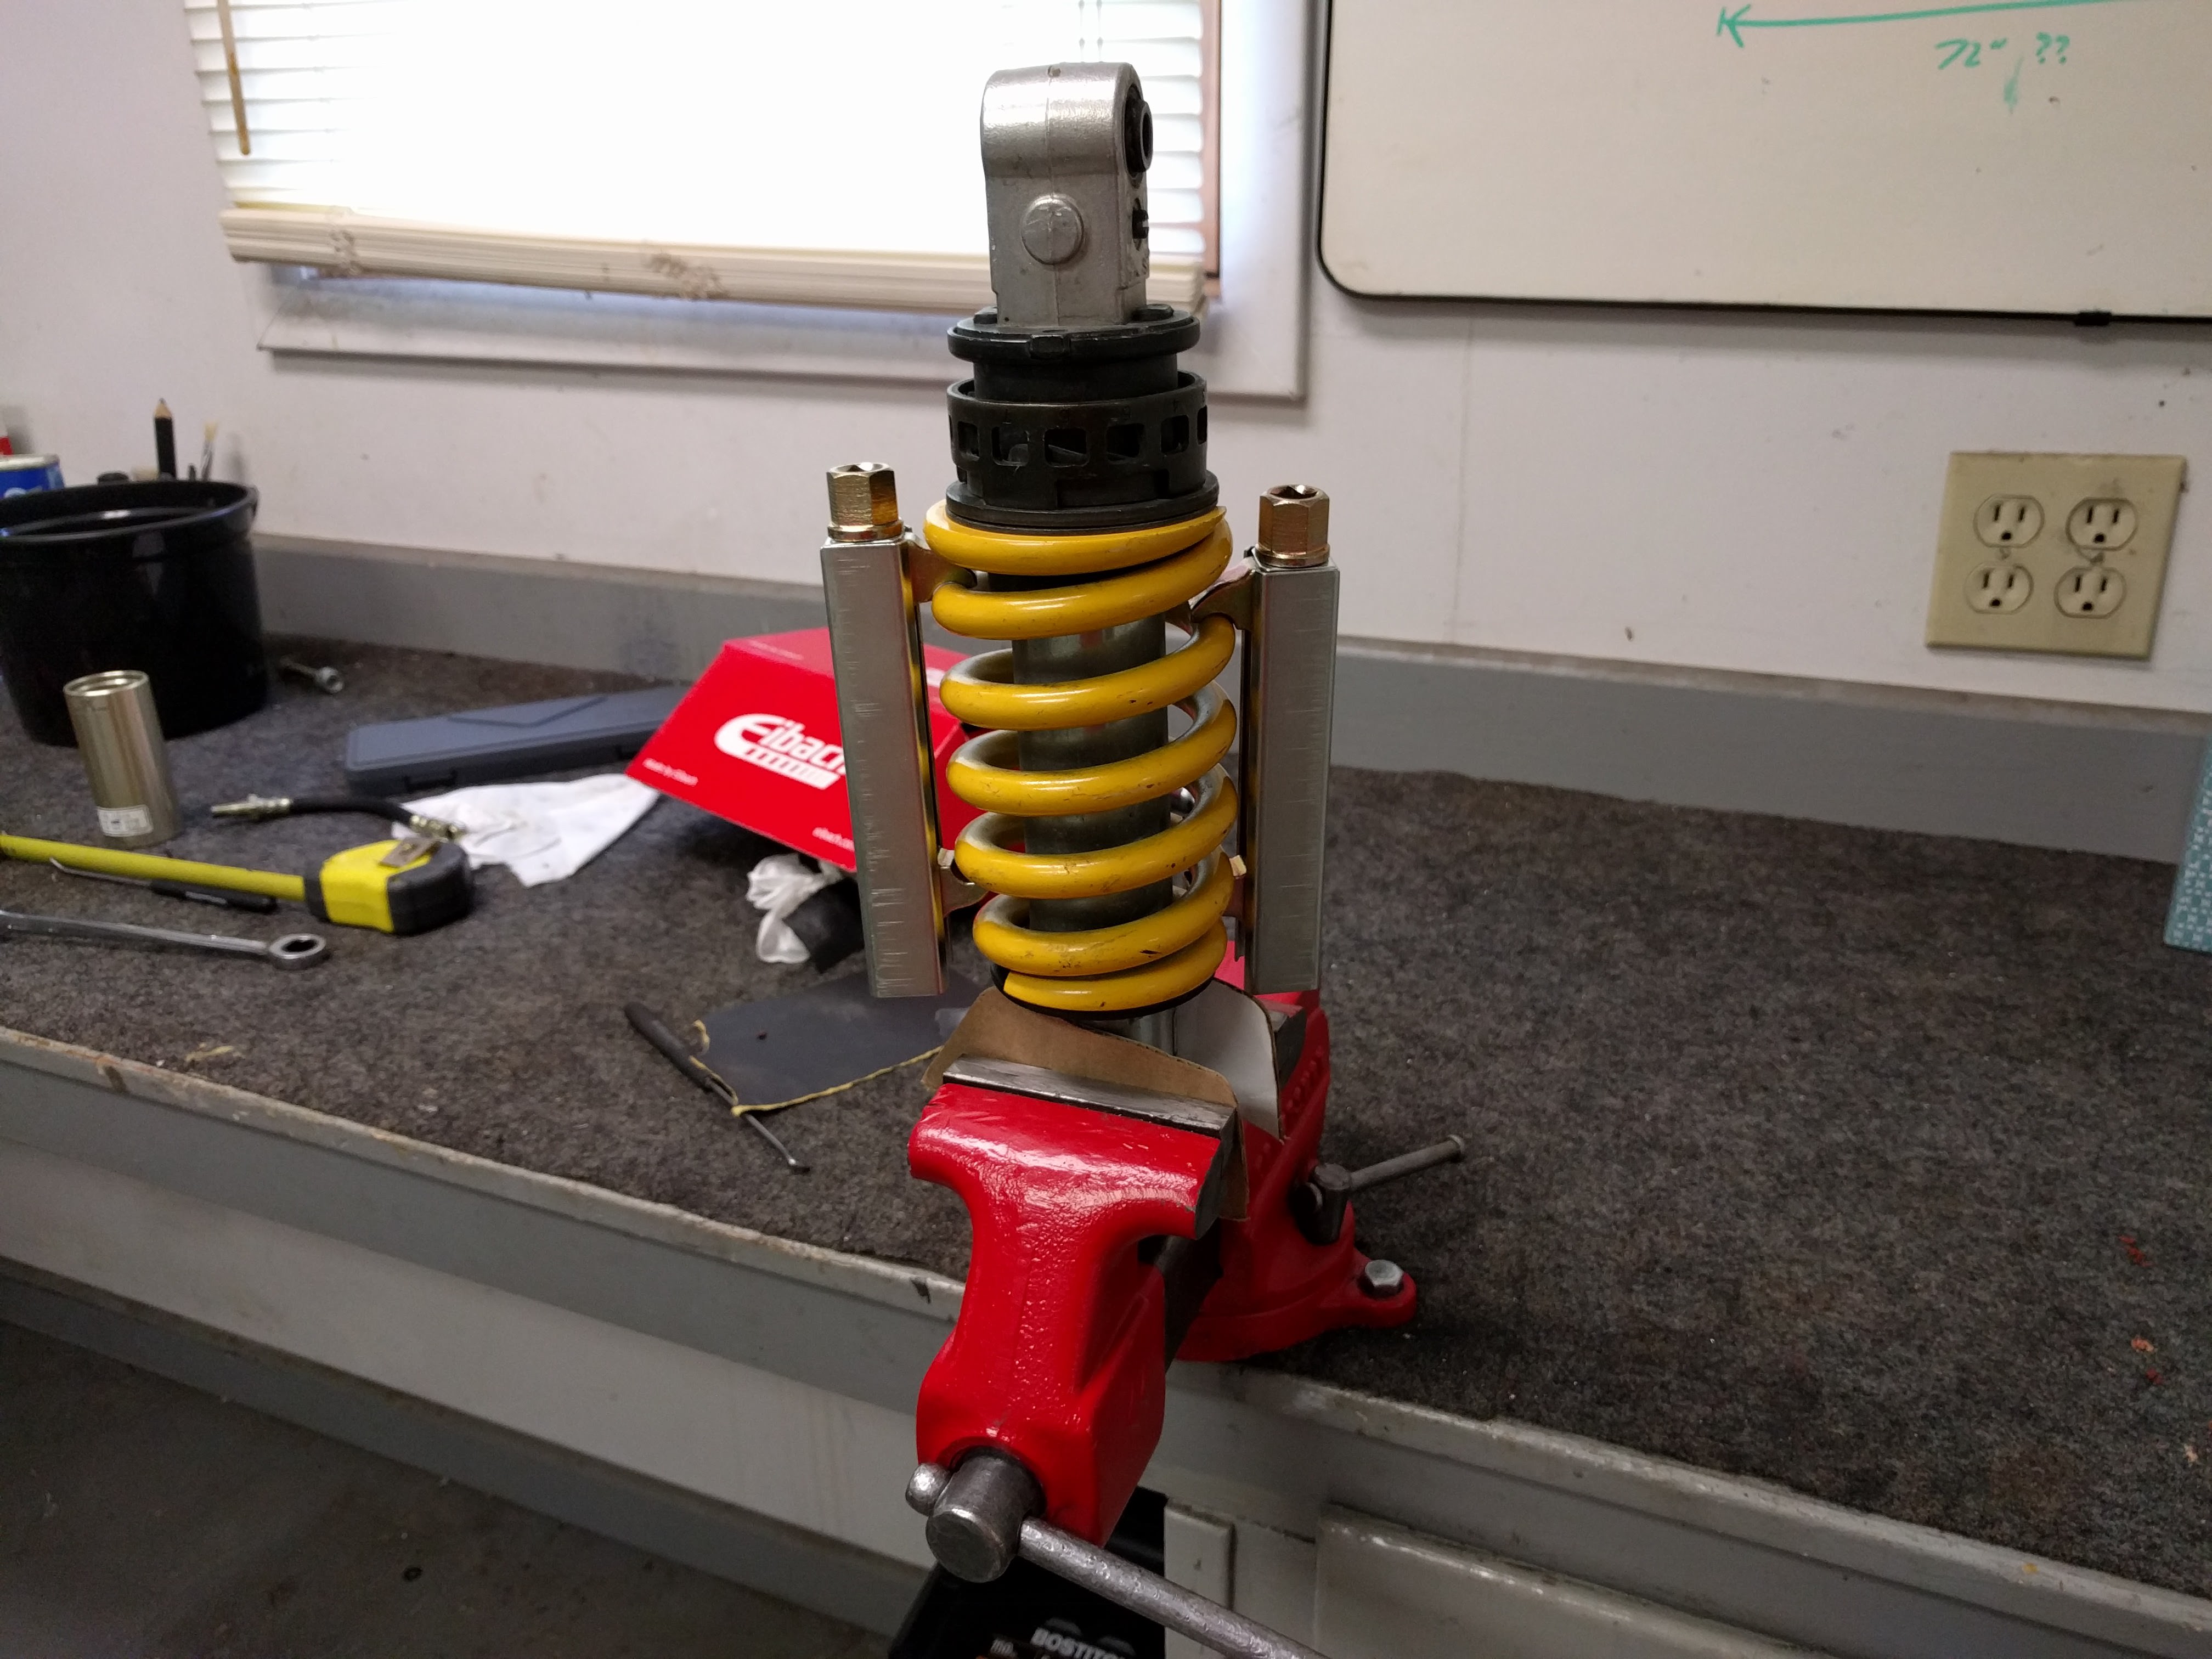
Take your shock. We're gonna disassemble this thing completely and rebuild it faster, stronger, etc. Remove the spring with spring compressors. You'll need the small, super-sketchy kind of spring compressor; the ones sized for car springs don't fit. Compress the spring enough to remove the spring collar, then carefully decompress it.
Remove the line separating the shock and the reservoir and empty out the old fluid into a waste oil bin or whatever.
Drill a small hole in the shock reservoir cap. Don't worry, we're throwing this piece out. WEAR SAFETY GOGGLES AND GLOVES. There might still be some nitrogen pressure in there. Mine had none whatsoever, but you never know. Push that cap inward and you'll see a snap ring. (Most of this shock is held together with snap rings). Remove the ring and then pull the cap out. This thing will get replaced with the Race Tech cap that has a valve on it. (In theory you could save like twenty bucks here by attaching a Schrader valve to the stock cap with, I dunno, a TIG welder? Getting into diminishing returns here. Anyway.).
The compression valve is on the reservoir opposite the hose that goes to the shock. I suggest removing it and cleaning it with brake parts cleaner. You're already here, after all. Don't lose any of the tiny, easily-loseable pieces. After you've removed the compression valve and the hose, you can remove the other cap on the reservoir and clean all up in there too. If the rubber condom-looking piece inside the reservoir looks beat up, you can replace it with a new one from RT, but it's a pretty thick piece of rubber in a pretty well sealed environment so it may be fine. (Mine was just fine.)
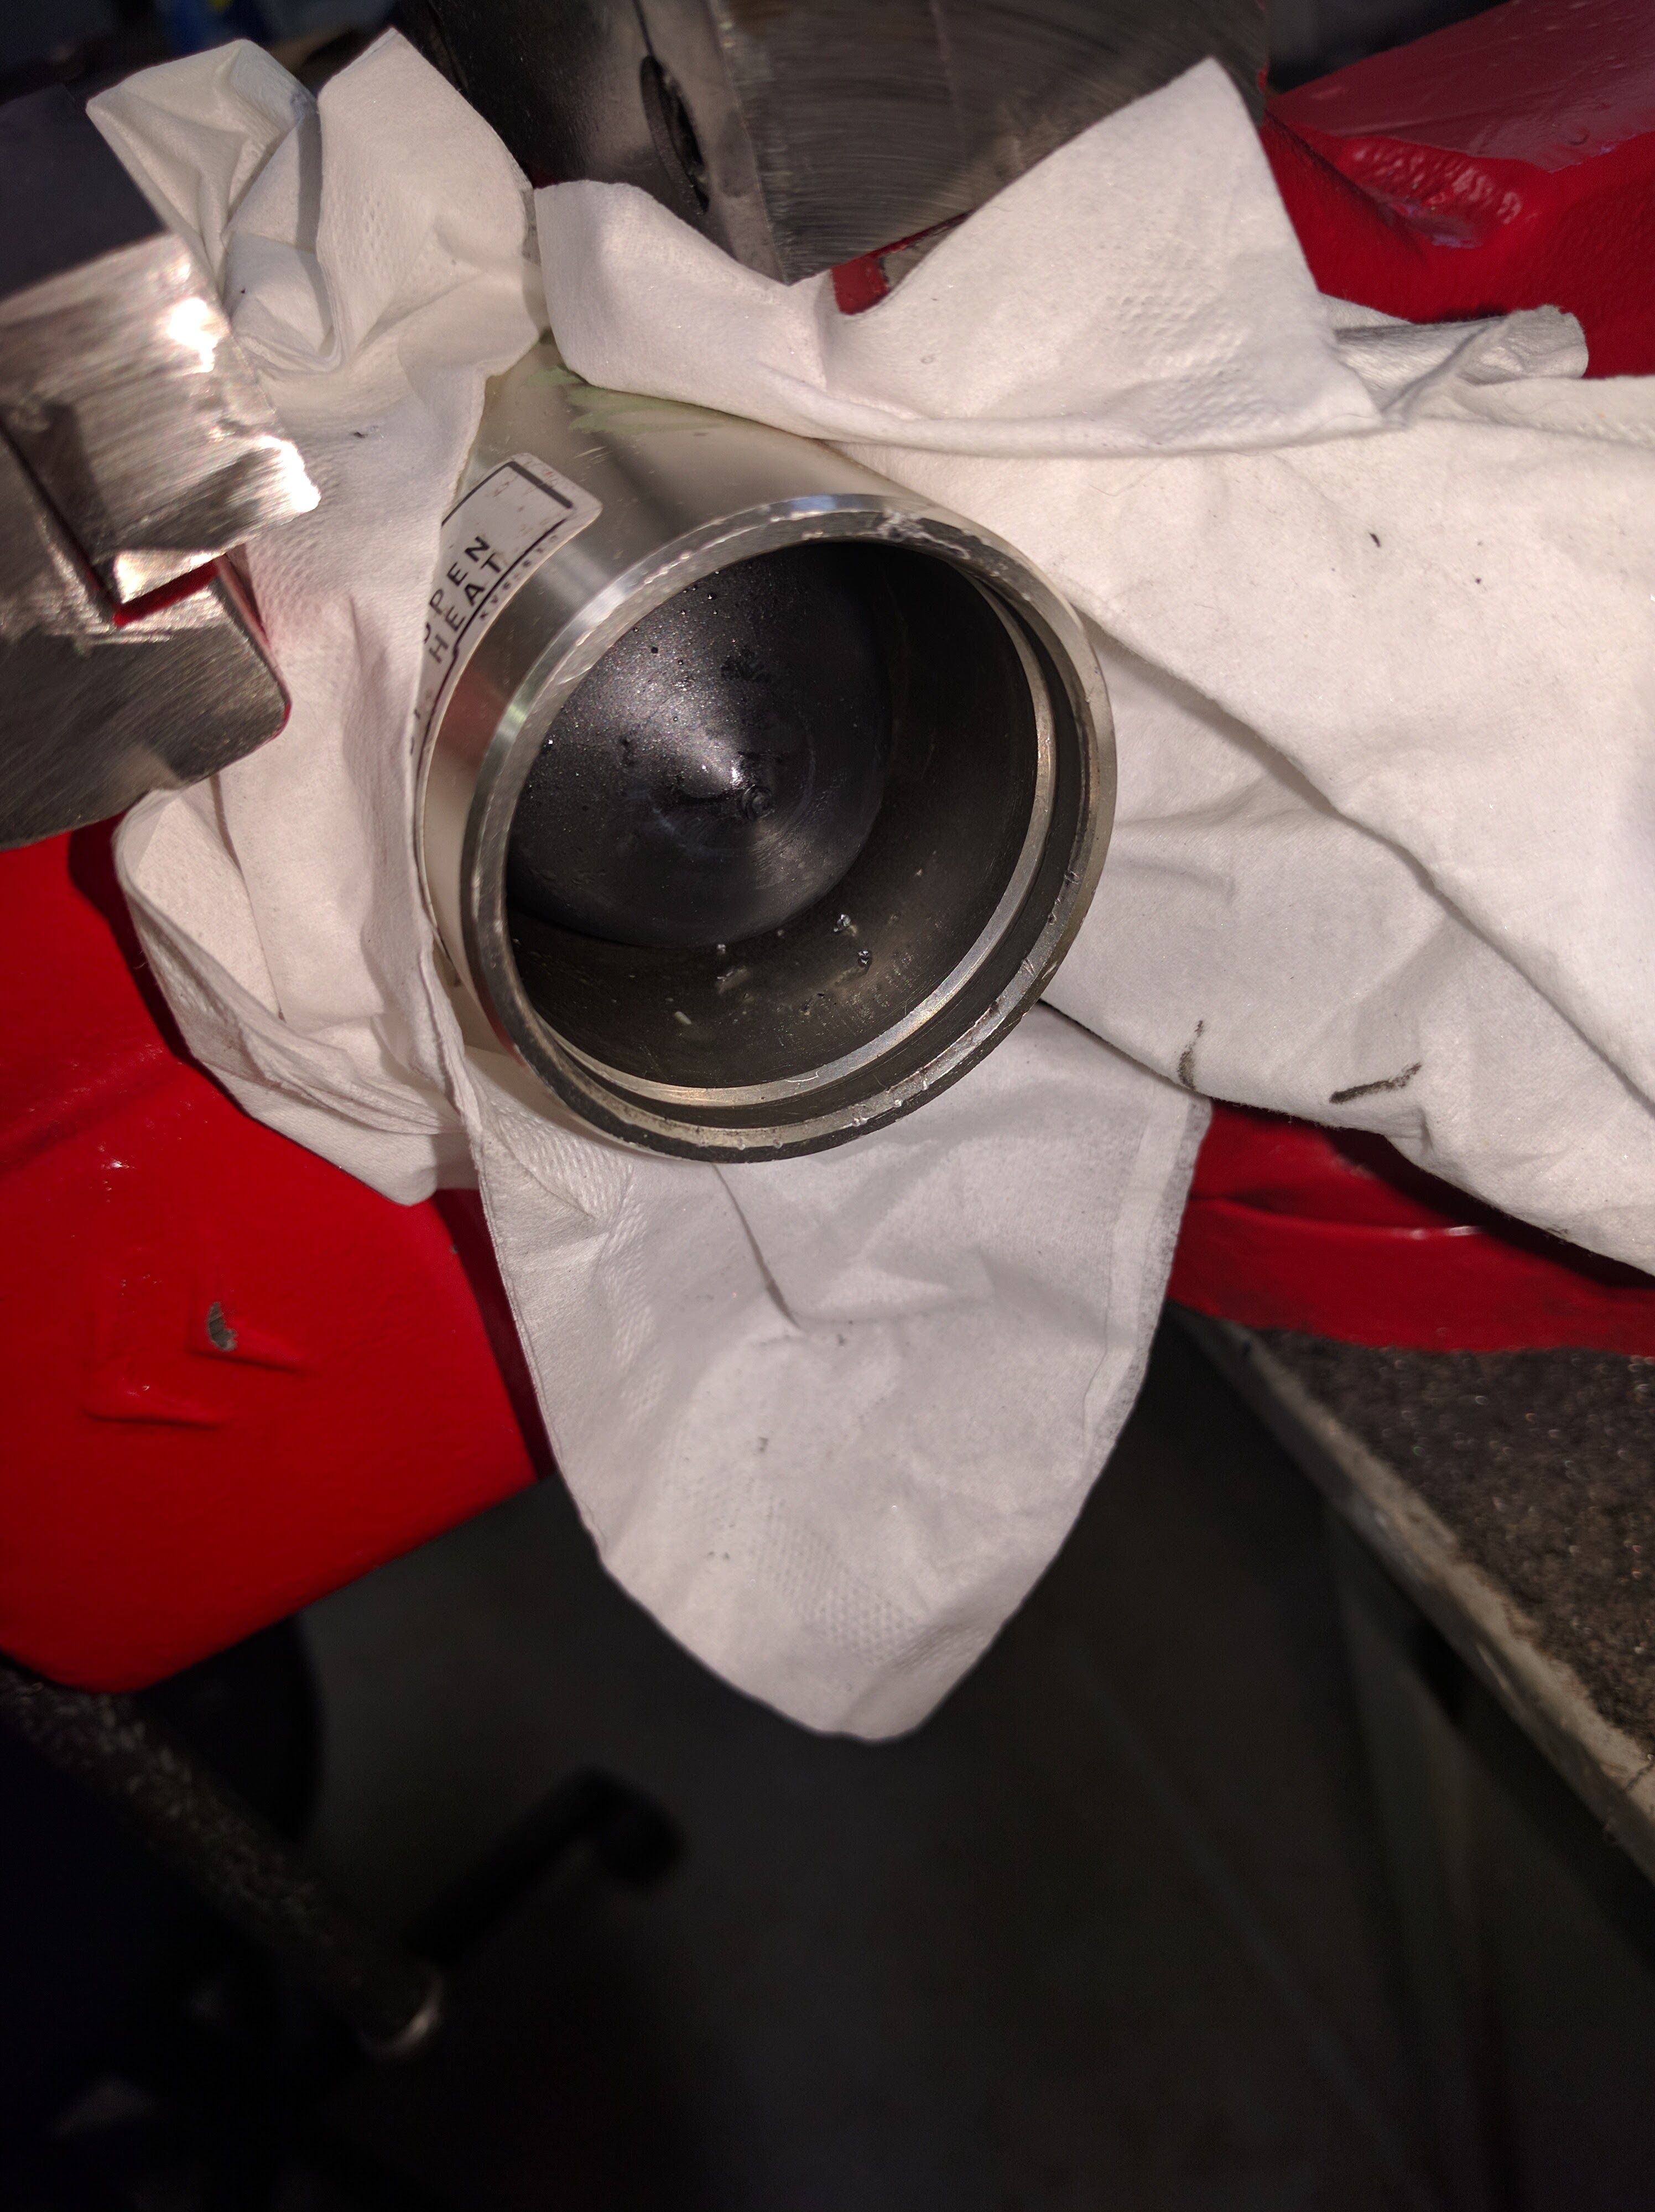
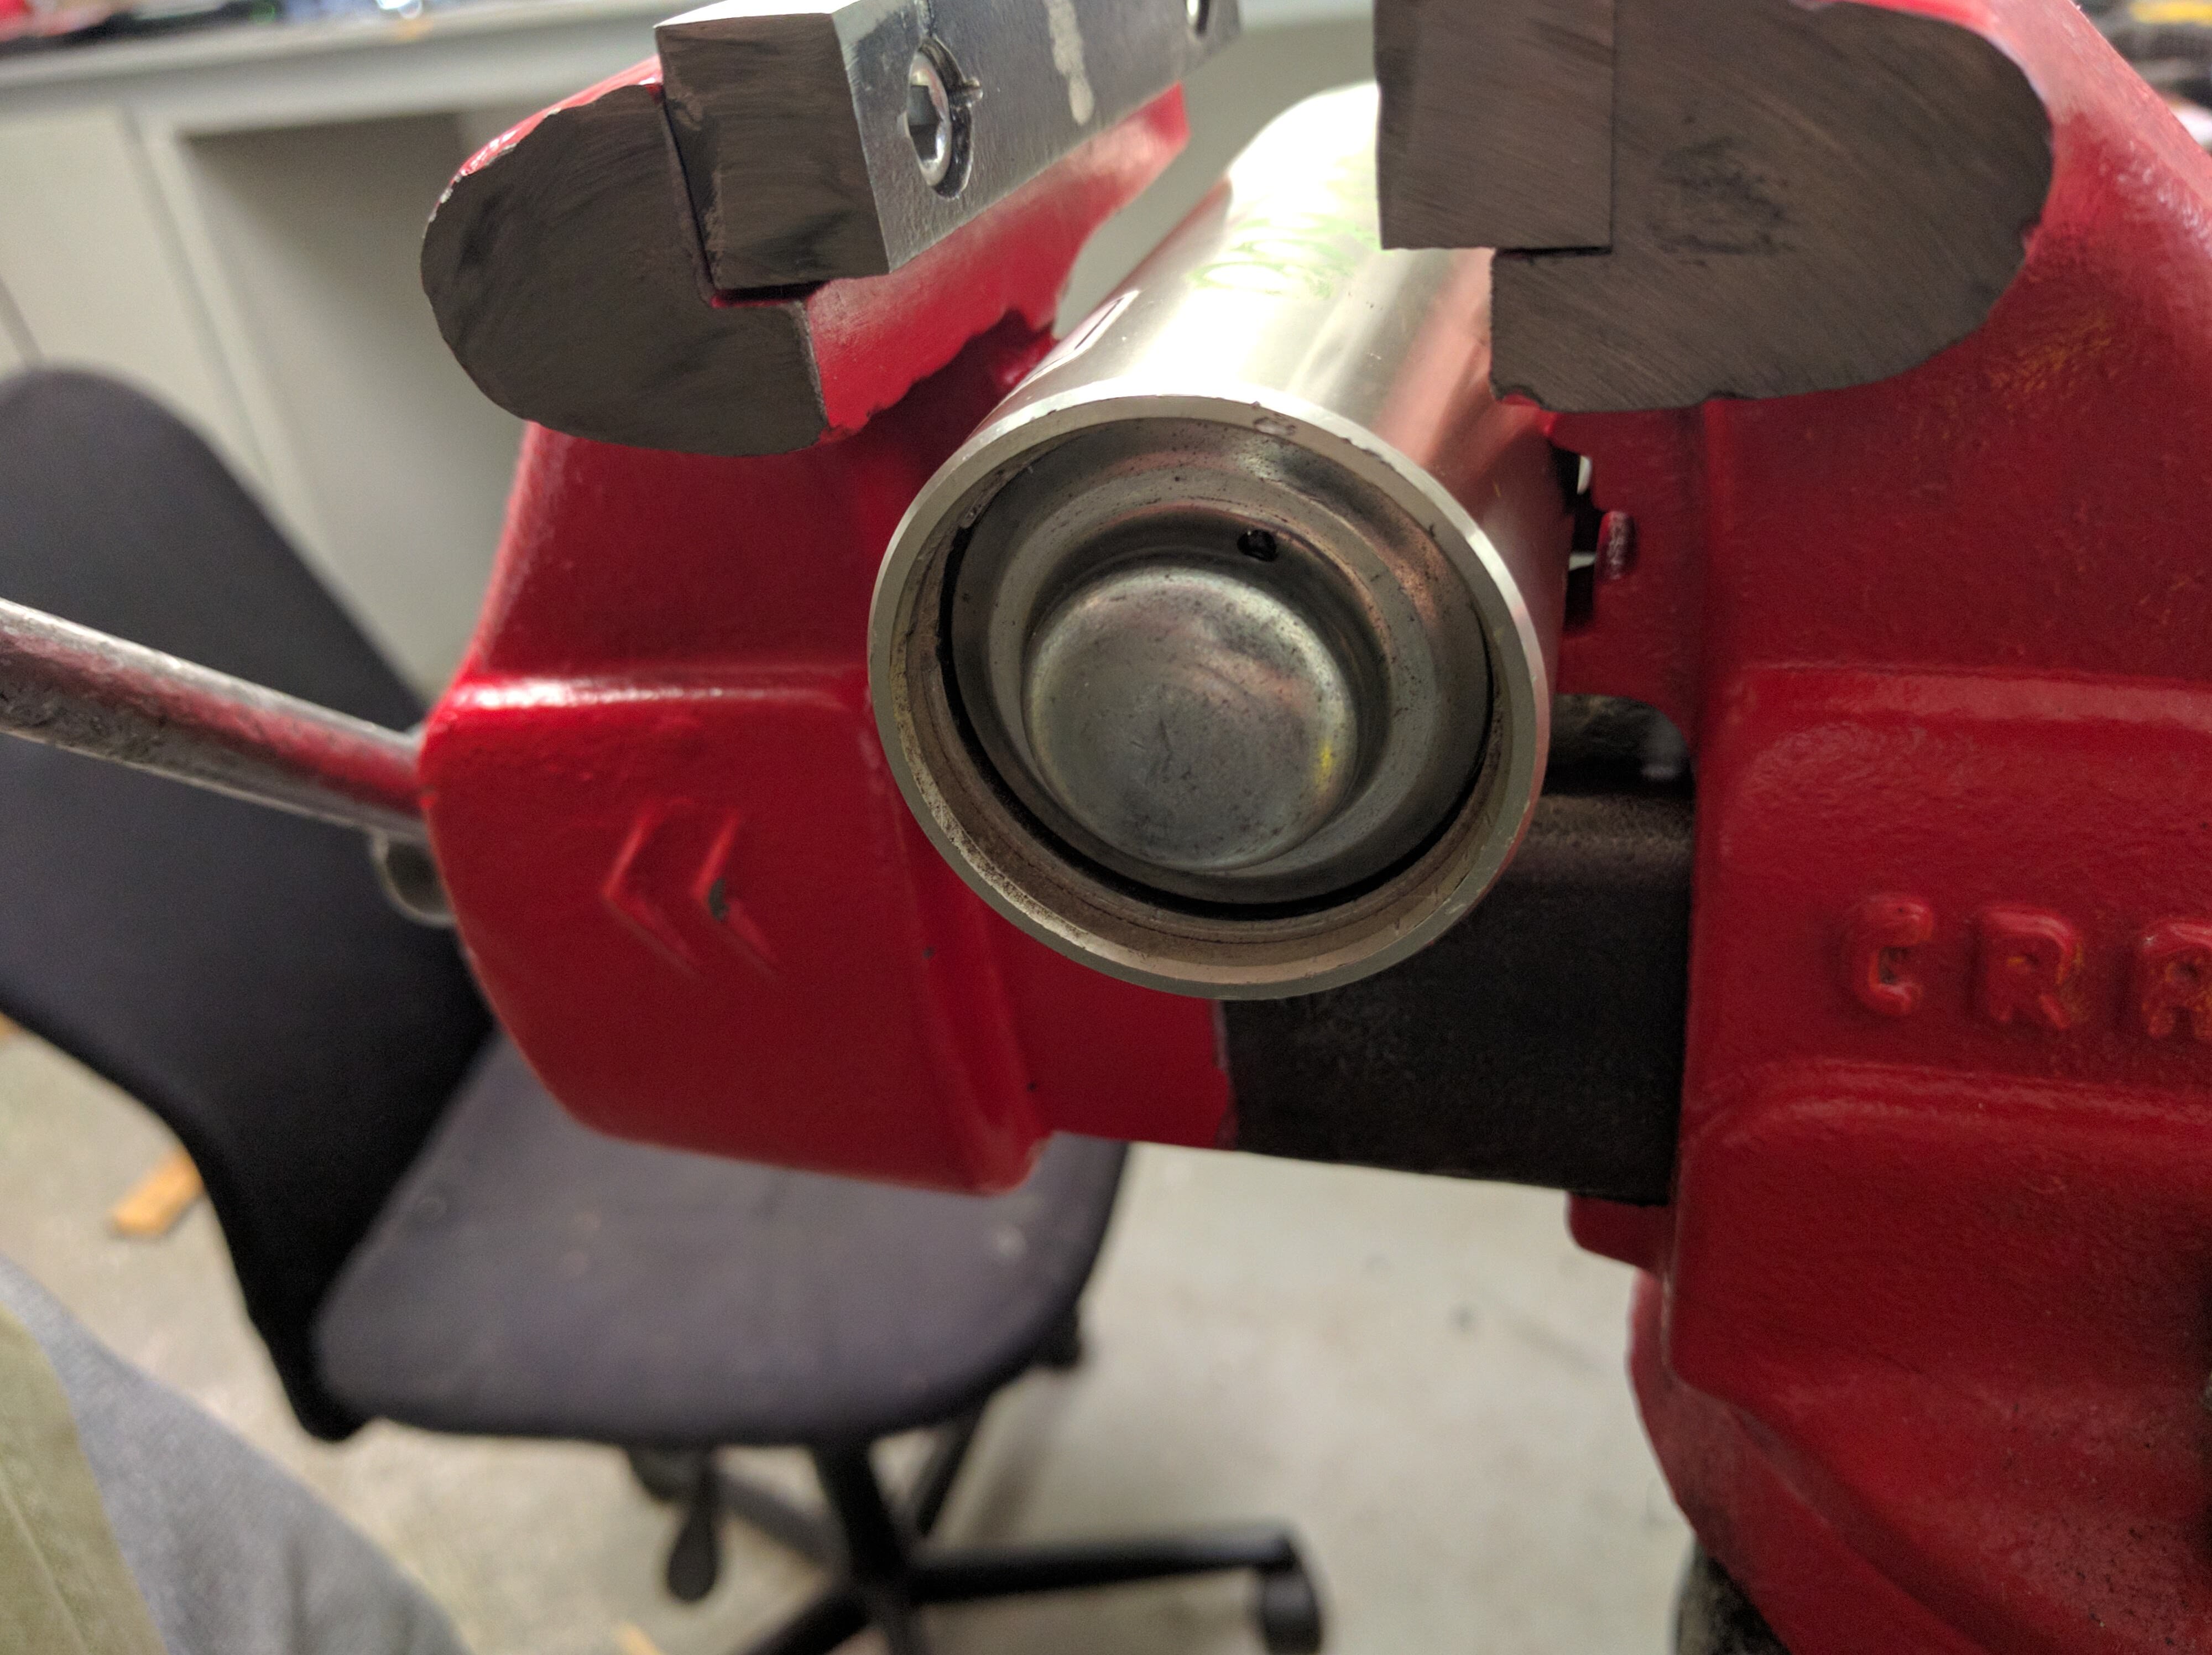
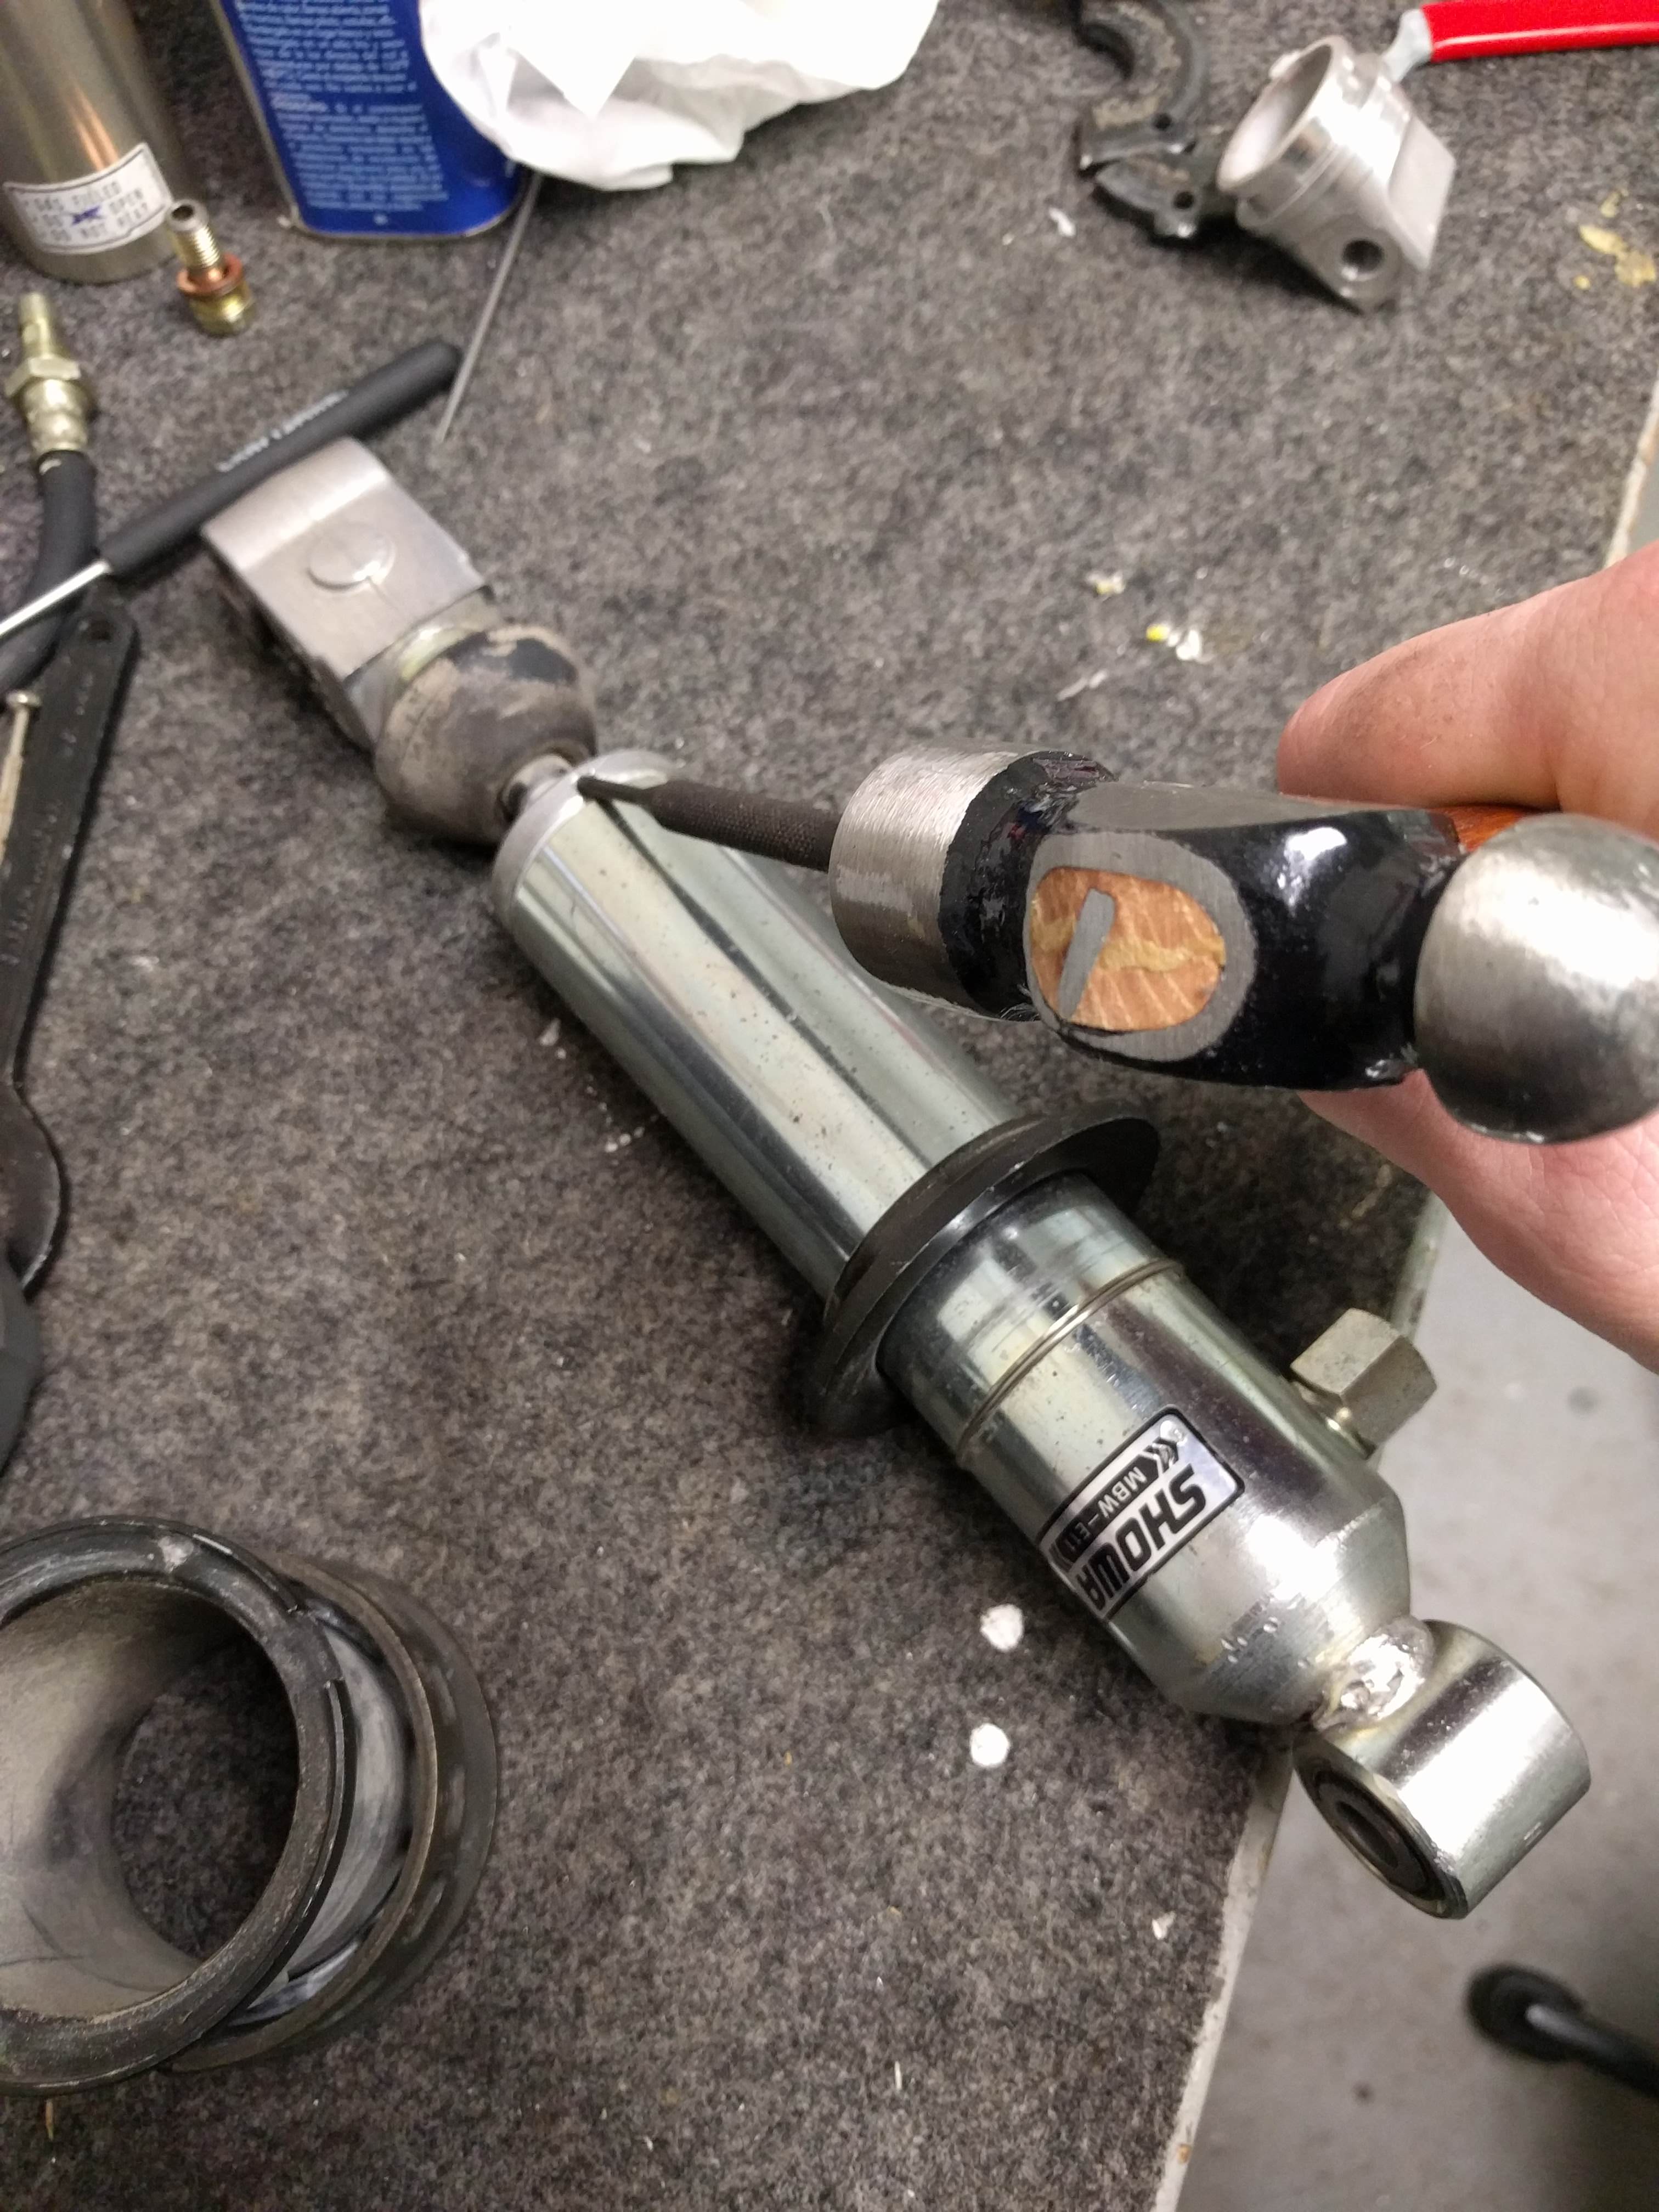
Now start disassembling the shock itself. RT has a set of instructions here IP Sk Rebuild STD but they're generic; still, they can be a good reference. I used a hammer and drift punch to remove the shock cap, they suggest a chisel for some reason. After removing the cap, push the seal underneath the cap into the shock body so you can remove another snap ring, then pull the whole thing out. Clean all this up with brake parts cleaner too.
Optional bonus round: I splurged and bought the Gold Valve upgrade kit. This isn't at all necessary and you can save like 200 dollars by not buying this. If you didn't get the gold valve kit, just clean everything up really well and skip ahead to reassembly.
So, a hydraulic damper works by pushing oil through the holes in the piston valve, which slows down the motion of the piston. The stack of thin washers ("shims") on each side of the valve will bend under pressure, and based on the diameter and thickness of the shims in the stack, the shock absorber can be set up to have different rates of damping in either the compression direction (i.e. in) or the rebound direction (i.e. out) and at different speeds and so on. The "gold valve kit" is just a replacement piston valve and a bunch of shims, along with a table to consult on the RT web site so you can set up a shim stack for your weight and desired rate of damping (rather than the one-size-fits-all setup that the Showa OEM shim stack is set up for). Again, probably not a huge difference. Diminishing returns. But we're here anyway.
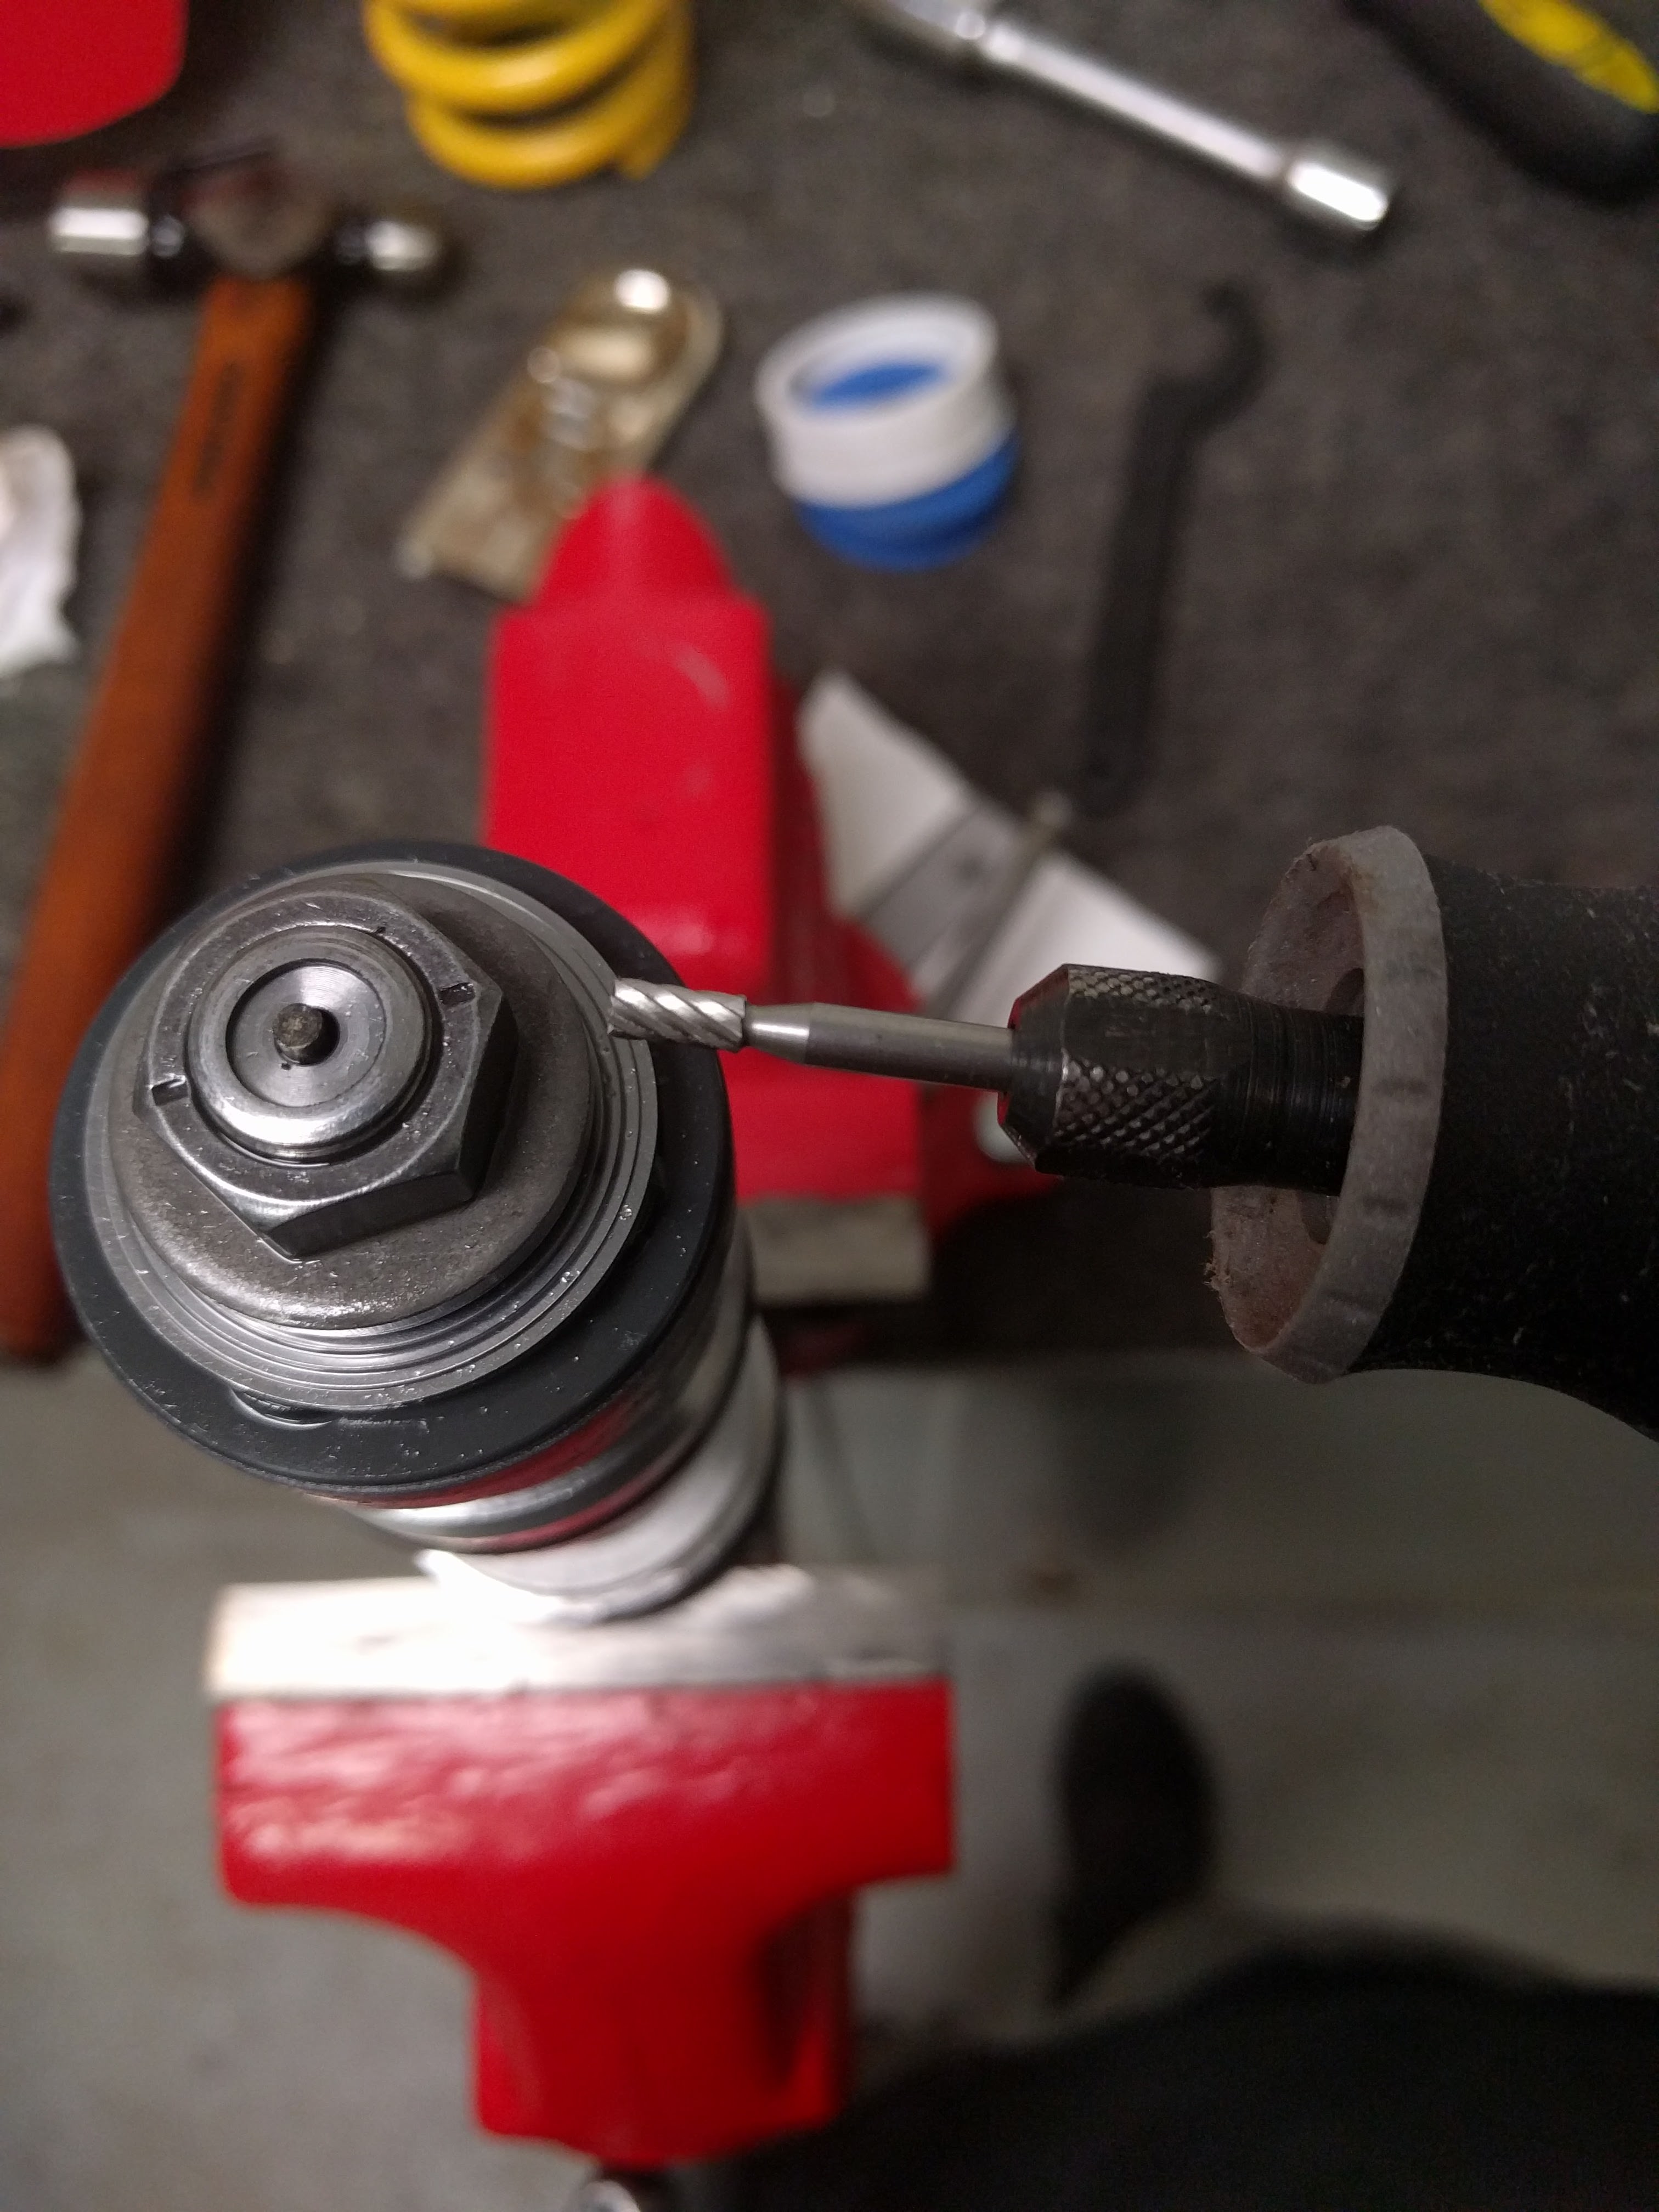
The nut holding on the shim stack is peened into place so it doesn't come loose. CAREFULLY remove the peening with a Dremel or whatever. The threaded shaft is also peened over; you'll need to use a file to take that off. Once you've done both, then remove the nut.
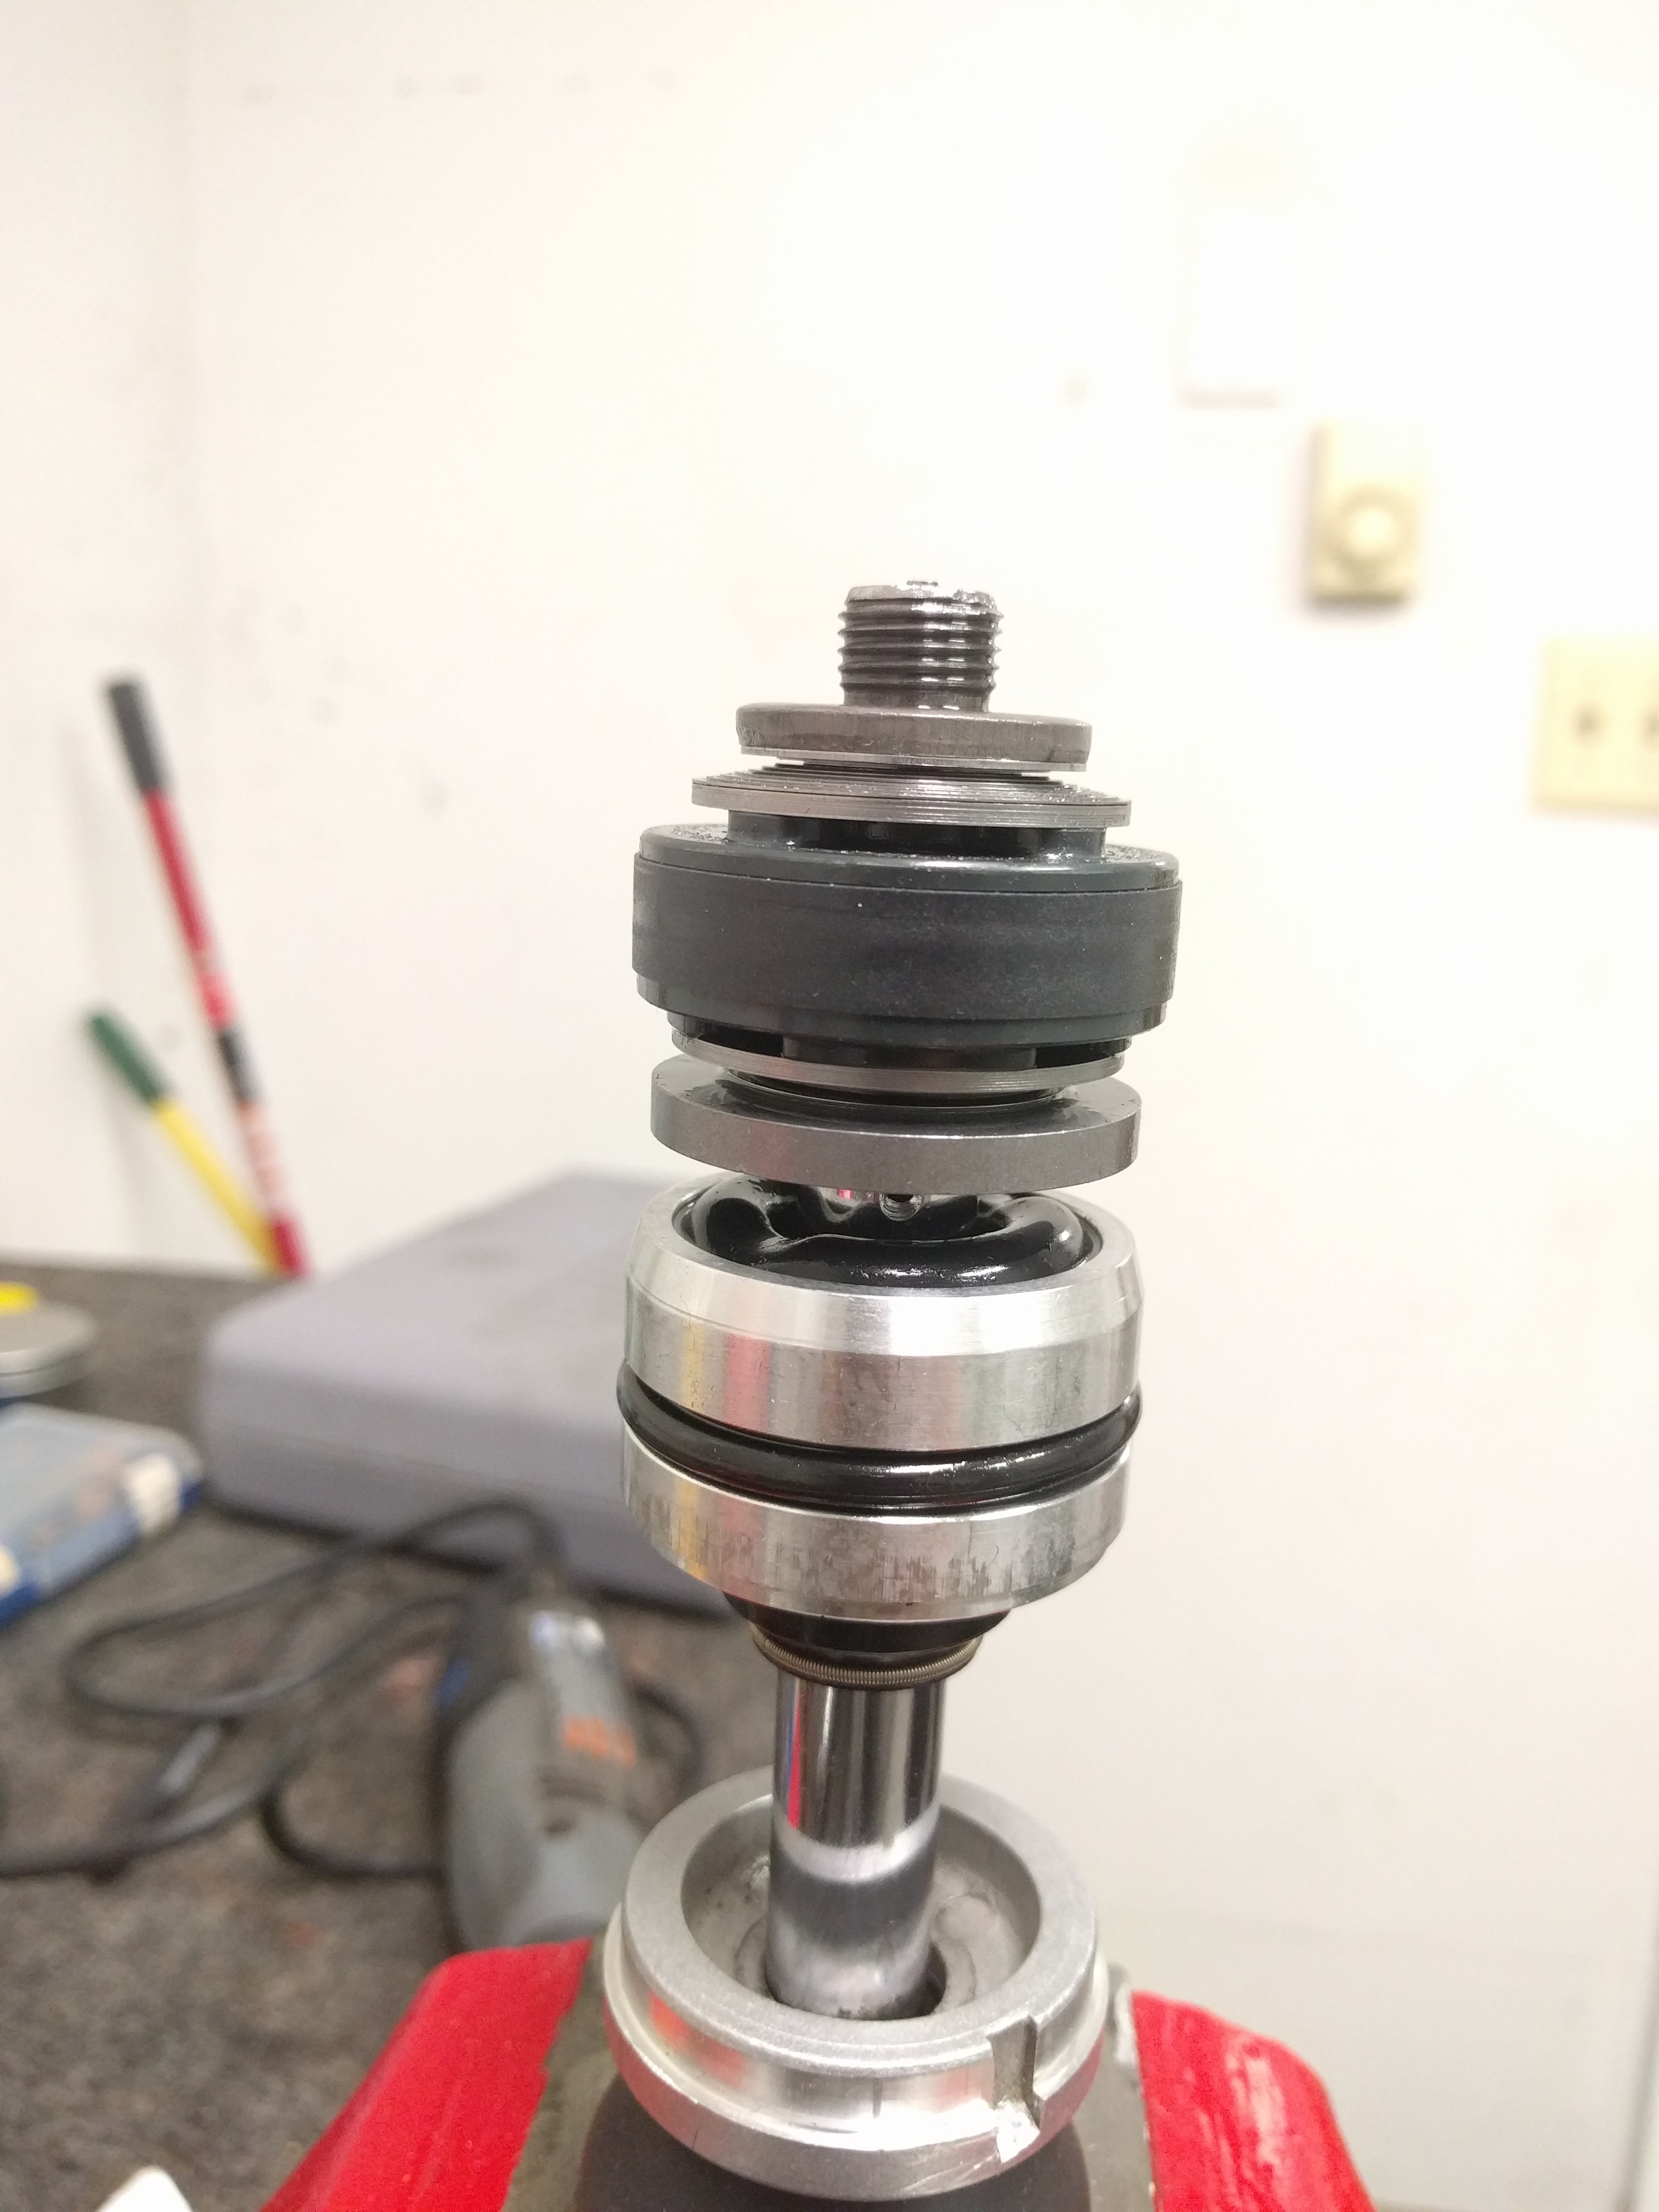
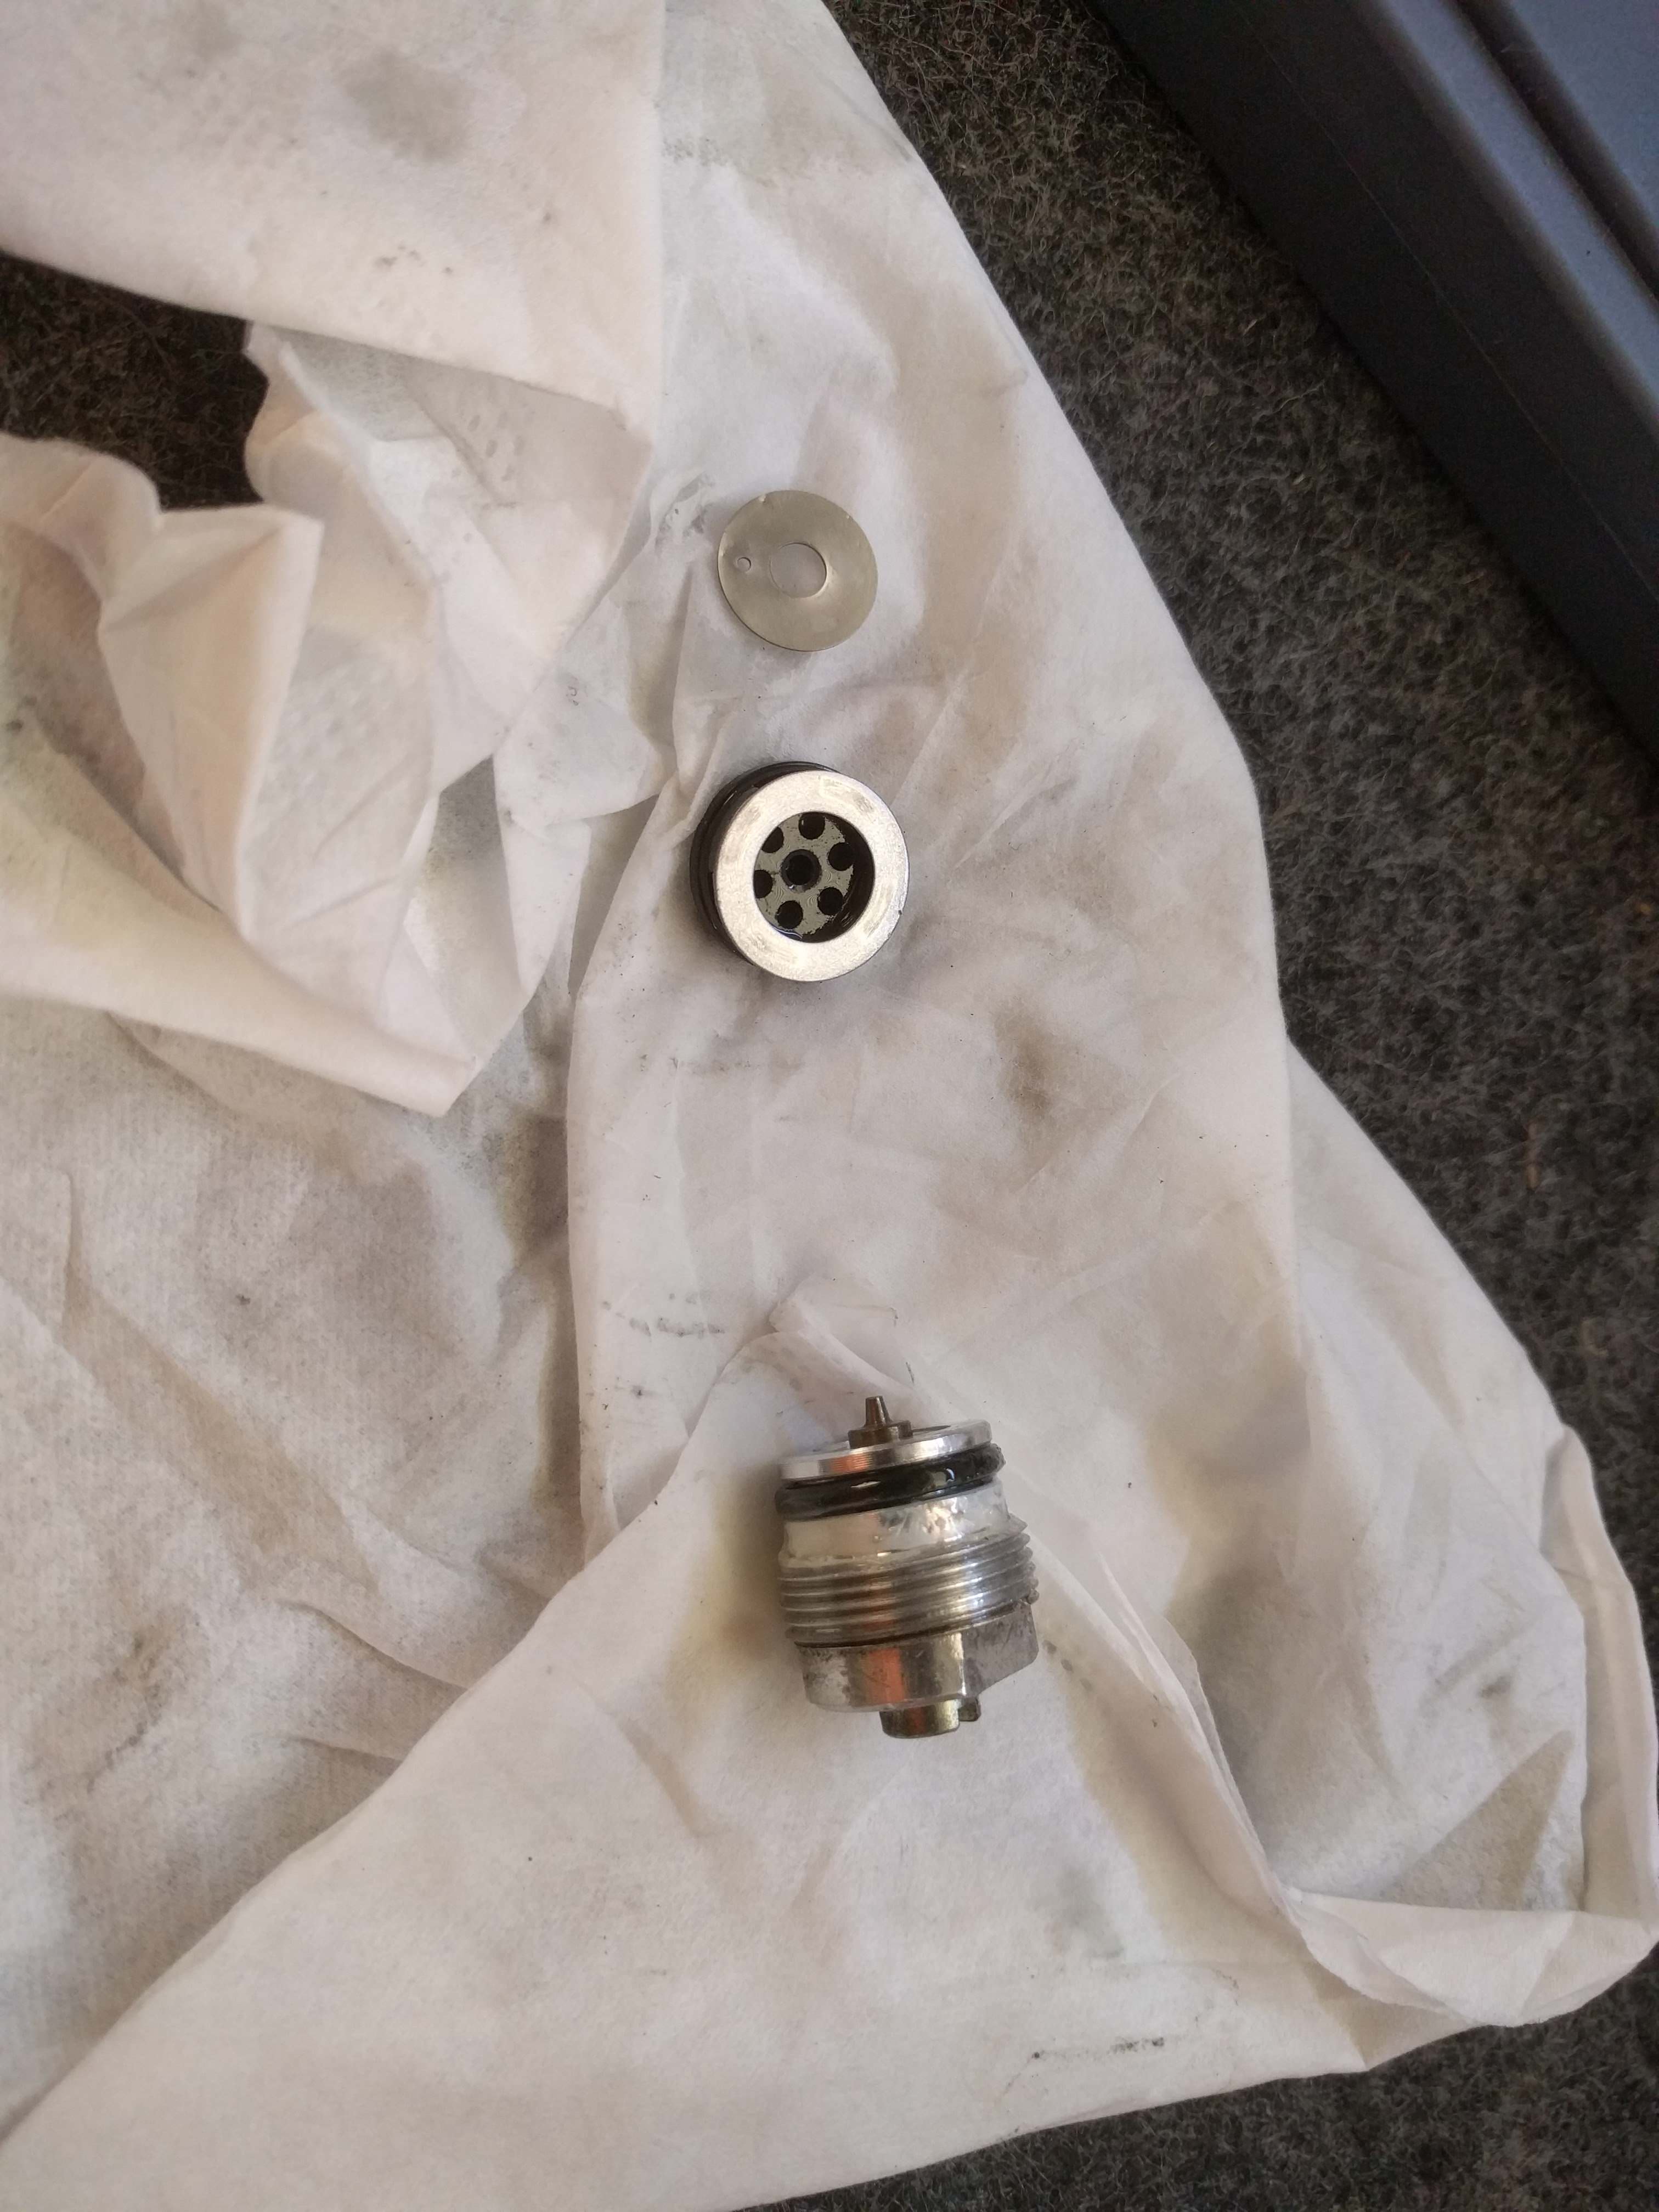
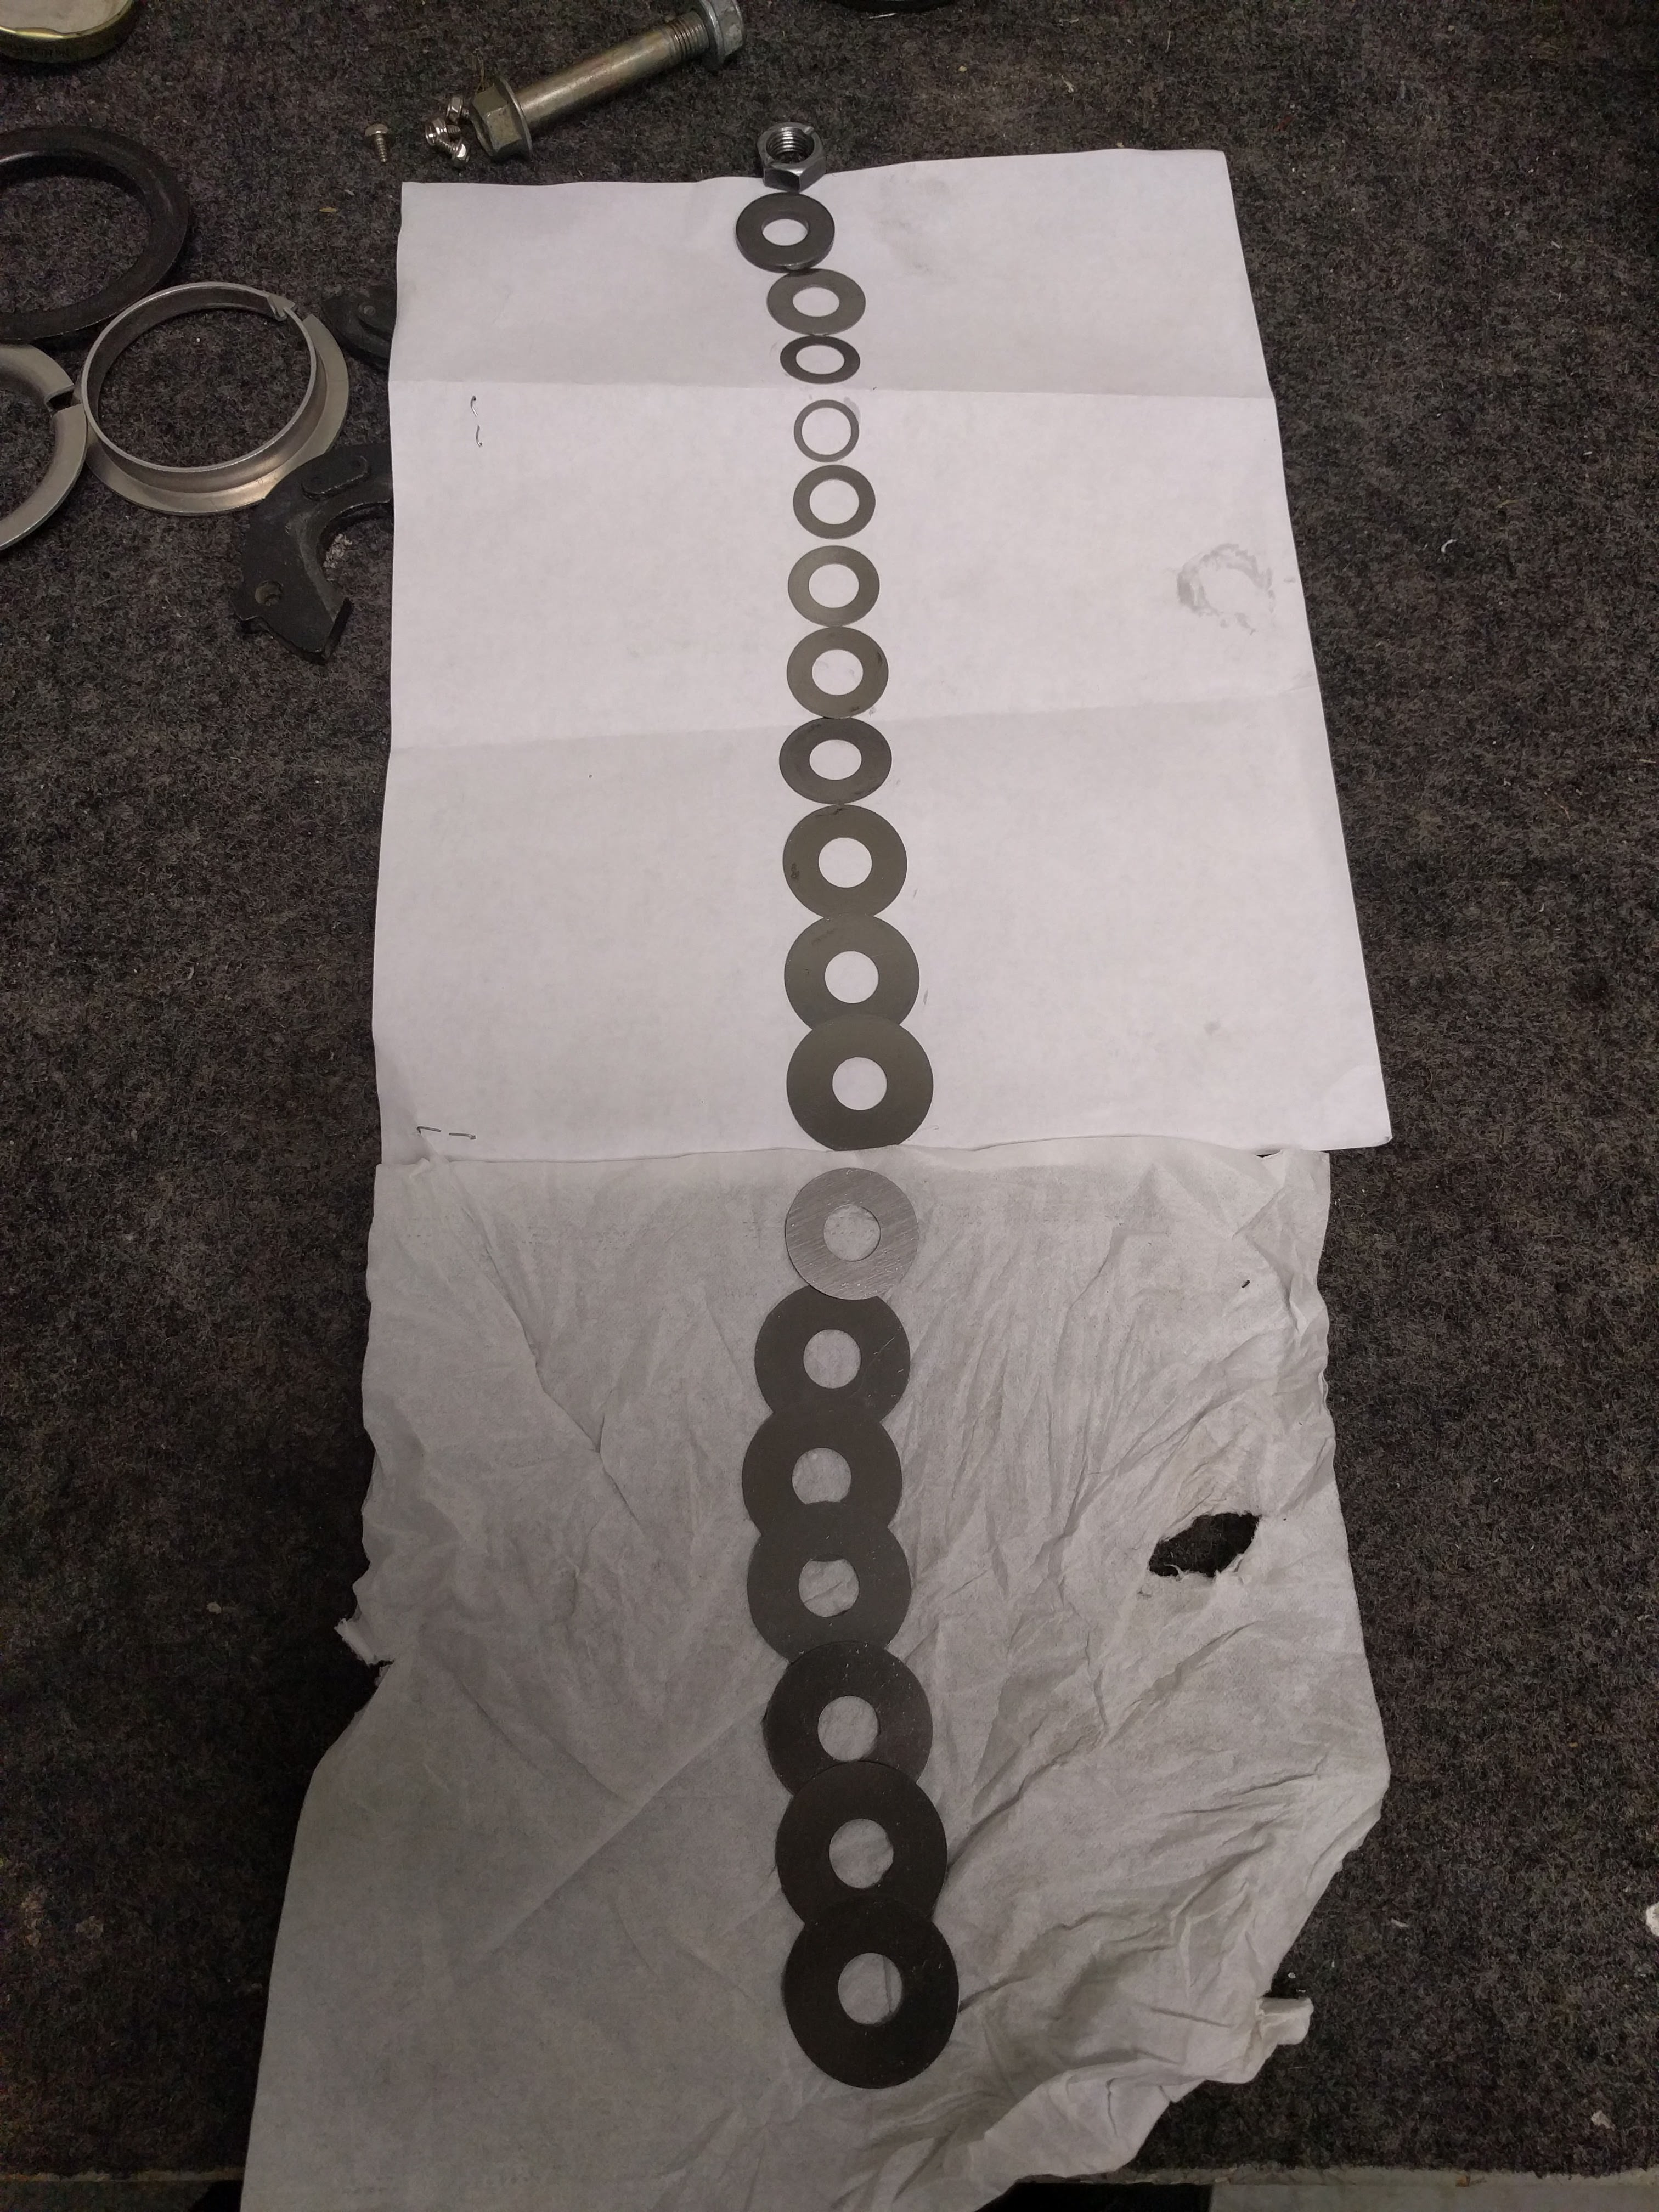
Remove the old valve and shim stacks. Put on the new ones. Use calipers to make sure you're putting the right shims in the right places; this isn't a fun step to have to re-do. I found it useful to lay out the whole stack on a paper towel first.
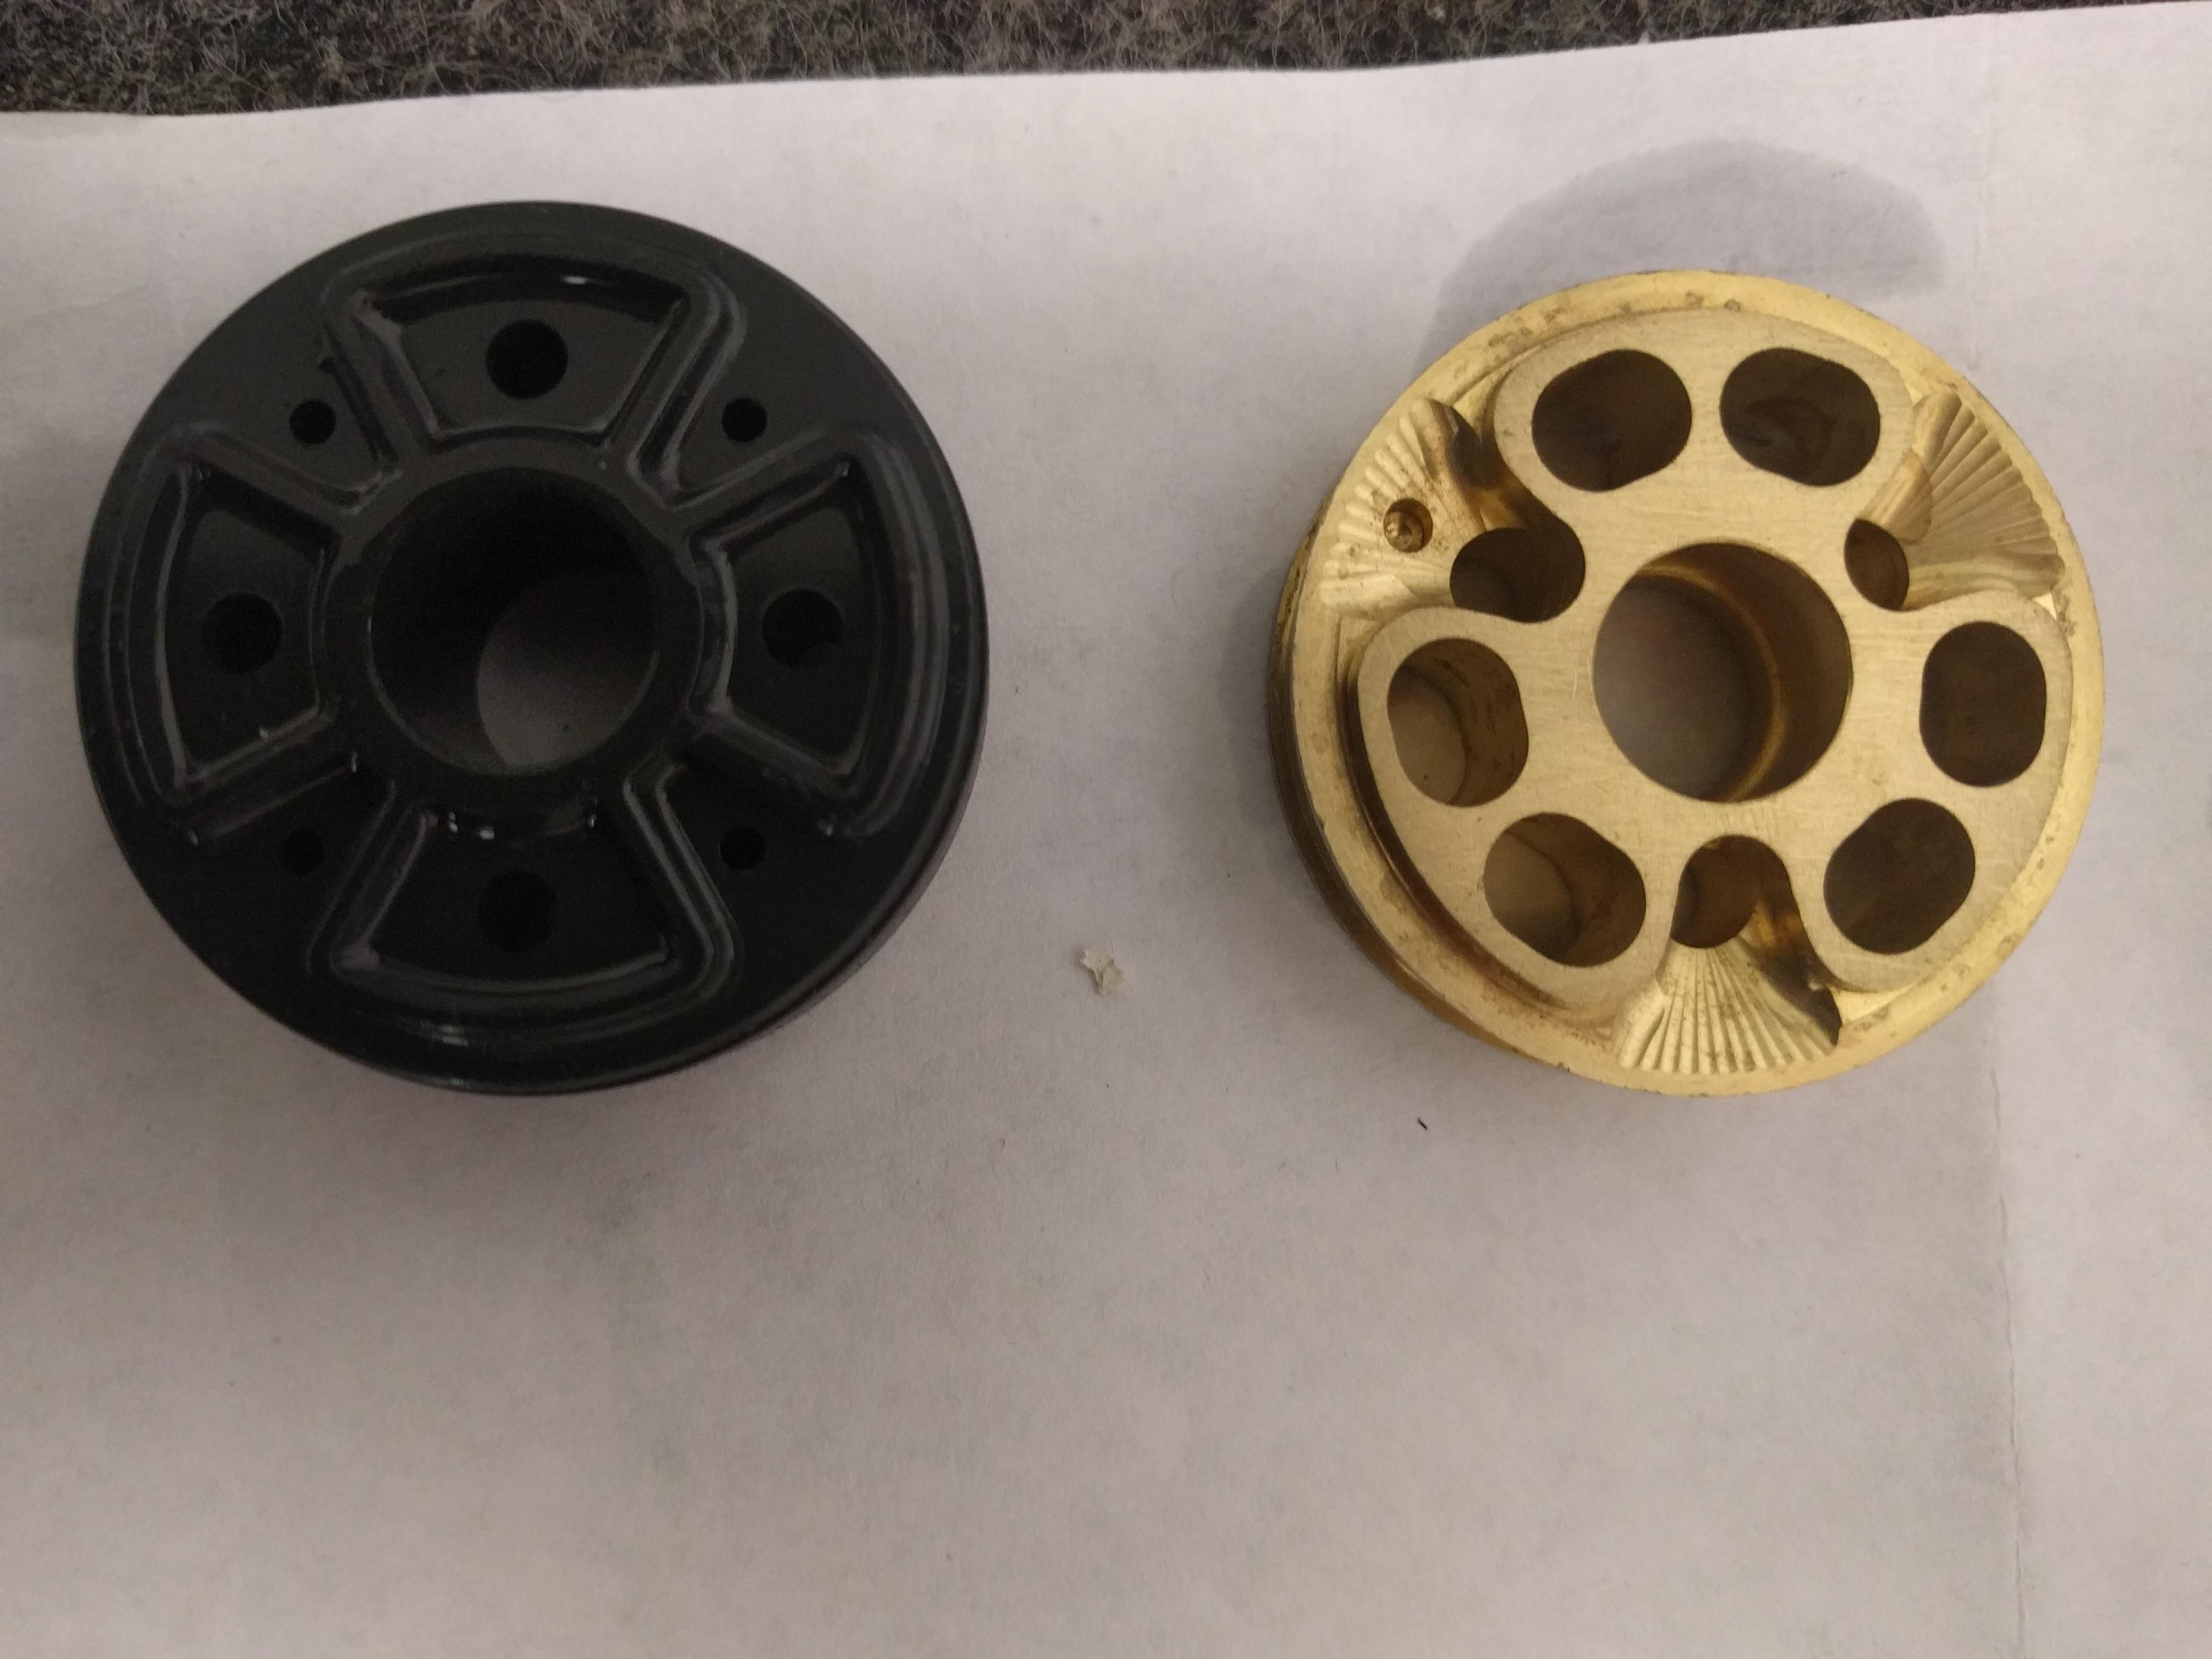
(OEM Showa valve vs. Race Tech gold valve)
When reassembling the valves onto the shaft, it might not be as tall as the stock shim stack, so you may need to add washers to space it out. Don't use washers that are large enough to impede the flow! When you reattach the nut on top that holds everything in place, use red Loctite instead of peening it, it'll be fine.
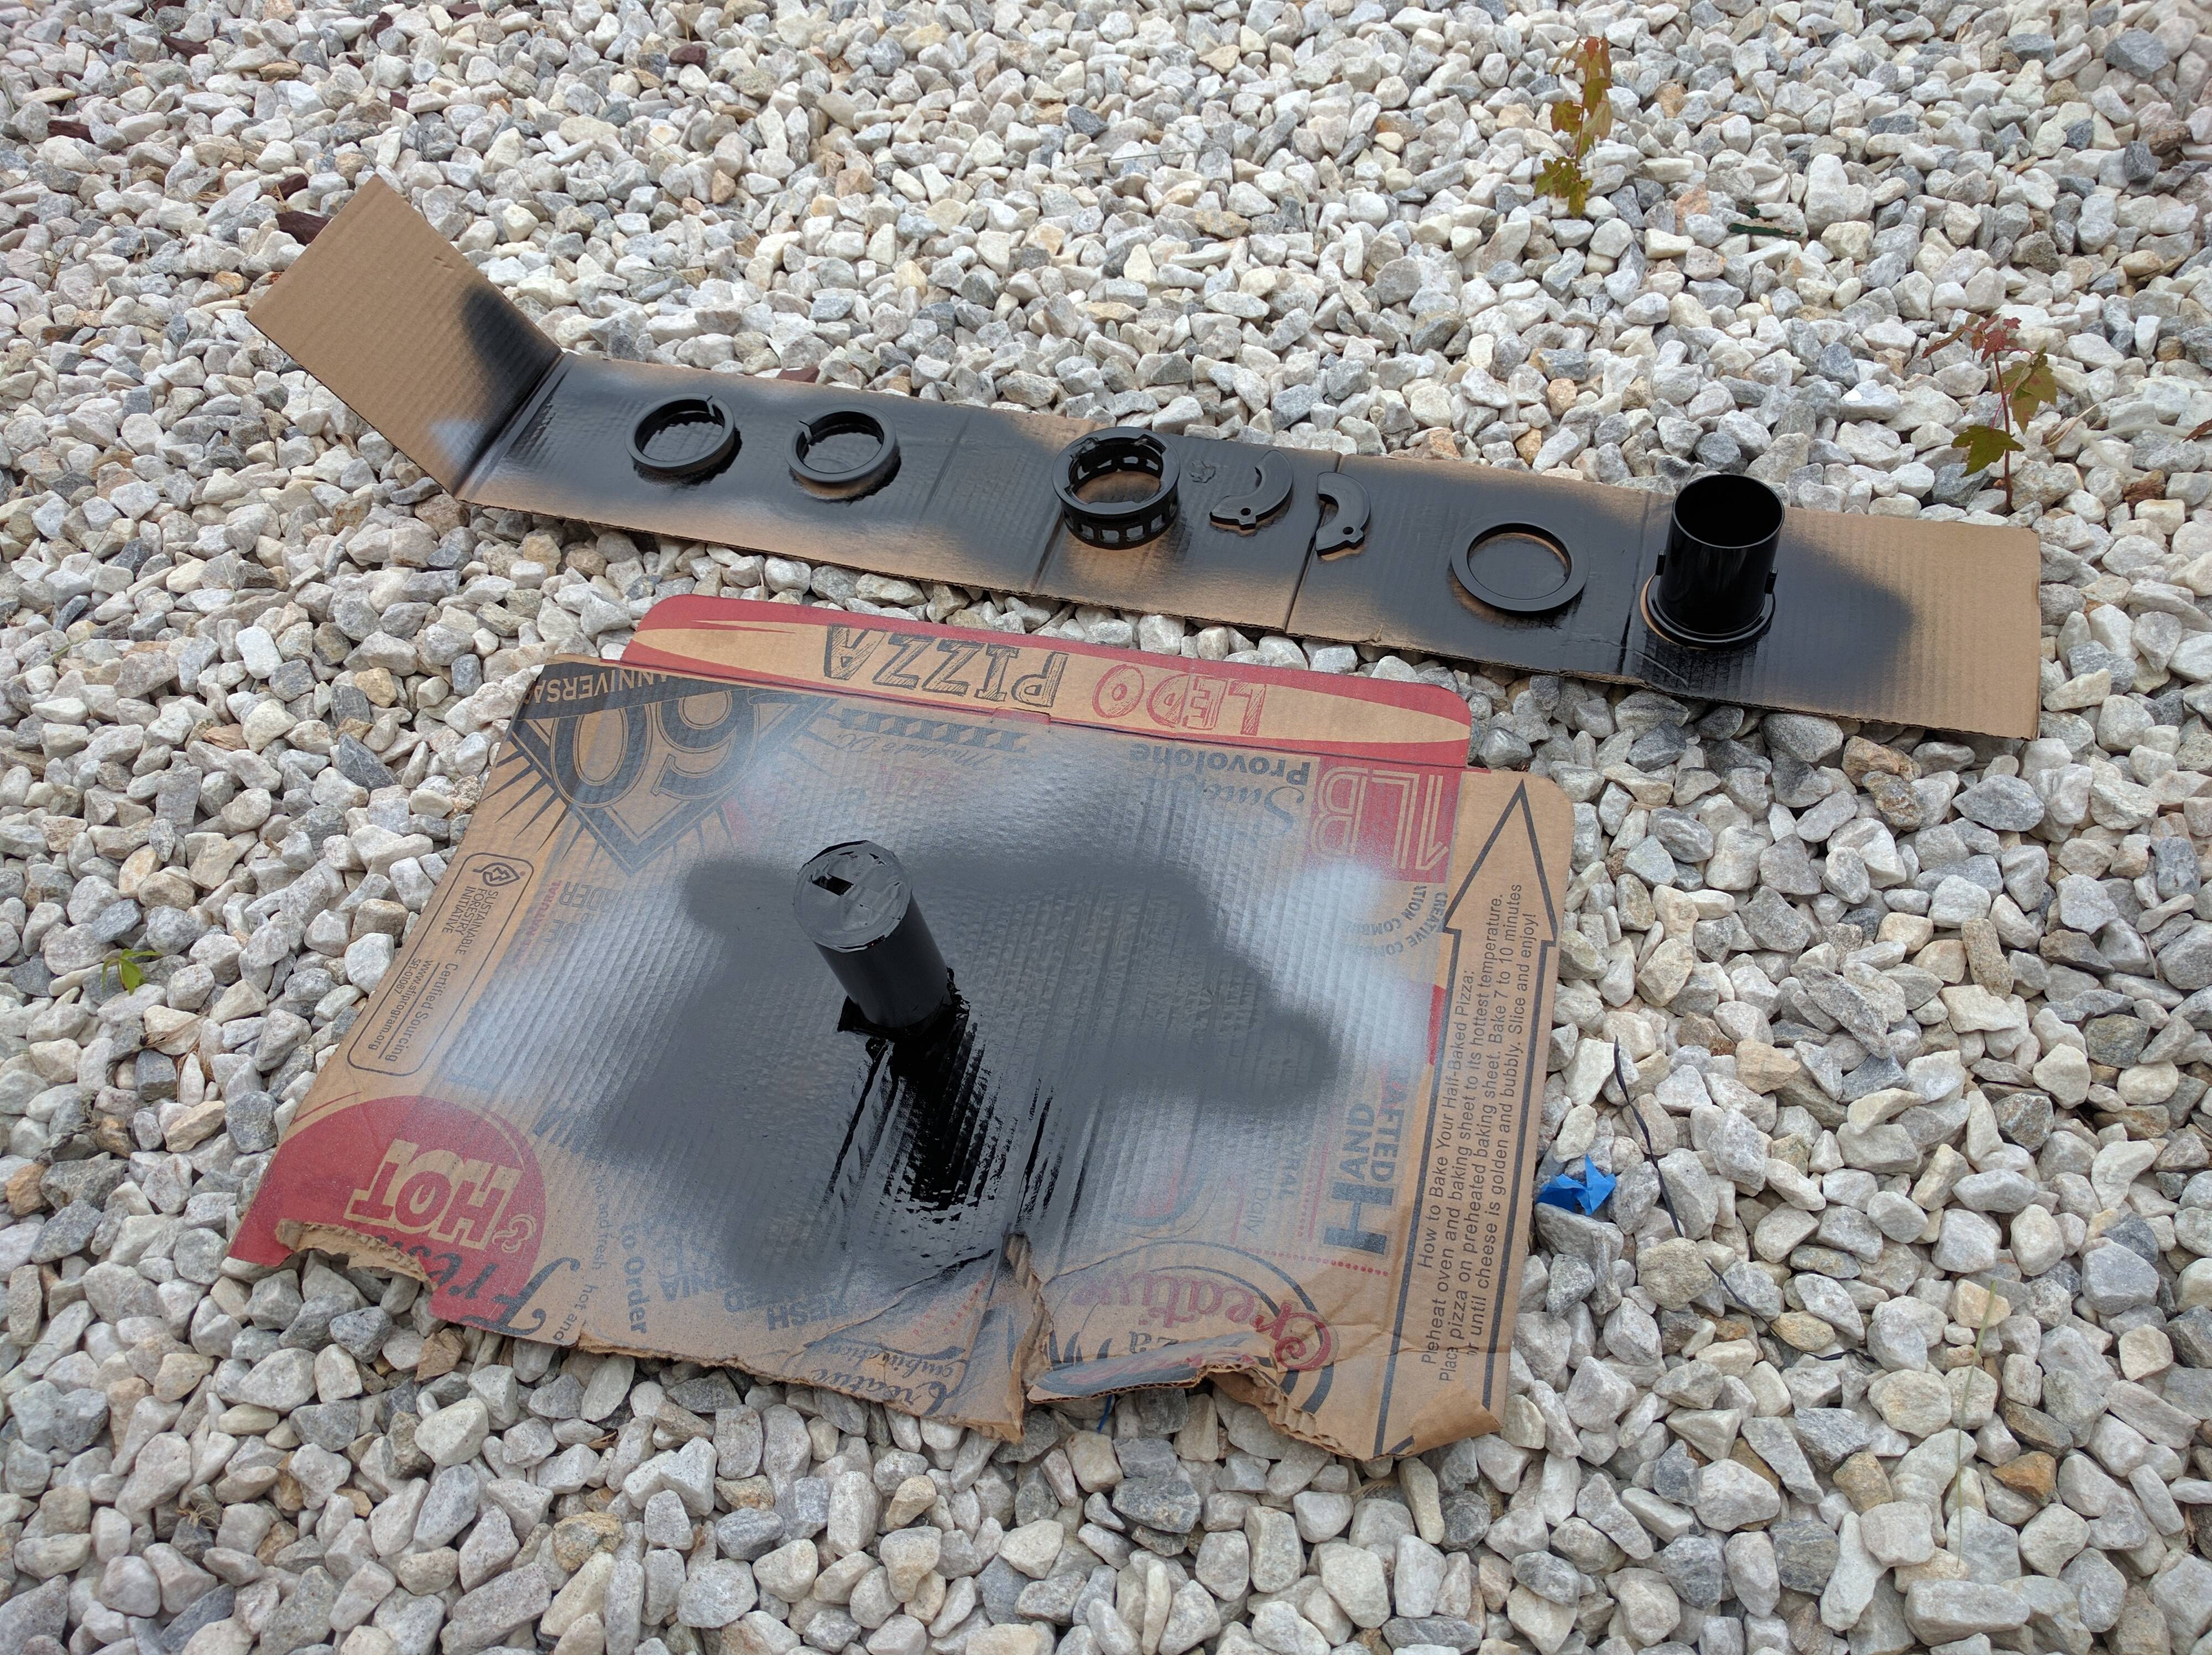
very optional: while everything was still disassembled, I repainted all the black parts and polished all the shiny parts, because that's the kind of overachiever I am.
Okay, now for the hard part; we need to reassemble this shock without getting any air in it. It's like bleeding a brake line except if the brake line didn't have any bleeder valve in it! I don't have any good pictures of this part because it's hard enough to do without holding a camera. First reassemble the reservoir, with the new valve-stem-equipped cap. The F4i shock has the internal reservoir bladder "backwards", so the Race Tech directions are off. You need to put the bladder in pointing toward the cap, not away from it as they show. Attach the hose to the reservoir and then to the shock body (I found it necessary to use PTFE plumbing tape on the threads for the hose, or else it would leak). Use new copper crush washers, just like a brake line. Then, fill up the shock with suspension fluid. Set it up so that air bubbles can go straight up from the reservoir, through the hose, out the shock body, and leave it there for a while so the air can float on out.
So, the plan here is that we'll pressurize the reservoir with air from an air compressor, then push in the shaft while depressurizing the reservoir. First push the shaft in up and down slowly (winky face emoji) to bleed out all the air from it. Suspension fluid will probably get everywhere during this whole process. Once it's bled, top the shock body off with fluid and then push the shaft seal in all the way. The fluid should be overflowing as you put the seal in, right up until the o-ring gets to the shock body, and then you can't press any further because you can't compress the liquid shock oil.
When this happens you keep pressing in with one hand while the other hand lets out the pressure in the reservoir. Ideally, you'll push in far enough to seat the circlip that holds in the shock shaft. Give the reservoir some more air pressure and then test out the shock by moving the shaft. You shouldn't hear ANY air bubbles moving around when you move the shaft in and out. If you do, you need to remove it and re-bleed it and start again. This took me three tries.
Then you want to get rid of the air and pressurize instead with nitrogen, at 210 PSI or thereabouts, because 1) air has moisture and oxygen and other undesirable stuff in it and 2) your compressor probably doesn't go up to 210 PSI. You probably don't have a tank of nitrogen just lying around; a shop will do this for like $30, which on the one hand stops you from buying $400 of single-use tools (a cylinder of nitrogen, a pressure regulator, and the special nitrogen refill tool), but on the other hand seems excessive for $0.001 worth of nitrogen gas. Your call. I was able to borrow the whole nitro charging setup from a co-worker.
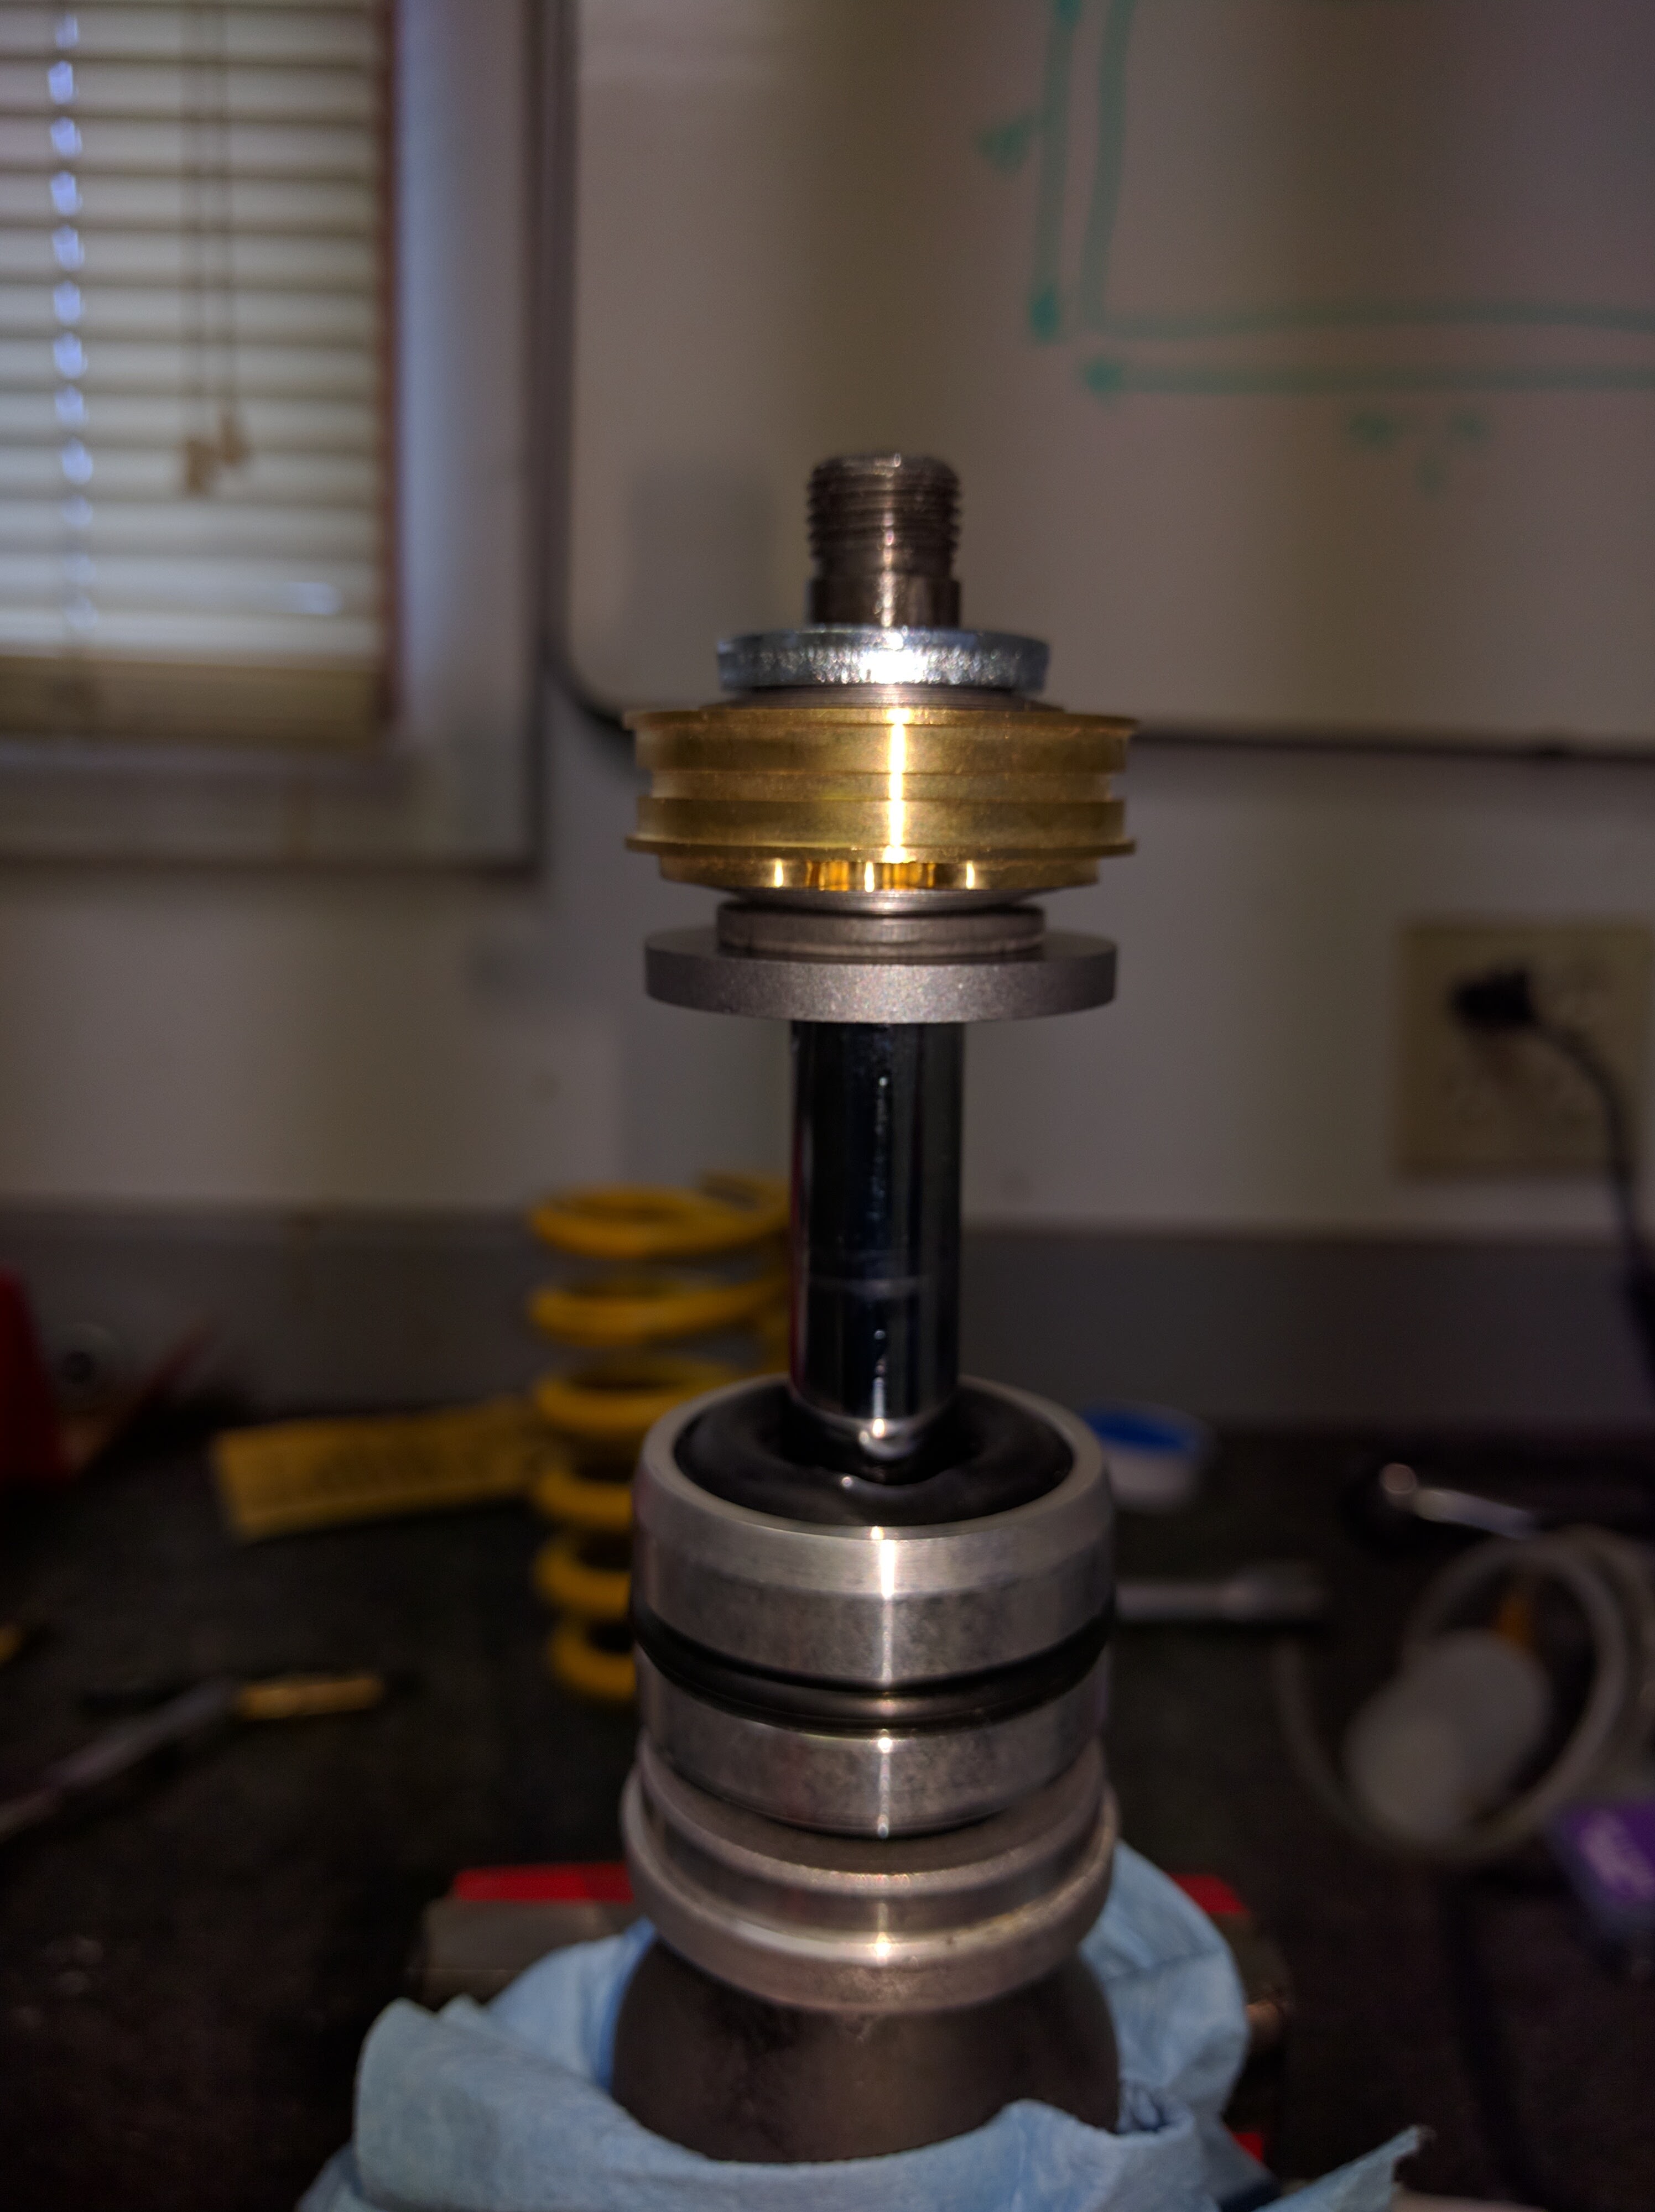
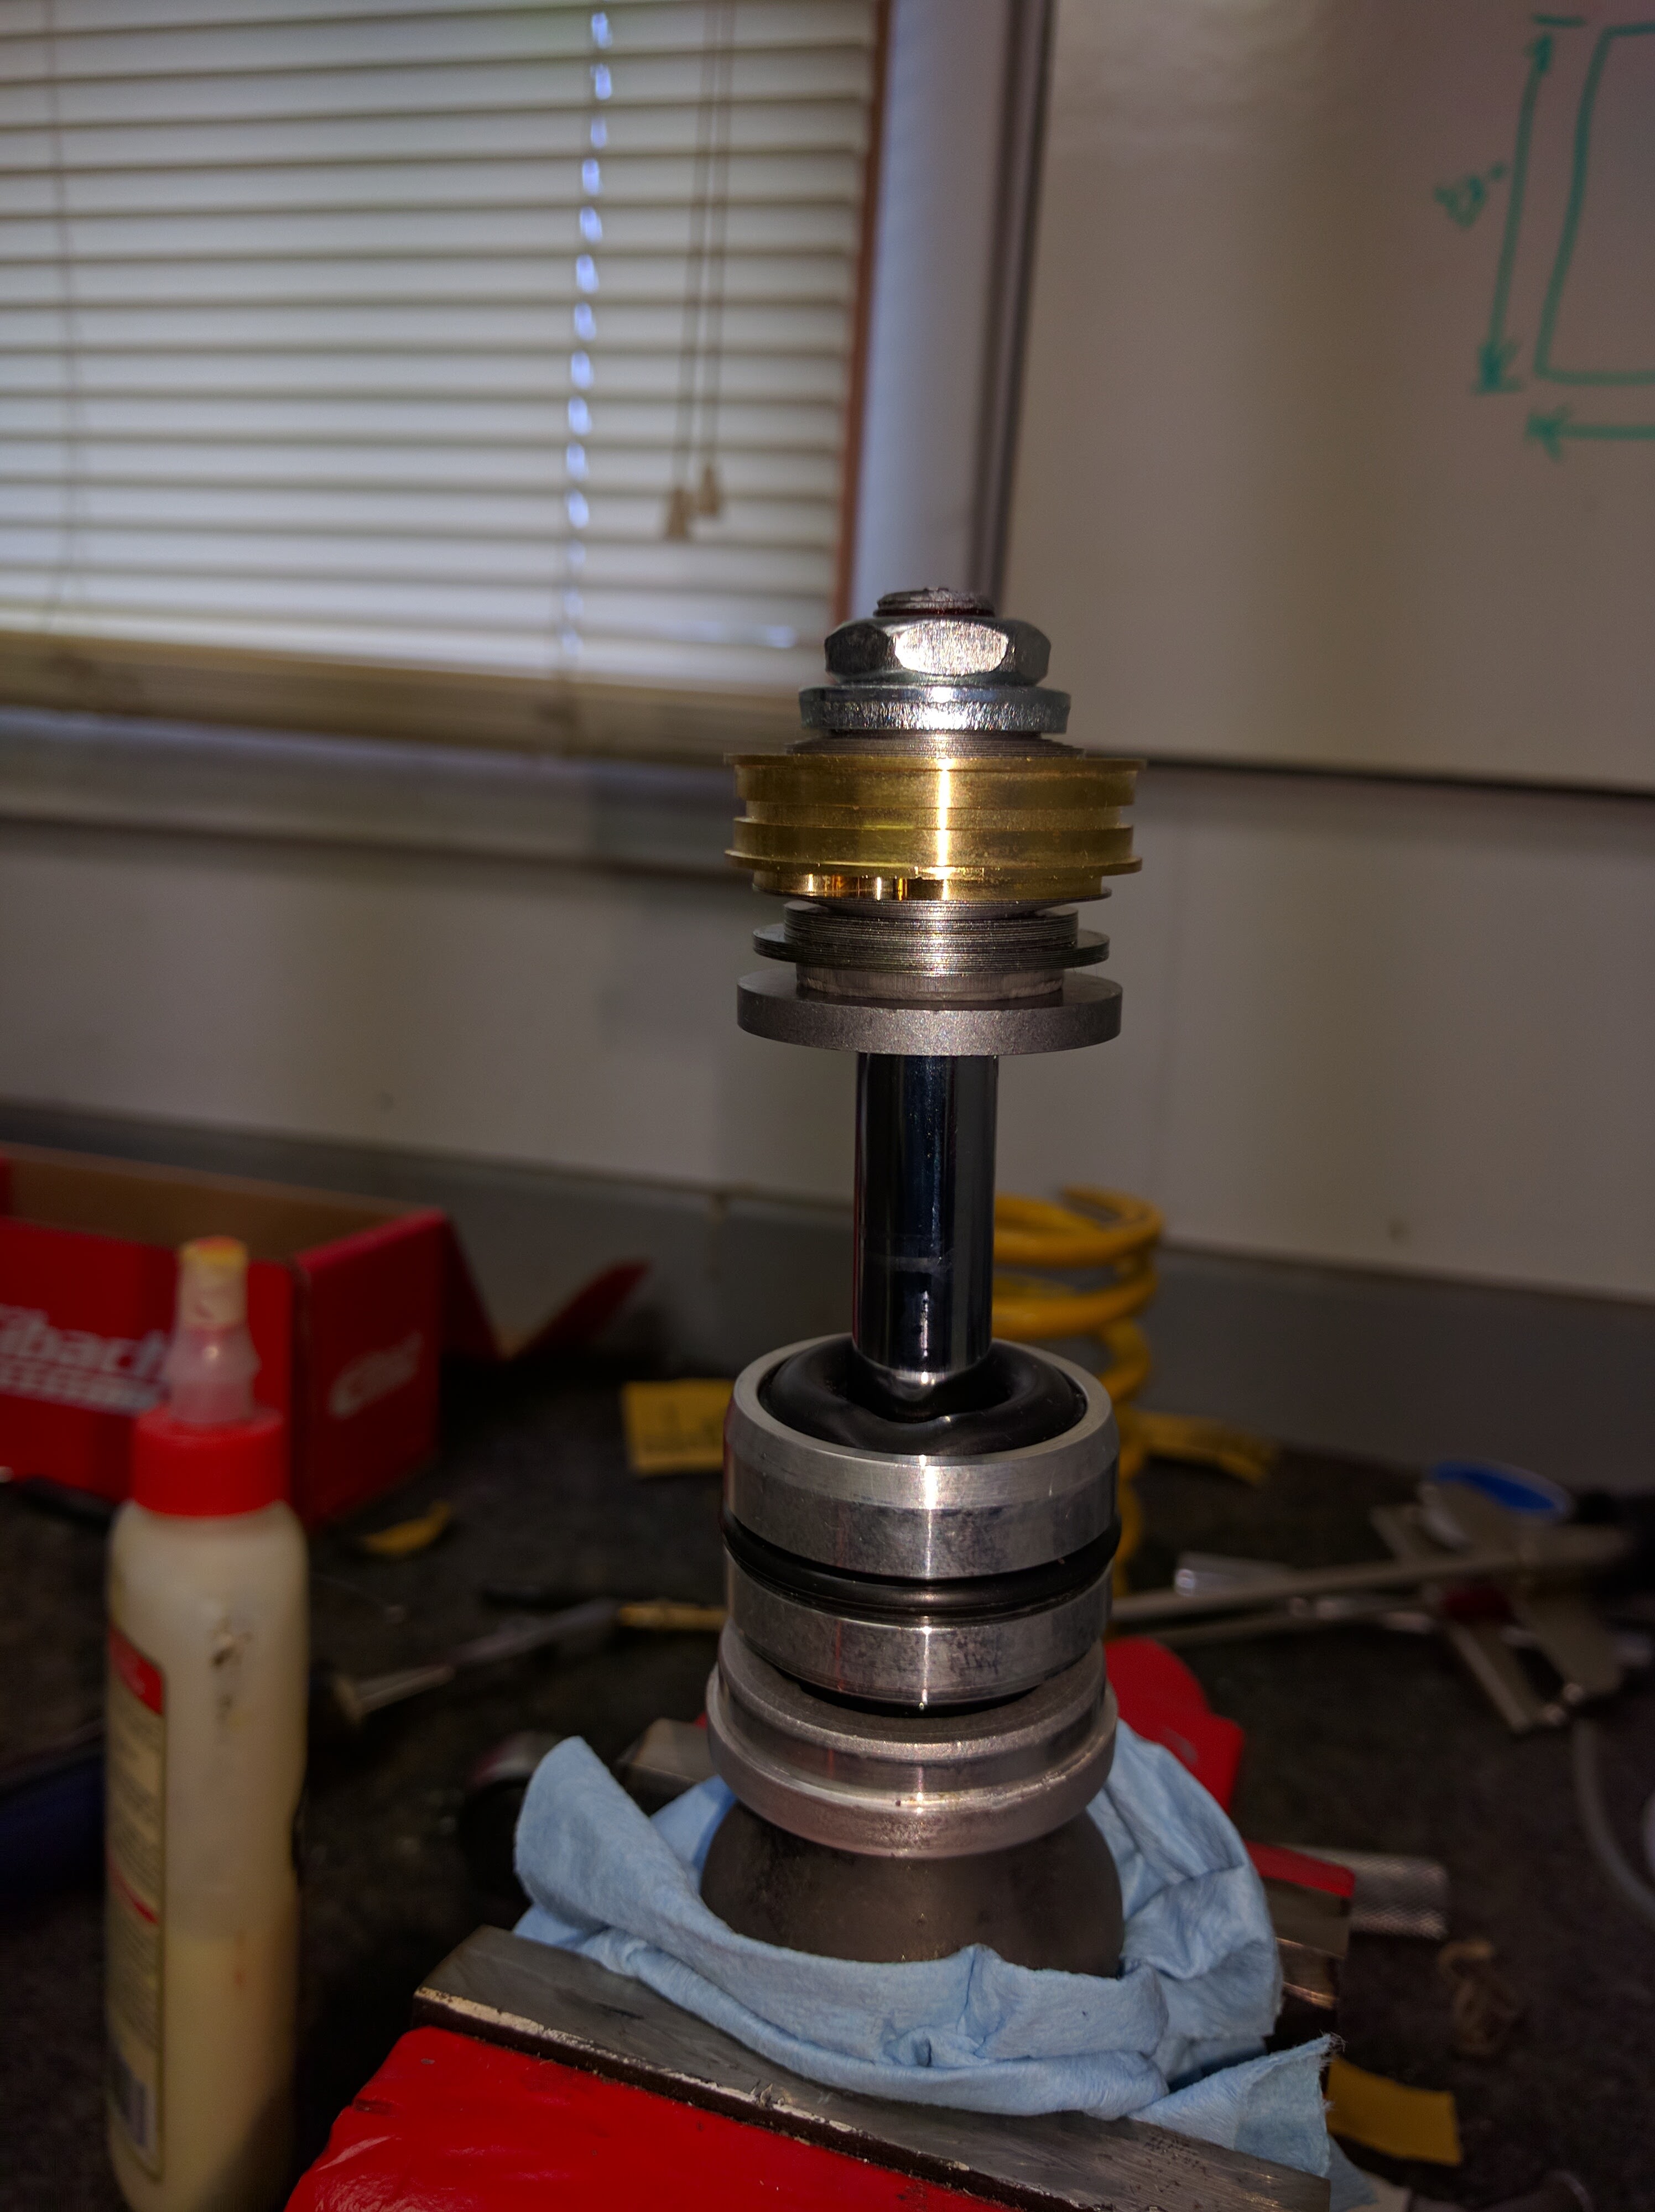
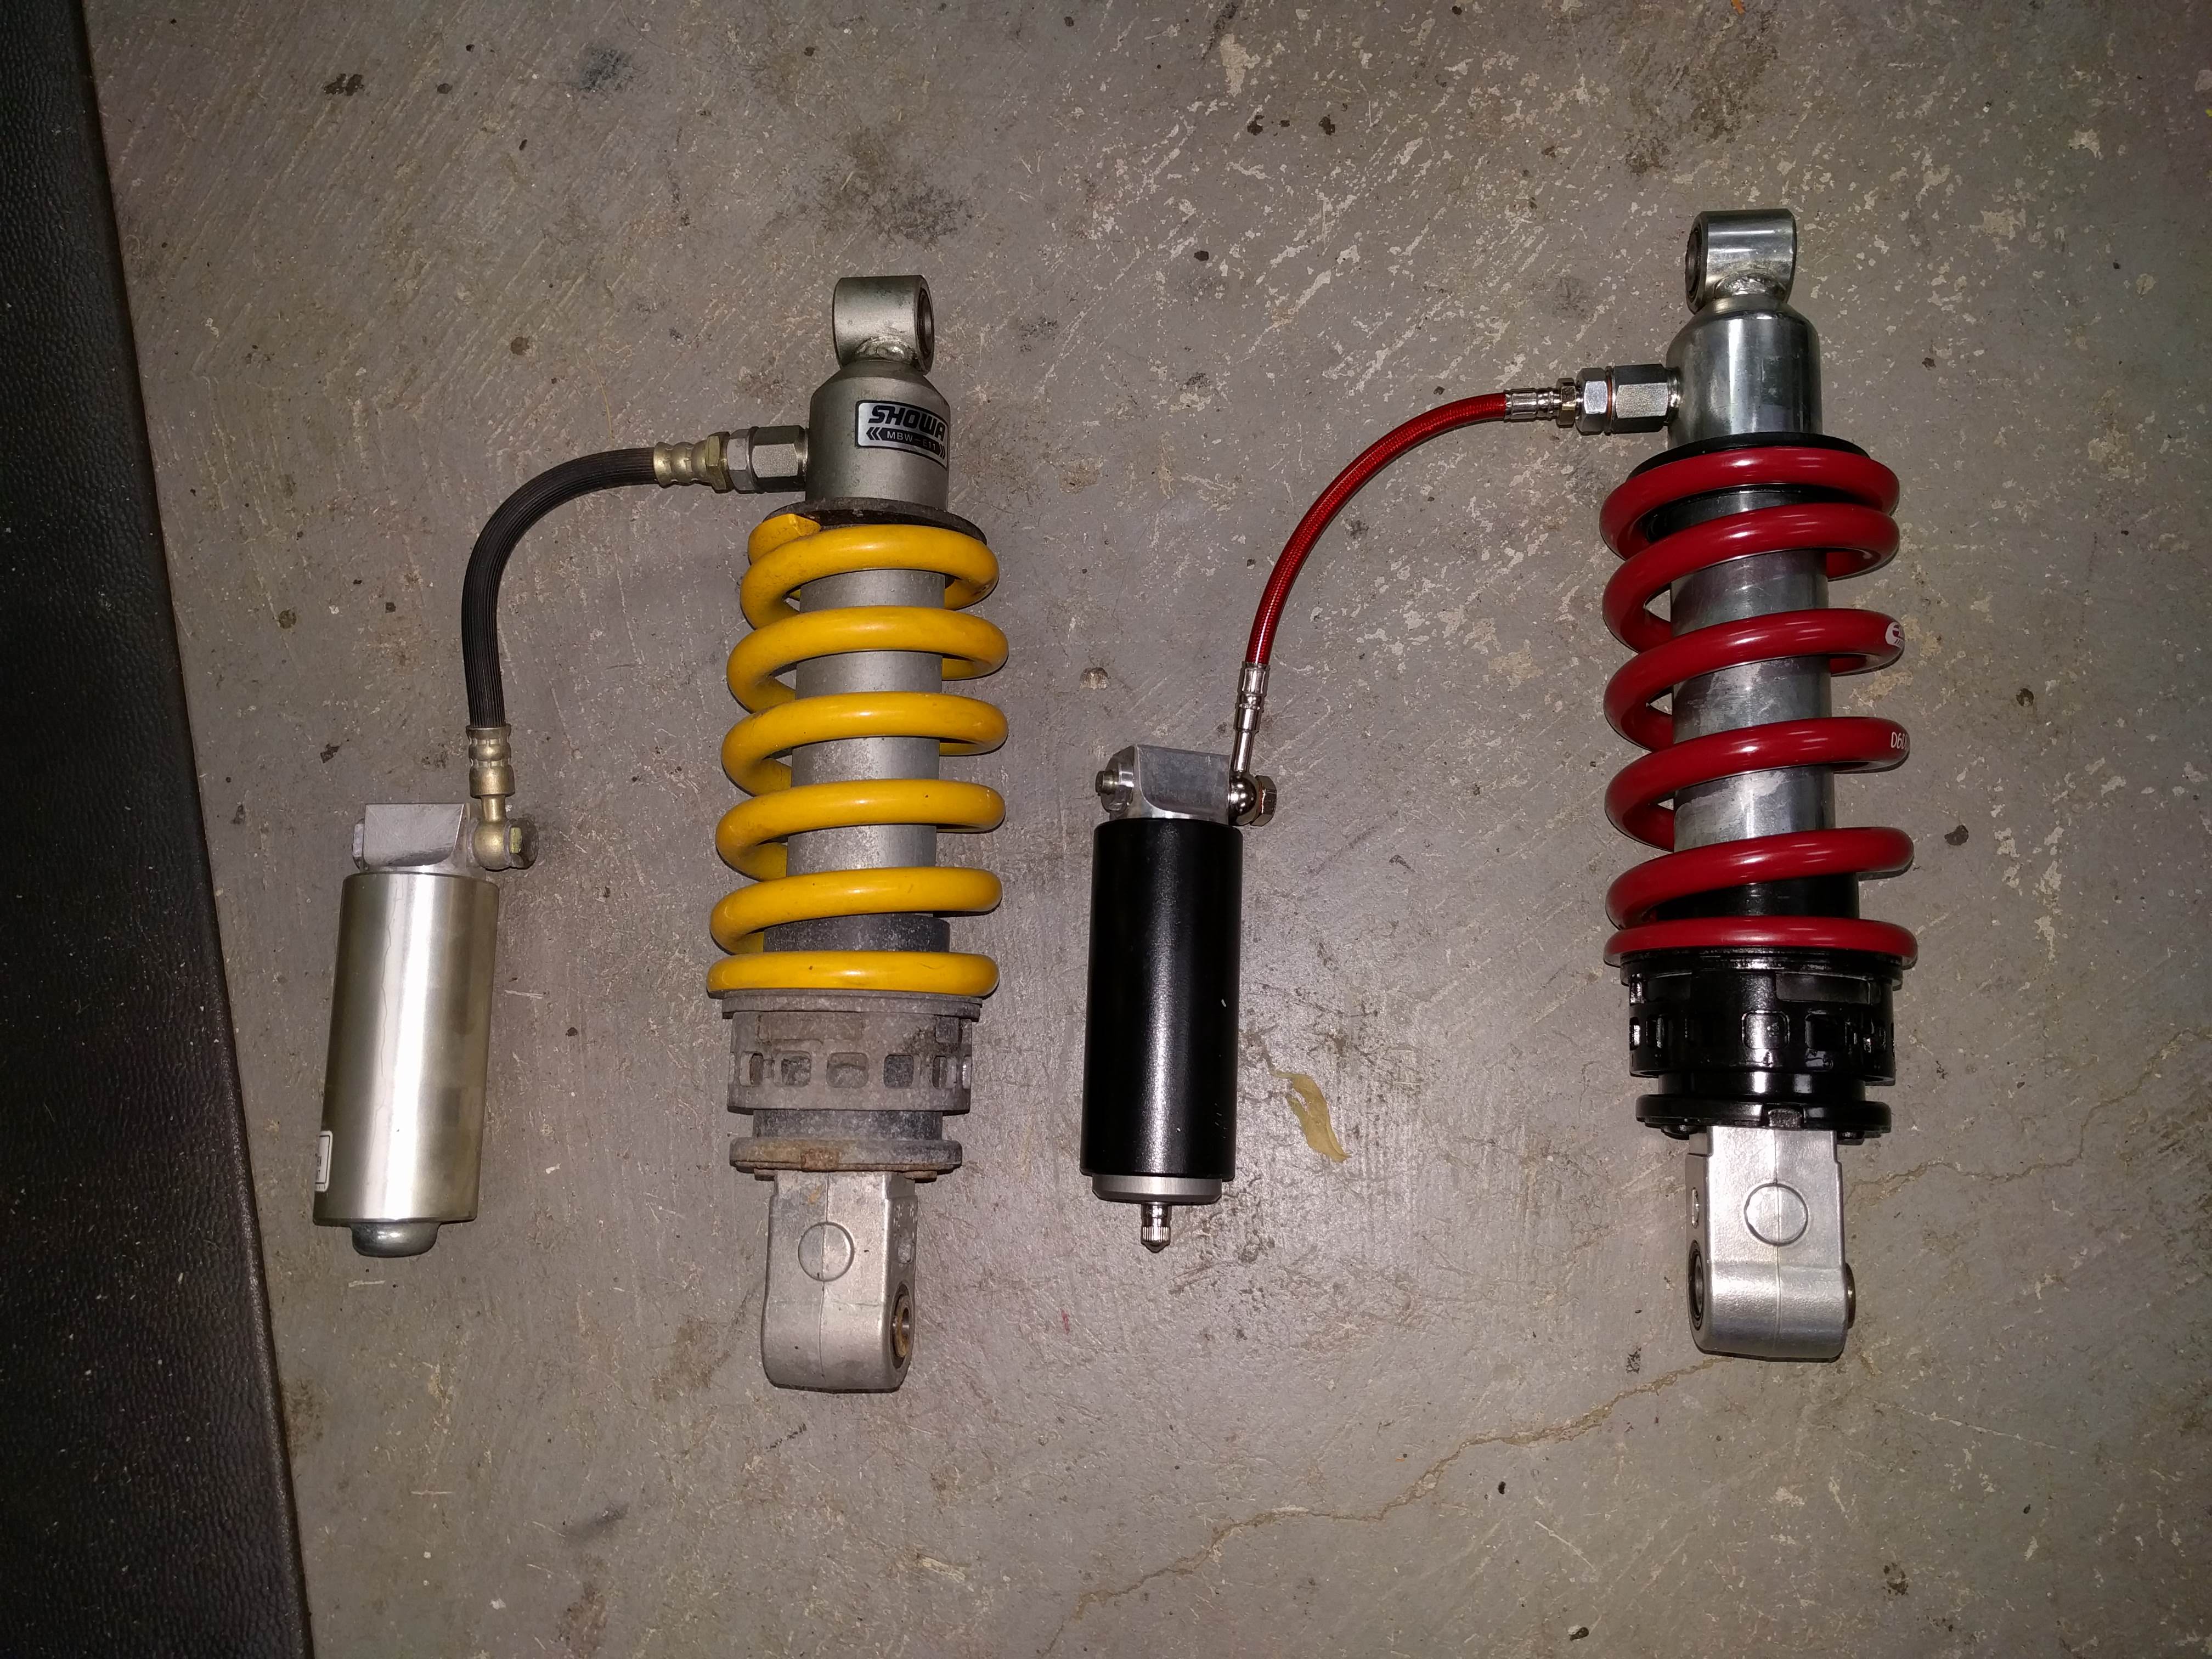
Check for leaks and air bubbles again, then compress the new spring and seat it in place with all those collar parts (including the adapter, the aftermarket spring won't fit without it), and you're done! Comparison, old vs. newly rebuilt:
Now go put it on the bike! The rebuilt shock will perform as good or better than brand new, and if you didn't splurge on the unnecessarily expensive gold valves and custom pressure line, you could do this for less than $200, which is not bad at all.
There are two problems with the rear shock on your F4i. First, the spring rate is so soft that it must have been designed for a rider weighing about 130 lbs. Second, the oil has broken down and most all of the nitrogen has probably leaked out over the past -- geez, a decade and a half. Now I feel old.
There's a few options available to fix this. You can drop more than $1000 on a custom built rear shock from Penske or Race Tech. They'll still build them for the F4i, as far as I can tell. Ohlins used to, but doesn't anymore; you might find one on eBay (again, pushing $1000, even used). If I had that kind of money to throw around I probably wouldn't be riding a fifteen year old sportbike. Need what they call the "80/50" solution, 80% of the performance for 50% of the cost. Besides, what's the fun in bolting on already-built parts? Sounds boring.
So, the plan is, replace the spring with a new, stiffer one, and rebuild the shock internals. (There was a thread somewhere on here once where someone just replaced the spring, but the date on that thread is a decade ago. You probably need to rebuild the shock now too).
You will need:
PARTS:
* The OEM Showa rear shock
* A new spring
* Adapter collars so the spring fits
* Shock fluid
* New reservoir cap with a valve in it
* New seals
* New copper crush washers
* Optionally: Gold Valve Kit
* Very Optionally: new custom shock oil line from the reservoir to the shock body
TOOLS:
Air compressor, motorcycle spring compressor, circlip tool, vise, drift punch and hammer, dremel, file, yadda yadda yadda. Your basic garage workshop setup, in other words. Make sure you have an absolute ton of paper towels on hand.
First get your spring rate. There's a calculator here: http://racetech.com/ProductSearch/12/Honda/CBR600F4i/2001-06[/url[
For my weight, it recommends 15 kg/mm. (or, in freedom units, 840 lbs/in). Then it recommends a bunch of expensive springs, some custom Race Tech builds and some from SK at what must be a 3x markup. Springs for coilover shocks (which is what this part basically is) are commodity items, folks. You want one with 2.25 inches inner diameter and 6 inches free (uncompressed) height, and that has your desired spring rate. I got one from Eibach, which has the convenient item code 0600.225.0850 (i.e. length, diameter, and spring rate). They have it at Summit Racing here, I guess people use them for coilovers on Miatas or whatever. https://www.summitracing.com/parts/eib-06002250850 You can also get one from Hyperco, they have a different numbering scheme where the part number will be 186Annnn where nnnn is the spring rate in pounds per inch. There are probably other manufacturers, but these are the easiest to find retail. Notice that the stock spring has a weird taper to it; every replacement will be straight instead, so you'll need an adaptor to make it fit.
You will need some parts from Race Tech: You need the spring adaptor collars (SPSC B5855N and SPSC B5552N) to make a non-tapered spring fit on the shock. You need either the reservoir cap (SMRC 40501) or the gold valve kit that includes it (SMGV S4005). I went with the gold valve because I'm rebuilding the shock anyway, but if I'm honest, noticing the difference is above my skill level; you can just go with the cap. You might as well buy new seals and bushings while you're there; this isn't a job you'll want to do twice. If you look on eBay you might find these parts cheaper from a reseller; it's funny how that works.
And you need new shock oil. I don't recommend you buy it from Race Tech. RT is rebranding somebody else's oil and I don't know whose. I got a quart of Maxima 3wt Shock Fluid for fifteen bucks. (A quart is more than enough.) There isn't a lot of standardization about what "3 Weight" means for suspension oil, but here's a chart that somebody put together, I don't know where he gets his info or how accurate it is, but it's as good info as any: Suspension fluids | Peter Verdone Designs
I got myself an F4i shock from a salvage bike so I could still ride while I worked on this. This is optional but will only cost you like $25.
(I had a new reservoir line custom-built by Galfer to match my red SS brake lines, this was ridiculously excessive and you can just reuse the stock one. If you do get one built, it's 8 inches in length, with a D148 fitting on one end and a D1130 fitting on the other end with a D008A banjo bolt)
Take your shock. We're gonna disassemble this thing completely and rebuild it faster, stronger, etc. Remove the spring with spring compressors. You'll need the small, super-sketchy kind of spring compressor; the ones sized for car springs don't fit. Compress the spring enough to remove the spring collar, then carefully decompress it.
Remove the line separating the shock and the reservoir and empty out the old fluid into a waste oil bin or whatever.
Drill a small hole in the shock reservoir cap. Don't worry, we're throwing this piece out. WEAR SAFETY GOGGLES AND GLOVES. There might still be some nitrogen pressure in there. Mine had none whatsoever, but you never know. Push that cap inward and you'll see a snap ring. (Most of this shock is held together with snap rings). Remove the ring and then pull the cap out. This thing will get replaced with the Race Tech cap that has a valve on it. (In theory you could save like twenty bucks here by attaching a Schrader valve to the stock cap with, I dunno, a TIG welder? Getting into diminishing returns here. Anyway.).
The compression valve is on the reservoir opposite the hose that goes to the shock. I suggest removing it and cleaning it with brake parts cleaner. You're already here, after all. Don't lose any of the tiny, easily-loseable pieces. After you've removed the compression valve and the hose, you can remove the other cap on the reservoir and clean all up in there too. If the rubber condom-looking piece inside the reservoir looks beat up, you can replace it with a new one from RT, but it's a pretty thick piece of rubber in a pretty well sealed environment so it may be fine. (Mine was just fine.)
Now start disassembling the shock itself. RT has a set of instructions here IP Sk Rebuild STD but they're generic; still, they can be a good reference. I used a hammer and drift punch to remove the shock cap, they suggest a chisel for some reason. After removing the cap, push the seal underneath the cap into the shock body so you can remove another snap ring, then pull the whole thing out. Clean all this up with brake parts cleaner too.
Optional bonus round: I splurged and bought the Gold Valve upgrade kit. This isn't at all necessary and you can save like 200 dollars by not buying this. If you didn't get the gold valve kit, just clean everything up really well and skip ahead to reassembly.
So, a hydraulic damper works by pushing oil through the holes in the piston valve, which slows down the motion of the piston. The stack of thin washers ("shims") on each side of the valve will bend under pressure, and based on the diameter and thickness of the shims in the stack, the shock absorber can be set up to have different rates of damping in either the compression direction (i.e. in) or the rebound direction (i.e. out) and at different speeds and so on. The "gold valve kit" is just a replacement piston valve and a bunch of shims, along with a table to consult on the RT web site so you can set up a shim stack for your weight and desired rate of damping (rather than the one-size-fits-all setup that the Showa OEM shim stack is set up for). Again, probably not a huge difference. Diminishing returns. But we're here anyway.
The nut holding on the shim stack is peened into place so it doesn't come loose. CAREFULLY remove the peening with a Dremel or whatever. The threaded shaft is also peened over; you'll need to use a file to take that off. Once you've done both, then remove the nut.
Remove the old valve and shim stacks. Put on the new ones. Use calipers to make sure you're putting the right shims in the right places; this isn't a fun step to have to re-do. I found it useful to lay out the whole stack on a paper towel first.
(OEM Showa valve vs. Race Tech gold valve)
When reassembling the valves onto the shaft, it might not be as tall as the stock shim stack, so you may need to add washers to space it out. Don't use washers that are large enough to impede the flow! When you reattach the nut on top that holds everything in place, use red Loctite instead of peening it, it'll be fine.
very optional: while everything was still disassembled, I repainted all the black parts and polished all the shiny parts, because that's the kind of overachiever I am.
Okay, now for the hard part; we need to reassemble this shock without getting any air in it. It's like bleeding a brake line except if the brake line didn't have any bleeder valve in it! I don't have any good pictures of this part because it's hard enough to do without holding a camera. First reassemble the reservoir, with the new valve-stem-equipped cap. The F4i shock has the internal reservoir bladder "backwards", so the Race Tech directions are off. You need to put the bladder in pointing toward the cap, not away from it as they show. Attach the hose to the reservoir and then to the shock body (I found it necessary to use PTFE plumbing tape on the threads for the hose, or else it would leak). Use new copper crush washers, just like a brake line. Then, fill up the shock with suspension fluid. Set it up so that air bubbles can go straight up from the reservoir, through the hose, out the shock body, and leave it there for a while so the air can float on out.
So, the plan here is that we'll pressurize the reservoir with air from an air compressor, then push in the shaft while depressurizing the reservoir. First push the shaft in up and down slowly (winky face emoji) to bleed out all the air from it. Suspension fluid will probably get everywhere during this whole process. Once it's bled, top the shock body off with fluid and then push the shaft seal in all the way. The fluid should be overflowing as you put the seal in, right up until the o-ring gets to the shock body, and then you can't press any further because you can't compress the liquid shock oil.
When this happens you keep pressing in with one hand while the other hand lets out the pressure in the reservoir. Ideally, you'll push in far enough to seat the circlip that holds in the shock shaft. Give the reservoir some more air pressure and then test out the shock by moving the shaft. You shouldn't hear ANY air bubbles moving around when you move the shaft in and out. If you do, you need to remove it and re-bleed it and start again. This took me three tries.
Then you want to get rid of the air and pressurize instead with nitrogen, at 210 PSI or thereabouts, because 1) air has moisture and oxygen and other undesirable stuff in it and 2) your compressor probably doesn't go up to 210 PSI. You probably don't have a tank of nitrogen just lying around; a shop will do this for like $30, which on the one hand stops you from buying $400 of single-use tools (a cylinder of nitrogen, a pressure regulator, and the special nitrogen refill tool), but on the other hand seems excessive for $0.001 worth of nitrogen gas. Your call. I was able to borrow the whole nitro charging setup from a co-worker.
Check for leaks and air bubbles again, then compress the new spring and seat it in place with all those collar parts (including the adapter, the aftermarket spring won't fit without it), and you're done! Comparison, old vs. newly rebuilt:
Now go put it on the bike! The rebuilt shock will perform as good or better than brand new, and if you didn't splurge on the unnecessarily expensive gold valves and custom pressure line, you could do this for less than $200, which is not bad at all.
#2
09-18-2018, 06:02 PM

Senior Member
#3
09-18-2018, 06:55 PM

Senior Member
Excellent write up!!!! By the time I reached about 60,000 miles I could tell my stock rear shock was done. If I hadn't stumbled onto my current ohlins I would have had racetech rebuild mine just like yours. My only question is your statement to the oem rear spring, being sprung for a light weight person. Then you referenced racetechs site, which shows the oem rear spring perfect for a 180lbs rider, which is about dead average so most people will not need to replace making this even cheaper.

#5
09-20-2018, 08:35 PM

Senior Member
Join Date: Oct 2011
Location: Monticello, Indiana
Posts: 777
Likes: 0
Received 0 Likes
on
0 Posts
What was your total cost with all parts that you used and what would it have been with only a rebuild(no new spring and no valve)?
I agree that rebuilding the oem shock is a much better option than buying an ohlins/fox/penske shock online that would probably need rebuilt anyway and wouldn't come sprung or valved for your weight. But I'm curious as to the total costs since it doesn't cost all that much to send out a shock to be rebuilt. The last one I had done was a rebuild with a custom valve, no spring replacement and it was $300. I'm all for doing things myself but only if it's economical.
Also, the oem f4i spring is plenty stiff. More than enough for my ~200lb *** geared up at the track. The front however is comically soft.
#6
09-21-2018, 07:12 AM
Join Date: May 2016
Posts: 2
Likes: 0
Received 0 Likes
on
0 Posts
I'm at 225 lbs buck naked and much prefer the stiffer spring, especially at track days, your own use case may vary.
Total cost, parts bought from a whole wide range of sources so your own bill might be a bit different:
Race Tech Shock Oil Dust Seal Set: $25.70
Maxima 3wt Shock Fluid, 1qt: $15.95
sketchy-*** spring compressor: $39.95
(normally I don't put tools in the bill of materials but these bent during this job and were discarded. invest in a better one if you see yourself doing this more than once)
Eibach Spring 0600.225.0850: $67.47
Race Tech spring adapter collars $6.98
Race Tech shock gold valve kit (includes reservoir cap) $169.99
Galfer custom oil line $73.40
So, my total was $400. If you leave off the custom line and gold valves (you'll need to buy the $30 Race Tech reservoir cap instead, because the stock one doesn't have a valve for nitrogen charging) you're at $187. If you don't need a spring either, because the stock spring rate is just fine for you, you're at $112. This is not counting getting the thing filled with nitrogen. I was able to borrow that whole setup from a buddy. A shop near me charges $36 for it. So, keep that in mind. This also doesn't count a half a can of brake parts cleaner and a ton of paper towels, which you will need
#7
09-22-2018, 04:28 AM

Welcome crew
#9
03-02-2019, 09:09 PM

I'm at 225 lbs buck naked and much prefer the stiffer spring, especially at track days, your own use case may vary.
Total cost, parts bought from a whole wide range of sources so your own bill might be a bit different:
Race Tech Shock Oil Dust Seal Set: $25.70
Maxima 3wt Shock Fluid, 1qt: $15.95
sketchy-*** spring compressor: $39.95
(normally I don't put tools in the bill of materials but these bent during this job and were discarded. invest in a better one if you see yourself doing this more than once)
Eibach Spring 0600.225.0850: $67.47
Race Tech spring adapter collars $6.98
Race Tech shock gold valve kit (includes reservoir cap) $169.99
Galfer custom oil line $73.40
So, my total was $400. If you leave off the custom line and gold valves (you'll need to buy the $30 Race Tech reservoir cap instead, because the stock one doesn't have a valve for nitrogen charging) you're at $187. If you don't need a spring either, because the stock spring rate is just fine for you, you're at $112. This is not counting getting the thing filled with nitrogen. I was able to borrow that whole setup from a buddy. A shop near me charges $36 for it. So, keep that in mind. This also doesn't count a half a can of brake parts cleaner and a ton of paper towels, which you will need
Total cost, parts bought from a whole wide range of sources so your own bill might be a bit different:
Race Tech Shock Oil Dust Seal Set: $25.70
Maxima 3wt Shock Fluid, 1qt: $15.95
sketchy-*** spring compressor: $39.95
(normally I don't put tools in the bill of materials but these bent during this job and were discarded. invest in a better one if you see yourself doing this more than once)
Eibach Spring 0600.225.0850: $67.47
Race Tech spring adapter collars $6.98
Race Tech shock gold valve kit (includes reservoir cap) $169.99
Galfer custom oil line $73.40
So, my total was $400. If you leave off the custom line and gold valves (you'll need to buy the $30 Race Tech reservoir cap instead, because the stock one doesn't have a valve for nitrogen charging) you're at $187. If you don't need a spring either, because the stock spring rate is just fine for you, you're at $112. This is not counting getting the thing filled with nitrogen. I was able to borrow that whole setup from a buddy. A shop near me charges $36 for it. So, keep that in mind. This also doesn't count a half a can of brake parts cleaner and a ton of paper towels, which you will need
1 3wt fork oil? Is that because of your gold valves?
2 do you have any static sag on your new rear spring? I installed the same spring and I am the same weight. My sag numbers are to low
any help would be great
#10
05-08-2023, 03:07 PM

Hello, I know it's an old thread but can someone help. I am rebuilding the same shock and noticed that the bladder is in reverse, in most shocks the nitrogen is inside the bladder and oil on the outside, in this one it's the other way round. My question is it this correct or has someone tampered with it. Thank you.

Thread
Thread Starter
Forum
Replies
Last Post