Bucking/ Misfiring (?) After CCT Install?
#1
 10-18-2013, 07:29 PM


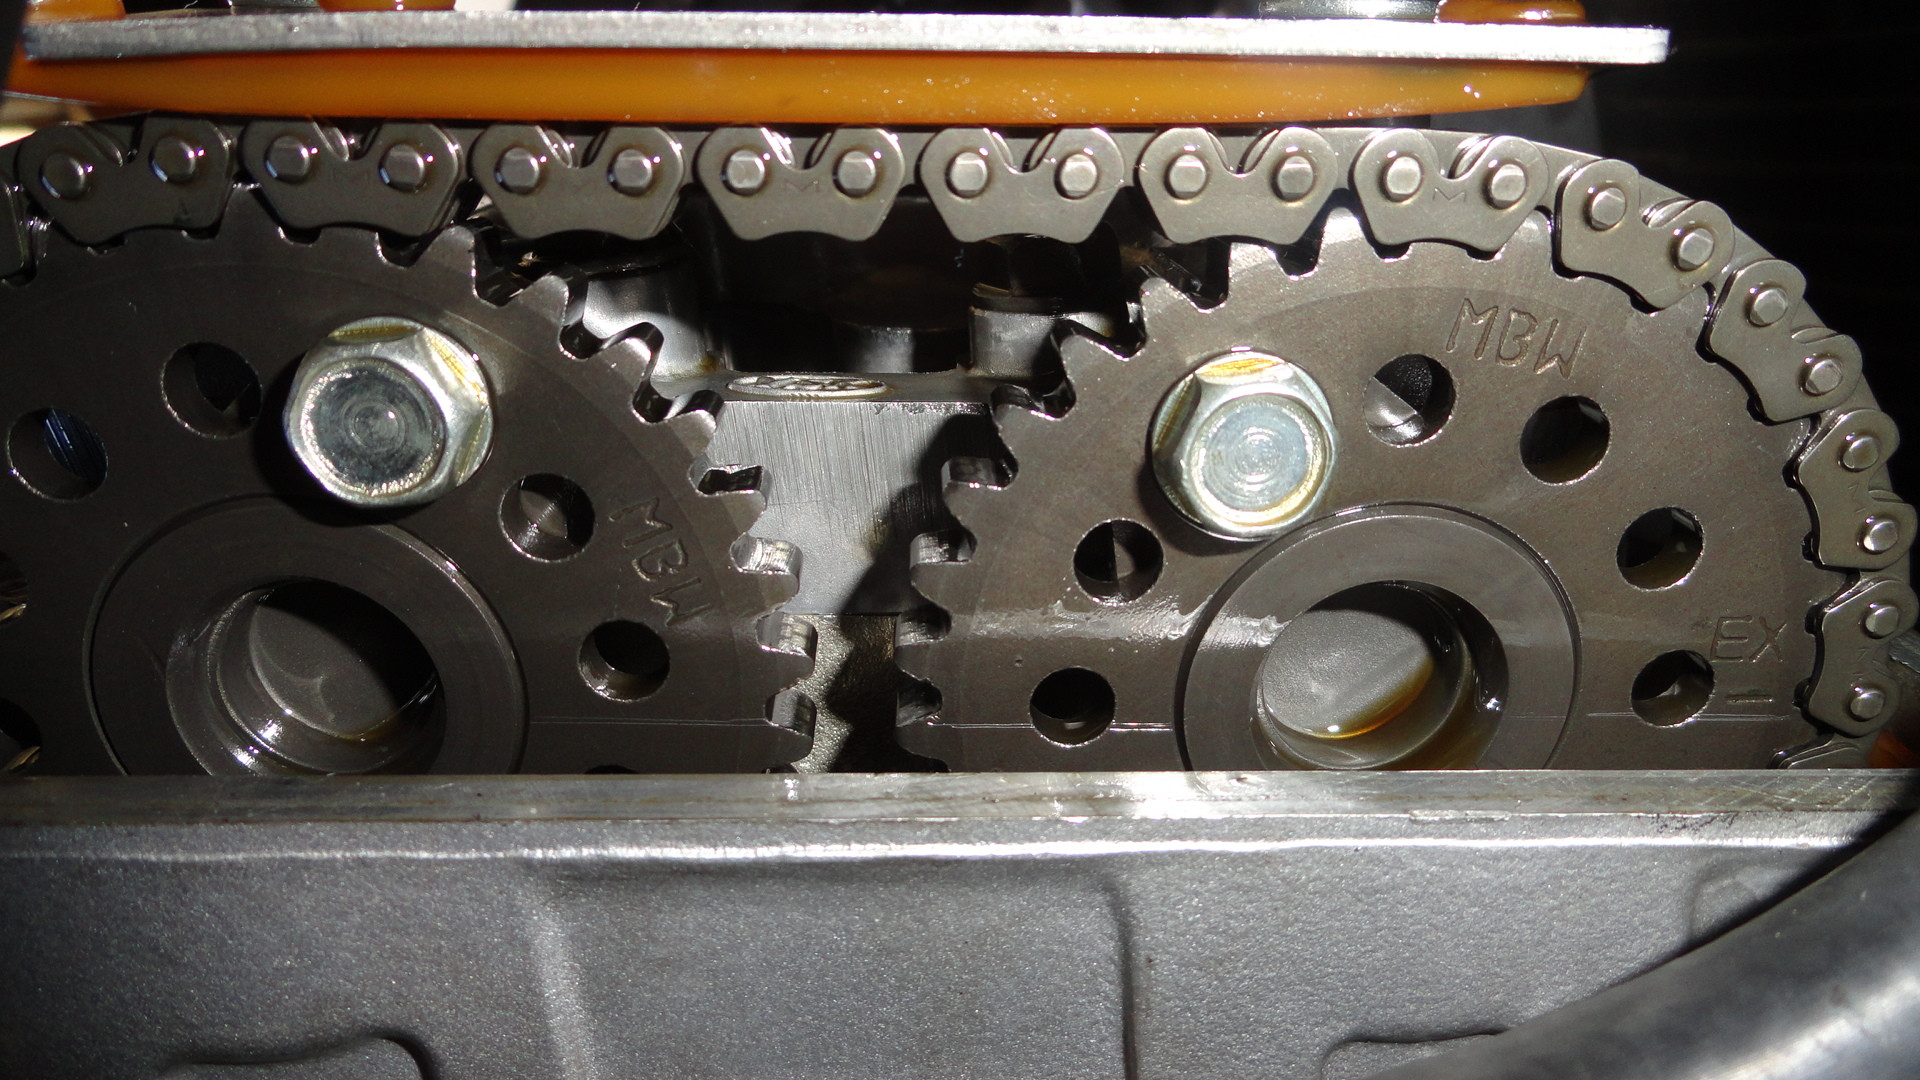
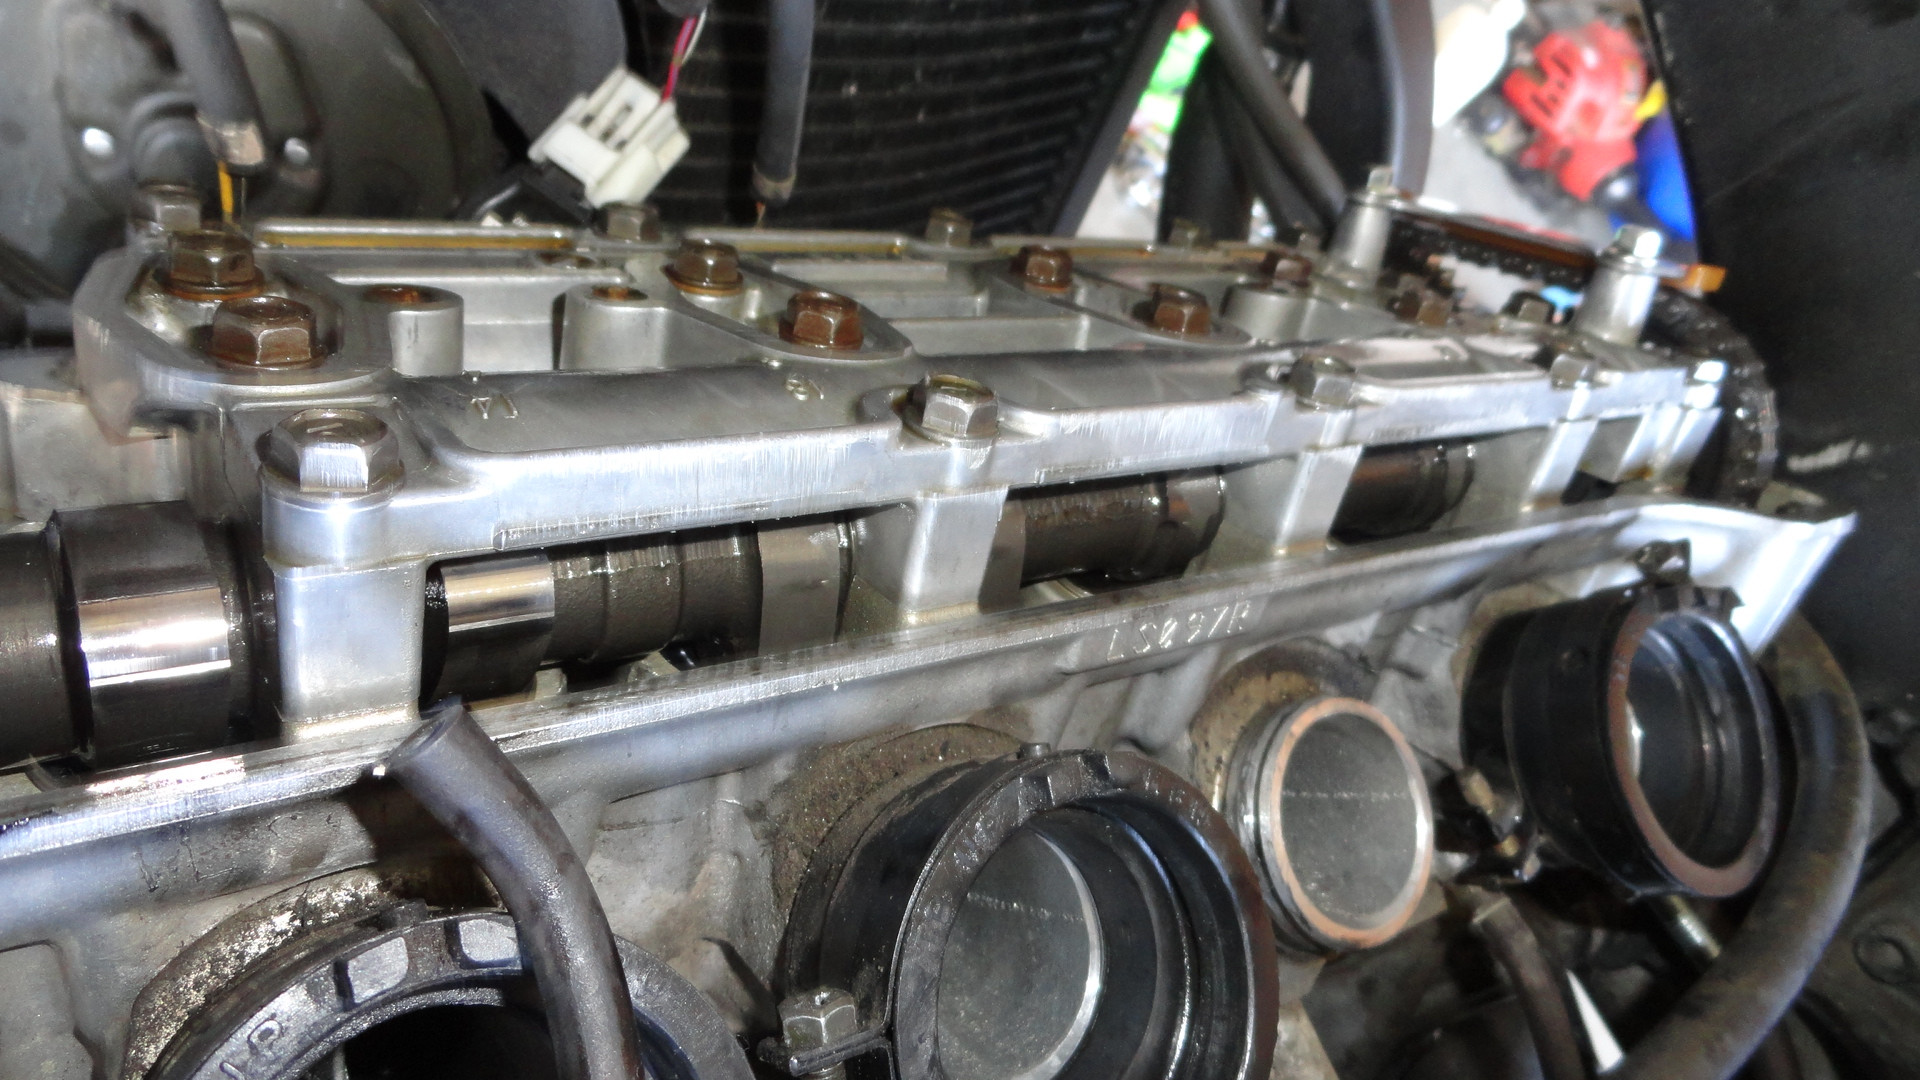
Hi guys. So I recently installed an APE manual CCT because I was getting the infamous noise. Unfortunately, after the install, the bike idles fine but as I start to bring the clutch out and also while I ride slowly in first gear, the bike bucks back and forth and it sounds like if the engine isn't firing right or something. It also feels like it wants to die rather quickly as I try to engage the clutch (pull out). When I put everything back together, I made sure that the lines were lined up on the cam sprockets as well while the engine was lined up to that 'T' line on the right side of the engine.
Also, after the CCT install, I forgot to tighten the locknut on the first time starting it up. So the cam chain pushed the bolt out to the point where it was making the infamous loose CCT noise. I immediately turned off the engine and re-tightened everything. Could the cam chain have jumped a tooth when this happened?
Hope you guys can help out!
#2
10-19-2013, 08:30 AM

Member
Join Date: Oct 2013
Location: Belleville,ON
Posts: 69
Likes: 0
Received 0 Likes
on
0 Posts
#3
10-19-2013, 04:16 PM
Note: The 'IN' mark is lined up, but not visible in picture

Also, when taking it all apart, I found that the breather hose on the top of the valve cover wasn't plugged in to the air box (woops). I'm pretty sure this wouldn't cause any problems with the engine but I figure i'd mention it.
#4
10-19-2013, 07:18 PM
Member
Join Date: Oct 2013
Location: Belleville,ON
Posts: 69
Likes: 0
Received 0 Likes
on
0 Posts
The intake and exhaust cams look good. You need to have them flush with the top of the casing and atleast the exhaust looks as though it is. More importantly they need to be parallel with the top of the case which looks like is the case. The crank sprocket is another story it is very hard to tell from the pic but it looks like it might be a little off, It might just be the pic but use the mark in the casing and while the cams are lined up you want to have the line just past the "T" aligned with the mark in the casing(see pic)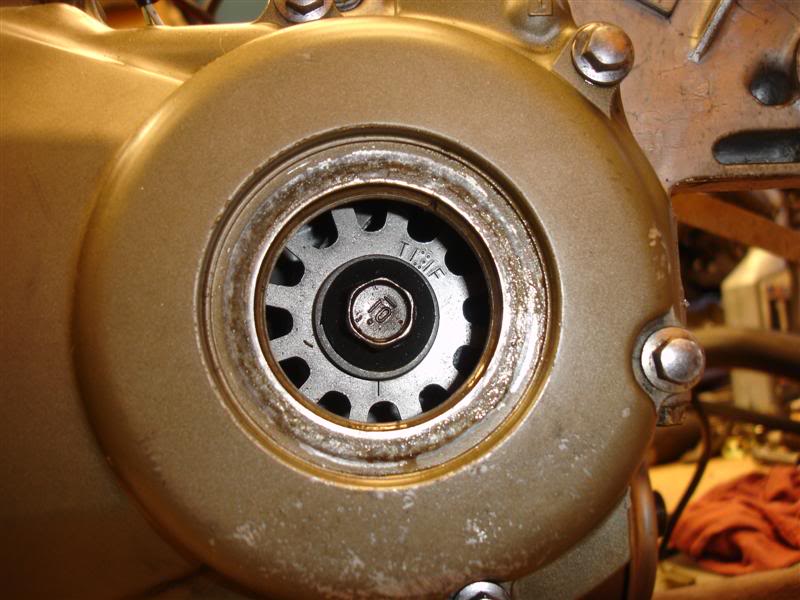
#5
10-20-2013, 01:30 AM
The intake and exhaust cams look good. You need to have them flush with the top of the casing and atleast the exhaust looks as though it is. More importantly they need to be parallel with the top of the case which looks like is the case. The crank sprocket is another story it is very hard to tell from the pic but it looks like it might be a little off, It might just be the pic but use the mark in the casing and while the cams are lined up you want to have the line just past the "T" aligned with the mark in the casing(see pic)
#6
10-20-2013, 08:05 AM
Member
Join Date: Oct 2013
Location: Belleville,ON
Posts: 69
Likes: 0
Received 0 Likes
on
0 Posts
did the bike idle high when you were done? which line on the valve cover was disconnected? the back one or one of the two on the front to the air injection control valve? That could possibly have been the problem. The symptoms sounded like a timing issue but it could have been that air circuit.
#7
10-20-2013, 02:14 PM
did the bike idle high when you were done? which line on the valve cover was disconnected? the back one or one of the two on the front to the air injection control valve? That could possibly have been the problem. The symptoms sounded like a timing issue but it could have been that air circuit.


#8
10-20-2013, 05:14 PM
Member
Join Date: Oct 2013
Location: Belleville,ON
Posts: 69
Likes: 0
Received 0 Likes
on
0 Posts
#9
10-22-2013, 04:28 PM
 Thanks so much for the help Diesel, I really appreciate it. This CCT install ended up taking about a week due to me over tightening and breaking a valve cover bolt originally, and having to wait on the new bolt from Honda. And then also from being scared to ruin the engine and taking it apart again to double check my timing (Guess it's better safe than sorry). I'm definitely getting to know the inside of my bike a little more though from the experience!
#10
10-22-2013, 08:49 PM
Senior Member
Join Date: Apr 2012
Location: northeast florida
Posts: 458
Likes: 0
Received 0 Likes
on
0 Posts
ahh i did this too, when it says 10 newton meters it means it, i was like what the hell this isnt enough so i bumped it up 2 or 3 NM's and snapped one.

