It Lives!!! Rebuilding my F4
#1
 03-09-2015, 10:20 AM


Hello CBRForums, this is my first post on the forums. I have been perusing the how-to's for years. Finally it is my time to post a bike thread. So here we go.
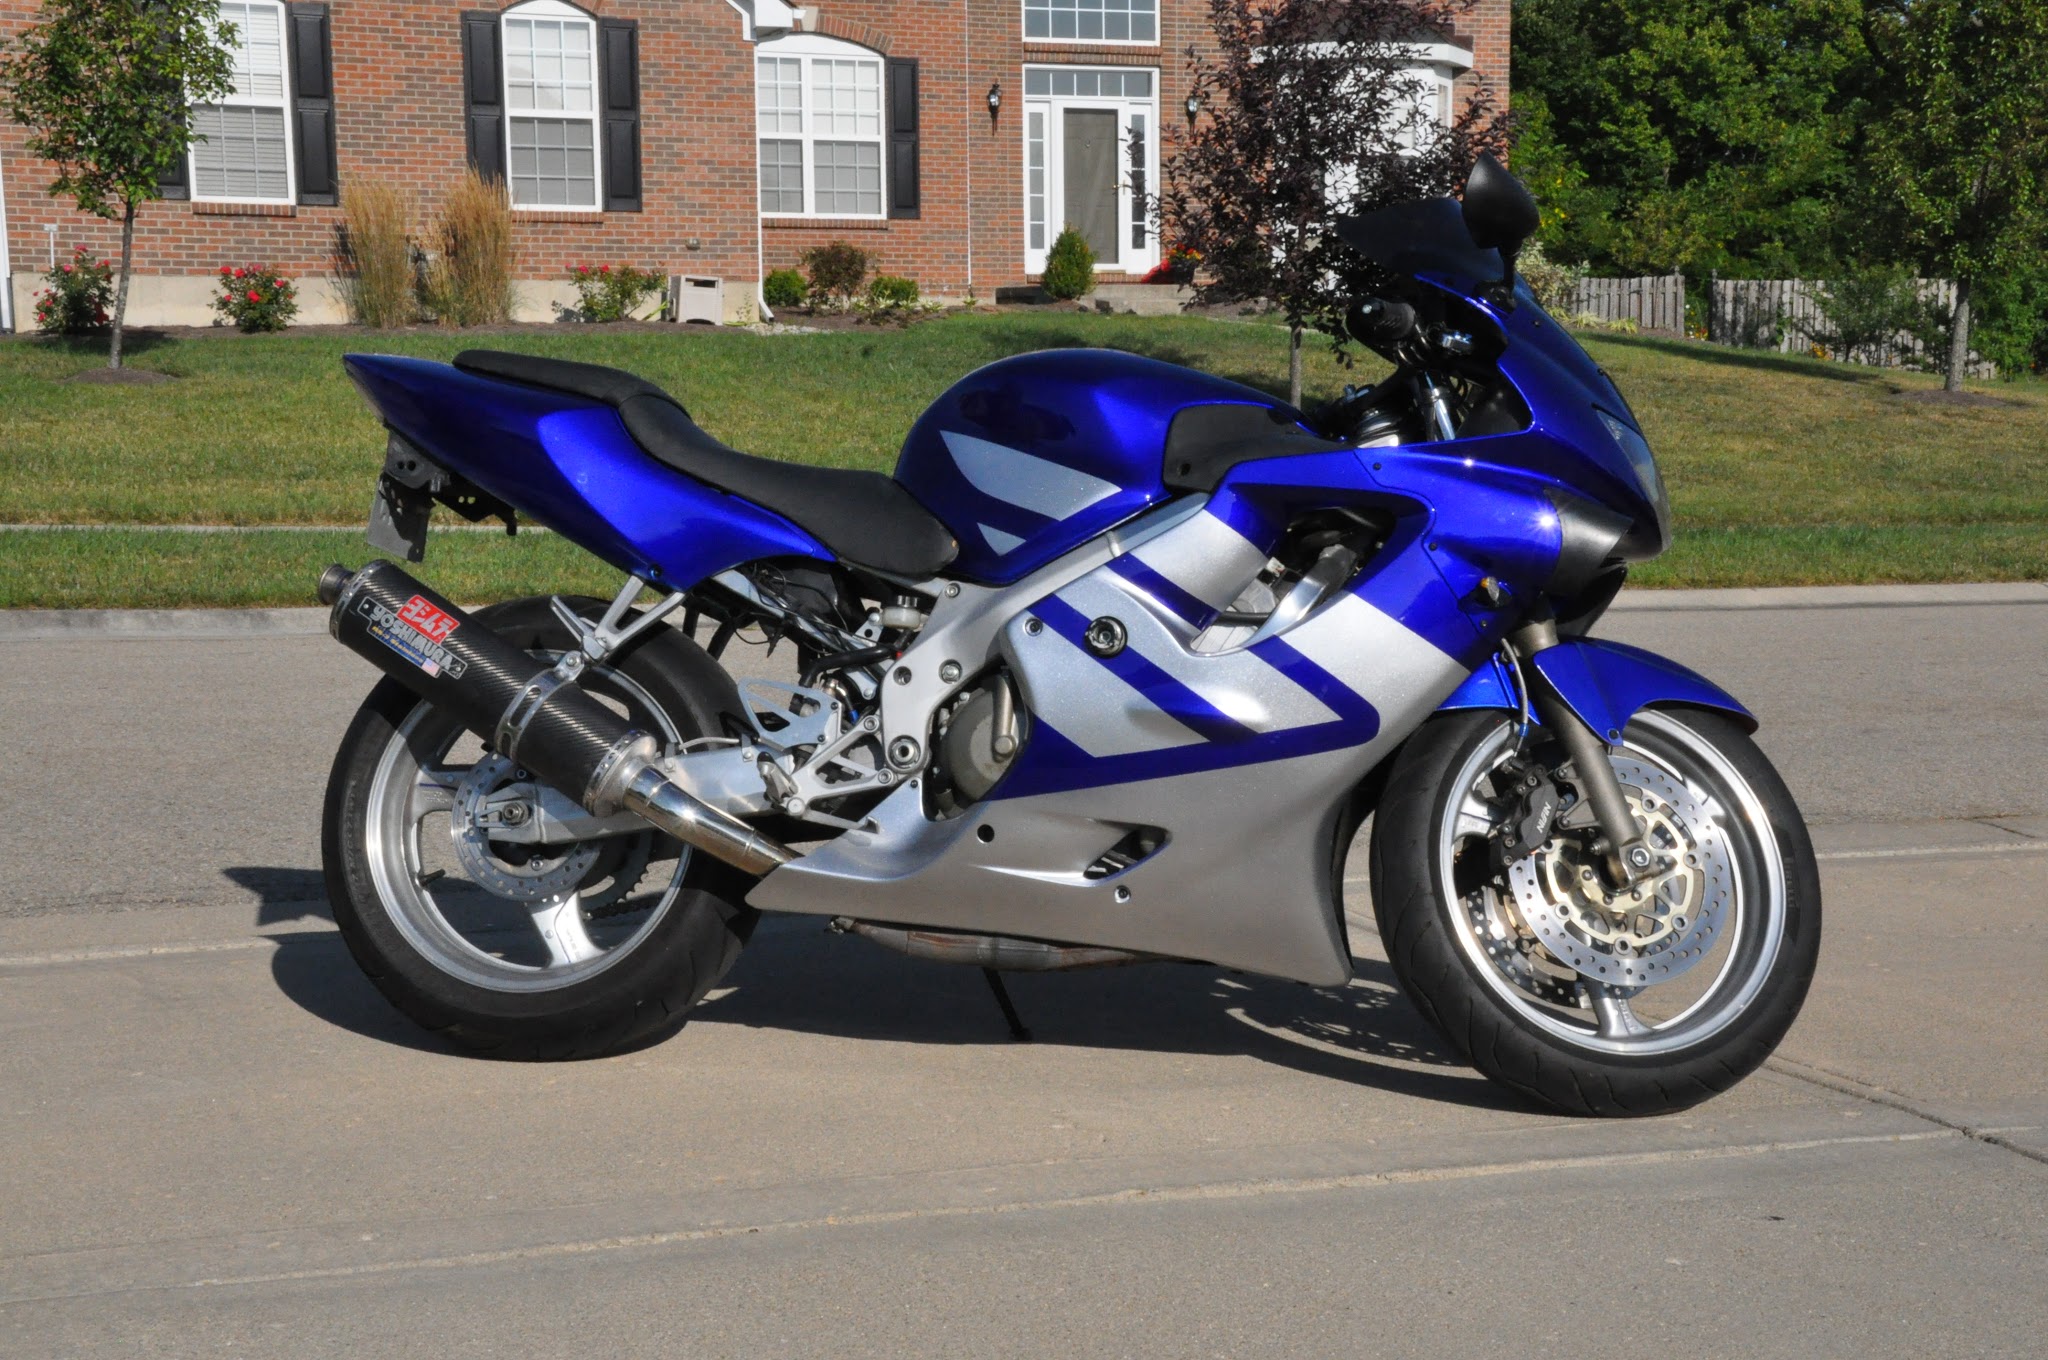
Bought her back in 2011 and she looked like this:
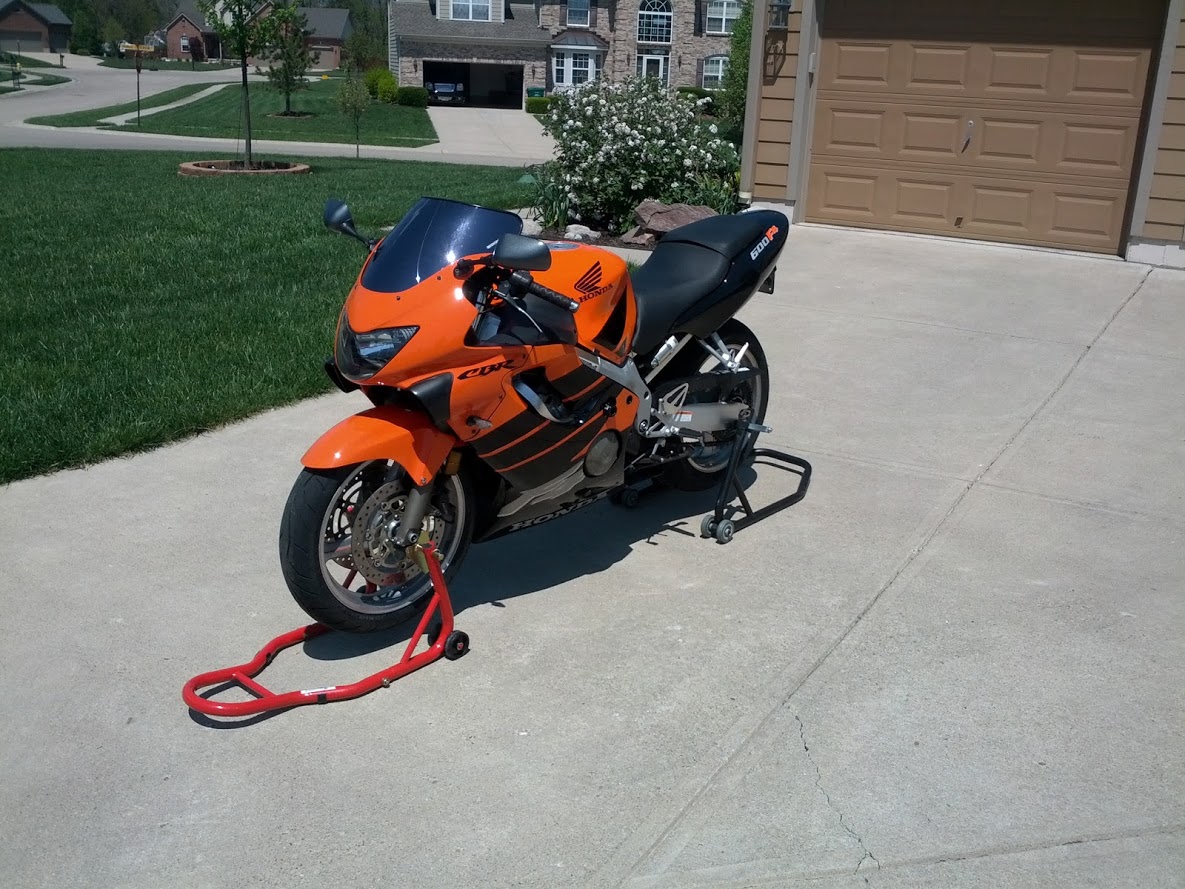
Had a yoshi CF pipe. Stage 2 Jets. K&N air filter. Integrated Tail light. And a whole lot of stuff wrong from the PO.
Had a blast riding for about 2 years until one unfortunate day she took a nasty high side spill.
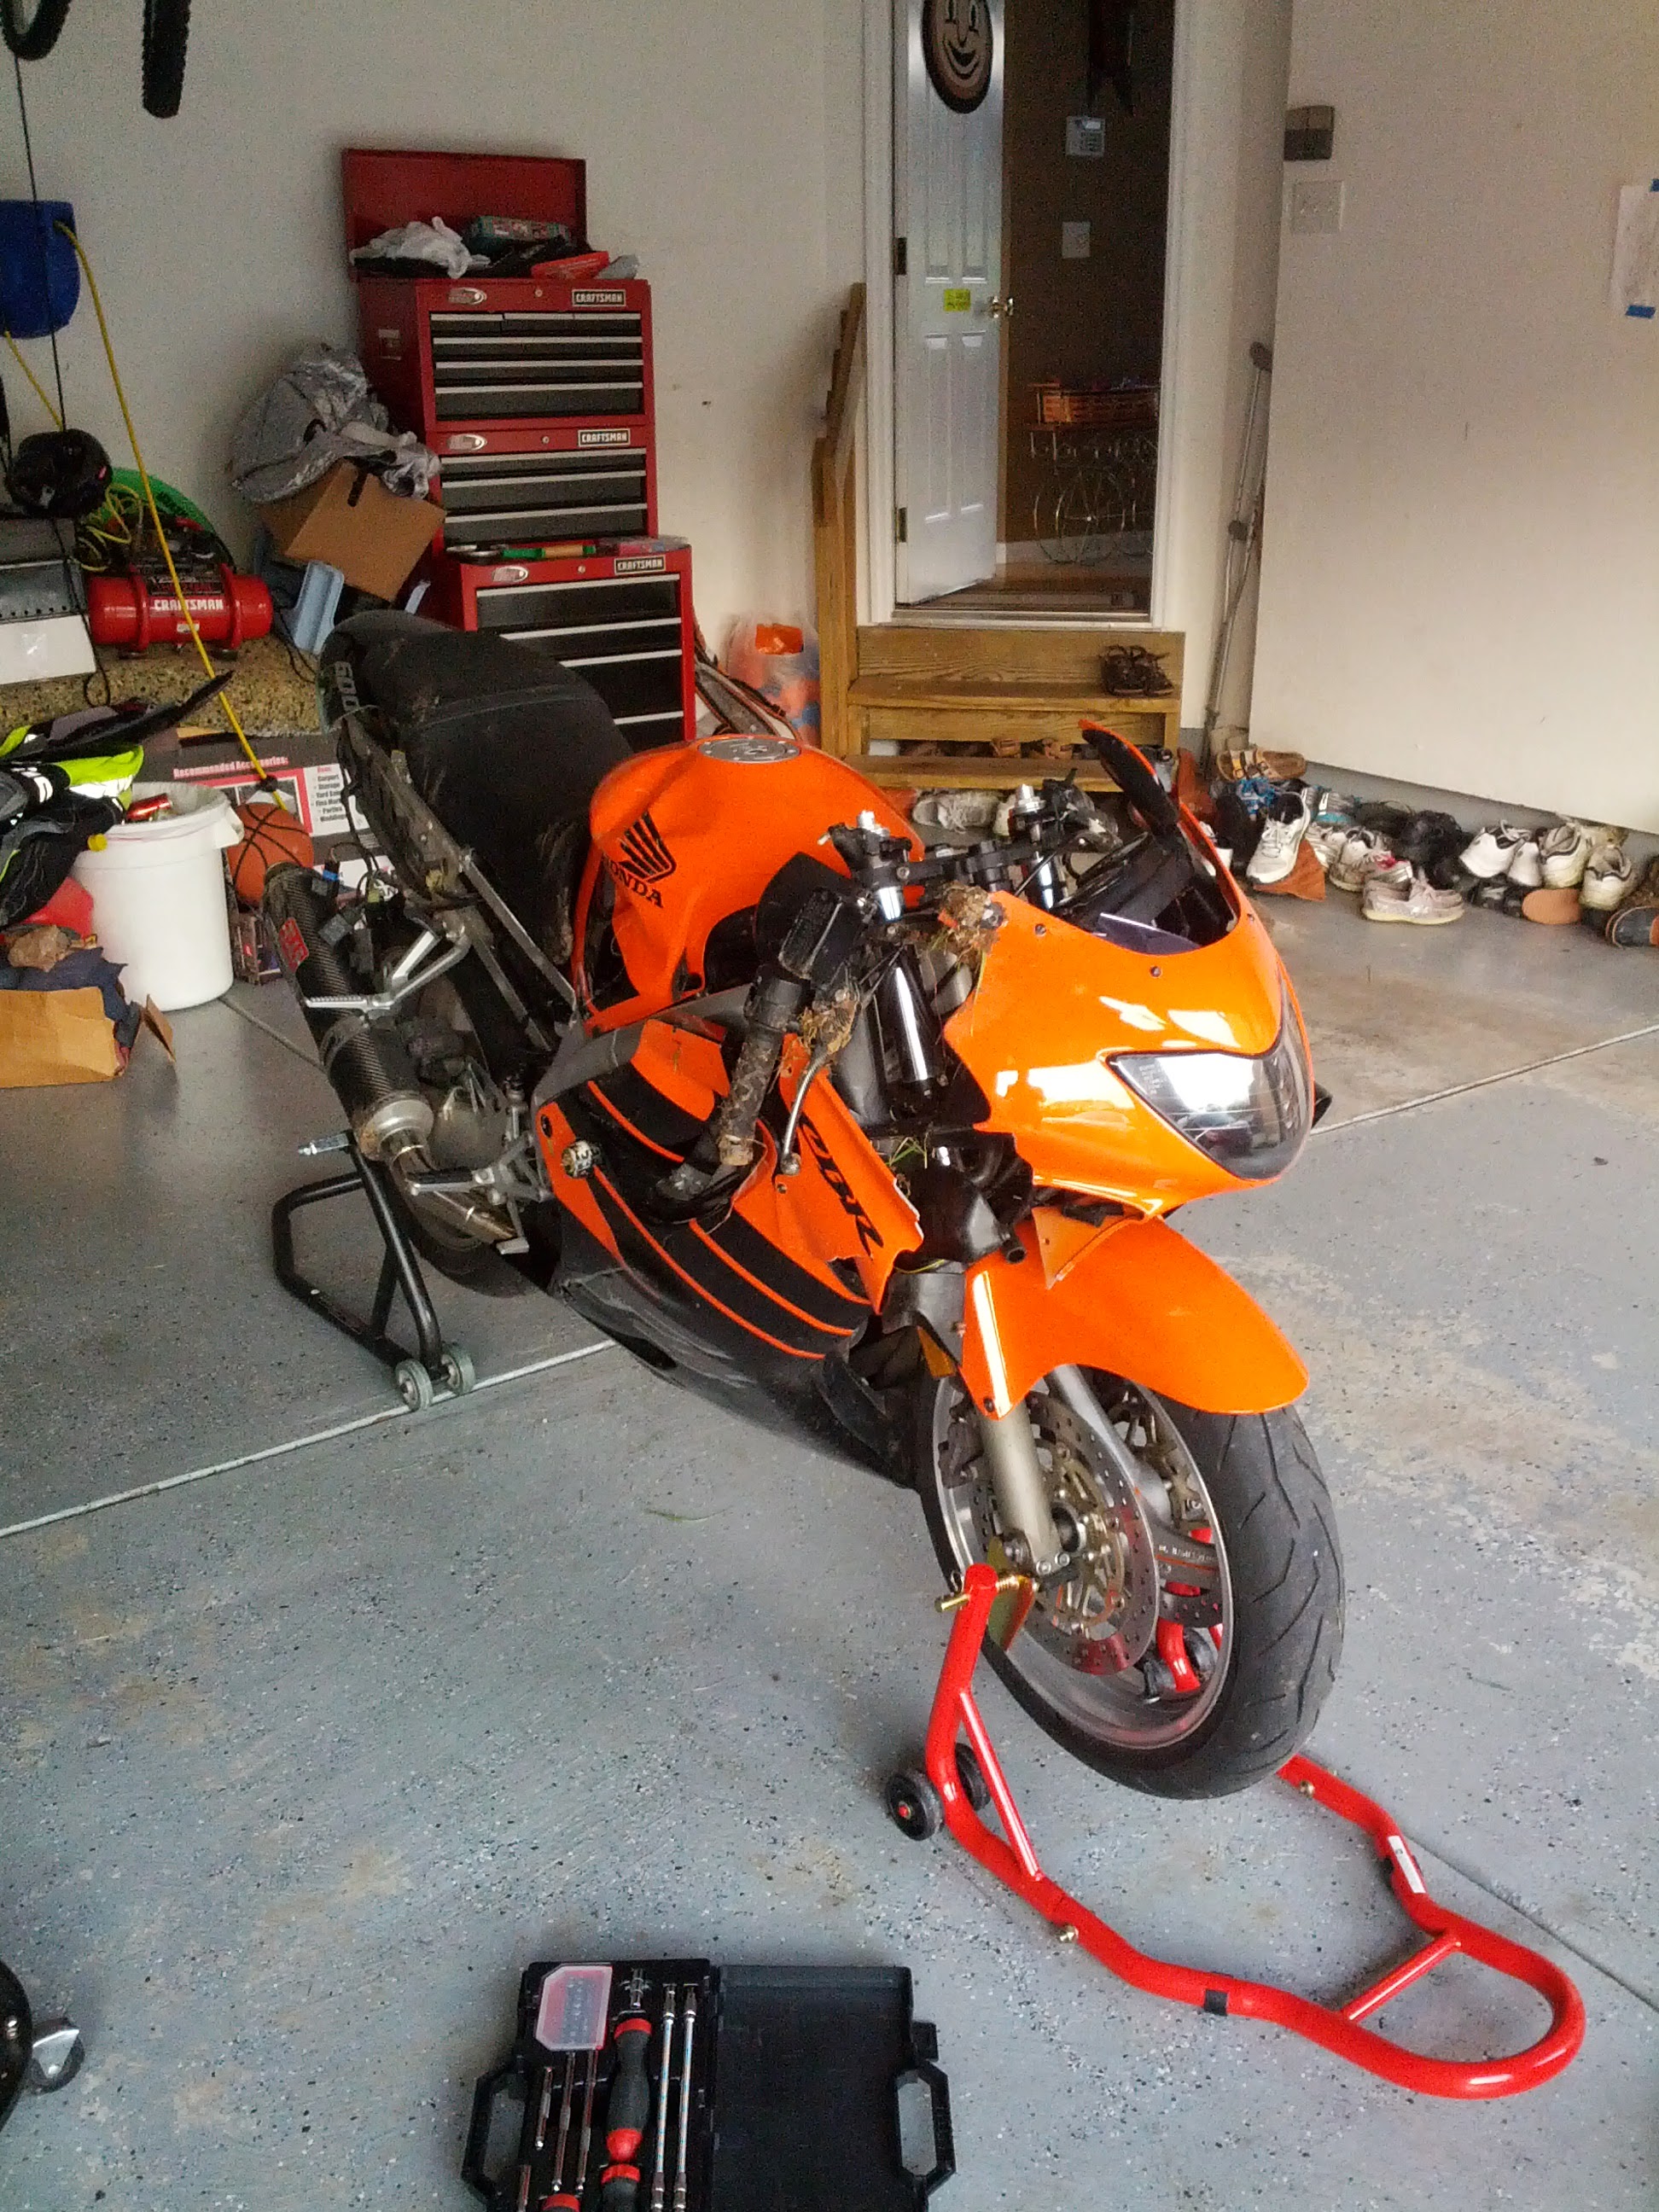
I made it out of the crash with nothing but a few bruises and some scrapes. Thank god for gear!!! Icon makes one fantastic riding jacket. After all of the damage was assessed, the bike needed:
- A new upper stay
-New gagues/Repair the old ones (front cover cracked over tach.)
-New upper fairing/repair the old one (in about 7 pieces)
-New windscreen
-New Clip-on bars (the left one was sheared off)
-New engine kill switch
-New tank (the old one didn't leak but it was crimped at the dent and couldn't be repaired)
-New/ Repaired side plastics
-New Subframe (it bent in 3 different directions)
-New tail plastic
-New Paint once it was all fixed
While I was at it I did some maintenance/mods:
-New chain/ sprockets
-Brake pads
-SS brake lines
-New Levers
When I wrecked the bike, I didnt have any money to fix it so, some duct tape and zip ties would have to suffice until I could pull together the funds to fix her right. I found the necessary parts at a salvage yard (Subframe, tail plastic, clipons, kill switch) Had to buy a new upper stay from Honda. Got her into something like a streetfighter and rode for a year till I had the money to finish.

Once I had all of the money, I went ahead and bought a used tank off ebay. I ended up buying a used tank on ebay. Ordered a new upper stay and a Chinese front fairing. (A complete nightmare to fit BTW. I really should have listened to all the wise people on this forum) After a ton of plastic welding and body work (~60 hrs), I finally got the plastics together. I ended up deciding on House of Kolors Kandy Cobalt blue over Orion Silver for the paint. I stole the paint graphics from the early F4i (the sharp wing looks amazing IMHO).
I decided to go ahead and buy new gauges. A new front cover and gasket from Honda was going to run ~$200. So, I picked up a set of Koso RX-2 gauges off of amazon for like $275 on sale. They are fantastic. Vastly improved over the stock gauges. Make it feel like a whole new bike! They have a multicolor display. Digital speedo. 0-60, 0-100, 1/4 mile, and 1/2 mile timing capabilities. I had to fabricate an aluminum bracket to make it fit and it took a ton of hacking and soldering all of the connections. But, it was well worth the effort.

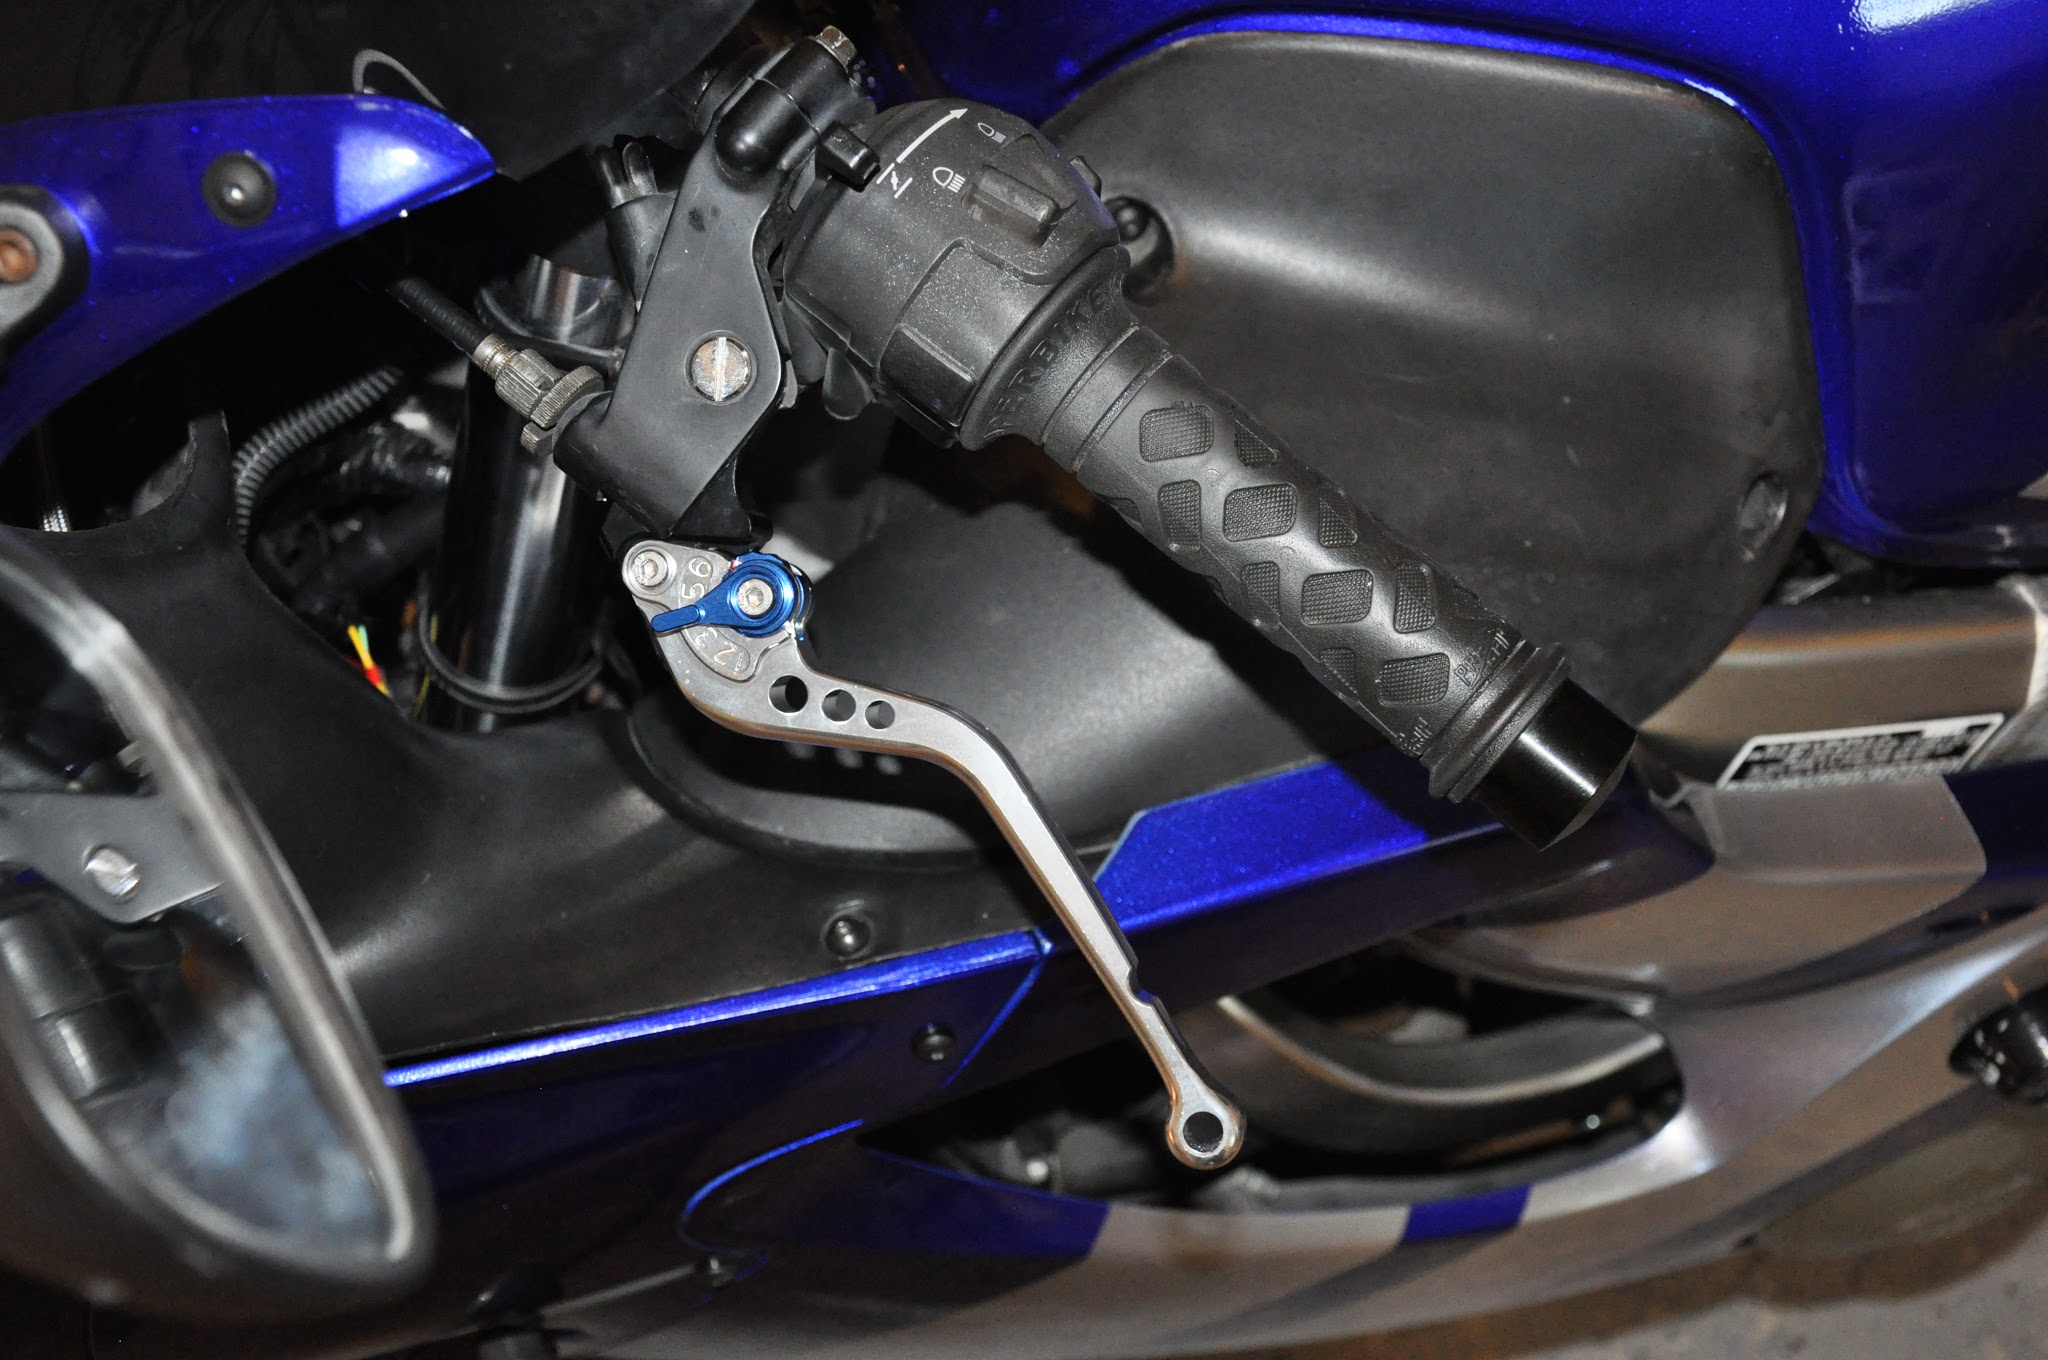
I also bought some knockoff levers from The2Wheels.com. They are just as good as any set of $200 levers I have ever felt. And they are like $30 shipped. You can see the SS brake lines from CoreMoto.
Here are the levers:
After 18 months of work and headache, she was finished.
I want to give a huge thank you to all of the great people here at CBRForum. I used this site for help throughout the process. You all have fantastic how to's.
Have a happy riding season, now that it is finally here (at least in SW ohio)
Bought her back in 2011 and she looked like this:
Had a yoshi CF pipe. Stage 2 Jets. K&N air filter. Integrated Tail light. And a whole lot of stuff wrong from the PO.
Had a blast riding for about 2 years until one unfortunate day she took a nasty high side spill.
I made it out of the crash with nothing but a few bruises and some scrapes. Thank god for gear!!! Icon makes one fantastic riding jacket. After all of the damage was assessed, the bike needed:
- A new upper stay
-New gagues/Repair the old ones (front cover cracked over tach.)
-New upper fairing/repair the old one (in about 7 pieces)
-New windscreen
-New Clip-on bars (the left one was sheared off)
-New engine kill switch
-New tank (the old one didn't leak but it was crimped at the dent and couldn't be repaired)
-New/ Repaired side plastics
-New Subframe (it bent in 3 different directions)
-New tail plastic
-New Paint once it was all fixed
While I was at it I did some maintenance/mods:
-New chain/ sprockets
-Brake pads
-SS brake lines
-New Levers
When I wrecked the bike, I didnt have any money to fix it so, some duct tape and zip ties would have to suffice until I could pull together the funds to fix her right. I found the necessary parts at a salvage yard (Subframe, tail plastic, clipons, kill switch) Had to buy a new upper stay from Honda. Got her into something like a streetfighter and rode for a year till I had the money to finish.
Once I had all of the money, I went ahead and bought a used tank off ebay. I ended up buying a used tank on ebay. Ordered a new upper stay and a Chinese front fairing. (A complete nightmare to fit BTW. I really should have listened to all the wise people on this forum) After a ton of plastic welding and body work (~60 hrs), I finally got the plastics together. I ended up deciding on House of Kolors Kandy Cobalt blue over Orion Silver for the paint. I stole the paint graphics from the early F4i (the sharp wing looks amazing IMHO).
I decided to go ahead and buy new gauges. A new front cover and gasket from Honda was going to run ~$200. So, I picked up a set of Koso RX-2 gauges off of amazon for like $275 on sale. They are fantastic. Vastly improved over the stock gauges. Make it feel like a whole new bike! They have a multicolor display. Digital speedo. 0-60, 0-100, 1/4 mile, and 1/2 mile timing capabilities. I had to fabricate an aluminum bracket to make it fit and it took a ton of hacking and soldering all of the connections. But, it was well worth the effort.
I also bought some knockoff levers from The2Wheels.com. They are just as good as any set of $200 levers I have ever felt. And they are like $30 shipped. You can see the SS brake lines from CoreMoto.
Here are the levers:
After 18 months of work and headache, she was finished.
I want to give a huge thank you to all of the great people here at CBRForum. I used this site for help throughout the process. You all have fantastic how to's.
Have a happy riding season, now that it is finally here (at least in SW ohio)

#3
03-09-2015, 02:05 PM

Wow indeed, Never seen either color scheme before and I quite like them both! Specially the current one! I know all about hacking an RX-2 gauge to work, I`m on my last straight of making mine function, just need to connect the temp sensor and get the engine running to verify the tach works but I`ve had more than one wire around my neck in the process!
Enjoy your reborn bike and ATGATT!
Enjoy your reborn bike and ATGATT!
#4
03-10-2015, 11:08 AM
Wow indeed, Never seen either color scheme before and I quite like them both! Specially the current one! I know all about hacking an RX-2 gauge to work, I`m on my last straight of making mine function, just need to connect the temp sensor and get the engine running to verify the tach works but I`ve had more than one wire around my neck in the process!
Enjoy your reborn bike and ATGATT!
Enjoy your reborn bike and ATGATT!
Did you get the fuel reserve light to work? I have tried next to everything and the fuel wont blink when the reserve kicks on. (I found that out the hard way 20 miles from home on the side of a country road
#5
03-10-2015, 01:24 PM
Not only the fuel light, I got the whole fuel gauge working. Although the gauge is in my Triumph here's how I got it to work, have a look if you can do the same as I don't know how it's set up on an F4. The Daytona level sensor is capable of providing the gauge data to show fuel level even though the original gauge only has the warning light.
I disconnected the entire fuel level sensor from the bike's electrics, took the wire that comes from the gauge and connected it to the + wire of the sensor and connected the - wire from the sensor to ground. I left the original warning wire that comes from the ECU disconnected completely.
IMPORTANT! If you try this find out which type fuel level sensor does the F4 have a 100ohm or a 410ohm as those two are the most common ones. This is important because you have to connect a dummy resistor across the wires of the original sensor plug to fool the bike that the sensor is still connected. If it is a 100ohm sensor get a resistor of approx 70ohm, if it's a 410 get something like 300-350. There also is a setting in the gauge to switch between 100 and 410, 100 being the default as it is more common.


Thread
Thread Starter
Forum
Replies
Last Post

