
New Bike, YELLOW! custom seat/undertail/+more
#1
 07-06-2011, 09:33 AM


Hi, great forum! I have been reading through as much as I can to see what others have done with their bikes and learn more about this great motorcycle. It was actually the 2 huge picture threads on here that made up my mind to get this bike over a thundercat.
I purchased a 97 CBR 600 F3 with 15k miles on it in April this year. This is my first big bike after passing my test. Previously I had a Honda 2010 cbf125 for 9 months.
Onto the photos-
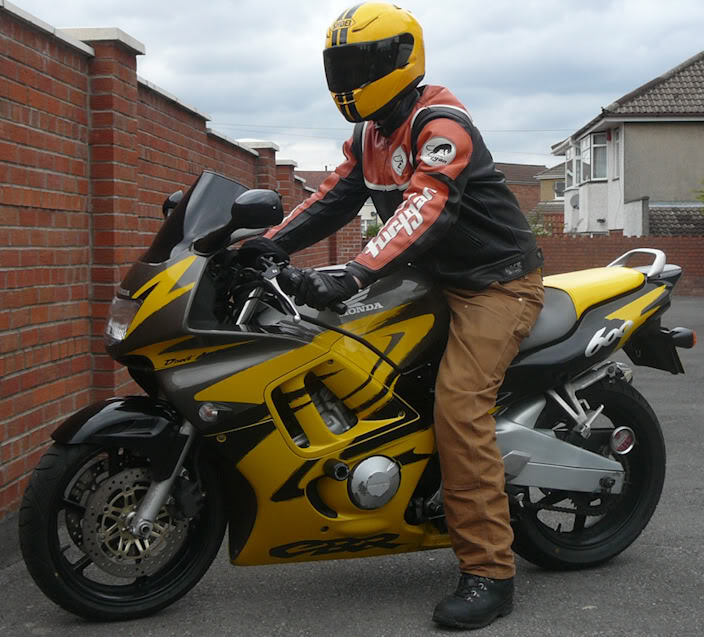
Here is the bike on the day I collected, during a break on the 290mile journey home. I decided rather than taking the motorway all the way I would split it into 2 days and take the A roads to take the time to enjoy the trip back. Thoughts after the ride: I definitely picked a great bike.
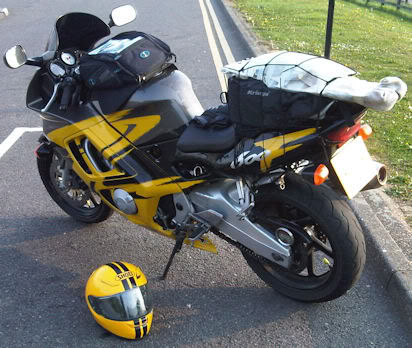
The thing on the back on top of my kriega us20 is the undertail that was given to me by the seller, he was even so kind as to provide a blanket to protect it with!
As you can see it was close to standard and in great condition on purchase.
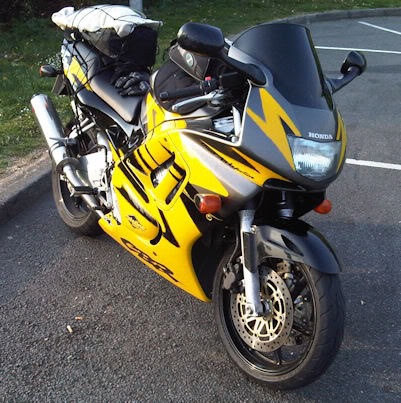
A couple of months later:
The first mod I did was the R&G Crash bungs which are already broken in very slightly so I am very glad I put them in even though I hated drilling into the fairings and next came the Scottoiler and Polishing the rear grab rail. Followed shortly by new tank protector, flush front indicators(I notice these are v popular here), cigarette lighter socket in the battery compartment with tomtom charger routed and fixed into my satnav holder on handlebars.
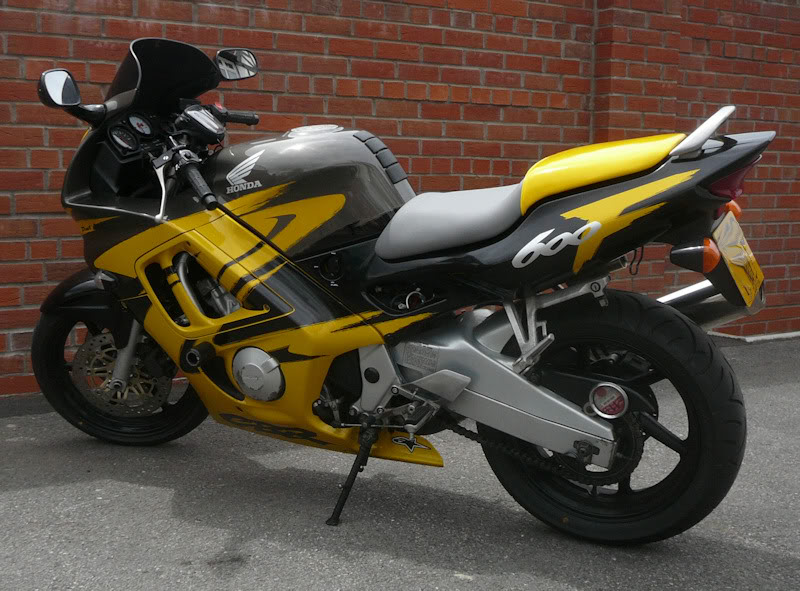
I got hold of a spare seat on ebay and found someone in bristol who was able to install my gel pad I ordered and recover the seat in a lighter grey colour with the pillion seat raised up in the style of a seat cowl in shiny yellow material, but still perfectly usable as a pillion seat. Also the seat is far more grippy now, I no longer slide around, I hope this lasts. Very interested in anyones thoughts on the new seat.
I have also now resprayed that scratch to match the rest just below the crash bung in the picture above.
I also got 2 new bridgestone tyres front and back to pass the mot.
Also does anyone know a good paint I can order online so that I can touch in the engine cover in the pic above?
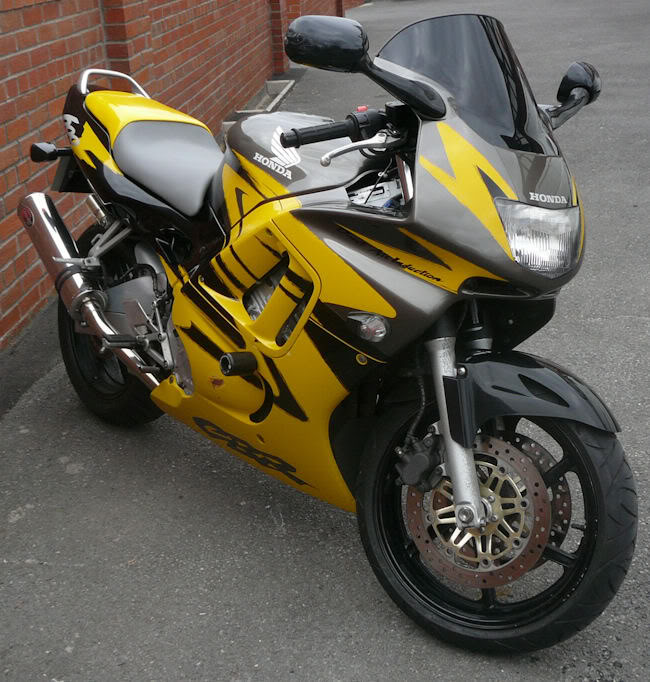
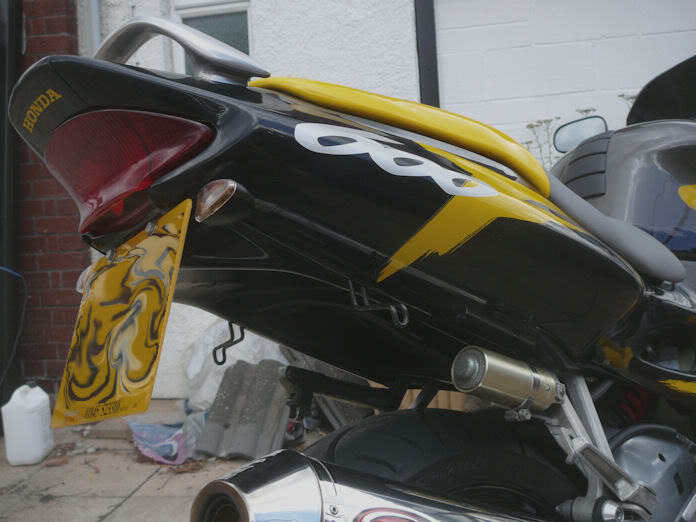
Lastly, the undertail, I had been putting it off as I thought it would be quite a bit of work. . . . As it turns out I vastly underestimated the amount of time it took to complete the project. I ordered some motrax arrow indicators(bulb not led) took the saw to the old fender and this is the end result.
Here are some pics below taken this morning.
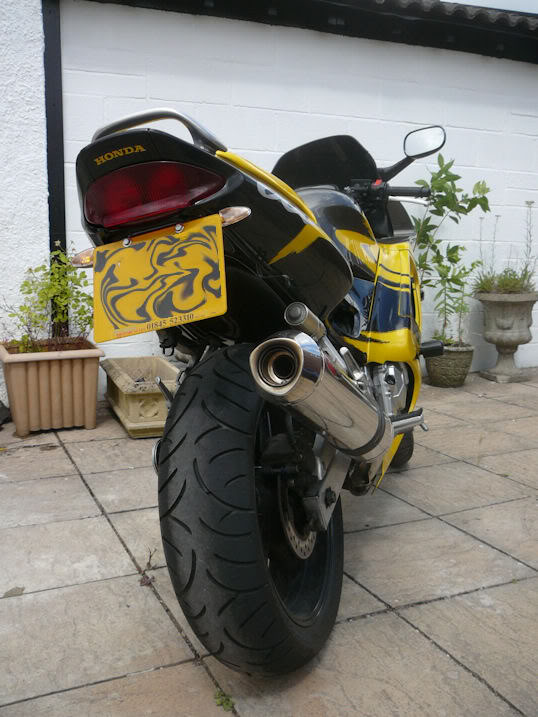
I mounted it with 2 metal brackets onto the battery compartment and 2 metal brackets on the brake light mounting bolts. I wanted it to be very secure to hold the numberplate and indicators in place.
I am not sure yet what I will do about a rear reflector.
Next up I am looking into panniers for camping trips or perhaps instead some more soft luggage to hook onto the back with the us20.
Comments welcome!
I purchased a 97 CBR 600 F3 with 15k miles on it in April this year. This is my first big bike after passing my test. Previously I had a Honda 2010 cbf125 for 9 months.
Onto the photos-
Here is the bike on the day I collected, during a break on the 290mile journey home. I decided rather than taking the motorway all the way I would split it into 2 days and take the A roads to take the time to enjoy the trip back. Thoughts after the ride: I definitely picked a great bike.
The thing on the back on top of my kriega us20 is the undertail that was given to me by the seller, he was even so kind as to provide a blanket to protect it with!
As you can see it was close to standard and in great condition on purchase.
A couple of months later:
The first mod I did was the R&G Crash bungs which are already broken in very slightly so I am very glad I put them in even though I hated drilling into the fairings and next came the Scottoiler and Polishing the rear grab rail. Followed shortly by new tank protector, flush front indicators(I notice these are v popular here), cigarette lighter socket in the battery compartment with tomtom charger routed and fixed into my satnav holder on handlebars.
I got hold of a spare seat on ebay and found someone in bristol who was able to install my gel pad I ordered and recover the seat in a lighter grey colour with the pillion seat raised up in the style of a seat cowl in shiny yellow material, but still perfectly usable as a pillion seat. Also the seat is far more grippy now, I no longer slide around, I hope this lasts. Very interested in anyones thoughts on the new seat.
I have also now resprayed that scratch to match the rest just below the crash bung in the picture above.
I also got 2 new bridgestone tyres front and back to pass the mot.
Also does anyone know a good paint I can order online so that I can touch in the engine cover in the pic above?
Lastly, the undertail, I had been putting it off as I thought it would be quite a bit of work. . . . As it turns out I vastly underestimated the amount of time it took to complete the project. I ordered some motrax arrow indicators(bulb not led) took the saw to the old fender and this is the end result.
Here are some pics below taken this morning.
I mounted it with 2 metal brackets onto the battery compartment and 2 metal brackets on the brake light mounting bolts. I wanted it to be very secure to hold the numberplate and indicators in place.
I am not sure yet what I will do about a rear reflector.
Next up I am looking into panniers for camping trips or perhaps instead some more soft luggage to hook onto the back with the us20.
Comments welcome!
#2
07-06-2011, 09:45 AM

Senior Member
#3
07-06-2011, 01:26 PM

#5
07-07-2011, 11:29 AM

Senior Member
Join Date: Jul 2010
Location: wichita falls, texas
Posts: 366
Likes: 0
Received 0 Likes
on
0 Posts
#6
07-08-2011, 04:10 AM
Hi Billet, I think what you are seeing is the circular red and white disc next to the rear sprocket which is the tax disc(vehicle license) and tax disc holder. Most other countries require just a sticker on the windscreen or rear license plate. In the United Kingdom we have a much more bulky and obtrusive method.
#7
07-08-2011, 04:26 AM

2011 Ride of the Year
#8
07-08-2011, 09:05 AM
I know, you spend out the money because you want to protect the fairings but to install them you have to do the opposite- drill 2 big holes into them!
Also it just so happens to be in a section where the fairing is not a flat surface, so it is slightly more tricky than on some bikes. It still was one of the least time consuming mods I did though. They also look a lot better on than I thought they might.
The thing that made me do the mod so early on, is that its one thing to drop a bike, its another thing entirely if you have a set of r&g's sat in the garage waiting to go on!
#9
07-09-2011, 09:25 PM
Senior Member
Join Date: Jul 2010
Location: wichita falls, texas
Posts: 366
Likes: 0
Received 0 Likes
on
0 Posts
#10
07-10-2011, 02:11 PM