
How To: Clean rusted gastank
#1
 06-04-2011, 10:25 PM


Join Date: Apr 2010
Location: Chicago, IL
Posts: 484
Likes: 0
Received 0 Likes
on
0 Posts
Like some if not most, my gas tank sat empty while I worked on my bike and collected surface rust... this surface rust unfortunately got into my carbs, but that was a project of its own...
There are many ways of cleaning a rusted gastank, I chose to do it via reverse electric plating.
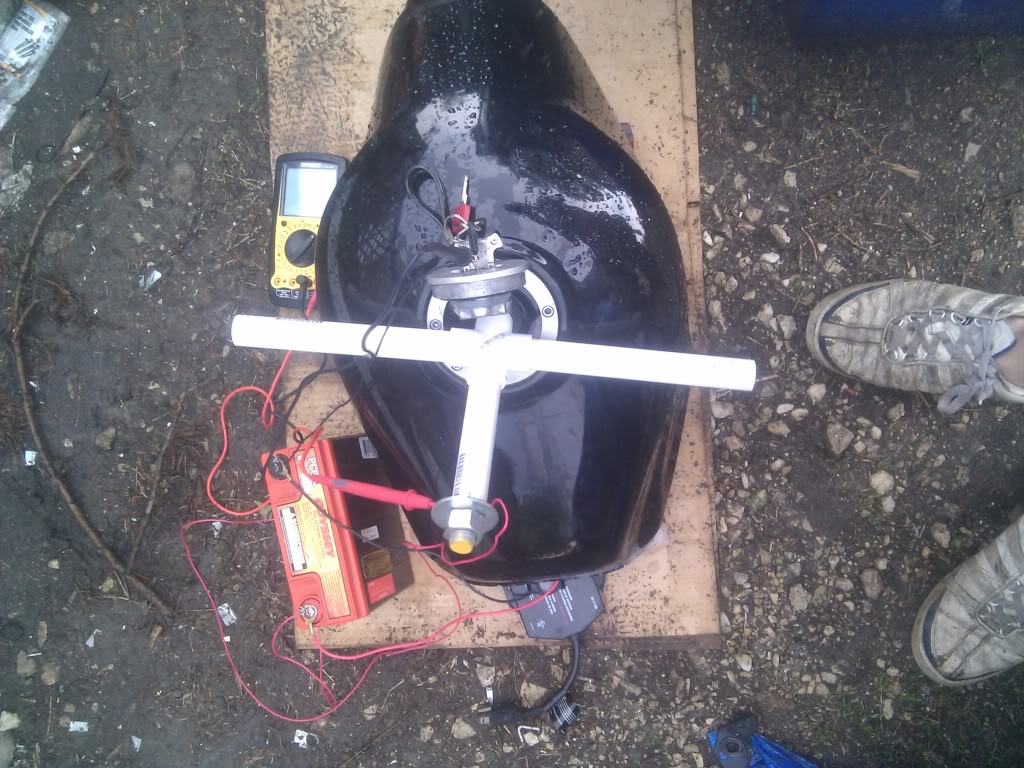
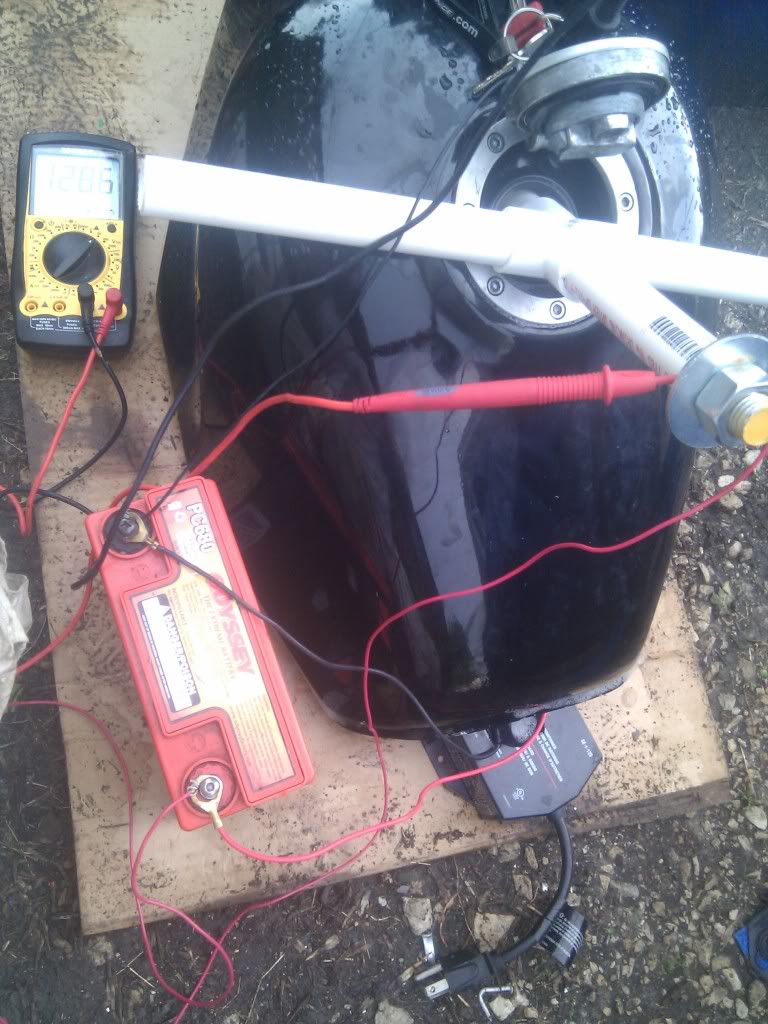
!My Setup!
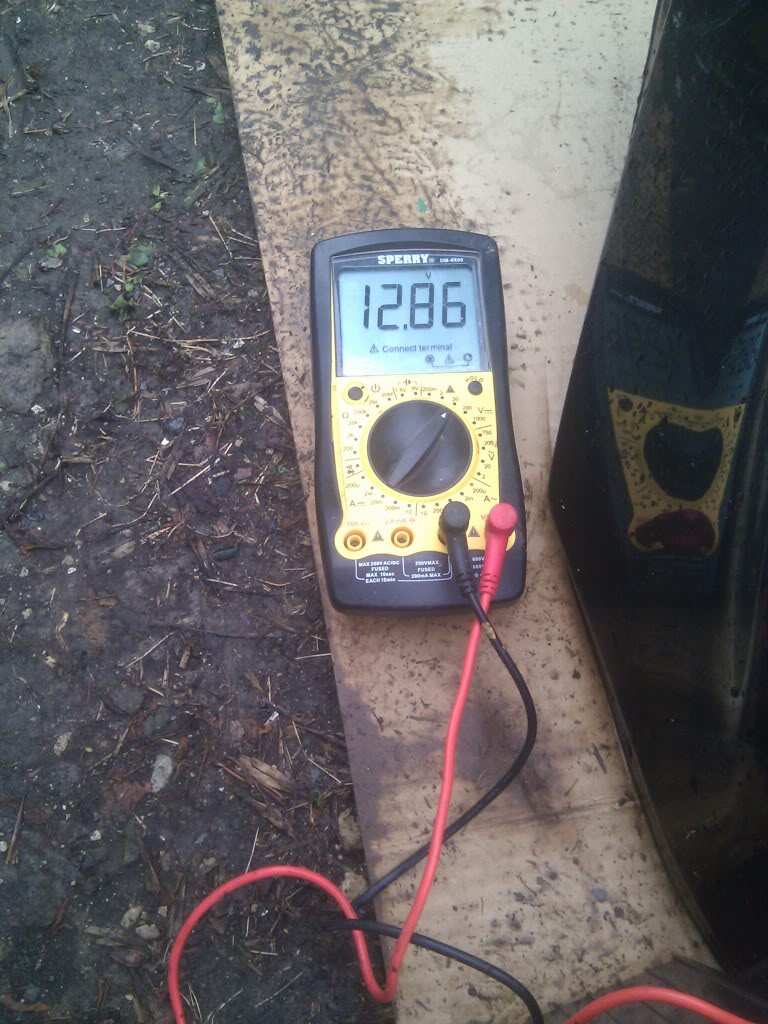
Wall to trickle charger, trickle charger to battery, battery + with inline fuse to a 3/4" threaded rod... insulated wire wrapping the rod 4 times towards the top, - battery terminal grounded to gas cap. The rod is setup so there isn't any metal on metal contact... I have a 4 way pvc going through the pipe and on each side 8 inches of pvc so that the rid sits securely on the tank... holding the pvc tight on the top 1 huge 3/4" in washer with a huge 3/4" nut and on the bottom another nut... this way I can adjust the length of the rod at my disgression and will hold securely . Additionally as a precaution I am monitoring the voltage with a multimetere connected the the rod (+) and ground it at key (-)... the tank is filled with baking washing soda 3 table spoons of baking washing soda, 1/4L CLR (which is tank safe, gas safe) and the remainder is water... pretty simple all around many precautions so that it doesn't cause a spark/fire/short...etc... I didn't connect the battery tender, I want to see how much voltage per hr it drains from the battery (which is around .15v/ hr... I ran it earlier for about 7hrs and it drained less than 1/2 v but it was a little different of a setup... From what I've read if you use just the baking washing soda you'll have to run it for 12hrs minimum for surface rust... with the help of CLR it should probably clean thicker and heavier rust out completely within 12hrs...
!IMPORTANT!
+ has to be on the rod and - has to be on the tank as ground, if it's not I've read you can have serious consiquences...
Make sure the rod has good protection from the ground (tank.) If the rod at any point touches you can potentially have a short, so beware. Also make sure the rod does not touch the bottom of the tank.
Do not do this inside, fumes come from the soda and clr, so it can be hazardous...
!Needed!
1. One 3/4" threaded rod, I used 3/4" since it was cheapest at home depot ($3.50), also get One washer ($.40/each) that fits on the rod and Two nuts screw onto it ($.50/each.) Use steel or iron rod, not aluminum.
2. 1 4 way 3/4" PVC pipe ($1.89) and 1 2ft 3/4" pipe ($2.90), have the guys at HD cut it into 8inch parts.
3. Although not required, CLR ($6.00)
4. Armon Hammer Baking Washing Soda - I got mine at Jewel it was $3.00 for a huge box...
5. Battery tender or battery... the battery can be weak, tender doesn''t have to be a 300$ one... if it makes 1v it's good enough.
6. Misc INSULATED wiring, and inline fuse if you want to be safe.
Total cost is around $20
!Steps!
1. Pour out old petrol
2. Remove Petcock/Tubes/Gas cover (I didn't remove the gas cover, but I highly recommendt it.) Rinse tank with water so there's not too much petrol there... plug everything somehow
3. Take a water bottle (Make sure it's from water, and clean...) put 1TABLESPOON of soda for every gallon of water, my tank is around 3,5gallons so I put 4Tablespoons of detergent... more wont make it go faster, or make it worse, you're just wasting good soda... fill bottle with water and shake till all soda is mixed with the water.
4. Prepare the rod, self explanitory... just make sure you wrap the rod 2 or 3 times with the + stripped wire towards the middle and run it on the inside of the pvc... it'll reduce the chances of you getting shocked
5. Pour in the mixed soda and 1/4L of CLR into the tank, then fill the remaining with water.
6. Pop the rod into the tank and hook up the + terminal and - to the tank somewhere... sit and watch...
Somewhere along the way you'll need to pour the water out and put fresh mixture in... the way to tell is when the water is redish/orange and dense..
Once done just rince the tank a few times, get some gas rinse the tank again, then once you feel comfortable it's cleaned out see how it looks.
There are many ways of cleaning a rusted gastank, I chose to do it via reverse electric plating.
!My Setup!
Wall to trickle charger, trickle charger to battery, battery + with inline fuse to a 3/4" threaded rod... insulated wire wrapping the rod 4 times towards the top, - battery terminal grounded to gas cap. The rod is setup so there isn't any metal on metal contact... I have a 4 way pvc going through the pipe and on each side 8 inches of pvc so that the rid sits securely on the tank... holding the pvc tight on the top 1 huge 3/4" in washer with a huge 3/4" nut and on the bottom another nut... this way I can adjust the length of the rod at my disgression and will hold securely . Additionally as a precaution I am monitoring the voltage with a multimetere connected the the rod (+) and ground it at key (-)... the tank is filled with baking washing soda 3 table spoons of baking washing soda, 1/4L CLR (which is tank safe, gas safe) and the remainder is water... pretty simple all around many precautions so that it doesn't cause a spark/fire/short...etc... I didn't connect the battery tender, I want to see how much voltage per hr it drains from the battery (which is around .15v/ hr... I ran it earlier for about 7hrs and it drained less than 1/2 v but it was a little different of a setup... From what I've read if you use just the baking washing soda you'll have to run it for 12hrs minimum for surface rust... with the help of CLR it should probably clean thicker and heavier rust out completely within 12hrs...
!IMPORTANT!
+ has to be on the rod and - has to be on the tank as ground, if it's not I've read you can have serious consiquences...
Make sure the rod has good protection from the ground (tank.) If the rod at any point touches you can potentially have a short, so beware. Also make sure the rod does not touch the bottom of the tank.
Do not do this inside, fumes come from the soda and clr, so it can be hazardous...
!Needed!
1. One 3/4" threaded rod, I used 3/4" since it was cheapest at home depot ($3.50), also get One washer ($.40/each) that fits on the rod and Two nuts screw onto it ($.50/each.) Use steel or iron rod, not aluminum.
2. 1 4 way 3/4" PVC pipe ($1.89) and 1 2ft 3/4" pipe ($2.90), have the guys at HD cut it into 8inch parts.
3. Although not required, CLR ($6.00)
4. Armon Hammer Baking Washing Soda - I got mine at Jewel it was $3.00 for a huge box...
5. Battery tender or battery... the battery can be weak, tender doesn''t have to be a 300$ one... if it makes 1v it's good enough.
6. Misc INSULATED wiring, and inline fuse if you want to be safe.
Total cost is around $20
!Steps!
1. Pour out old petrol
2. Remove Petcock/Tubes/Gas cover (I didn't remove the gas cover, but I highly recommendt it.) Rinse tank with water so there's not too much petrol there... plug everything somehow
3. Take a water bottle (Make sure it's from water, and clean...) put 1TABLESPOON of soda for every gallon of water, my tank is around 3,5gallons so I put 4Tablespoons of detergent... more wont make it go faster, or make it worse, you're just wasting good soda... fill bottle with water and shake till all soda is mixed with the water.
4. Prepare the rod, self explanitory... just make sure you wrap the rod 2 or 3 times with the + stripped wire towards the middle and run it on the inside of the pvc... it'll reduce the chances of you getting shocked
5. Pour in the mixed soda and 1/4L of CLR into the tank, then fill the remaining with water.
6. Pop the rod into the tank and hook up the + terminal and - to the tank somewhere... sit and watch...
Somewhere along the way you'll need to pour the water out and put fresh mixture in... the way to tell is when the water is redish/orange and dense..
Once done just rince the tank a few times, get some gas rinse the tank again, then once you feel comfortable it's cleaned out see how it looks.
#2
06-05-2011, 02:53 AM

Member


#5
06-05-2011, 09:41 AM

Senior Member
#7
06-05-2011, 11:34 AM
Join Date: Apr 2010
Location: Chicago, IL
Posts: 484
Likes: 0
Received 0 Likes
on
0 Posts
#8
06-05-2011, 12:03 PM
Join Date: Apr 2010
Location: Chicago, IL
Posts: 484
Likes: 0
Received 0 Likes
on
0 Posts
#9
06-06-2011, 04:52 AM
Member
Here is the vid i promised. http://youtu.be/pk9n0_90G_E
I hope youre able to see the difference before and after. My camera phone sucks. Although I can assure you that the evaporust stuff really works. Even on super gunked up tanks. I put a ton of info in the vid description. I hope it helps people.
I hope youre able to see the difference before and after. My camera phone sucks. Although I can assure you that the evaporust stuff really works. Even on super gunked up tanks. I put a ton of info in the vid description. I hope it helps people.
#10
06-06-2011, 10:33 AM

Senior Member
Join Date: Apr 2010
Location: Northern Kentucky
Posts: 107
Likes: 0
Received 0 Likes
on
0 Posts