
My Selina-MOTO Repsol Fairings
#1
 04-21-2010, 01:39 AM


Hey all! So I just recently decided to contribute to this awesome forum since I've learned so much from it and figured I'd start off with some pics/info on the Chinese fairings dealer Selina-MOTO.
Although I did like the original blue, white and red color scheme of my '93 CBR600 F2, I wanted to get some nice new ones since I have a lot more confidence at riding than when I first started.
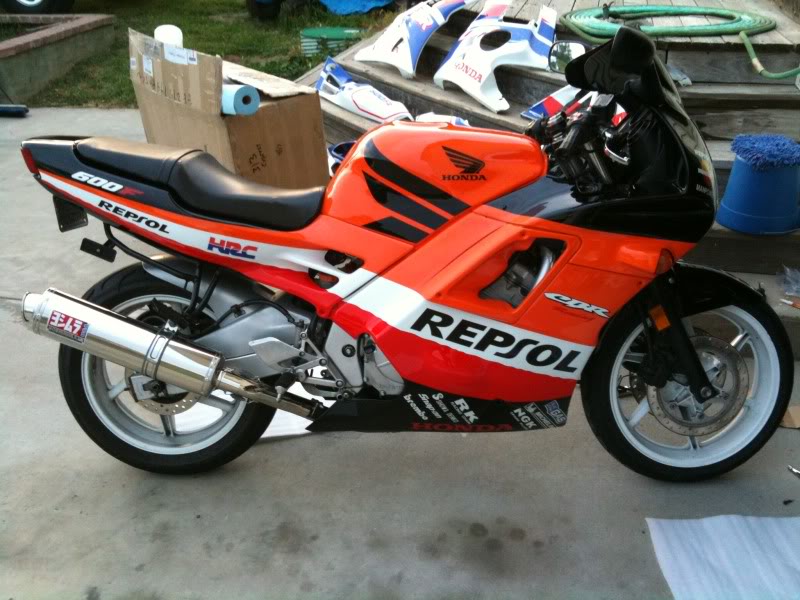
After countless hours looking through all the ebay dealers for aftermarket fairing sets, I decided to go with the Repsol set. The Repsol fairings just seemed so retro and just stood out much more than the rest. So I placed an order for those and it totaled out to $543.00 which seemed reasonable enough for what would be a brand new lookin' bike.
I should also point out that literally right after placing the order I came across a post here that showed the left and right tail fairings on the aftermarket kits had holes for a grab bar. My bike doesn't have a grab bar and it'd look bad with the holes there so I immediately sent an email to Selina-MOTO asking if they'd be able to send me the left and right tail fairings without the holes. They replied in less than in hour with a positive response saying they would cover the holes up for me. So I figured they would just cover up the holes with some plugs or something, which was fine with me since it would save me some work, but the fairings they sent didn't have any holes and it was all one piece. So I was happy about that and the fact that they replied very quick and were flexible about the fairings themselves.
The package also arrived much quicker than expected. I ordered it on March 29th and it was at the post office waiting for me by April 17th! Course I had to wait till Monday April 19th to pick it up but it was still quick nonetheless.
The paint job was also very pretty and shiny but you can still scratch through the paint fairly easy if your not somewhat careful with them. It all went together pretty well for the most part too but it would definitely be a good idea to have a dremel and maybe some epoxy handy nearby..
But anyways..I better start posting some pics to keep people interested lol. I'll post some pics then outline some of the more difficult parts about fitting the fairings onto my bike.
Here's my bike before:
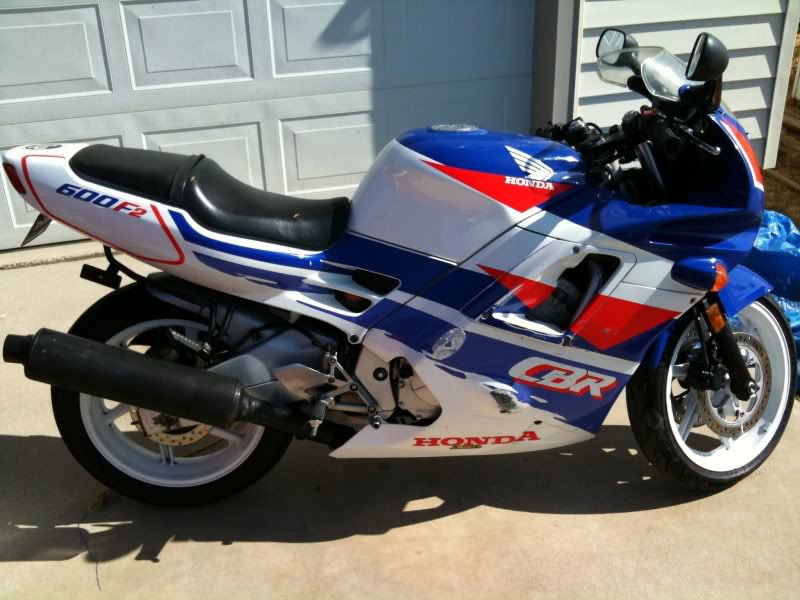
and here she is after with the old fairings in the background:
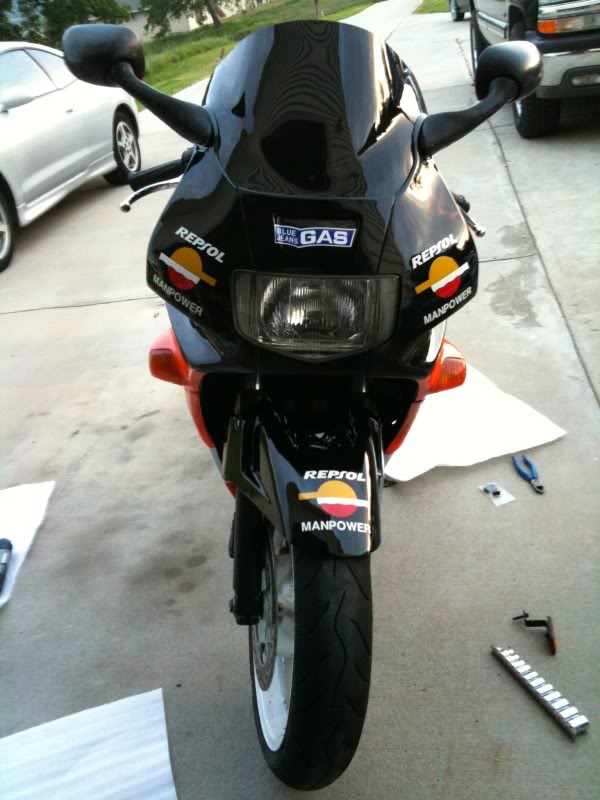
So yea..looks like a whole new sexy bike and for only 540 bucks LOL! The "Blue Jeans GAS" logo on the front is kinda funky though..wish it said Honda instead but no biggie, I'll probably cover it up with a Yoshimura sticker or something. Also the windscreen stands up a bit high for my tastes but it was free so I'm gonna use it!
So it looks nice and all that jazz but how was it getting it all fitted? The only part that really gave me trouble was the front piece where you mount the headlight. This is where some dremel action and epoxy comes in handy too. So for some reason Selina-MOTO decided to put screws INSIDE the top two cylinder holes of the front piece that the headlight is mounted on. It would have been fine if the screws had been longer but they weren't and one of the cylinders snapped off while trying to get the screw through the headlight hole just a bit further So after that snapped off I was a bit upset but decided to remove the other one with a dremel and took out both the screws from their insides. After that I epoxied them back on and got some longer screws.
Here are those offending cylinder screw mounts:
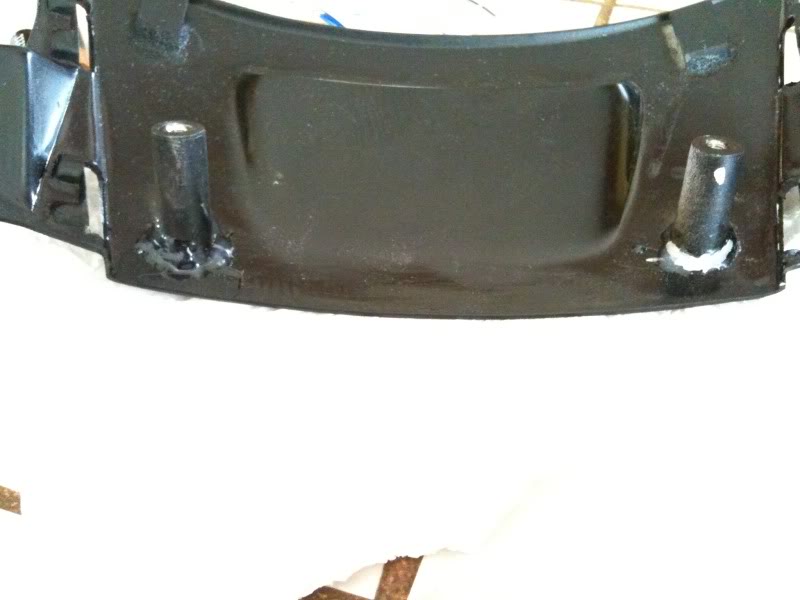
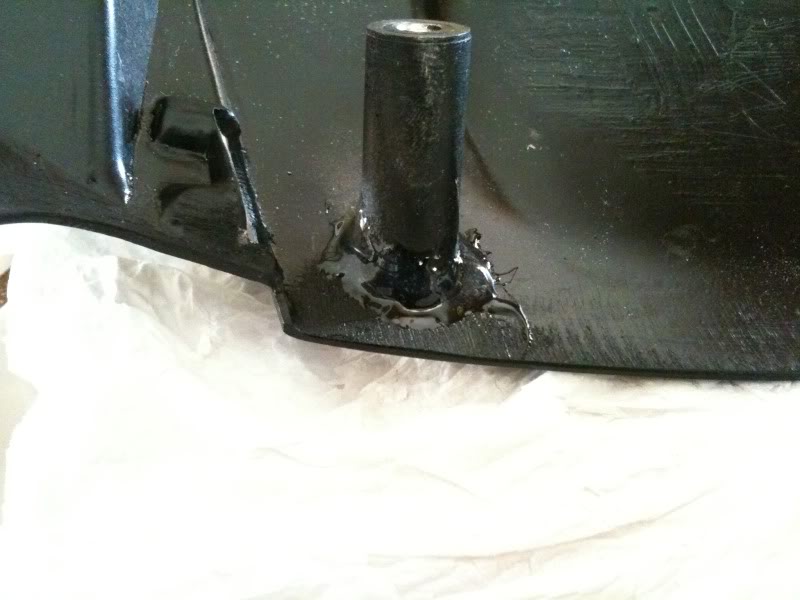
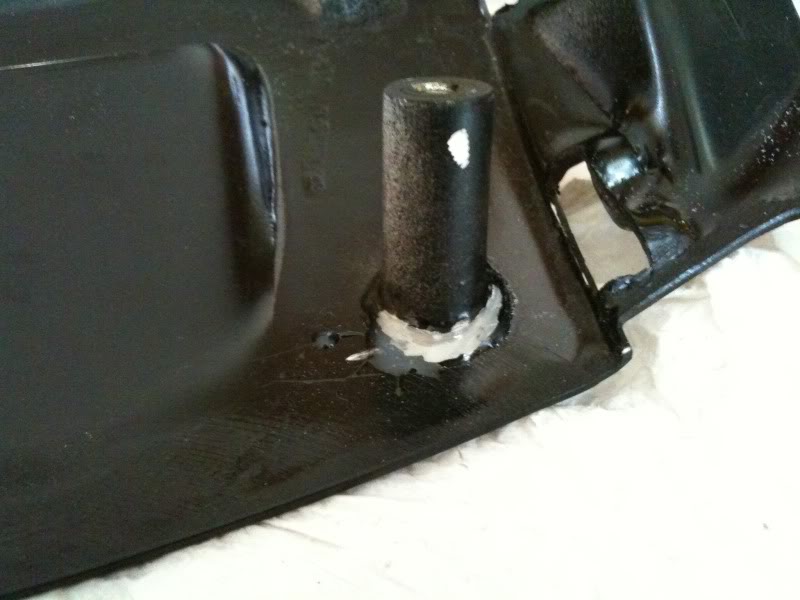
I didn't put the screws back on the inside either because it was easier for me to mount the headlight with them not inside.
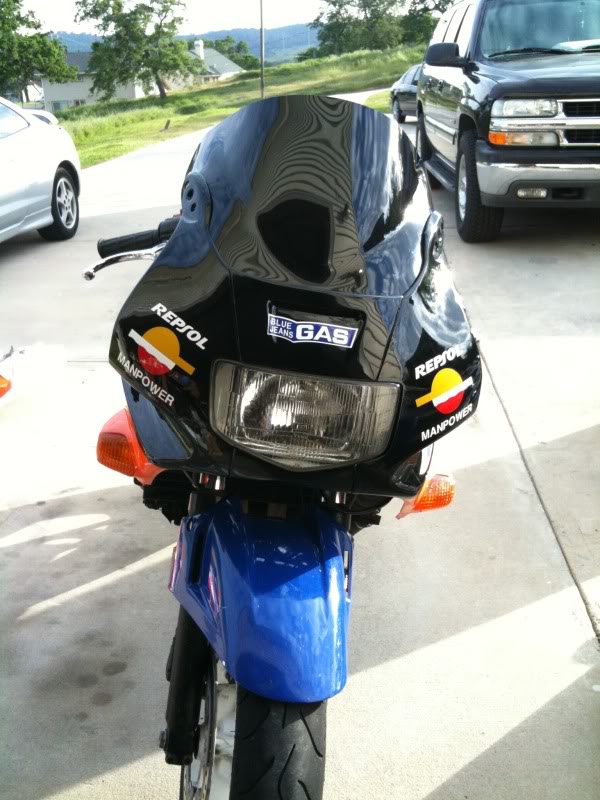
So once that was done I mounted the headlight on it and put the front cowl back onto the bike without much trouble and it came out like so:
I should also point out that the holes to mount the windscreen onto the bike were too small so I used the dremel the make them a bit bigger.
I noticed from various posts here that people had some questions about the tank cover and I can say it is just that..a painted ABS plastic cover that goes over your current tank. And as you can see it does look good and it fits on the original tank good. You can't tell it's a cover until you get closer and see the gap between the cover and the actually tank where the gas cap is:
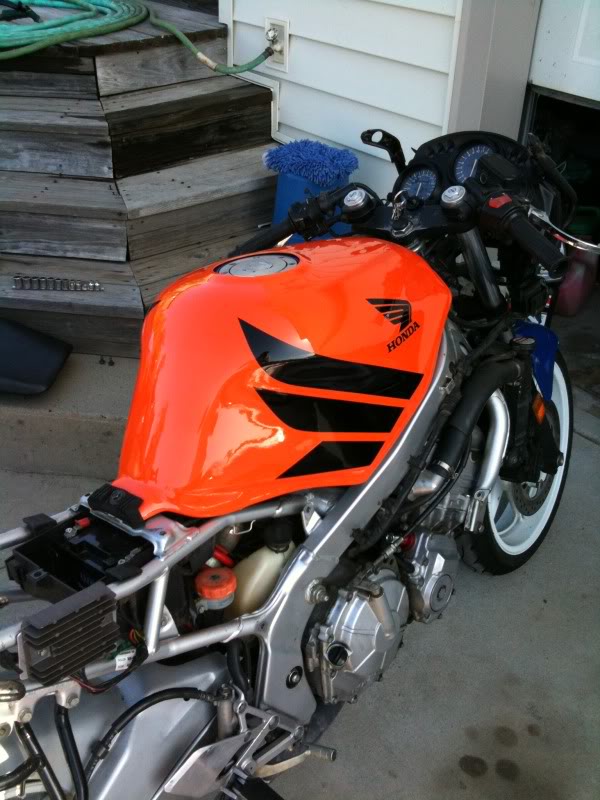
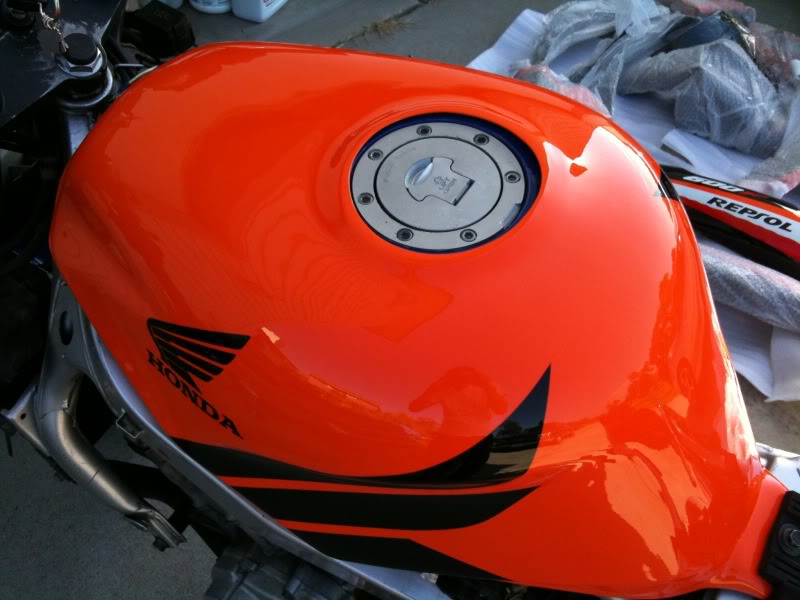
It would be a good idea to get a tank pad to prevent any scratches on the tank cover since it can and probably will happen without one.
So I got the front cowl, the windscreen, and the tank cover on so all that's left are the side and tail fairings Those definitely fit on pretty tight and some of the holes on both side fairings needed some dremel action to align the holes with the ones on the frame but the tail fairings fit on without a hitch.
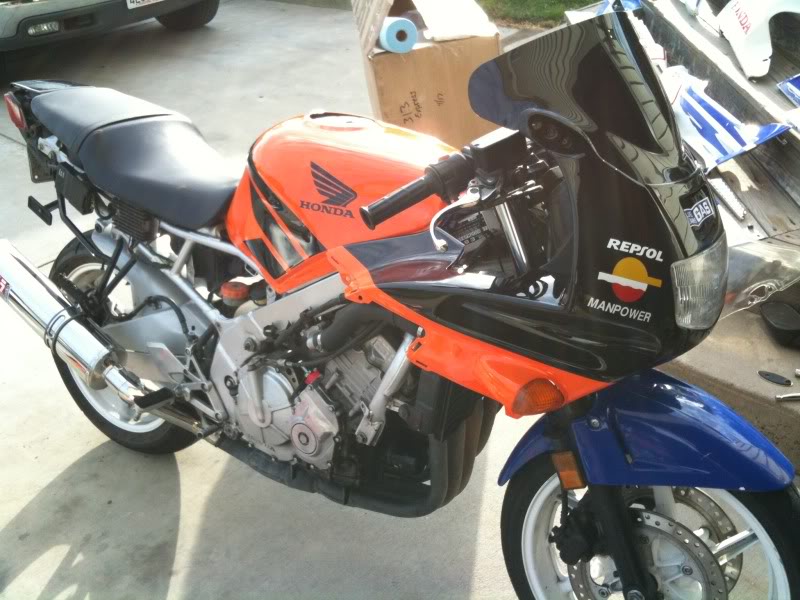
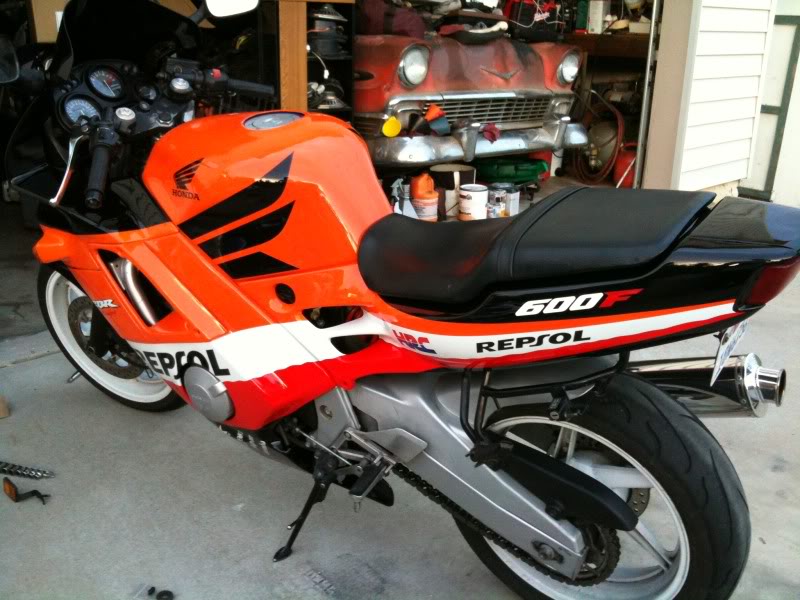
And it turned out like YAY :
:
Still need to get some screws for those little windows on the side fairings and the fuse box but its just about done.
So that's pretty much it for fitting the fairings onto my bike. I'd have to say to expect to spend at least a day fitting them on your bike unless you get lucky and it all goes on without a problem (which is very unlikely with non-OEM fairings). It was definitely a fun project and I enjoy doing these sorts of things even when I have to work through all the problems. It was fun putting this review together and I hope someone finds this useful or interesting or whatever lol.
Laterz
Although I did like the original blue, white and red color scheme of my '93 CBR600 F2, I wanted to get some nice new ones since I have a lot more confidence at riding than when I first started.
After countless hours looking through all the ebay dealers for aftermarket fairing sets, I decided to go with the Repsol set. The Repsol fairings just seemed so retro and just stood out much more than the rest. So I placed an order for those and it totaled out to $543.00 which seemed reasonable enough for what would be a brand new lookin' bike.
I should also point out that literally right after placing the order I came across a post here that showed the left and right tail fairings on the aftermarket kits had holes for a grab bar. My bike doesn't have a grab bar and it'd look bad with the holes there so I immediately sent an email to Selina-MOTO asking if they'd be able to send me the left and right tail fairings without the holes. They replied in less than in hour with a positive response saying they would cover the holes up for me. So I figured they would just cover up the holes with some plugs or something, which was fine with me since it would save me some work, but the fairings they sent didn't have any holes and it was all one piece. So I was happy about that and the fact that they replied very quick and were flexible about the fairings themselves.
The package also arrived much quicker than expected. I ordered it on March 29th and it was at the post office waiting for me by April 17th! Course I had to wait till Monday April 19th to pick it up
The paint job was also very pretty and shiny but you can still scratch through the paint fairly easy if your not somewhat careful with them. It all went together pretty well for the most part too but it would definitely be a good idea to have a dremel and maybe some epoxy handy nearby..
But anyways..I better start posting some pics to keep people interested lol. I'll post some pics then outline some of the more difficult parts about fitting the fairings onto my bike.
Here's my bike before:
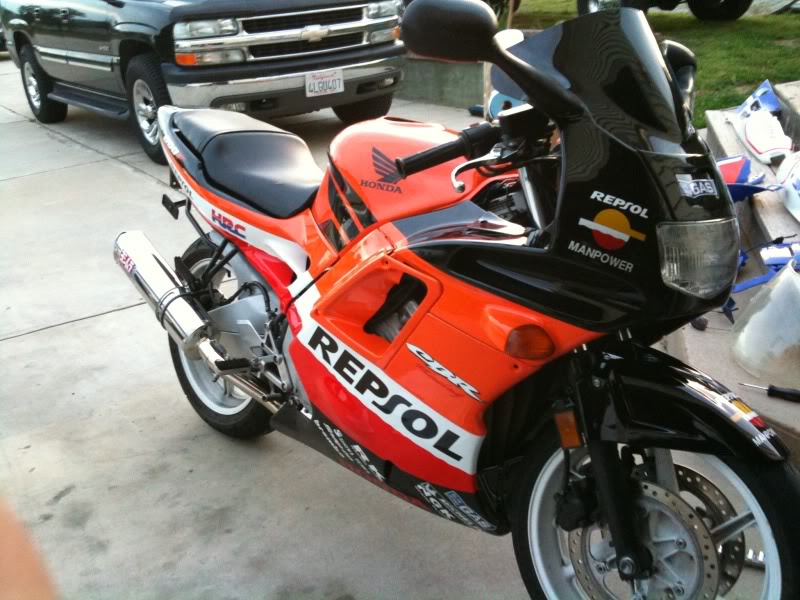
and here she is after with the old fairings in the background:
So yea..looks like a whole new sexy bike and for only 540 bucks LOL! The "Blue Jeans GAS" logo on the front is kinda funky though..wish it said Honda instead but no biggie, I'll probably cover it up with a Yoshimura sticker or something. Also the windscreen stands up a bit high for my tastes but it was free so I'm gonna use it!
So it looks nice and all that jazz but how was it getting it all fitted? The only part that really gave me trouble was the front piece where you mount the headlight. This is where some dremel action and epoxy comes in handy too. So for some reason Selina-MOTO decided to put screws INSIDE the top two cylinder holes of the front piece that the headlight is mounted on. It would have been fine if the screws had been longer but they weren't and one of the cylinders snapped off while trying to get the screw through the headlight hole just a bit further
Here are those offending cylinder screw mounts:
I didn't put the screws back on the inside either because it was easier for me to mount the headlight with them not inside.
So once that was done I mounted the headlight on it and put the front cowl back onto the bike without much trouble and it came out like so:
I should also point out that the holes to mount the windscreen onto the bike were too small so I used the dremel the make them a bit bigger.
I noticed from various posts here that people had some questions about the tank cover and I can say it is just that..a painted ABS plastic cover that goes over your current tank. And as you can see it does look good and it fits on the original tank good. You can't tell it's a cover until you get closer and see the gap between the cover and the actually tank where the gas cap is:
It would be a good idea to get a tank pad to prevent any scratches on the tank cover since it can and probably will happen without one.
So I got the front cowl, the windscreen, and the tank cover on so all that's left are the side and tail fairings
And it turned out like YAY
Still need to get some screws for those little windows on the side fairings and the fuse box but its just about done.
So that's pretty much it for fitting the fairings onto my bike. I'd have to say to expect to spend at least a day fitting them on your bike unless you get lucky and it all goes on without a problem (which is very unlikely with non-OEM fairings). It was definitely a fun project and I enjoy doing these sorts of things even when I have to work through all the problems. It was fun putting this review together and I hope someone finds this useful or interesting or whatever lol.
Laterz
#2
04-21-2010, 01:56 AM

Member
Join Date: Apr 2010
Location: Louisville, KY. USA
Posts: 59
Likes: 0
Received 0 Likes
on
0 Posts

#4
04-21-2010, 11:22 AM

#5
04-21-2010, 12:00 PM


#8
04-22-2010, 09:45 PM

Administrator - Retired

#10
09-14-2010, 08:16 PM

hey i am doing the exact same thing u have done. i have a question... i am trying to get a fender eliminator going on. did u just buy that signal integrating kit? how did u mount your plates. i cant wait till i get my fairings. also are u the same guy who posted the youtube video : cbr f2 repsol?