When you click on links to various merchants on this site and make a purchase, this can result in this site earning a commission. Affiliate programs and affiliations include, but are not limited to, the eBay Partner Network.
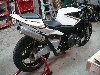
Brief intro, do a small project with my paps and had this CBRF1 for a couple years now, bike is completely stripped down to the frame at this point.
looking to rebuild a set of forks on a 1987 CBR600F1
got my seals, Race tech springs and Race tech emulators ready to go. I did a search and couldn't find much information about the installs itself and was wondering if anyone has had experience with either one of the Race Tech items I'm about to install. Any help would be greatly appreciated
I haven't done the racetech's, but the forks are pretty simple to rebuild. They are just like every dirt bike out there up till the 90's. The only difference is the anti dive piston, but it is cake. If you have the FSM it has step by steps on how to do it no issues.
I haven't done the racetech's, but the forks are pretty simple to rebuild. They are just like every dirt bike out there up till the 90's. The only difference is the anti dive piston, but it is cake. If you have the FSM it has step by steps on how to do it no issues.
Thanks dude
My old man was telling me it's a lot of work to rebuild them, I think he's just kindly saying to me that I'm going to be doing them myself 😂
I've done a number of fork rebuilds on CBR's. It's pretty straight forward. Messy tho.
A vise is a must particularly when compressing the springs to get the top nut on.
The Race Tech emulator cartridge just sits on top of the damping rod. Installing them is simple, adjusting is another story, because you have to take them out to adjust them.
So its been a while since i last posted, just a brief update here.
I got the forks done as everything was pretty straight forward, New springs and valves in with new seals. Had everything apart and noticed the guide bushing near the top were worn on the outer surface. These bush guides have a copper outer surface and showed good signs that it needed replacing, and so a quick phone call to Carter Honda here in Vancouver and $29 later i got me some new ones. inspected everything else and did my mods on the dampeners to work with the new valves, buttoned everything back up and now awaiting bike assembly with my old man.
The frame did have a crack in the usual spot and being a journeyman fabricator and welder I did the repairs on the crack myself and sent it to powder coating along with the wheels.
Carter Honda is great to do business with. I cross the line when I need parts for mine rather than deal with the folks down south who don't seem that interested in helping. Good luck and looking forward to seeing the pics.
Greetings again everyone,
Been a long time since my last posting, the project is still under way but just taking a little longer than expected.
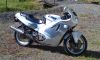
Looking for some sort of paint scheme layout diagram or measurements for the accents on the 90-91 silver on white paint scheme. Can anyone help me out with that?