600 Hurricane Idling too Fast
#1
 03-15-2014, 08:05 PM


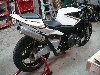
This past fall I purchased an 87 Hurricane 600. It's got Accel coils, a K&N filter, Fox rear shock, SuperTrap pipe, and a manual CCT already installed. It has all of the fairings except the fenders. I paid 1400 bucks. When I first got it it ran very well. But being the tinkerer I am I just couldn't leave it alone.
I put new plugs in first off. I installed NGK DPR8EA, but it had DPR7EA in it. Not sure if that could cause my issues, but the plug I installed is what the service manual called for.
My bowls were dripping a little so after reading a thread on this site I bought some O-rings to fix that. When I pulled the carbs off there was some rust in the bottoms of each bowl. I cleaned that out, checked each jet and the floats/needles, and put it back together. Ever since then it hasn't been quite right. After that it sat for the gist of the winter.
Today the weather was nice so I decided to dive back in. I suspected a leaky boot. They are a little hard but still somewhat pliable and not cracked. I pulled each bowl off again just to double check them and everything was fine but one main jet was partially clogged with super glue from when I installed the O-rings. I reassembled with a film of ultra gray permatex on each of the boots to ensure a good seal.
It runs great now, throttle is snappy, has power all the way to red-line, and cruises great. It idles good but way too fast at around 3-4k. Snapping the throttle doesn't help and there is play in the throttle cables. Idle **** is backed all the way off the throttle hub. I believe the choke cable is releasing all the way, and if I choke a hot engine it stalls.
When I assembled the carbs I set the sync according to the bypass holes like the manual says. They aren't perfect by pretty close. I have not fooled with the idle mixture screws. Does anyone have any theories on my problem? On the carbs there are 4 small hoses coming from each carb that join a larger piece of tubing. Could anyone tell me what these are for? Are there any common vacuum leaks on these bikes?
I took my first extended ride today (30 miles or so total) and it was a blast. The bike was running great except for the high idle.
#2
03-15-2014, 09:41 PM

Senior Member
Join Date: Aug 2008
Location: Northern California
Posts: 452
Likes: 0
Received 0 Likes
on
0 Posts
The plugs are fine, I don't see any need to go to a different heat range plug with a mostly stock engine. I have similar mods to my engine and OE plugs work well.
I suspect a carb issue is causing your problem either in the sync or possibly a clogged idle circuit on one or more carbs. If it's a vacuum leak it would have to be quite large, and the intake boots are the only place this would be possible that I can think of.
When you had your carbs apart did you spray all of the passages in the carb body out with compressed air? It's possible a small piece of what was in the bowls is blocking one or more places in the idle/pilot circuit. However, I am leaning more towards a sync issue as the first place to check. Setting the throttle plates visually to the bypass holes is how to get it in the ball park, and close enough to run. To sync the carbs accurately you need to use a manometer. You can buy something like the Morgan Carbtune or make your own for less than $20. I'm pretty sure your idle problem will improve a lot, if not completely, with a proper sync done with a manometer. If you want more info on that procedure let me know, I have a cheap homemade manometer here that works great.
#3
03-16-2014, 09:11 AM
I'm with Tahoe here.
First question is why did you use Super Glue? It breaks down from gasoline. None of those carb leak fixes work. One set of mine had some sort of miracle gasket forming material in the bowl gaps that was soft and mushy and found it's way into every orifice in all 4 carbs. PO said it was sold to be used for those gaskets...yeah right!
Carb cleaning is such a critical issue with these engines. Did you remove the pilot jets and manually clean them? Most try to just spray carb cleaner into them...it rarely works. Take them out and find a wire that will fit in the hole and make sure they are open. I use a couple of strands of multi-strand copper wire as a tiny brush. Spray some carb cleaner in there and then push the wire in and move it around.
How did you set the pilot screws? This is another important setting and needs to be set right. The manual setting is only the starting point. The screws need to be adjusted to the engine and location (elevation) after it is running.
The other thing that is highly suspect is finding Super Glue in one of the main jets. This indicates to me that it could be in other places inside the carbs...like the pilot jets or one of the small orifices or passages...I would go through them again and verify they are clean. Once the stuff gets fuel on it, it breaks down and will go everywhere.
Manually syncing is possible. I use a feeler gauge in the slide throat to set carbs on the bench. This eliminates the error factor of other methods. You can get very close with this and most times when I put the vacuum meter on later they need no adjustment.
Last edited by dennisgb; 03-16-2014 at 09:16 AM.
#4
03-16-2014, 09:30 AM
The plugs are fine, I don't see any need to go to a different heat range plug with a mostly stock engine. I have similar mods to my engine and OE plugs work well.
I suspect a carb issue is causing your problem either in the sync or possibly a clogged idle circuit on one or more carbs. If it's a vacuum leak it would have to be quite large, and the intake boots are the only place this would be possible that I can think of.
When you had your carbs apart did you spray all of the passages in the carb body out with compressed air? It's possible a small piece of what was in the bowls is blocking one or more places in the idle/pilot circuit. However, I am leaning more towards a sync issue as the first place to check. Setting the throttle plates visually to the bypass holes is how to get it in the ball park, and close enough to run. To sync the carbs accurately you need to use a manometer. You can buy something like the Morgan Carbtune or make your own for less than $20. I'm pretty sure your idle problem will improve a lot, if not completely, with a proper sync done with a manometer. If you want more info on that procedure let me know, I have a cheap homemade manometer here that works great.
I suspect a carb issue is causing your problem either in the sync or possibly a clogged idle circuit on one or more carbs. If it's a vacuum leak it would have to be quite large, and the intake boots are the only place this would be possible that I can think of.
When you had your carbs apart did you spray all of the passages in the carb body out with compressed air? It's possible a small piece of what was in the bowls is blocking one or more places in the idle/pilot circuit. However, I am leaning more towards a sync issue as the first place to check. Setting the throttle plates visually to the bypass holes is how to get it in the ball park, and close enough to run. To sync the carbs accurately you need to use a manometer. You can buy something like the Morgan Carbtune or make your own for less than $20. I'm pretty sure your idle problem will improve a lot, if not completely, with a proper sync done with a manometer. If you want more info on that procedure let me know, I have a cheap homemade manometer here that works great.
I'm all for saving some cash. There's a local shop here that I was gonna have sync the carbs for me. He charges 60 bucks but if I can do it for 20, sounds good to me.
My cleaning job was minimal, in comparison to a full tear down and rebuild. I figured since the bike ran so well there couldn't be much wrong inside. I removed the idle jet, ensured it was clean, shot some cleaner down it's hole, and reinstalled. On each carb some cleaner worked in and dripped out the brass bypass hole on the filter-side of the carbs.
I like to think that because I have great throttle response and a smooth idle the pilot circuits are in reasonable shape. But they may not even be in the equation at 4k.
Correct me if I'm wrong on this. The sync screws essentially just open/close the throttle screws to ensure that all 4 carbs are opening equally. So with a high idle condition, maybe both sync screws need to be backed off? When I set them, I only had the idle adjustment turned in 1 or two turns, maybe it should have been more.
What do you think about pulling the air box lid, bracing the tank off to the side, and playing with sync screws while it's running? The trial and error method?
The first time I tore down the carbs all but one idle jet was at least partially clogged. Maybe because they were so dirty the PO set the sync with dirty carbs.
I'm glad I got my ride in yesterday. Today it's back to the 35 degrees and rain. Yesterday we almost touched 70.
I'm with Tahoe here.
First question is why did you use Super Glue? It breaks down from gasoline. None of those carb leak fixes work. One set of mine had some sort of miracle gasket forming material in the bowl gaps that was soft and mushy and found it's way into every orifice in all 4 carbs. PO said it was sold to be used for those gaskets...yeah right!
Carb cleaning is such a critical issue with these engines. Did you remove the pilot jets and manually clean them? Most try to just spray carb cleaner into them...it rarely works. Take them out and find a wire that will fit in the hole and make sure they are open. I use a couple of strands of multi-strand copper wire as a tiny brush. Spray some carb cleaner in there and then push the wire in and move it around.
How did you set the pilot screws? This is another important setting and needs to be set right. The manual setting is only the starting point. The screws need to be adjusted to the engine and location (elevation) after it is running.
The other thing that is highly suspect is finding Super Glue in one of the main jets. This indicates to me that it could be in other places inside the carbs...like the pilot jets or one of the small orifices or passages...I would go through them again and verify they are clean. Once the stuff gets fuel on it, it breaks down and will go everywhere.
Manually syncing is possible. I use a feeler gauge in the slide throat to set carbs on the bench. This eliminates the error factor of other methods. You can get very close with this and most times when I put the vacuum meter on later they need no adjustment.
First question is why did you use Super Glue? It breaks down from gasoline. None of those carb leak fixes work. One set of mine had some sort of miracle gasket forming material in the bowl gaps that was soft and mushy and found it's way into every orifice in all 4 carbs. PO said it was sold to be used for those gaskets...yeah right!
Carb cleaning is such a critical issue with these engines. Did you remove the pilot jets and manually clean them? Most try to just spray carb cleaner into them...it rarely works. Take them out and find a wire that will fit in the hole and make sure they are open. I use a couple of strands of multi-strand copper wire as a tiny brush. Spray some carb cleaner in there and then push the wire in and move it around.
How did you set the pilot screws? This is another important setting and needs to be set right. The manual setting is only the starting point. The screws need to be adjusted to the engine and location (elevation) after it is running.
The other thing that is highly suspect is finding Super Glue in one of the main jets. This indicates to me that it could be in other places inside the carbs...like the pilot jets or one of the small orifices or passages...I would go through them again and verify they are clean. Once the stuff gets fuel on it, it breaks down and will go everywhere.
Manually syncing is possible. I use a feeler gauge in the slide throat to set carbs on the bench. This eliminates the error factor of other methods. You can get very close with this and most times when I put the vacuum meter on later they need no adjustment.
Yes the first time I disassembled the carbs I used a piece of wire to make sure they were clear. Yesterday I looked through each one and they were all clean but one was partially clogged. I also cleaned the side holes in each jet with the wire.
I haven't messed with the idle mixture screws at all. I thought they had more to do with idle quality and throttle response than idle speed, so them being out of adjustment shouldn't cause a 2500rpm idle spike. I do have a background in automotive, but motorcycles (at least multi-cylinder ones) are still very new to me.
Last edited by MrGiggles; 03-16-2014 at 09:42 AM.
#5
03-16-2014, 12:36 PM
Hmmm...okay...sort of hard to follow you here. It very hard to diagnose blind. Also, understanding these carbs is important...it's not a car. Sorry had to say that.
Pilot circuit is most misunderstood part of the system and the overlaps in the fuel delivery system are not understood very well. There are motorcycle carb 101 classes...I think there is one right here that would help you.
The pilot circuit delivers the fuel from idle to approx. 1/8th throttle...or a little more. The pilot screws are the air mixture for this fuel. When they are tuned to optimum before idle mechanical position is set the engine could run at 2500 RPM...sometimes when adjusting I have had to turn the idle down in order to complete the adjustments...so please don't make assumptions unless you understand.
Pilot Screw Adjustment - Cyclepedia
These screws and the orifice they fit into are also are traps for dirt so should be taken out and the orifice cleaned and the o rings should be replaced in a proper rebuild because air leaks can occur causing symptoms similar to vacuum leak and surprisingly a high idle is part of this. The order of the stack up o ring, washer and spring must be correct. You need to be very careful when you put the parts back together to insure that the o-ring and washer are flat in the orifice or you won't get the seal and will damage the o-ring, washer or both...again creating an air leak.
Proper adjustment of the pilot circuit is very important...can't stress this enough...so read the link above and realize that this needs to be clean and care taken during assembly and adjustment. Multi carbs are done one at a time in terms of adjusting the pilot screws.
A couple of other thoughts. You should try to verify choke function and position. If there is any choke at all then everything else is moot. Check position and cables for binding. Is the throttle making it back to the stop? What happens when you try to adjust the mechanical idle position?
Are you using a shop manual so you can see how all the parts work and are adjusted?
If your sync positions are off then all of this is worthless also. One carb open just a little too much will suck fuel like crazy and run the idle way up...look down the throats of the carbs and see what's going on...you can hear them such different and see if the gaps are close.
This is not plug and play stuff. Much more complicated than a carb on a car...take your time and understand how the stuff works and read what's going on...then make adjustments. This assumes everything is put together right...and even after years of doing this stuff, I have messed up so double check yourself and don't think you are the first guy to do it wrong or make a mistake.
I re-read what you wrote and one thing I missed was your asking about taking the air box off and moving the tank off to the side...bad assumption on my part here. I thought you had the air box off. First, with the air box off the tuning will be off slightly but it's the only way to do this because you can't get to anything or see what's going on. Most of us remove the gas tank and get a separate length of fuel hose and a funnel that will fit into the hose. Hook the hose to the fuel pump inlet and clamp it. Slide the other end with a clamp into the bottom of the funnel and clamp it tight. I put a hook on mine so I can hang it from the bars. You might have to tape it to the frame so it will stay relatively straight. Pour some fuel into the funnel (don't fill to the top). Now you can run the engine while you make adjustments...you can run for quite a while on half a funnel...if it takes a while to get things figured out stop the engine and add some fuel. Be careful not to spill on the hot engine...if your not comfortable with a little raw fuel...take it to a shop.
Last edited by dennisgb; 03-16-2014 at 01:02 PM.
#6
03-16-2014, 01:08 PM
Hmmm...okay...sort of hard to follow you here. It very hard to diagnose blind. Also, understanding these carbs is important...it's not a car. Sorry had to say that.
Pilot circuit is most misunderstood part of the system and the overlaps in the fuel delivery system are not understood very well. There are motorcycle carb 101 classes...I think there is one right here that would help you.
The pilot circuit delivers the fuel from idle to approx. 1/8th throttle...or a little more. The pilot screws are the air mixture for this fuel. When they are tuned to optimum before idle mechanical position is set the engine could run at 2500 RPM...sometimes when adjusting I have had to turn the idle down in order to complete the adjustments...so please don't make assumptions unless you understand.
Pilot Screw Adjustment - Cyclepedia
These screws and the orifice they fit into are also are traps for dirt so should be taken out and the orifice cleaned and the o rings should be replaced in a proper rebuild because air leaks can occur causing symptoms similar to vacuum leak and surprisingly a high idle is part of this. The order of the stack up o ring, washer and spring must be correct. You need to be very careful when you put the parts back together to insure that the o-ring and washer are flat in the orifice or you won't get the seal and will damage the o-ring, washer or both...again creating an air leak.
Proper adjustment of the pilot circuit is very important...can't stress this enough...so read the link above and realize that this needs to be clean and care taken during assembly and adjustment. Multi carbs are done one at a time in terms of adjusting the pilot screws.
A couple of other thoughts. You should try to verify choke function and position. If there is any choke at all then everything else is moot. Check position and cables for binding. Is the throttle making it back to the stop? What happens when you try to adjust the mechanical idle position?
Are you using a shop manual so you can see how all the parts work and are adjusted?
If your sync positions are off then all of this is worthless also. One carb open just a little too much will suck fuel like crazy and run the idle way up...look down the throats of the carbs and see what's going on...you can hear them such different and see if the gaps are close.
This is not plug and play stuff. Much more complicated than a carb on a car...take your time and understand how the stuff works and read what's going on...then make adjustments. This assumes everything is put together right...and even after years of doing this stuff, I have messed up so double check yourself and don't think you are the first guy to do it wrong or make a mistake.
I've had several ATV carbs apart so I'm somewhat familiar with how the pilot circuit works.
I think my next plan of action is to run it with the tank off and toy with the sync screws and see if it has any affect on the idle speed. Then I can also double check the choke linkage.
If I can get it to slow down anywhere close to an actual idle, I will go ahead and attempt to adjust the idle circuits. If playing with those doesn't do anything for me, they are coming back off.
The idle speed **** works fine. I can turn it in until it makes contact and the idle speed increases, but I can back it all the way off past the point of contact, with no affect on the idle speed.
I downloaded the Service Manual from this forum and have been following that. My amateur assessment of the mechanical condition of the carbs was a pass. Everything seemed to work like it should.
Last edited by MrGiggles; 03-16-2014 at 01:15 PM.
#7
03-16-2014, 02:40 PM
Ha! Quadrajet! You must have been around a while like me...last one of those I worked on was a long time ago. You needed a minimum of 3 hands to put them back together...better with 4. The difference is there was only one...not four carbs acting independently. ATV carbs are similar though and if you worked on a twin with dual carbs your half way there.
Okay so if you feel comfortable about the carb condition you likely have a sync issue...manually adjusting the sync without a vacuum meter is not a good idea...I've done it and gotten things better but not right. Consider a feeler gauge to get them all the same...it will get you closer.
Still be concerned if you didn't take those pilot screws out...much harder to do this on the bike. If they are dirty or the O-rings are bad...you'll have a problem getting it to idle right. Leaving them alone once you get an idle also is the wrong approach. to get best idle and response they need to be set to your motor, environment and altitude. Don't dismiss them as not important here or you will end up accepting something less that a good running, quick responding bike. They supply the fuel system up to the needle jet...and they also make the transition when the needle takes over. The reason they call it circuit overlap is because each circuit is supplying a portion of the fuel as you twist the grip. The pilot circuit continues supplying a portion of the fuel through out the range...as do the others. If it is not set right you will have problems...even tho it seems okay now. You have no idle circuit operating at 2500 RPM so once you get that working, it needs to function right. The pilot circuit is the one part of fuel delivery that causes most of the running issues...and it's the one people understand the least and do not set properly.
The problem with assuming it does not need adjusting is, once you get it to idle and it idles like crap you will follow your tail around trying to figure out what changed...nothing will have changed, you will just be operating at the proper RPM to show the problem.
You might get lucky and the sync will cure it...but it may have a flat spot as you throttle up...all I can say is you'll see...sometimes we have to go through it ourselves to get it...that's okay but try to remember what I said here...it will save you time and headaches.
Last edited by dennisgb; 03-16-2014 at 02:42 PM.
#8
03-16-2014, 02:57 PM
Ha! Quadrajet! You must have been around a while like me...last one of those I worked on was a long time ago. You needed a minimum of 3 hands to put them back together...better with 4. The difference is there was only one...not four carbs acting independently. ATV carbs are similar though and if you worked on a twin with dual carbs your half way there.
Okay so if you feel comfortable about the carb condition you likely have a sync issue...manually adjusting the sync without a vacuum meter is not a good idea...I've done it and gotten things better but not right. Consider a feeler gauge to get them all the same...it will get you closer.
Still be concerned if you didn't take those pilot screws out...much harder to do this on the bike. If they are dirty or the O-rings are bad...you'll have a problem getting it to idle right. Leaving them alone once you get an idle also is the wrong approach. to get best idle and response they need to be set to your motor, environment and altitude. Don't dismiss them as not important here or you will end up accepting something less that a good running, quick responding bike. They supply the fuel system up to the needle jet...and they also make the transition when the needle takes over. The reason they call it circuit overlap is because each circuit is supplying a portion of the fuel as you twist the grip. The pilot circuit continues supplying a portion of the fuel through out the range...as do the others. If it is not set right you will have problems...even tho it seems okay now. You have no idle circuit operating at 2500 RPM so once you get that working, it needs to function right. The pilot circuit is the one part of fuel delivery that causes most of the running issues...and it's the one people understand the least and do not set properly.
The problem with assuming it does not need adjusting is, once you get it to idle and it idles like crap you will follow your tail around trying to figure out what changed...nothing will have changed, you will just be operating at the proper RPM to show the problem.
You might get lucky and the sync will cure it...but it may have a flat spot as you throttle up...all I can say is you'll see...sometimes we have to go through it ourselves to get it...that's okay but try to remember what I said here...it will save you time and headaches.
Okay so if you feel comfortable about the carb condition you likely have a sync issue...manually adjusting the sync without a vacuum meter is not a good idea...I've done it and gotten things better but not right. Consider a feeler gauge to get them all the same...it will get you closer.
Still be concerned if you didn't take those pilot screws out...much harder to do this on the bike. If they are dirty or the O-rings are bad...you'll have a problem getting it to idle right. Leaving them alone once you get an idle also is the wrong approach. to get best idle and response they need to be set to your motor, environment and altitude. Don't dismiss them as not important here or you will end up accepting something less that a good running, quick responding bike. They supply the fuel system up to the needle jet...and they also make the transition when the needle takes over. The reason they call it circuit overlap is because each circuit is supplying a portion of the fuel as you twist the grip. The pilot circuit continues supplying a portion of the fuel through out the range...as do the others. If it is not set right you will have problems...even tho it seems okay now. You have no idle circuit operating at 2500 RPM so once you get that working, it needs to function right. The pilot circuit is the one part of fuel delivery that causes most of the running issues...and it's the one people understand the least and do not set properly.
The problem with assuming it does not need adjusting is, once you get it to idle and it idles like crap you will follow your tail around trying to figure out what changed...nothing will have changed, you will just be operating at the proper RPM to show the problem.
You might get lucky and the sync will cure it...but it may have a flat spot as you throttle up...all I can say is you'll see...sometimes we have to go through it ourselves to get it...that's okay but try to remember what I said here...it will save you time and headaches.
I'm gonna try to mess with the sync screws and see if it will slow down. If it does and runs good, great. If it idles like crap I will pull the carbs and clean that idle circuit.
Thank you for your help. Forums like these are invaluable.
#9
03-16-2014, 08:27 PM
Senior Member
Join Date: Aug 2008
Location: Northern California
Posts: 452
Likes: 0
Received 0 Likes
on
0 Posts
Looks like I don't have much to add at this point  On the DIY manometer part I basically built something very similar to this homemade manometer. That thread is for a FI bike, but the principle is the same as far as building the tool is concerned. You're measuring relative vacuum between cylinders either way whether it's a throttle body or a carburetor
The only difference on our bikes is instead of the extensions on the ends of the tubing you need to use a threaded adapter to screw into the carb bodies. I made my own by using 5mm allen head bolts and drilling out the center of each one. In hindsight, it would be much easier to buy something like these Motion Pro adapters which will be much easier to use. I'll be buying a set myself next time I need to sync mine.
On the DIY manometer part I basically built something very similar to this homemade manometer. That thread is for a FI bike, but the principle is the same as far as building the tool is concerned. You're measuring relative vacuum between cylinders either way whether it's a throttle body or a carburetor The only difference on our bikes is instead of the extensions on the ends of the tubing you need to use a threaded adapter to screw into the carb bodies. I made my own by using 5mm allen head bolts and drilling out the center of each one. In hindsight, it would be much easier to buy something like these Motion Pro adapters which will be much easier to use. I'll be buying a set myself next time I need to sync mine.
Last edited by TahoeRider; 03-16-2014 at 08:31 PM.
#10
04-08-2014, 01:05 AM

Senior Member
Join Date: Feb 2012
Location: SoCal
Posts: 109
Likes: 0
Received 0 Likes
on
0 Posts
When I bought a set of non-CA carbs the PO had some jets that were way larger then the manual called for. when i hooked everything up it would idle at like 5k.
What size jets are in your bike now?