
Alternator cover removal - how?


#13
 12-21-2012, 05:14 PM

Join Date: Dec 2012
Location: Brisbane, Australia
Posts: 65
Likes: 0
Received 0 Likes
on
0 Posts
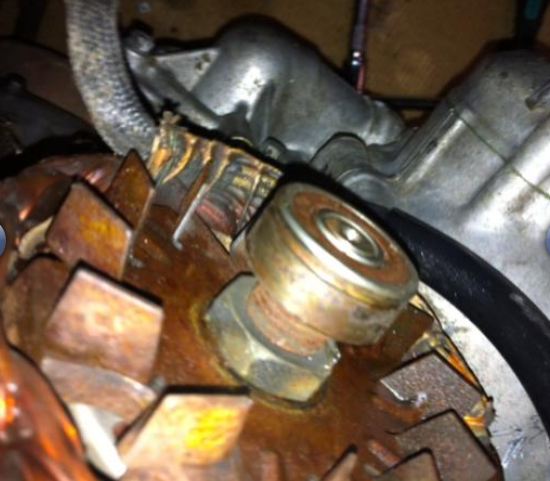
Thanks gents. Any thoughts on using a puller to remove the bearing? This will give me easy access to the nut you see. I think the fan will have to come off to be able to get a shaft into the alternator so I can finally get the nut on the other end loose.
It's like pulling teeth only less income?
It's like pulling teeth only less income?
#14
12-22-2012, 10:51 PM
Join Date: Dec 2012
Location: Brisbane, Australia
Posts: 65
Likes: 0
Received 0 Likes
on
0 Posts
Ok, some more progress.! borrowed a 3 legged puller from a mate - thanks Tony!
Bearing successfully removed. the puller has compressed the seal somewhat on the bearing, so i will need to get a new one if possible.
I dont know much about bearings. it is marked:
NSK B10-50D JAPAN
if anyone can explain what that means?
it has an external diameter of 26mm and an internal of 10mm
It has a height of 10mm also
Looking here i am out with my measurements but hey the power of the net!
http://www.autospark.eu/bearings/bearings/b10-50d-nsk
ok, so that takes me to the 21mm nut which was 22mm, so not a bad guesstimate.
a socket on that got it loose with the 14mm spanner on the actual nut we are trying to get to.
once that was off, the fan came out. the fan is deceptive as it is actually a large lump of metal. pliers on a blade to ease it out and don't drop it on the ground like i did.
finally the internals of the alternator are revealed. My mate Mal turned up just in time for me to hold a big screwdriver in there whilst he tweaked the nut loose. He's a big bloke and leaned on it til it gave. we still had to extend the 14mm spanner with another spanner.
he just sniffed and muttered something about it being easy enough - thanks mate for being here for the glory!
So now that its loose i can actually move forward with removing the Alternator and jump back into the process i am following.
thoughts on bearings gratefully received. with it being Christmas now i doubt the bearing shops will be open for 2-3 weeks but I'm still feeling good about getting this far.
If you have followed me this far, thank you and have a great Christmas!
Owen
Last edited by oml67; 12-22-2012 at 10:53 PM. Reason: additional info
#15
12-23-2012, 03:09 AM
Join Date: Dec 2012
Location: Brisbane, Australia
Posts: 65
Likes: 0
Received 0 Likes
on
0 Posts

#16
12-23-2012, 04:21 AM

Crazy CBR Salvage Guy. RIP
#18
12-23-2012, 07:22 AM
Join Date: Dec 2012
Location: Brisbane, Australia
Posts: 65
Likes: 0
Received 0 Likes
on
0 Posts
Ok, so a little more progress.
I'm drifting away from simply removing the Alternator cover into replacing the starter clutch and alternator damper.
Please let me know if its ok to chronicle my journey in this thread or if its appropriate to start another?
14mm Nut spun off by hand easily enough.
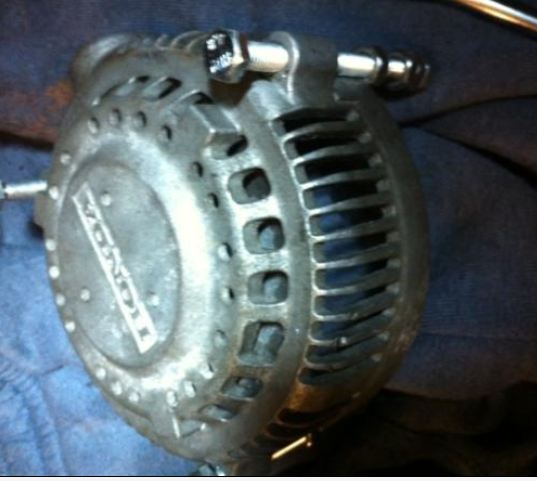
The three 12mm bolts holding the Alternator body to the engine came out quickly enough. The case was simple enough to prise gently away. there is a ring collar as well that came off with a gentle lever from my favourite long screwdriver. this collar has an oil seal so i was careful.
it was interesting to note the smell of engine oil the minute the three bolts were removed - into the belly of the beast!
The whole thing came out easily and i am now committed to this process.
Insanely i pulled all the various parts off the Alternator shaft, so reassembly will need very careful referral to the exploded diagrams i have yet to find.
I will buy a new damper assembly and a new starter clutch. Prices in Oz will be mad, so if anyone knows a good US or UK site i can order from , please advise.
I tied the chain up to prevent it falling into the engine and set about the chain.
I bent the retaining tang down about 50-60 degrees. with a bit of jiggling my long nose pliers went under the chain at the top of the arc and this seemed to encourage the chain to move off the gear.
The whole damper moves around a little and i actually pushed it back inwards to free it from the chain. once free from the gear it was easy enough to remove the damper.
Its a much bigger bit of kit than i was expecting - pleasantly chunky you might say?
I have qualms about the chain not engaging on the lower gear (round the crank?) but i cannot do much except pull the chain up when starting the re-assembly.
for now i need to figure out how to release the tensioner using the bike spoke method, although i did not notice the tensioner spring any tighter?
I'm also hunting through my sockets to get the right guide for the shaft as it slots back into the inner end bearing.
I apologise for the lack of photos, it would be great to be able to just comment on each stage that i have photographed but alas i lack the technical ability to integrate the photos at this stage.
I wont have much to say on this job until the parts arrive. as mentioned before if you know where to get the parts, please let me know here. I'll keep hunting on the net and through the forums, i cant be the first person who needs these bits
have a great Christmas everyone.
Cheers Owen
I'm drifting away from simply removing the Alternator cover into replacing the starter clutch and alternator damper.
Please let me know if its ok to chronicle my journey in this thread or if its appropriate to start another?
14mm Nut spun off by hand easily enough.
The three 12mm bolts holding the Alternator body to the engine came out quickly enough. The case was simple enough to prise gently away. there is a ring collar as well that came off with a gentle lever from my favourite long screwdriver. this collar has an oil seal so i was careful.
it was interesting to note the smell of engine oil the minute the three bolts were removed - into the belly of the beast!
The whole thing came out easily and i am now committed to this process.
Insanely i pulled all the various parts off the Alternator shaft, so reassembly will need very careful referral to the exploded diagrams i have yet to find.
I will buy a new damper assembly and a new starter clutch. Prices in Oz will be mad, so if anyone knows a good US or UK site i can order from , please advise.
I tied the chain up to prevent it falling into the engine and set about the chain.
I bent the retaining tang down about 50-60 degrees. with a bit of jiggling my long nose pliers went under the chain at the top of the arc and this seemed to encourage the chain to move off the gear.
The whole damper moves around a little and i actually pushed it back inwards to free it from the chain. once free from the gear it was easy enough to remove the damper.
Its a much bigger bit of kit than i was expecting - pleasantly chunky you might say?
I have qualms about the chain not engaging on the lower gear (round the crank?) but i cannot do much except pull the chain up when starting the re-assembly.
for now i need to figure out how to release the tensioner using the bike spoke method, although i did not notice the tensioner spring any tighter?
I'm also hunting through my sockets to get the right guide for the shaft as it slots back into the inner end bearing.
I apologise for the lack of photos, it would be great to be able to just comment on each stage that i have photographed but alas i lack the technical ability to integrate the photos at this stage.
I wont have much to say on this job until the parts arrive. as mentioned before if you know where to get the parts, please let me know here. I'll keep hunting on the net and through the forums, i cant be the first person who needs these bits
have a great Christmas everyone.
Cheers Owen