2002 F4i Stunt Bike Build
#11
 05-06-2011, 11:35 AM


Join Date: Jan 2010
Location: Nor*Jers
Posts: 218
Likes: 0
Received 0 Likes
on
0 Posts
And yeah my avatar always throw people off, I made it that way intentionally :P
#12
05-10-2011, 09:22 AM
Join Date: Jan 2010
Location: Nor*Jers
Posts: 218
Likes: 0
Received 0 Likes
on
0 Posts
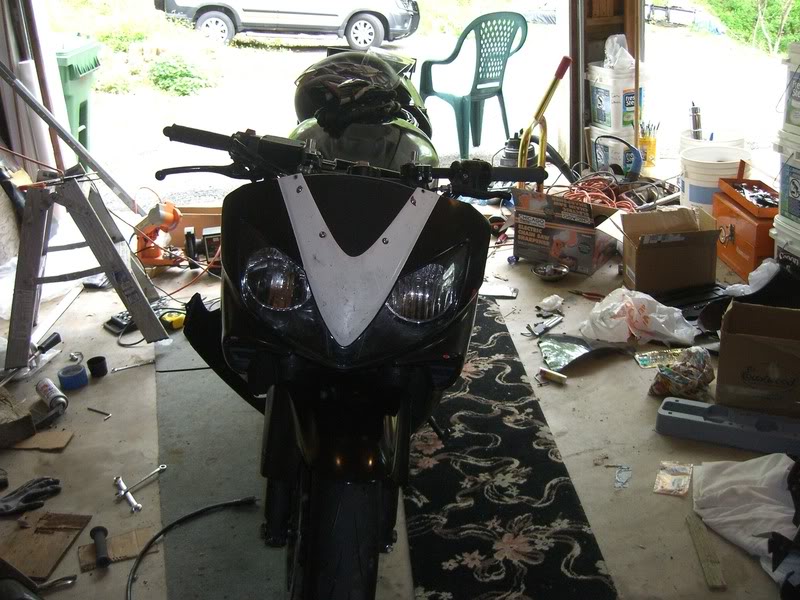
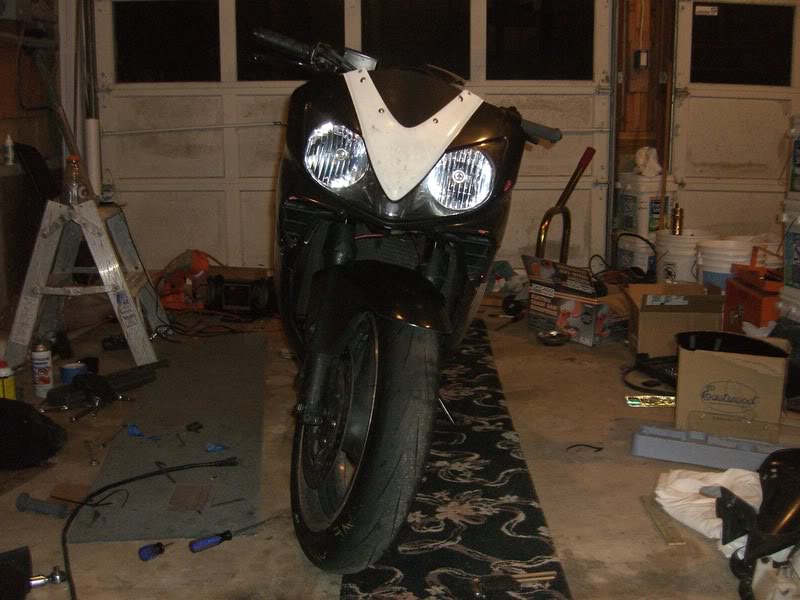
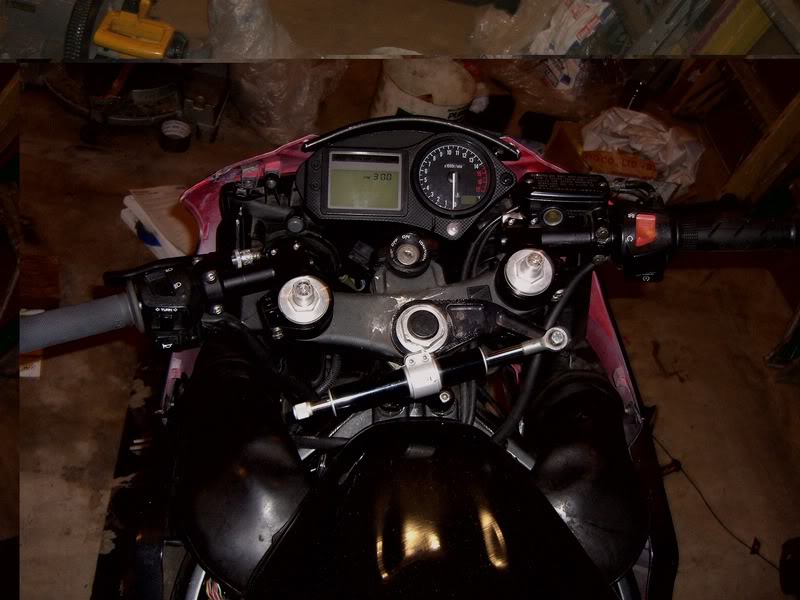
Did some more work this weekend. My stealthstay came in so I installed that. A stealth stay is made by a small company in California for stunters. It is an ultra low profile stay constructed of steel that lets you run your complete upper and let the clip ons clear the top of the stay. It does require chopping the upper quite a bit though.
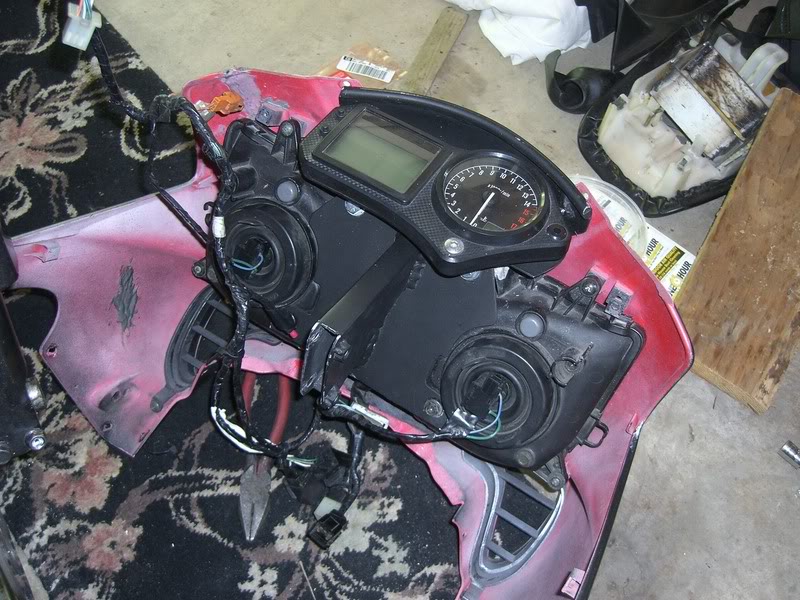
The first thing I had to address was the fact that the mounting points on the headlights on my upper were cracked. So to fix this I did a ****ty first attempt at plastic welding.
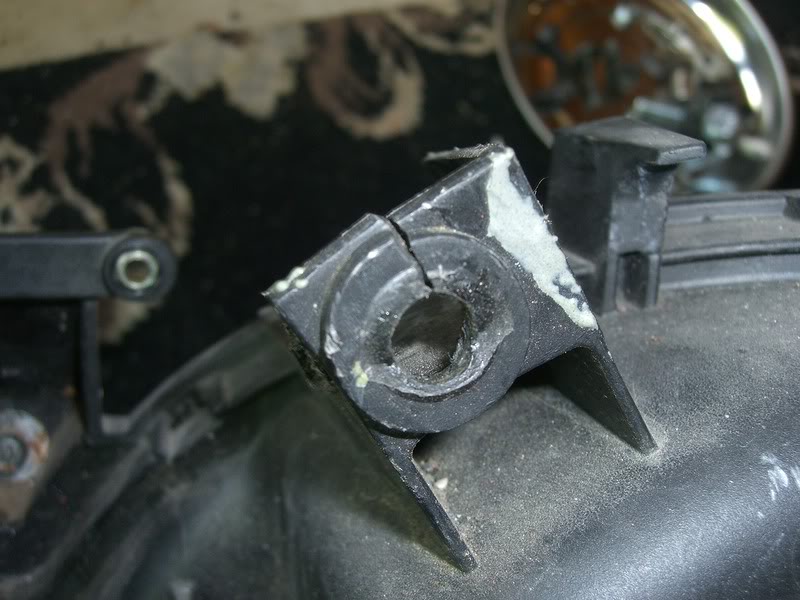
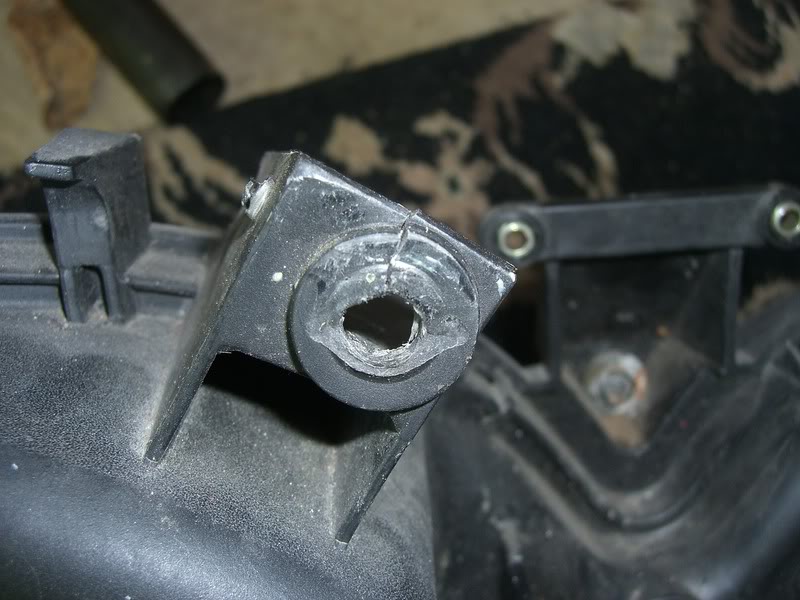
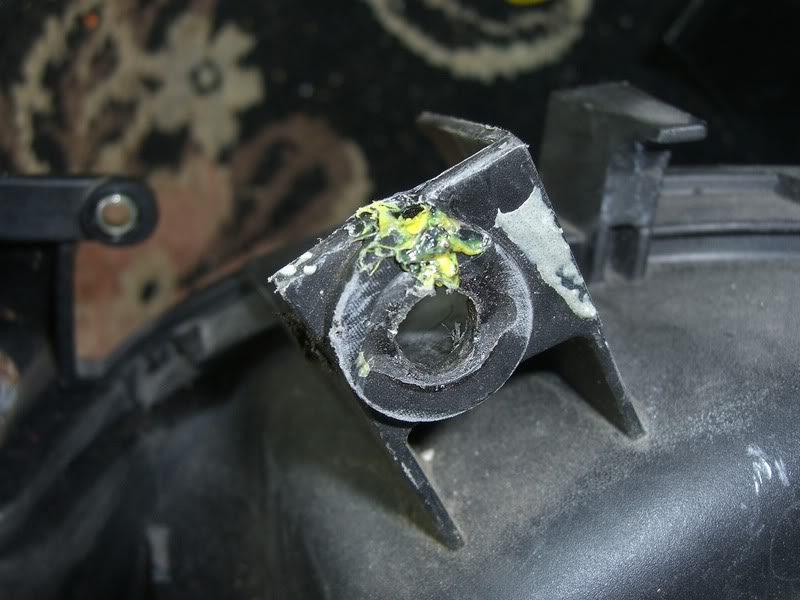
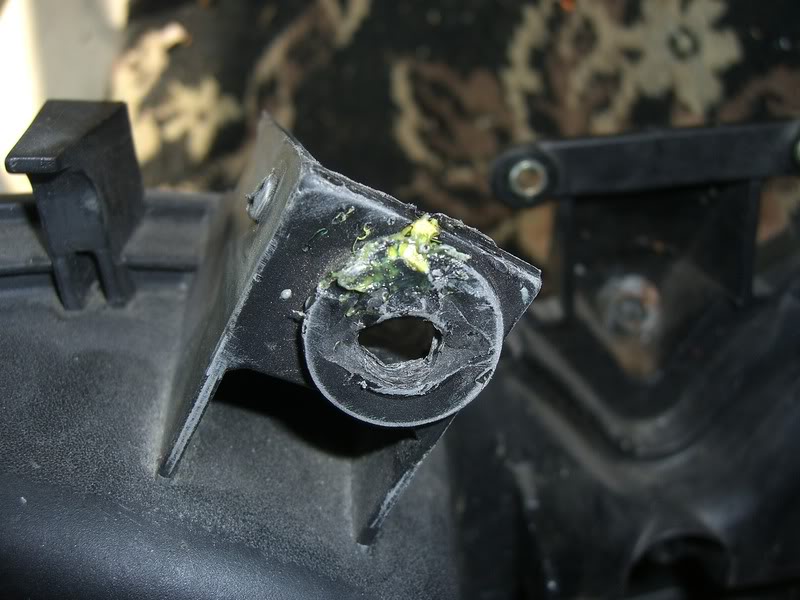
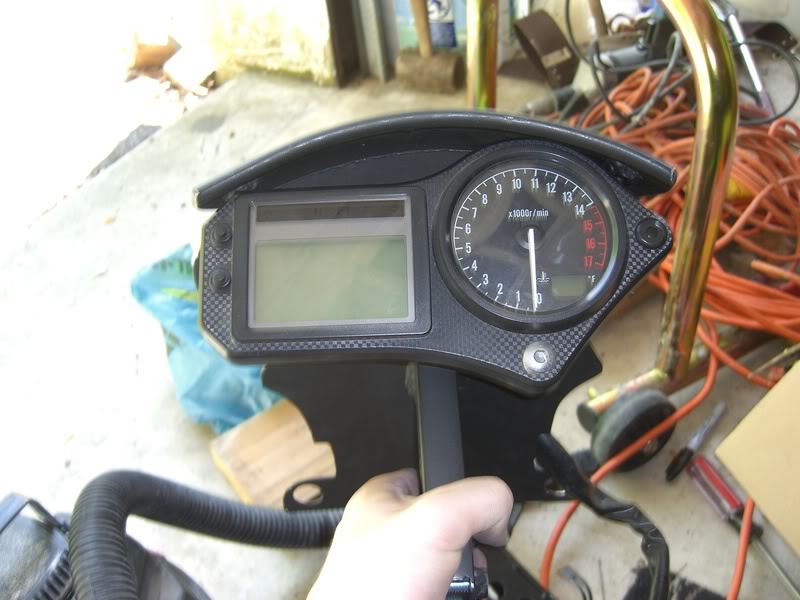
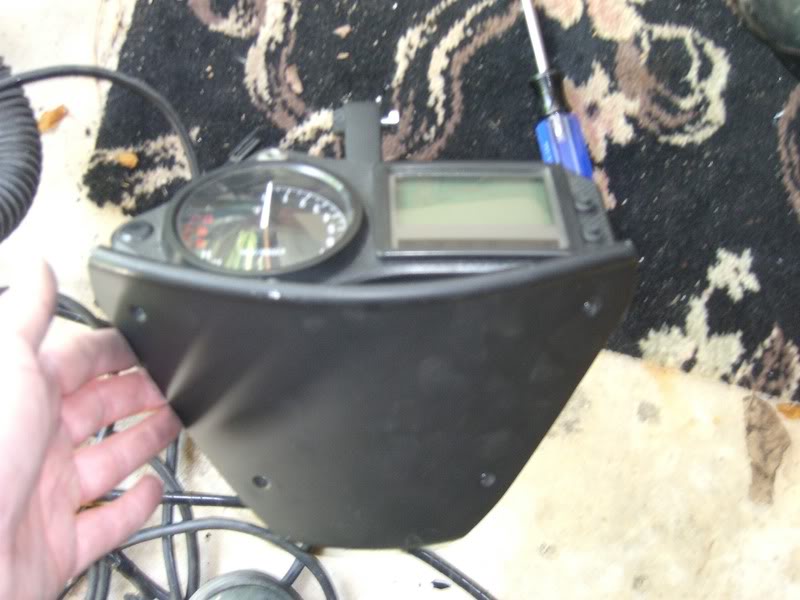
To install this little beauty, it had to be done in stages. first the gauges had to be installed on the stay. Then you had to install the stay onto the headlight. Then I had to install that onto the upper, and then the entire assembly had to be put on the bike via the stays main bolts.
Also I wanted to get a better pic of the RSC shorty easy pull clutch I installed a while back.
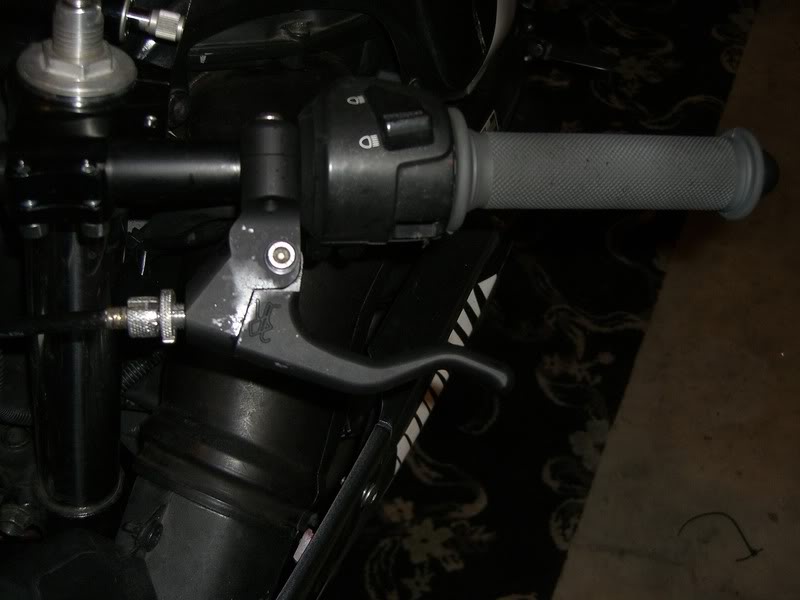
And here is a good shot of the finalized controls.
Yesterday was my birthday and I got the 56t sprocket that I asked for from my sister, the 16t sprocket I asked from my gf and my DID chain came in last week as well. I also have word that my cage and subframe cage are on the way and will be here by the weekend. More to come soon!
The first thing I had to address was the fact that the mounting points on the headlights on my upper were cracked. So to fix this I did a ****ty first attempt at plastic welding.
To install this little beauty, it had to be done in stages. first the gauges had to be installed on the stay. Then you had to install the stay onto the headlight. Then I had to install that onto the upper, and then the entire assembly had to be put on the bike via the stays main bolts.
Also I wanted to get a better pic of the RSC shorty easy pull clutch I installed a while back.
And here is a good shot of the finalized controls.
Yesterday was my birthday and I got the 56t sprocket that I asked for from my sister, the 16t sprocket I asked from my gf and my DID chain came in last week as well. I also have word that my cage and subframe cage are on the way and will be here by the weekend. More to come soon!

#14
05-13-2011, 02:47 PM
Official Welcome Crew Spicy Cat
#15
05-15-2011, 07:51 PM

#16
05-16-2011, 09:04 AM
Join Date: Jan 2010
Location: Nor*Jers
Posts: 218
Likes: 0
Received 0 Likes
on
0 Posts
#17
05-16-2011, 02:01 PM
#18
05-17-2011, 09:41 PM

#19
05-18-2011, 08:35 AM
Join Date: Jan 2010
Location: Nor*Jers
Posts: 218
Likes: 0
Received 0 Likes
on
0 Posts
Not setting up the handbrake yet because I'm a scrub and I want to learn to be really good with my foot brake before I go handbrake. I heard that the fiberglass can still crack but as far as I'm concerned this tail is only temporary until I can move on to a round bar. Then when I get a new tail I think I am going to go the fiberglass and a steel tailsaver on the inside under the plastic. I want to maybe fab up something that can even be bolted to the subframe.
#20
05-18-2011, 10:06 AM