WALKTHROUGH: Changing Air Filter (600RR)
#1
 12-16-2007, 04:01 AM


WALKTHROUGH: How to Change Air Filter on 2005-2006 600RR:
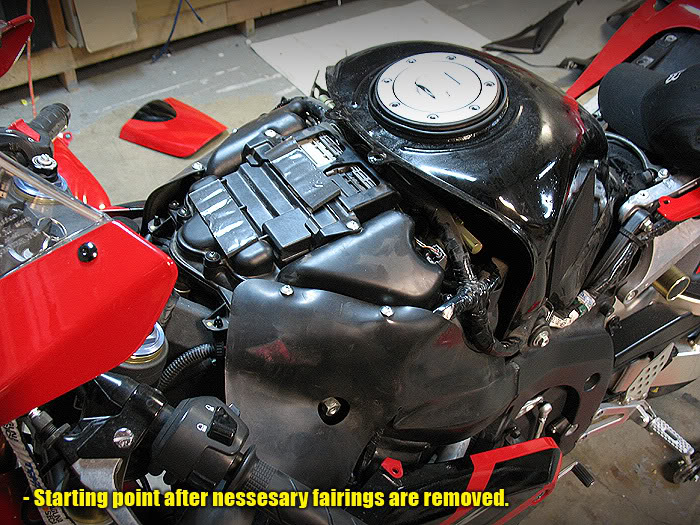
First and foremost, you are going to need to remove a few of your fairings to make things much easier.
- Remove seat
- Remove intake-tube covers
- Loosen mid-fairings
- Remove side covers
- Remove tank cover

When you have everything taken off, you should now have a view of your airbox which lies underneath your tank cover.
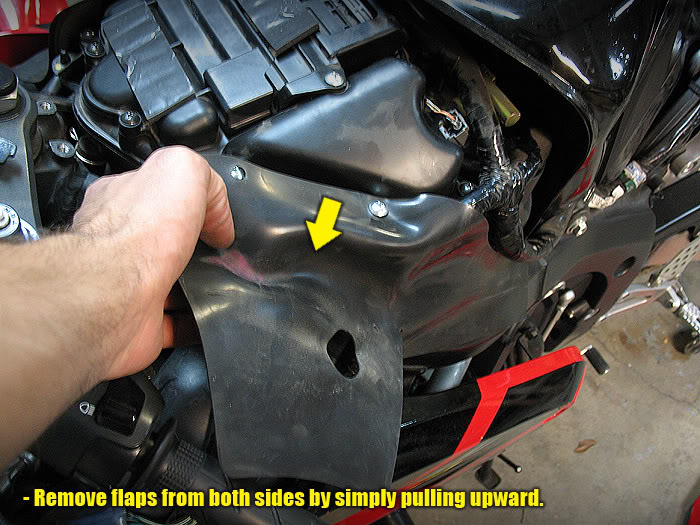
First, you are going to need to remove the rubber flaps on either side of the airbox. These just come right off by pulling the rubber flap off of the silver screws as shown below.......
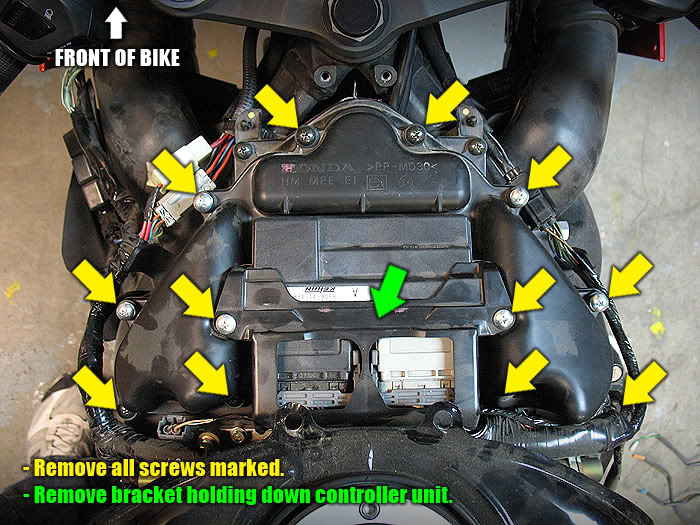
Once the flaps are removed, you can now start removing the screws to the airbox cover. You will need to remove all screws, including those holding down the bracket, which secures a controller unit in place. Remove the screws and the bracket securing the controller unit.
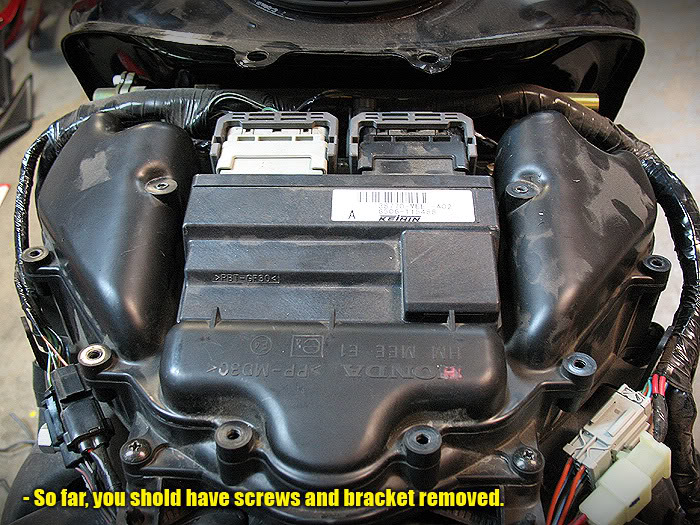
You should now have all the screws and bracket removed. You now have a clear view of the controller unit which you will need to disconnect to get to the air filter.
Disconnect the controller unit by flipping the grey handles forward (towards the front of the motorcycle) to unlock the harness for disconnecting. You will need to disconnect both harnesses.
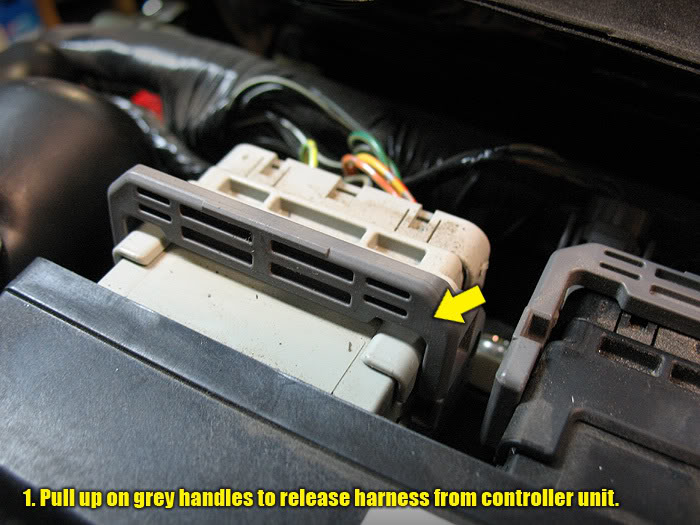
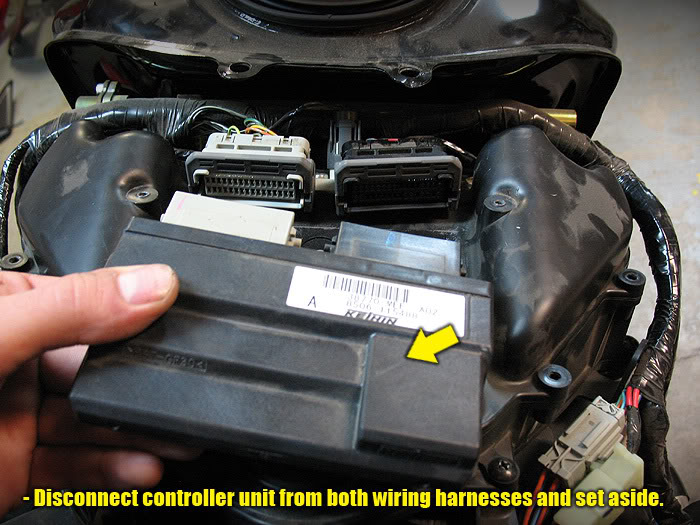
With both harnesses unlocked, gently disconnect the harnesses from the controller unit. Place the controller unit in a safe place (it's extremely expensive and controls the fuel injection systems)
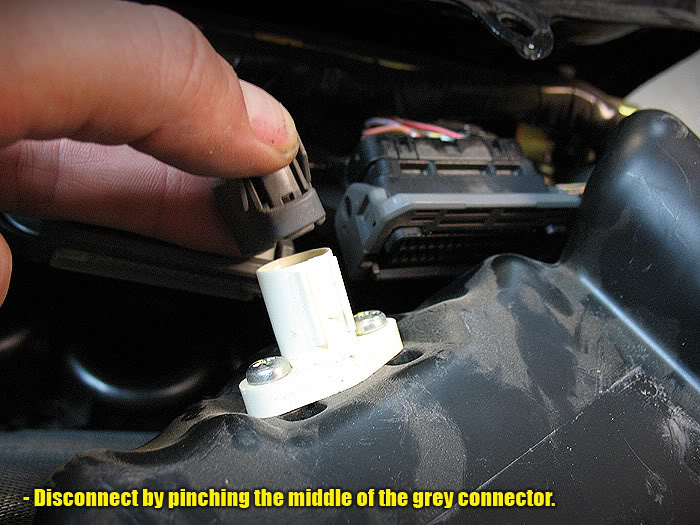
Next, you will need to gently open the airbox cover, and slide it forward (towards the front of the bike) just a couple inches so you can gain access to disconnect a sensor. Disconnect the sensor by applying pressure in the middle of the grey connector. Disconnect the sensor and set airbox cover aside.
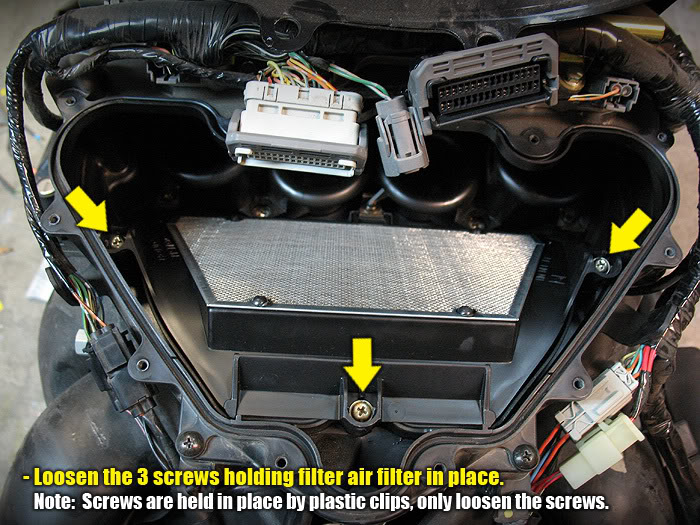
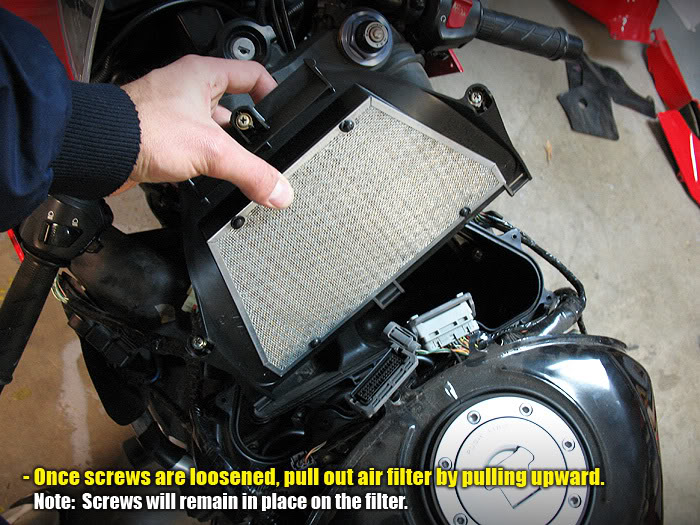
You now have a clear view inside the airbox and need to remove the air filter. You will need to loosen (but not remove) 3 screws as shown below. There are plastic clips holding the screws to the filter so they aren't lost into the throttle bodies. Simple loosen the screws.
Once the screws are loosened, carefully pull out the air filter.
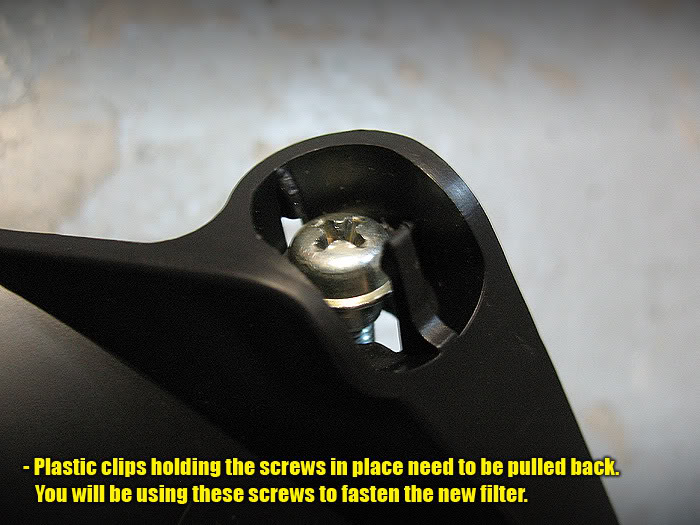
Now you will need to remove the 3 screws from the old filter, so you can use them to fasten your new filter into place. Simply bend the plastic retaining clips back to release screw.
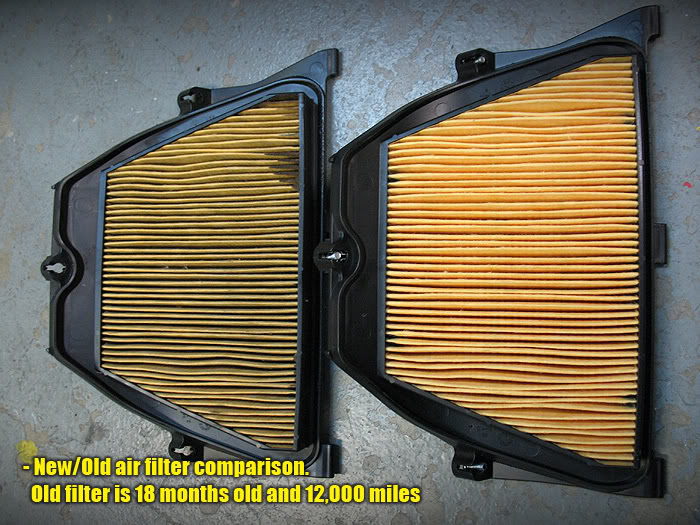
Here is a comparison of a 12,000 mile-old air filter to a new one. The older filter doesn't look that bad until you use the "light test" method. Hardly any light was visible through the old filter, versus the new filter lit right up.
Examine the inside of the airbox to make sure there is no dirt or debris. If there is (which is normal), simply vacuum up the loose debris. If there is dirt, clean it with a simple household cleaner. Take extreme care not to drop any debris into the throttle bodies.
[image
First and foremost, you are going to need to remove a few of your fairings to make things much easier.
- Remove seat
- Remove intake-tube covers
- Loosen mid-fairings
- Remove side covers
- Remove tank cover
When you have everything taken off, you should now have a view of your airbox which lies underneath your tank cover.
First, you are going to need to remove the rubber flaps on either side of the airbox. These just come right off by pulling the rubber flap off of the silver screws as shown below.......
Once the flaps are removed, you can now start removing the screws to the airbox cover. You will need to remove all screws, including those holding down the bracket, which secures a controller unit in place. Remove the screws and the bracket securing the controller unit.
You should now have all the screws and bracket removed. You now have a clear view of the controller unit which you will need to disconnect to get to the air filter.
Disconnect the controller unit by flipping the grey handles forward (towards the front of the motorcycle) to unlock the harness for disconnecting. You will need to disconnect both harnesses.
With both harnesses unlocked, gently disconnect the harnesses from the controller unit. Place the controller unit in a safe place (it's extremely expensive and controls the fuel injection systems)
Next, you will need to gently open the airbox cover, and slide it forward (towards the front of the bike) just a couple inches so you can gain access to disconnect a sensor. Disconnect the sensor by applying pressure in the middle of the grey connector. Disconnect the sensor and set airbox cover aside.
You now have a clear view inside the airbox and need to remove the air filter. You will need to loosen (but not remove) 3 screws as shown below. There are plastic clips holding the screws to the filter so they aren't lost into the throttle bodies. Simple loosen the screws.
Once the screws are loosened, carefully pull out the air filter.
Now you will need to remove the 3 screws from the old filter, so you can use them to fasten your new filter into place. Simply bend the plastic retaining clips back to release screw.
Here is a comparison of a 12,000 mile-old air filter to a new one. The older filter doesn't look that bad until you use the "light test" method. Hardly any light was visible through the old filter, versus the new filter lit right up.
Examine the inside of the airbox to make sure there is no dirt or debris. If there is (which is normal), simply vacuum up the loose debris. If there is dirt, clean it with a simple household cleaner. Take extreme care not to drop any debris into the throttle bodies.
[image
The following users liked this post:
Danielporter (09-23-2021)

#3
12-16-2007, 05:26 AM


#6
03-26-2008, 09:42 AM

The following users liked this post:
Bossylady80 (08-10-2020)
#7
05-06-2008, 02:25 AM


#9
10-14-2008, 01:10 PM

Senior Member
Join Date: Jan 2007
Location:
Posts: 148
Likes: 0
Received 0 Likes
on
0 Posts
Great walk through on changing the air filter. I will be changing mine with a BMC Race filter in the next few days and will for sure be coming back to here for a little help. So much to do just to change a filter. Thanks Blue Fox for the walk through and pictures.
