That silly parp-parp horn...
#1
 09-08-2014, 05:23 PM


Join Date: Jun 2009
Location: Sydney, Australia
Posts: 47
Likes: 0
Received 0 Likes
on
0 Posts
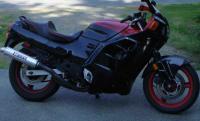
I have long wanted to replace the silly parp-parp stock horn on my ’89 1KF with something which sounds more, er, assertive. My ’81 Beemer has a pair of Fiamm horns which are much more what I had in mind, so I decided to get a pair of them for the Honda.
Now, just a quick caveat on the following description: I am not an auto-electrician or professional mechanic of any description, so please read this with that in mind. This is just how I did the horns, it is not intended as a definitive procedure. It may just save you a bit of time if you decide to do the same job. Ok, now that that’s out of the way…
Problem number 1 was I didn’t seem to be able to find anyone who sells the Fiamms in Australia. However, I recently went on vacation to Vancouver, so visited our good friends at Canadian Tire and got a Fiamm "El Grande" set (cheesy name). For CAN$30 you get the high and low note horns, a relay, two brackets and two attaching nuts. However, you don’t get a set of instructions or any wiring harness. So, problem number 2 was sorting out the relay attachments. Thanks to the wonders of the interweb, this was quickly done. I then bought a couple of metres of red and black wire (which I didn't use in the end), some female connectors, and an in-line fuse connector. I wasn't sure what fuse rating to get, so opted for the smallest I could find in the shop, which was 10A. I figured that should be OK, and safer to have too low than too high.
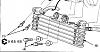
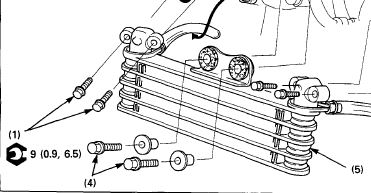
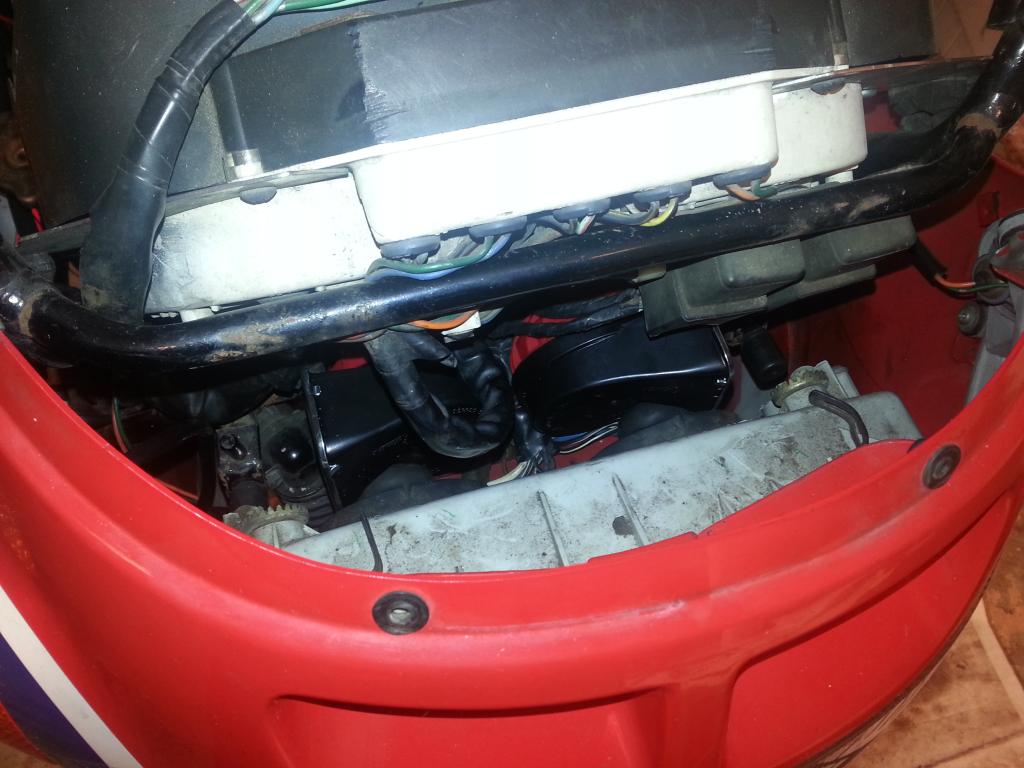
I removed all the front-end bodywork so as to get the best possible access for the placement of the new horns. Problem number 3 turned out to be where to fit the new horns. The thing is that you have a pair of horns, not just the one, the horns are bigger than the stock horn, you have to make sure you don’t get in the way of the shocks as they turn, you want at least some weather protection etc. I initially tried attaching one of them on the fitting where the existing horn was, and attaching the second horn at the equivalent position on the other side of the bike. However, there are relays and wiring and other “stuff” which gets in the way on that side, so that idea didn’t work. I finally decided on mounting the horns above the oil cooler using the bolts labelled as 4 in this diagram to attach the brackets:
The speedo cable restricts the space you have for the horn on the LHS (looking from the rear of the bike) and makes that fitting a bit awkward. I had to rotate the horns such that the trumpets point outwards rather than down (my preference) because I needed some extra room for the headlamp connectors which were snagging on the horn bodies.
I mounted the relay on the old horn attachment bolt hole,and wired it up as follows:
Now, just a quick caveat on the following description: I am not an auto-electrician or professional mechanic of any description, so please read this with that in mind. This is just how I did the horns, it is not intended as a definitive procedure. It may just save you a bit of time if you decide to do the same job. Ok, now that that’s out of the way…
Problem number 1 was I didn’t seem to be able to find anyone who sells the Fiamms in Australia. However, I recently went on vacation to Vancouver, so visited our good friends at Canadian Tire and got a Fiamm "El Grande" set (cheesy name). For CAN$30 you get the high and low note horns, a relay, two brackets and two attaching nuts. However, you don’t get a set of instructions or any wiring harness. So, problem number 2 was sorting out the relay attachments. Thanks to the wonders of the interweb, this was quickly done. I then bought a couple of metres of red and black wire (which I didn't use in the end), some female connectors, and an in-line fuse connector. I wasn't sure what fuse rating to get, so opted for the smallest I could find in the shop, which was 10A. I figured that should be OK, and safer to have too low than too high.
I removed all the front-end bodywork so as to get the best possible access for the placement of the new horns. Problem number 3 turned out to be where to fit the new horns. The thing is that you have a pair of horns, not just the one, the horns are bigger than the stock horn, you have to make sure you don’t get in the way of the shocks as they turn, you want at least some weather protection etc. I initially tried attaching one of them on the fitting where the existing horn was, and attaching the second horn at the equivalent position on the other side of the bike. However, there are relays and wiring and other “stuff” which gets in the way on that side, so that idea didn’t work. I finally decided on mounting the horns above the oil cooler using the bolts labelled as 4 in this diagram to attach the brackets:

The speedo cable restricts the space you have for the horn on the LHS (looking from the rear of the bike) and makes that fitting a bit awkward. I had to rotate the horns such that the trumpets point outwards rather than down (my preference) because I needed some extra room for the headlamp connectors which were snagging on the horn bodies.
I mounted the relay on the old horn attachment bolt hole,and wired it up as follows:
- Relay pin 30 – connected to the battery positive via the 10A fuse. 10A was a pure guess: I don’t know what the current draw is. In any event, the fuse hasn’t blown yet…
- Relay pin 86 – to the horn switch
- Relay pin 85 – to ground (I used the other wire coming from the horn switch because this is wired to ground).
- Relay pin 87 (pair) – one to each of the new horns. The new horns are earthed through the body of the horn to the mounting bracket which is bolted to the bike frame.
- The relay is fairly exposed to the elements so I may have to move it, or weather-protect it in some way.
- The horn trumpets are facing sideways instead of down so there may be water ingress through splashing from below which gets trapped in the horn. This will not be good. A solution might be to make up longer brackets so the horns sit slightly higher giving more space for the light bulb connectors and allowing the trumpets to be rotated to face downwards.


#3
09-09-2014, 01:15 PM
Maybe this - one airhorn and 136Db!
Motorcycle Snail Horn Compact Airhorn Car Vehicle Yacht Boat 136db HUS | eBay
Nice write up Oscar Foxtrot !
Motorcycle Snail Horn Compact Airhorn Car Vehicle Yacht Boat 136db HUS | eBay
Nice write up Oscar Foxtrot !
#4
09-09-2014, 04:11 PM

#5
09-13-2014, 11:41 PM
Join Date: Jun 2009
Location: Sydney, Australia
Posts: 47
Likes: 0
Received 0 Likes
on
0 Posts
OK, so after some rogering around, I now know how to upload images...
Here's a drawing form the workshop manual showing the location where I bolted on the brackets for the horns (see bolts marked #4)
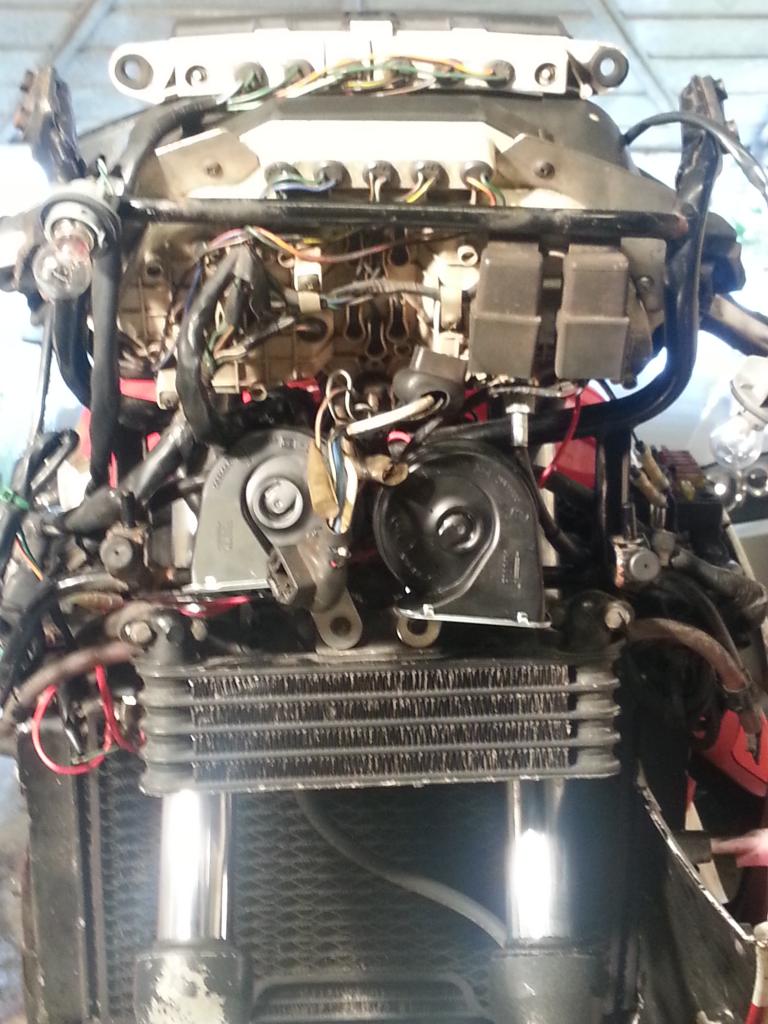
Here's a (blurry, sorry) picture from the front showing the horns in place. However, I did find I had to rotate the horn trumpets so that they faced outwards in order to get the top faring back on (headlight connectors were in the way):
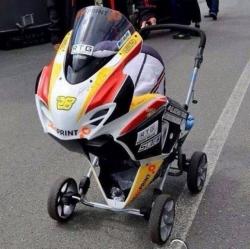
And then the final configuration with the horn trumpets facing outwards:
Here's a drawing form the workshop manual showing the location where I bolted on the brackets for the horns (see bolts marked #4)
Here's a (blurry, sorry) picture from the front showing the horns in place. However, I did find I had to rotate the horn trumpets so that they faced outwards in order to get the top faring back on (headlight connectors were in the way):
And then the final configuration with the horn trumpets facing outwards:
#6
09-14-2014, 02:56 PM
#7
09-14-2014, 10:29 PM
Join Date: Jun 2009
Location: Sydney, Australia
Posts: 47
Likes: 0
Received 0 Likes
on
0 Posts
Will you be able to change the headlight bulbs, or will you have to remove the nose fairing for access?
I think I will re-visit the location come the first time I have to replace a bulb or the next time I take the nose off for something else. I think a better location might be on a custom-made bracket connected on the front of the oil cooler.

Thread
Thread Starter
Forum
Replies
Last Post