HOW TO: Valve Adjustment (OH.MY.GOD.SO.MANY.PICTURES)
#1
 08-13-2007, 08:08 PM


Join Date: Mar 2006
Location: Cape Cod, MA
Posts: 902
Likes: 0
Received 0 Likes
on
0 Posts
**** it, and **** the forum rules that says 20 pictures per post.
Would of been ****ing nice to know that before it wouldn't let me back out and canceled all of my editing
I'll come back in 2 years to finish this post
This is a step by step display of how to do a valve adjustment on a 93-96 CBR1000F. This is going to show as much as possible for those who don't know what they are doing.
Stuff you need:
1) Tools for removing you fairing
2) Honda tool for adjusting the valve OR a 10mm deep socket and a pair of vise grips and a long 3mm hex.
3) TORQUE WRENCH (unless you think your gifted and can tell when something is only at 9ft lbs and not 13 ft lbs.)
4) Feeler guages (cheap set from your local auto parts store will do)
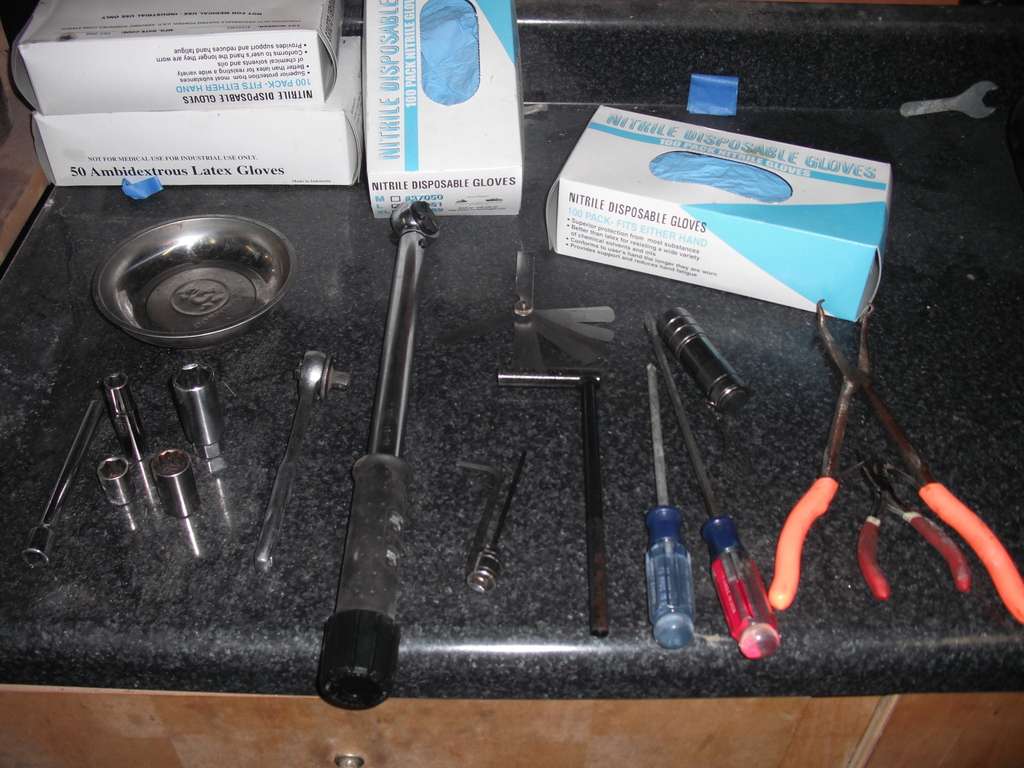
Tools Shown:
10mm, 14mm, 17mm sockets and 3/4" spark plug socket
3/8" socket driver and 6" extension
3/8" torque wrench
5mm allen key, 3mm allen key with 3/8" socket
Valve nut tool
Blade and Philips screwdriver
Fuel pliers and small pliers
LED flashlight
feeler gauges
magnetic parts holder
Gloves...lots of gloves. And then some more gloves
Step One: Remove the left side fairing (self explanatory)
From this:
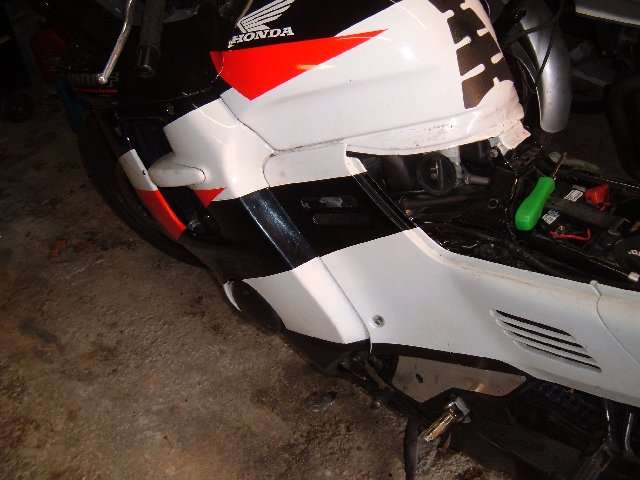
To this:

In 2 minutes flat
You don't need to remove the right side, but I did because I adjusted the balancer shaft while the bike is in the shed.
Step Two: Remove the tank (this will be a long post for those who are unsure of where to start). This step is easier of the tank is empty or low on fuel (much lighter than a full tank.)
Start by unbolting the two bolts at the front of the tank just below the triple tree. Lift the tank up and set the prop rod in place.

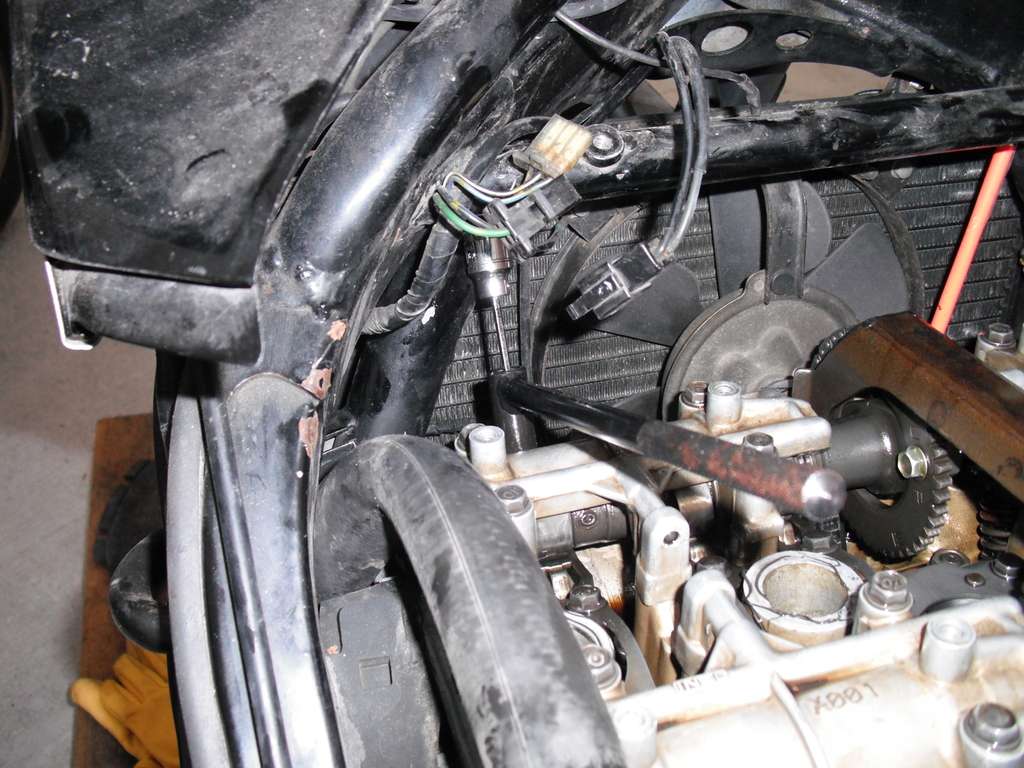
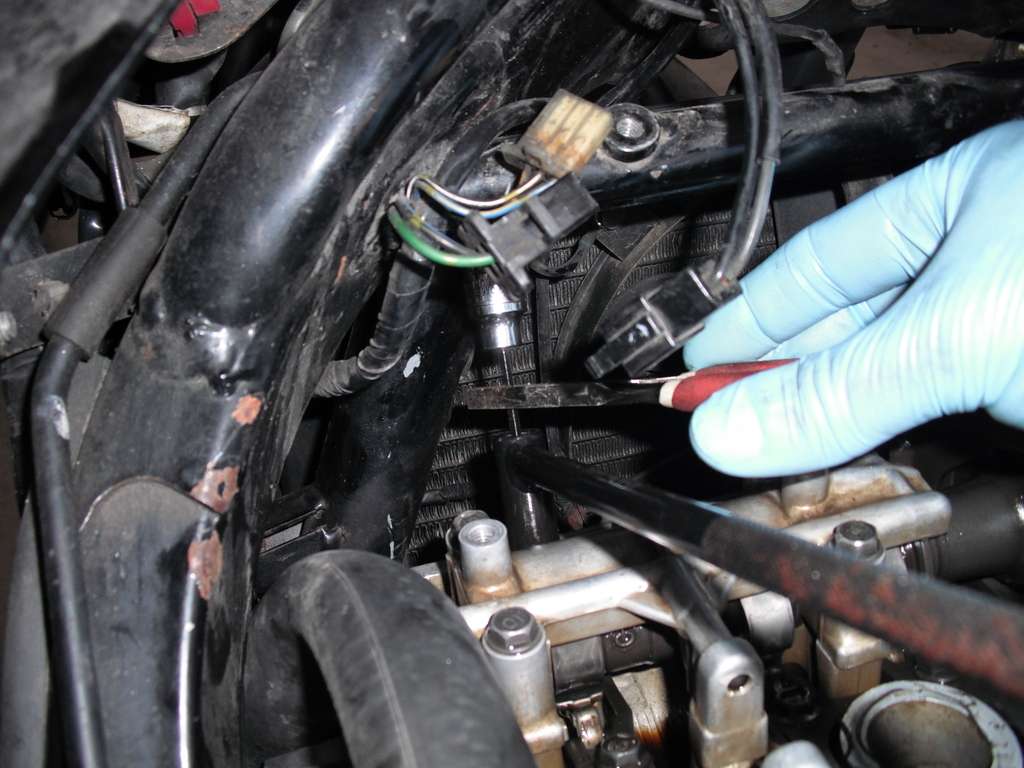
Shut the fuel off and remove the fuel line and the vacuum line. Straight down from the petcock is a grouping of electrical connectors:

The lower red one controls the fuel gauge. Go ahead and disconnect it and carefully pull it out so it's hanging out from behind the tank.
Now the fun part: for unhooking the front of the tank you can either remove the pin on the prop rod (easy way) or you can unbolt the whole assembly. Either way, once that's done, carefully lower the tank back down. Now unbolt the rear of the tank:

Now CAREFULLY lift the tank up and set aside. Keep and eye on the front prop rod / assembly to make sure it doesn't catch on anything.

STEP THREE: Remove the Ignition coils
Technically, you could just unscrew the spark plug wires, but then **** just gets in the way, so I just remove the whole bracket.
Remove the bolt above the coils and the bolt on the far side of each coil.

Also, undo the electrical connectors on the left side of the coil bracket.

Go ahead, and set the coils aside. You can move the small air filter that was bolted to the right side and swing it out of the way. Also, you can now pull the rubber heat shield out.

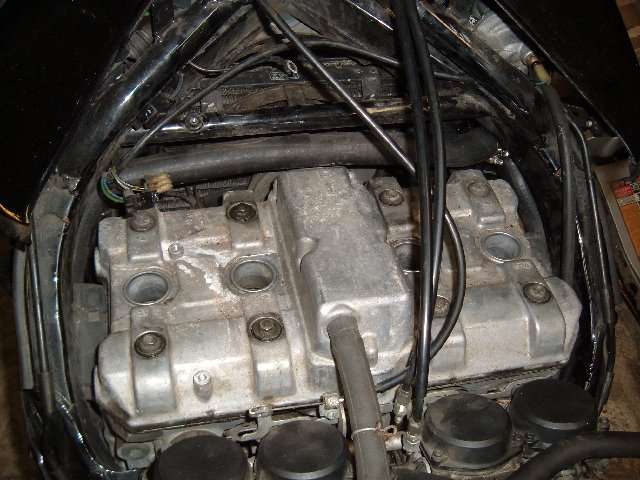
STEP FOUR: Remove the valve cover
Start by removing the big breather tube. Then remove the eight (8) bolts. Also, if the rubber spacers stick to the valve cover, gently pry then off with a blade screwdriver. After that's done, give the chain housing a couple of light taps with a rubber mallet to loosen everything.

If you tilt your handlebars all the way to the left, you should have enough slack in the cables to wiggle the now loosened valve cover out and your greeted with:
While your down there, go ahead and remove the spark plugs and give them a look over.
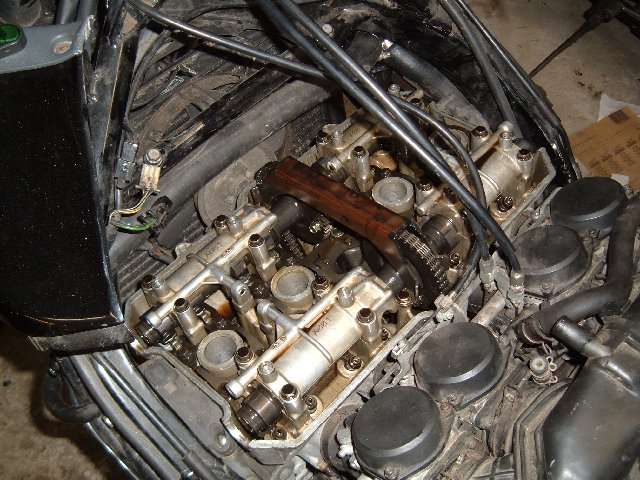
STEP FIVE: Let's start ****ing things up!!
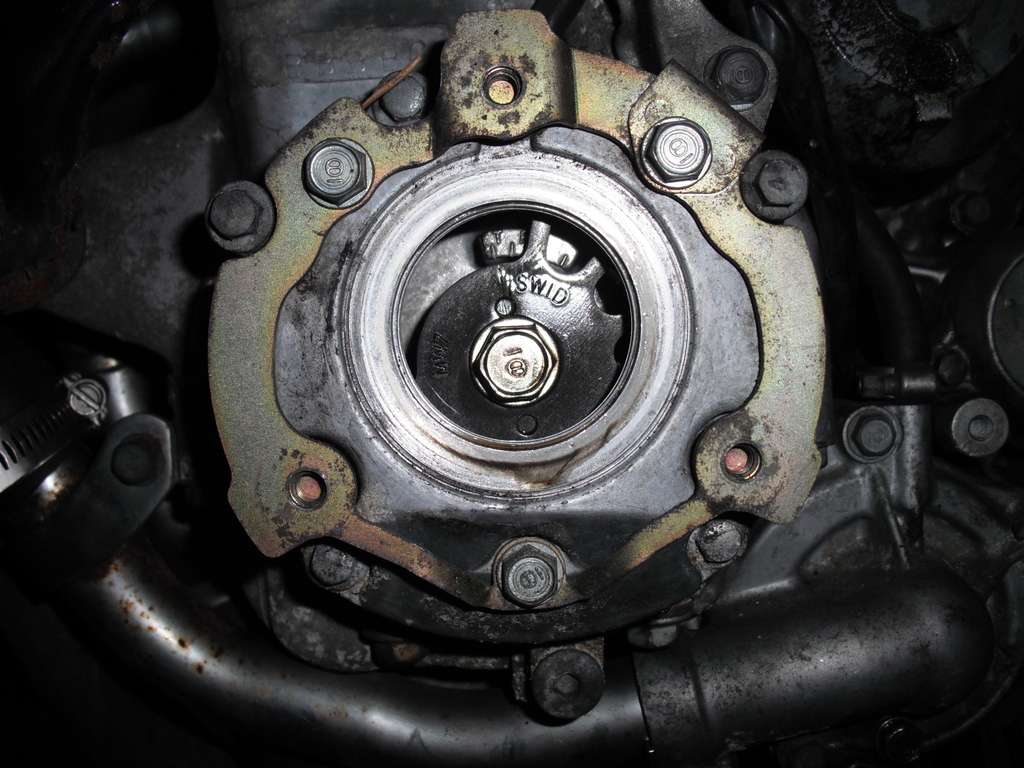
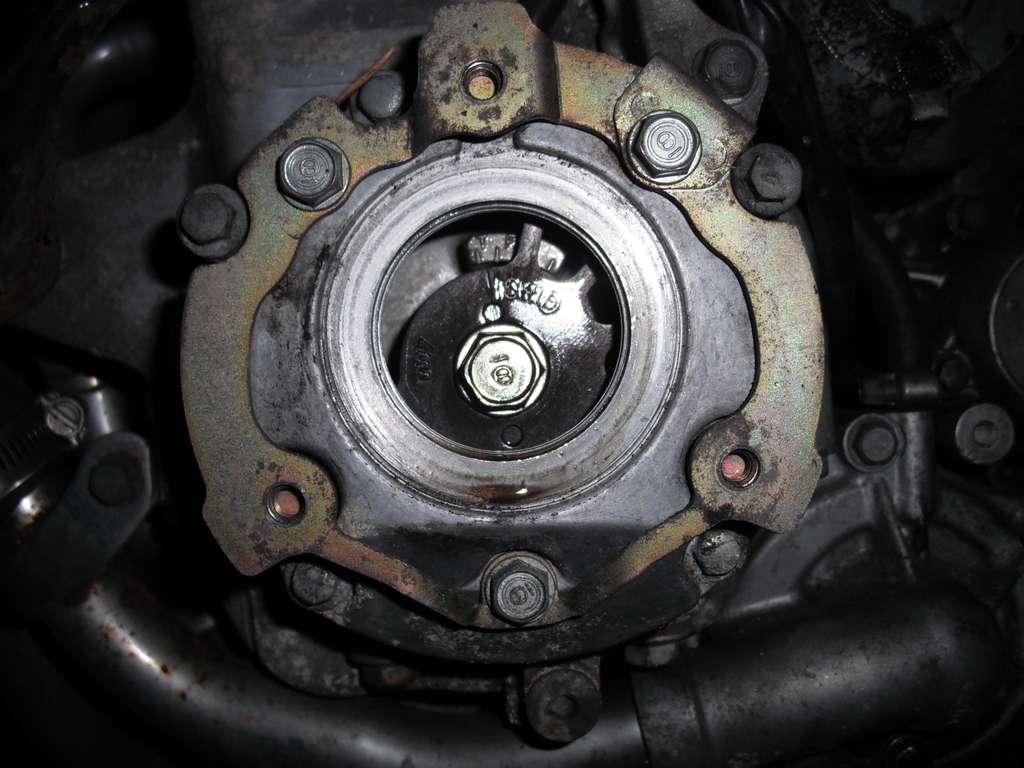
Grab you 17mm socket and undo the crankcase cover on the left side. You'll see a spider gear with some marking on it that looks like this:
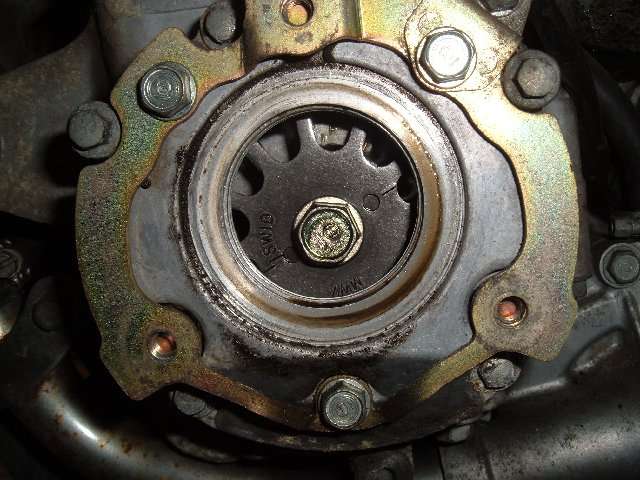
Take your 14mm socket and turn the nut COUNTERCLOCKWISE. Turn it until the markings line up like this:
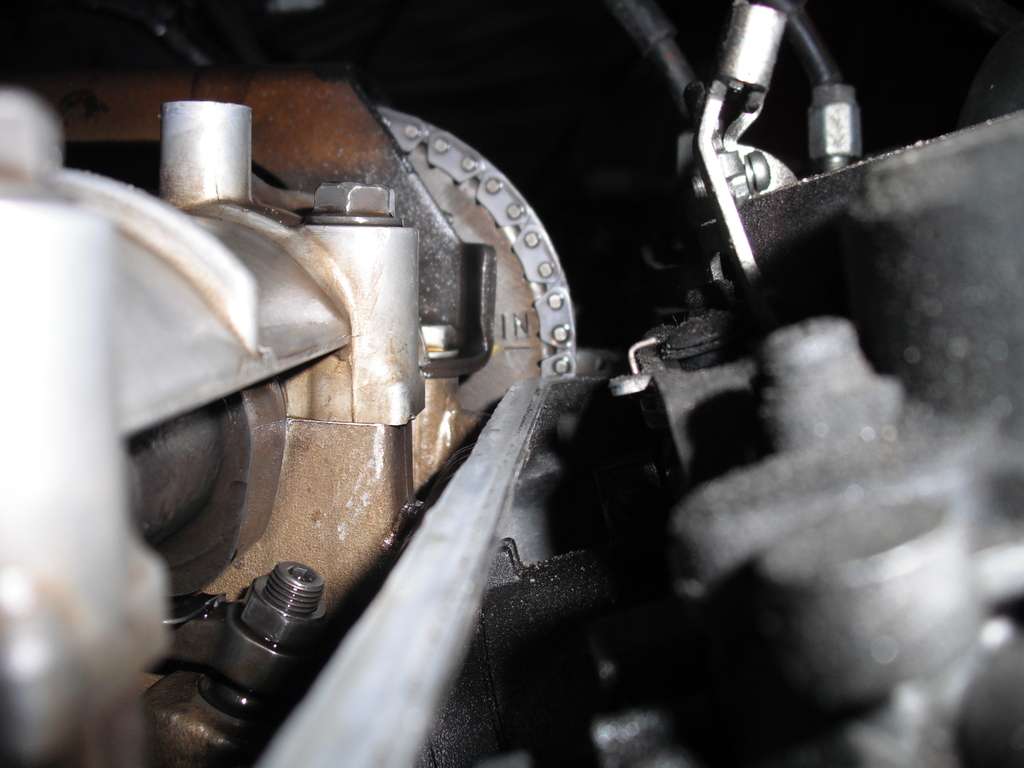
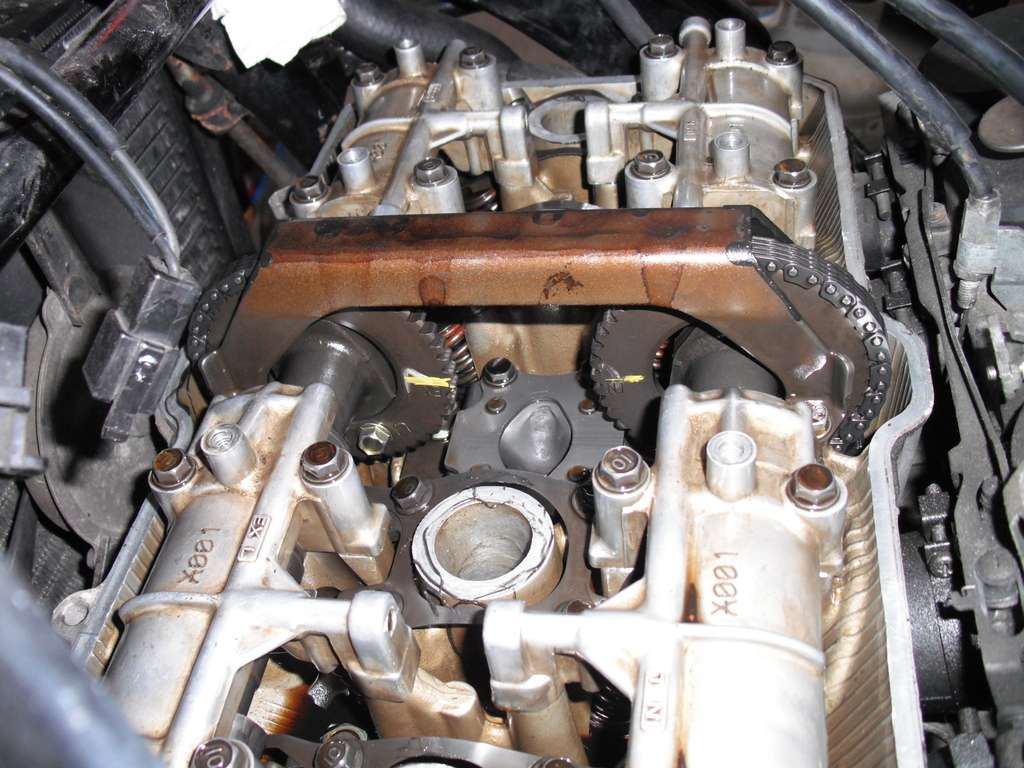
Check the camshafts to see if the intake and exhaust cam marks point away from each other and line up with the cylinder hear

Remember those feeler gauges you got from the autoparts store?? Yeah, so many feelers that you'll never use, so open it up and chuck everything above 0.008in (.203mm). Honestly, unless you own something from the 1980s (which I do) you'll never need to set something with a clearance of .25in. Might as well use a pizza box at that point.
Step SIX: #1 and #3 Intakes
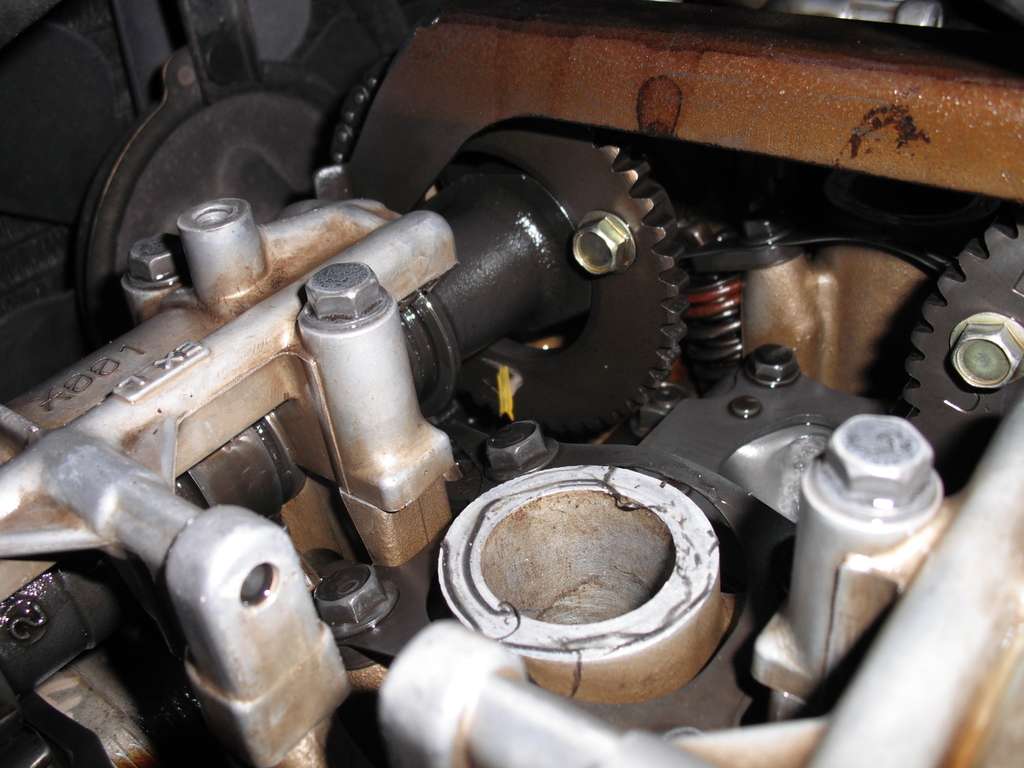
Take a .004" feeler and jam it under the cam lobes. If it's tight (which it probably is), take the .003" feeler and try to jam it in there. If it goes in smoothly, you're all set as it falls within the spec clearance. If it's tight, grab the honda valve nut tool and loosen the locknut on the valve.
Take the long 3mm allen with socket and loosen the adjuster until there is a slight drag on the 4mm feeler. Got it right where you want it? Good, replace the allen with the honda tool and slide the allen down. Carefully try to set it in the adjuster without turning it. I used the 3/8" drive socket to hold it in place while I tightened the locknut. Once the locknut is tight, recheck the clearance (the adjuster has a tendency to move with the locknut). If it's good, grab the torque wrench with a 10mm deep socket and tighten the locknut to 17lb ft.
Good to go? Lets move on then to...
Would of been ****ing nice to know that before it wouldn't let me back out and canceled all of my editing
I'll come back in 2 years to finish this post
This is a step by step display of how to do a valve adjustment on a 93-96 CBR1000F. This is going to show as much as possible for those who don't know what they are doing.
Stuff you need:
1) Tools for removing you fairing
2) Honda tool for adjusting the valve OR a 10mm deep socket and a pair of vise grips and a long 3mm hex.
3) TORQUE WRENCH (unless you think your gifted and can tell when something is only at 9ft lbs and not 13 ft lbs.)
4) Feeler guages (cheap set from your local auto parts store will do)
Tools Shown:
10mm, 14mm, 17mm sockets and 3/4" spark plug socket
3/8" socket driver and 6" extension
3/8" torque wrench
5mm allen key, 3mm allen key with 3/8" socket
Valve nut tool
Blade and Philips screwdriver
Fuel pliers and small pliers
LED flashlight
feeler gauges
magnetic parts holder
Gloves...lots of gloves. And then some more gloves
Step One: Remove the left side fairing (self explanatory)
From this:
To this:
In 2 minutes flat
You don't need to remove the right side, but I did because I adjusted the balancer shaft while the bike is in the shed.
Step Two: Remove the tank (this will be a long post for those who are unsure of where to start). This step is easier of the tank is empty or low on fuel (much lighter than a full tank.)
Start by unbolting the two bolts at the front of the tank just below the triple tree. Lift the tank up and set the prop rod in place.
Shut the fuel off and remove the fuel line and the vacuum line. Straight down from the petcock is a grouping of electrical connectors:
The lower red one controls the fuel gauge. Go ahead and disconnect it and carefully pull it out so it's hanging out from behind the tank.
Now the fun part: for unhooking the front of the tank you can either remove the pin on the prop rod (easy way) or you can unbolt the whole assembly. Either way, once that's done, carefully lower the tank back down. Now unbolt the rear of the tank:
Now CAREFULLY lift the tank up and set aside. Keep and eye on the front prop rod / assembly to make sure it doesn't catch on anything.
STEP THREE: Remove the Ignition coils
Technically, you could just unscrew the spark plug wires, but then **** just gets in the way, so I just remove the whole bracket.
Remove the bolt above the coils and the bolt on the far side of each coil.
Also, undo the electrical connectors on the left side of the coil bracket.
Go ahead, and set the coils aside. You can move the small air filter that was bolted to the right side and swing it out of the way. Also, you can now pull the rubber heat shield out.
STEP FOUR: Remove the valve cover
Start by removing the big breather tube. Then remove the eight (8) bolts. Also, if the rubber spacers stick to the valve cover, gently pry then off with a blade screwdriver. After that's done, give the chain housing a couple of light taps with a rubber mallet to loosen everything.
If you tilt your handlebars all the way to the left, you should have enough slack in the cables to wiggle the now loosened valve cover out and your greeted with:
While your down there, go ahead and remove the spark plugs and give them a look over.
STEP FIVE: Let's start ****ing things up!!
Grab you 17mm socket and undo the crankcase cover on the left side. You'll see a spider gear with some marking on it that looks like this:
Take your 14mm socket and turn the nut COUNTERCLOCKWISE. Turn it until the markings line up like this:
Check the camshafts to see if the intake and exhaust cam marks point away from each other and line up with the cylinder hear
Remember those feeler gauges you got from the autoparts store?? Yeah, so many feelers that you'll never use, so open it up and chuck everything above 0.008in (.203mm). Honestly, unless you own something from the 1980s (which I do) you'll never need to set something with a clearance of .25in. Might as well use a pizza box at that point.
Step SIX: #1 and #3 Intakes
Take a .004" feeler and jam it under the cam lobes. If it's tight (which it probably is), take the .003" feeler and try to jam it in there. If it goes in smoothly, you're all set as it falls within the spec clearance. If it's tight, grab the honda valve nut tool and loosen the locknut on the valve.
Take the long 3mm allen with socket and loosen the adjuster until there is a slight drag on the 4mm feeler. Got it right where you want it? Good, replace the allen with the honda tool and slide the allen down. Carefully try to set it in the adjuster without turning it. I used the 3/8" drive socket to hold it in place while I tightened the locknut. Once the locknut is tight, recheck the clearance (the adjuster has a tendency to move with the locknut). If it's good, grab the torque wrench with a 10mm deep socket and tighten the locknut to 17lb ft.
Good to go? Lets move on then to...
Last edited by malbojah; 04-23-2011 at 06:21 PM.
#2
08-13-2007, 09:08 PM
Join Date: Mar 2006
Location: Cape Cod, MA
Posts: 902
Likes: 0
Received 0 Likes
on
0 Posts
STEP SEVEN (7): #2 and #4 Exhausts
I'm going to be honest, doing the exhaust valves requires the patience of a horny nun at an orgy. It's so much easier with the engine out, but alas, I don't have any exhaust gaskets.
Grab that 14mm socket and turn the crankshaft COUNTERCLOCKWISE half a turn until it looks like this

The exhaust camshaft will be pointing straight down
Grab your 0.007" feeler and stab it in there. Same as the intakes, it'll be too tight so grab the .006" and see it it goes. Adjusting is the same as the intakes with one major exception: You cannot see the locknut or the adjuster. It's kinda like The Force (or sex): when it slides in just right, you'll know it.
What I did with the #2 valves was to set the adjuster at .007", lightly tighten the locknut, recheck the clearance. Then I did a little something like this:
Grab the small pliers and hold the hex key:
Now you can tighten the locknut while holding the adjuster in place. Got that all set? Good, let move on the to
STEP EIGHT (8): #2 and #4 Intakes
This one is so easy, I'm going to run through it quickly...rotate crank to look like this:
And the cams look like this:
Check, loosen, adjust, tighten, recheck, done. Ok people, move along, nothing to see here.
STEP NINE (9) #1 and #3 Exhaust Valves
Again, you should be getting good by now, so run right through it. Rotate crank COUNTER CLOCKWISE to look like this:
and the cams look like this:

(funny lettering on the exhaust cam sprocket visible). Same as step 7. Check, loosen, adjust, tighten, recheck. Don't forget that you can use the pliers to hold the ajuster in place while you tighten the locknut.
I'm going to be honest, doing the exhaust valves requires the patience of a horny nun at an orgy. It's so much easier with the engine out, but alas, I don't have any exhaust gaskets.
Grab that 14mm socket and turn the crankshaft COUNTERCLOCKWISE half a turn until it looks like this
The exhaust camshaft will be pointing straight down
Grab your 0.007" feeler and stab it in there. Same as the intakes, it'll be too tight so grab the .006" and see it it goes. Adjusting is the same as the intakes with one major exception: You cannot see the locknut or the adjuster. It's kinda like The Force (or sex): when it slides in just right, you'll know it.
What I did with the #2 valves was to set the adjuster at .007", lightly tighten the locknut, recheck the clearance. Then I did a little something like this:
Grab the small pliers and hold the hex key:
Now you can tighten the locknut while holding the adjuster in place. Got that all set? Good, let move on the to
STEP EIGHT (8): #2 and #4 Intakes
This one is so easy, I'm going to run through it quickly...rotate crank to look like this:
And the cams look like this:
Check, loosen, adjust, tighten, recheck, done. Ok people, move along, nothing to see here.
STEP NINE (9) #1 and #3 Exhaust Valves
Again, you should be getting good by now, so run right through it. Rotate crank COUNTER CLOCKWISE to look like this:
and the cams look like this:
(funny lettering on the exhaust cam sprocket visible). Same as step 7. Check, loosen, adjust, tighten, recheck. Don't forget that you can use the pliers to hold the ajuster in place while you tighten the locknut.
Last edited by malbojah; 04-23-2011 at 06:21 PM.
#3
08-14-2007, 07:47 AM

Senior Member
Join Date: Oct 2006
Location: BRISBANE.QLD.AUSTRALIA
Posts: 379
Likes: 0
Received 0 Likes
on
0 Posts

#5
08-14-2007, 12:40 PM
Join Date: Mar 2006
Location: Cape Cod, MA
Posts: 902
Likes: 0
Received 0 Likes
on
0 Posts
#6
08-16-2007, 08:33 AM
Great write up! Is there a way to pin these at the top so they don't get buried? This forum is getting pretty big and it's going to 5 pages deep in no time. And a search on valve adjustment is going to bring up hundreds of topics.
Anyway thanks Malbojah, great job.
Anyway thanks Malbojah, great job.

#8
08-16-2007, 04:16 PM

Senior Member
Join Date: Aug 2005
Location: Gold Coast, Australia
Posts: 976
Likes: 0
Received 0 Likes
on
0 Posts
#9
08-29-2007, 02:25 PM

Senior Member
Join Date: Jul 2006
Location: Hamden, CT USA
Posts: 243
Likes: 0
Received 0 Likes
on
0 Posts
Very useful write up. Good pictures too. There's just one thing I didn't understand. Why do you need to remove the left side fairing? I've beeen adjusting the valves on my '93 CBR1000F since I bought it new. I've never had to remove the fairing for this job. Besides the seat and tank I only remove the protective cover over the timing inspection cover. Of course the other bits that block the removal of the valve cover have to come off.
Good point too about setting the clearance a little loose before tightening the lock nut.
Good point too about setting the clearance a little loose before tightening the lock nut.
#10
08-29-2007, 04:12 PM

Senior Member
Join Date: Sep 2006
Location: Maassen nl
Posts: 472
Likes: 0
Received 0 Likes
on
0 Posts
