How To Replace Fuel Filter and Clean rust on fuel pump assembly
#1
 04-12-2013, 11:09 PM


Join Date: Jan 2013
Posts: 138
Likes: 0
Received 0 Likes
on
0 Posts
Hi Guys,
I just replaced my fuel filter during the Easter break, and I thought I could share the experience and some pictures here.
Fuel filter replacement is not in the maintenance schedule so it could be neglected. If you maintain your bike consistently it won�t cause a serious problem, I guess, since someone here can run his bike perfectly until 254k+ miles without any issue using stock filter.
Mine is only at 77000k (47000 miles), but I noticed bogging down every time I cruise down changing gear (that moment when you approach a stop light). My gas mileage was not satisfactory as well. I have changed my FPR and everything but problems persisted. After I changed this, bike ran very smooth.
This is the first how-to post from me, so please be gentle. Any suggestions or contributions are very welcome. Please correct me if any of these below are incorrect.
Symptoms:
� Bogging down / some sputtering / lagging at lower RPM
� Bad gas mileage
� RPM rises very slow when open throttle
Note: all these symptoms were gone after I replace the fuel filter
What you need for this job:
� Allen screw sets: 5mm & 6mm
� Ratchet wrench
� Sockets (8mm, 10mm & 12mm)
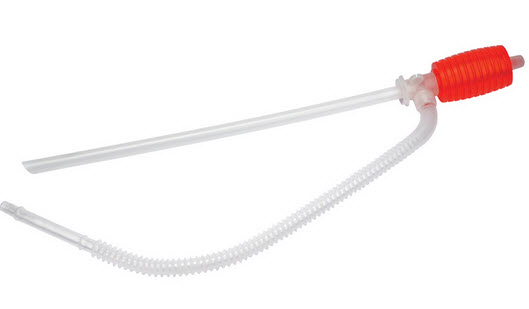
� Hand syphon tool
� Gas container / Jerry can
� Bungee cords to hold the tank
� Phillips screwdriver
� WD40, Acetone & White vinegar (Optional, only if you want to clean the base)
Estimate time to do it:
� Around 3-4 hours. Mostly because I need to soak vinegar to clean the rust. Replacing fuel filter only probably takes 1 hour or so.
Spare Parts:
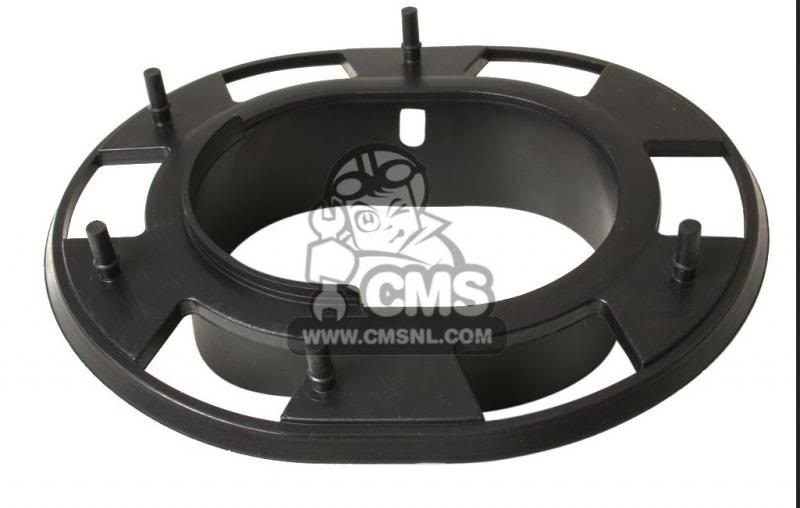
� Base gasket 17574-MBW-D20 GASKET, BASE $6.79
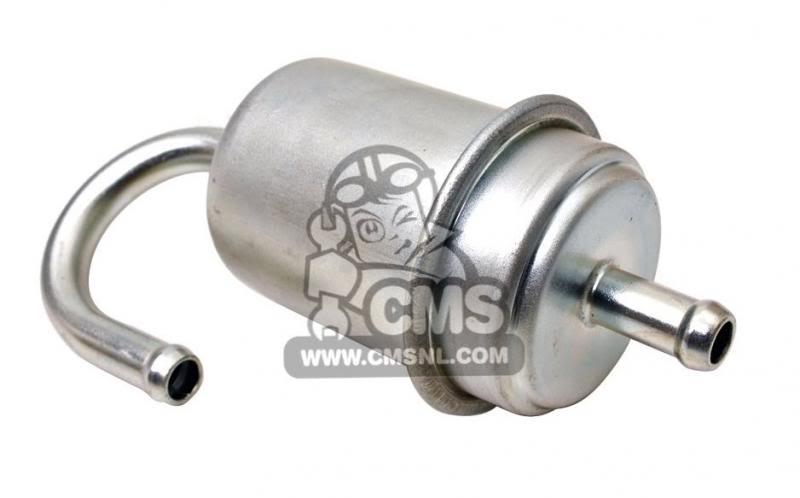
� Fuel Filter 16900-MBG-013 FILTER, FUEL $43.17
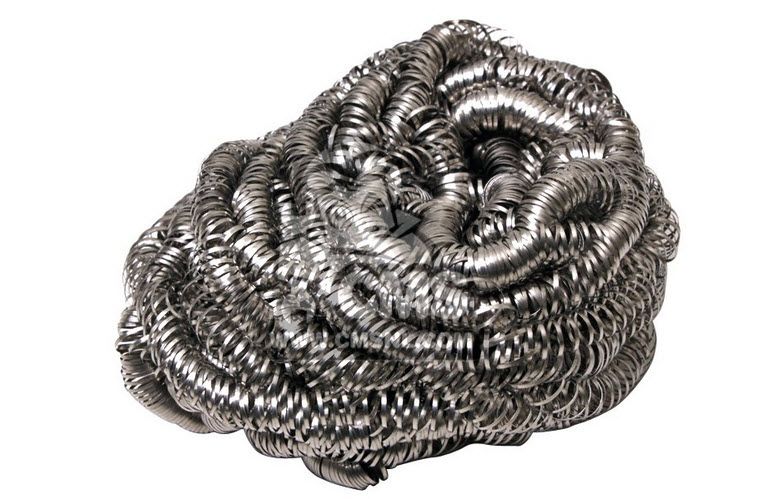
� Fuel return filter (Optional � No, Brillo pad is NOT compatible with this) 16714-MBG-000 FILTER, FUEL RETURN $5.66
� Sealing washer (optional) 90430-PD6-003 WASHER (6MM) $1.97
How to do:
1. Remove rear cowl
2. Remove seat (10mm sockets)
3. Remove 2 bolts at front of fuel tank (8mm socket)
4. Remove 2 bolts at rear of fuel tank (6mm Allen key)
5. Remove 2 bolts at side of fuel tank (5mm Allen key)
6. Lift the tank up, hold it with 2 bungee cords, put a thick towel at the base so it won�t slid
7. Drain the fuel tank using syphon tool, store the gas into a container
8. Unplug the fuel pump sensor
9. Release the fuel pressure by loosening the service check bolt (12mm)
10. Disconnect fuel return hose from Fuel Pressure Regulator
11. Remove 6 bolts at fuel pump mounting base (8mm socket)
12. Carefully pull out the assembly (do not damage any wirings inside, it will cost you a lot)
Note: I didn't disconnect main fuel hose from fuel pump assembly, so I did all this while still connected to throttle bodies. The tank however can completely be taken off
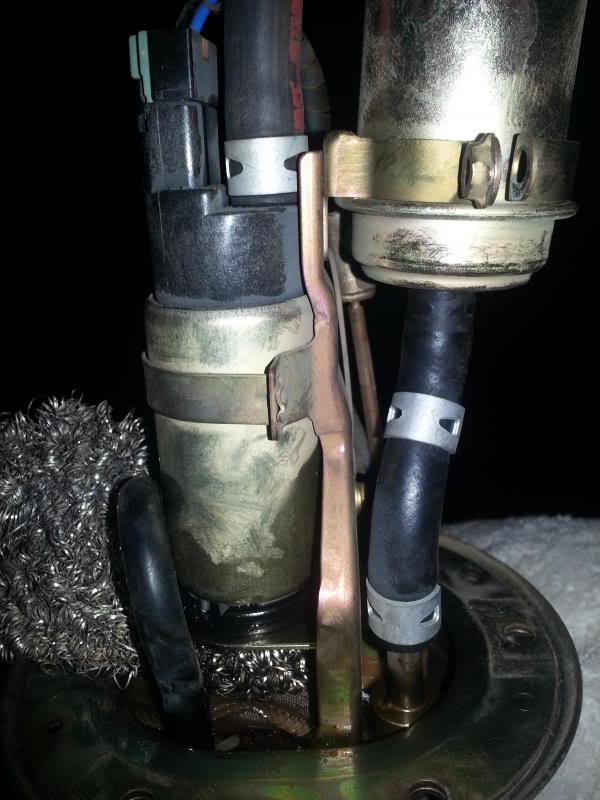
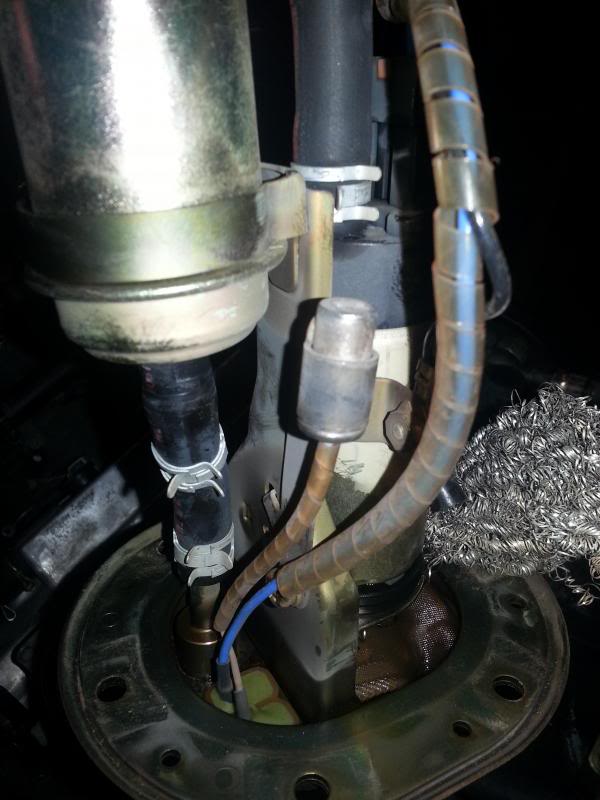
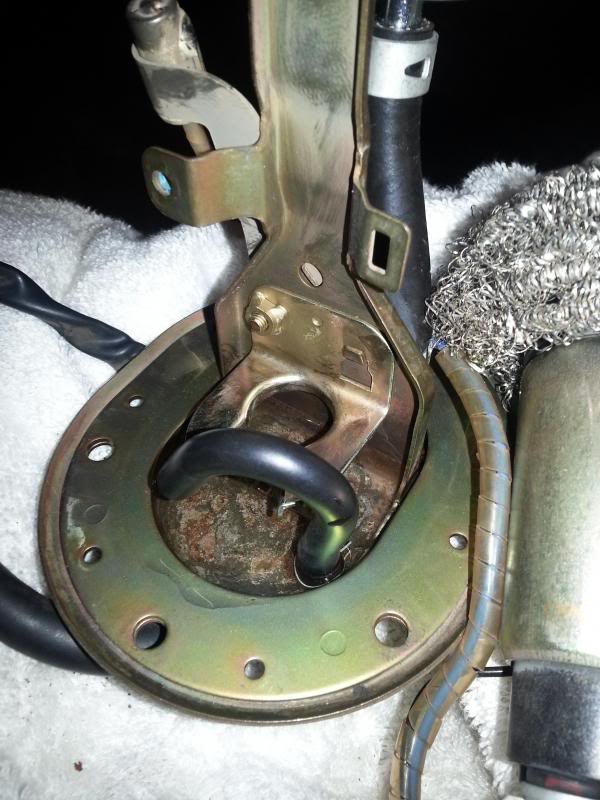
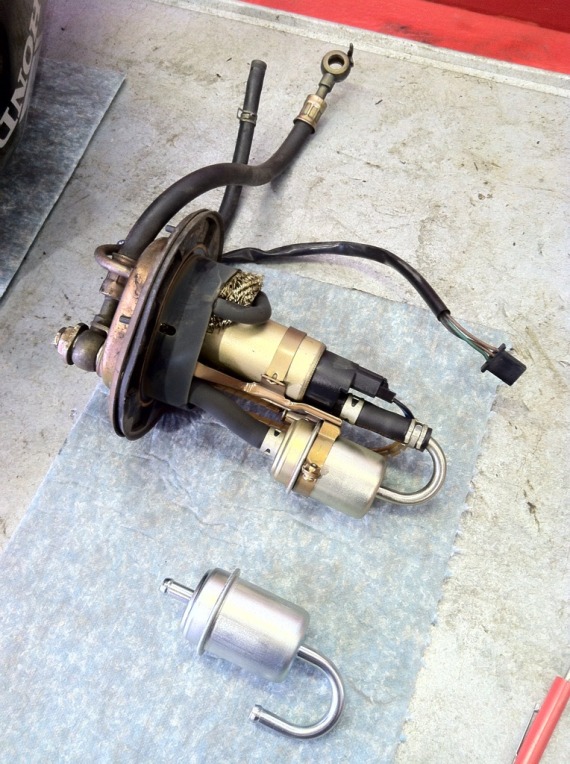
At this stage, you probably will see something like this pic below. Notice that steel �Brillo pad�? It�s fuel return filter.
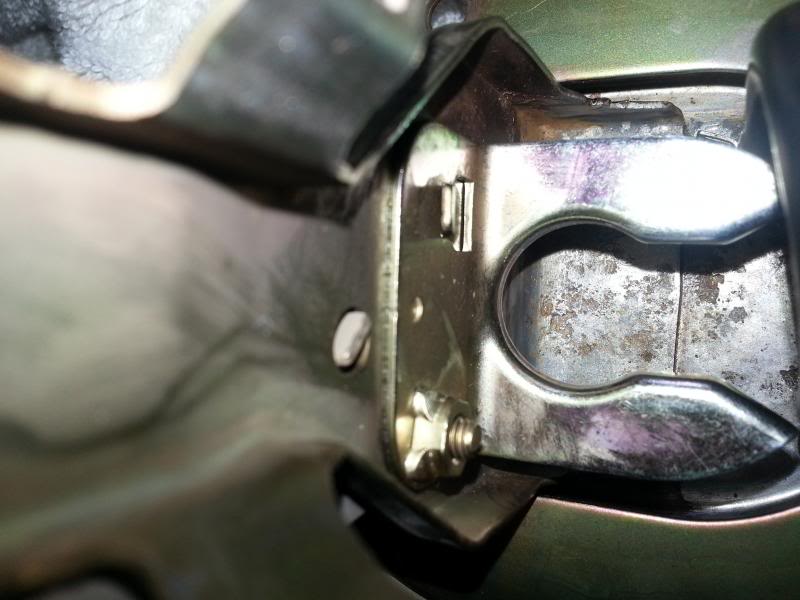
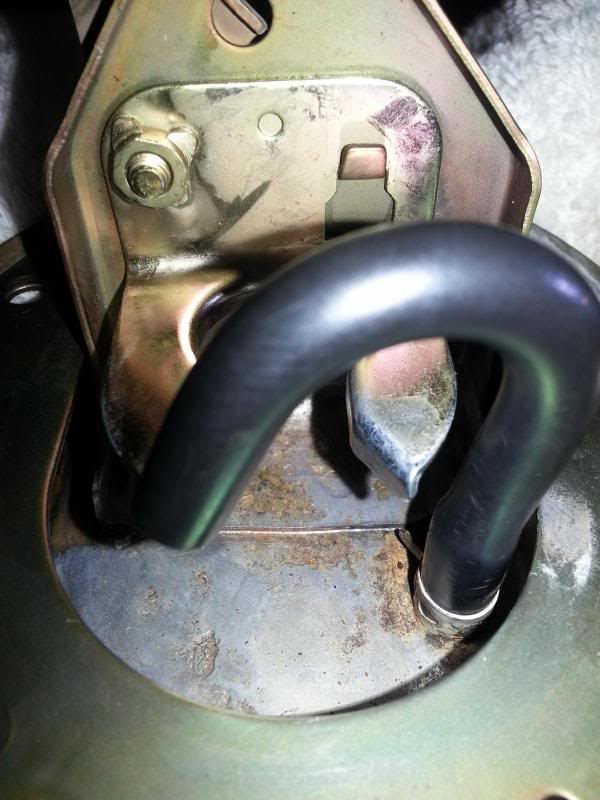
13. Unscrew the fuel filter holder (phillip screwdriver) and the hose clamps, install new one.
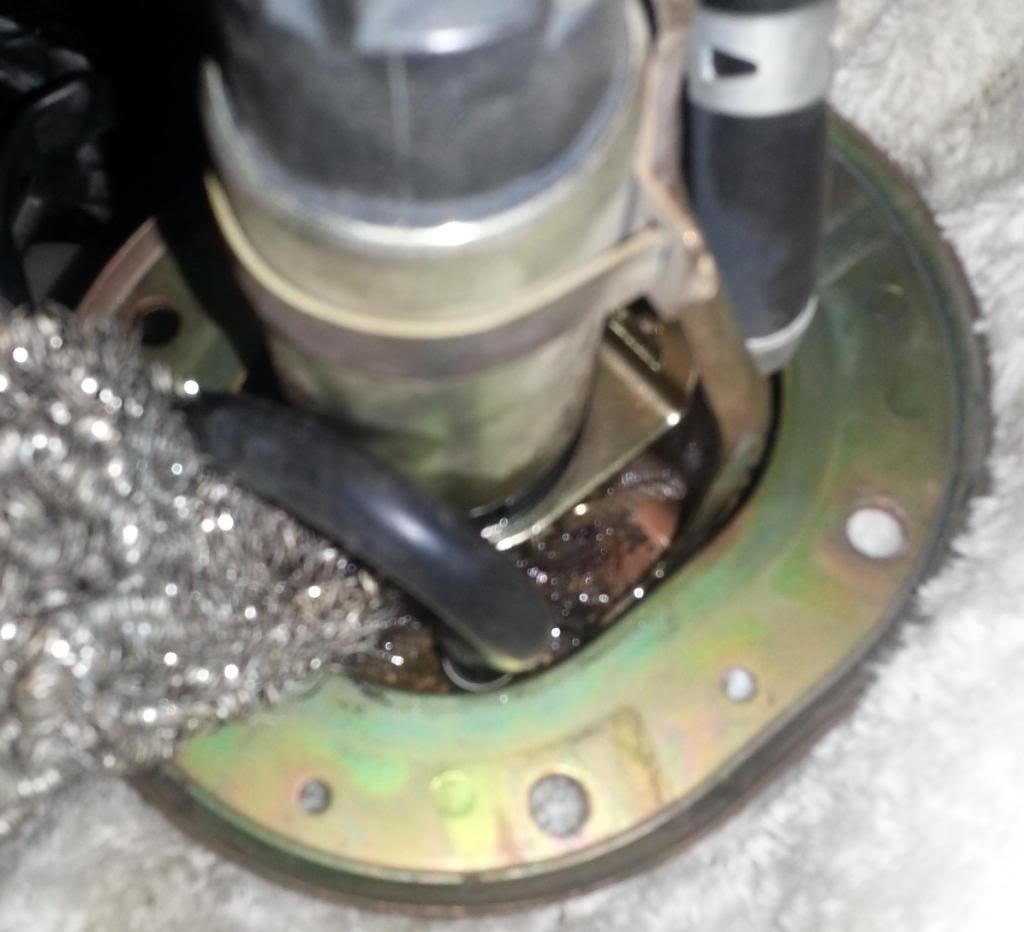
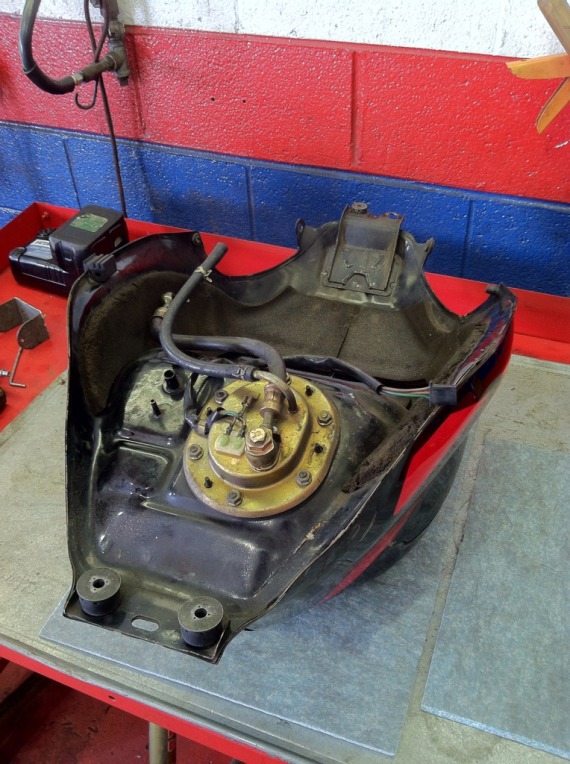
My base was full of rust. Now, put a bit of Acetone to clean it.
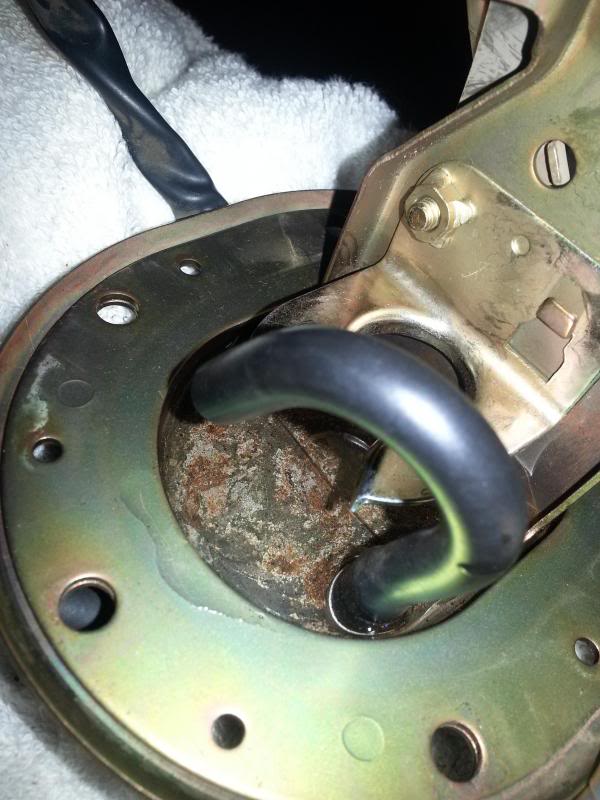
After cleaned with Acetone (Never soak it with Acetone, it�ll eat the rubber part) How you do it: Pour a bit, then scrub the rust.
Next, soak with white vinegar for 1-2 hours (you can do something else while waiting).
After 1-2 hours soaked with white vinegar, most rust is gone. Dry it, then quickly spray with WD40 to prevent contact with air.
14. At this stage you could also check the inside of your tank to see if there is more rust (if there is, the best way is to do the electrolytic rust removal, not covered here)
15. Replace the base gasket.
16. Put new fuel return filter and squeeze it into the base (That "Brillo" pad)
17. Carefully put the assembly back into fuel tank
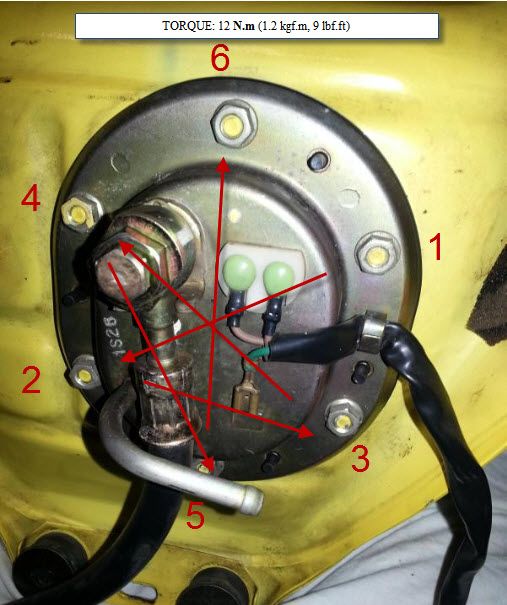
18. Put back the 6 bolts at the base. This have to be done in criss-cross order (see picture) and tighten up to specific torque 12 N.m (1.2 kgf.m, 9 lbs.ft)
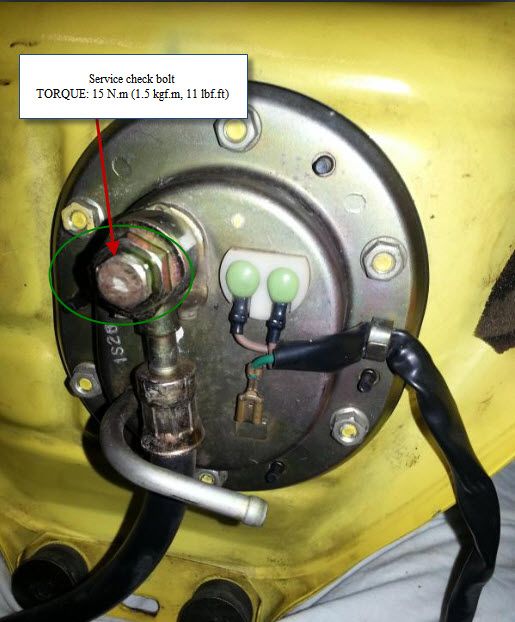
19. Tighten up the service check bolt to specific torque TORQUE: 15 N.m (1.5 kgf.m, 11 lbs.ft). Use new sealing washer if possible.
20. Reconnect fuel return hose and fuel pump sensor
21. Put back gas into tank
22. Test your bike before putting back everything, and you�re done!

Yay
I just replaced my fuel filter during the Easter break, and I thought I could share the experience and some pictures here.
Fuel filter replacement is not in the maintenance schedule so it could be neglected. If you maintain your bike consistently it won�t cause a serious problem, I guess, since someone here can run his bike perfectly until 254k+ miles without any issue using stock filter.
Mine is only at 77000k (47000 miles), but I noticed bogging down every time I cruise down changing gear (that moment when you approach a stop light). My gas mileage was not satisfactory as well. I have changed my FPR and everything but problems persisted. After I changed this, bike ran very smooth.
This is the first how-to post from me, so please be gentle.
Any suggestions or contributions are very welcome. Please correct me if any of these below are incorrect.Symptoms:
� Bogging down / some sputtering / lagging at lower RPM
� Bad gas mileage
� RPM rises very slow when open throttle
Note: all these symptoms were gone after I replace the fuel filter
What you need for this job:
� Allen screw sets: 5mm & 6mm
� Ratchet wrench
� Sockets (8mm, 10mm & 12mm)
� Hand syphon tool
� Gas container / Jerry can
� Bungee cords to hold the tank
� Phillips screwdriver
� WD40, Acetone & White vinegar (Optional, only if you want to clean the base)
Estimate time to do it:
� Around 3-4 hours. Mostly because I need to soak vinegar to clean the rust. Replacing fuel filter only probably takes 1 hour or so.
Spare Parts:
� Base gasket 17574-MBW-D20 GASKET, BASE $6.79
� Fuel Filter 16900-MBG-013 FILTER, FUEL $43.17
� Fuel return filter (Optional � No, Brillo pad is NOT compatible with this) 16714-MBG-000 FILTER, FUEL RETURN $5.66
� Sealing washer (optional) 90430-PD6-003 WASHER (6MM) $1.97
How to do:
1. Remove rear cowl
2. Remove seat (10mm sockets)
3. Remove 2 bolts at front of fuel tank (8mm socket)
4. Remove 2 bolts at rear of fuel tank (6mm Allen key)
5. Remove 2 bolts at side of fuel tank (5mm Allen key)
6. Lift the tank up, hold it with 2 bungee cords, put a thick towel at the base so it won�t slid
7. Drain the fuel tank using syphon tool, store the gas into a container
8. Unplug the fuel pump sensor
9. Release the fuel pressure by loosening the service check bolt (12mm)
10. Disconnect fuel return hose from Fuel Pressure Regulator
11. Remove 6 bolts at fuel pump mounting base (8mm socket)
12. Carefully pull out the assembly (do not damage any wirings inside, it will cost you a lot)
Note: I didn't disconnect main fuel hose from fuel pump assembly, so I did all this while still connected to throttle bodies. The tank however can completely be taken off
At this stage, you probably will see something like this pic below. Notice that steel �Brillo pad�? It�s fuel return filter.
13. Unscrew the fuel filter holder (phillip screwdriver) and the hose clamps, install new one.
My base was full of rust.
After cleaned with Acetone (Never soak it with Acetone, it�ll eat the rubber part) How you do it: Pour a bit, then scrub the rust.
Next, soak with white vinegar for 1-2 hours (you can do something else while waiting).
After 1-2 hours soaked with white vinegar, most rust is gone. Dry it, then quickly spray with WD40 to prevent contact with air.
14. At this stage you could also check the inside of your tank to see if there is more rust (if there is, the best way is to do the electrolytic rust removal, not covered here)
15. Replace the base gasket.
16. Put new fuel return filter and squeeze it into the base (That "Brillo" pad)
17. Carefully put the assembly back into fuel tank
18. Put back the 6 bolts at the base. This have to be done in criss-cross order (see picture) and tighten up to specific torque 12 N.m (1.2 kgf.m, 9 lbs.ft)
19. Tighten up the service check bolt to specific torque TORQUE: 15 N.m (1.5 kgf.m, 11 lbs.ft). Use new sealing washer if possible.
20. Reconnect fuel return hose and fuel pump sensor
21. Put back gas into tank
22. Test your bike before putting back everything, and you�re done!
Yay
Last edited by Kopi Ko; 04-14-2013 at 04:48 PM.
#2
04-13-2013, 10:43 AM

Ironmang
And here's a few pics from when I did this just recently too (minus the cleaning, my tank and everything was clean). I too was unaware that there was a serviceable fuel filter, thus it has never been changed and was still original with 255,000 miles. Here's what I found....
I cut the filter open to see what it looked like, and....uhhh.... yea. Oddly enough, bike still ran absolutely perfect! haha

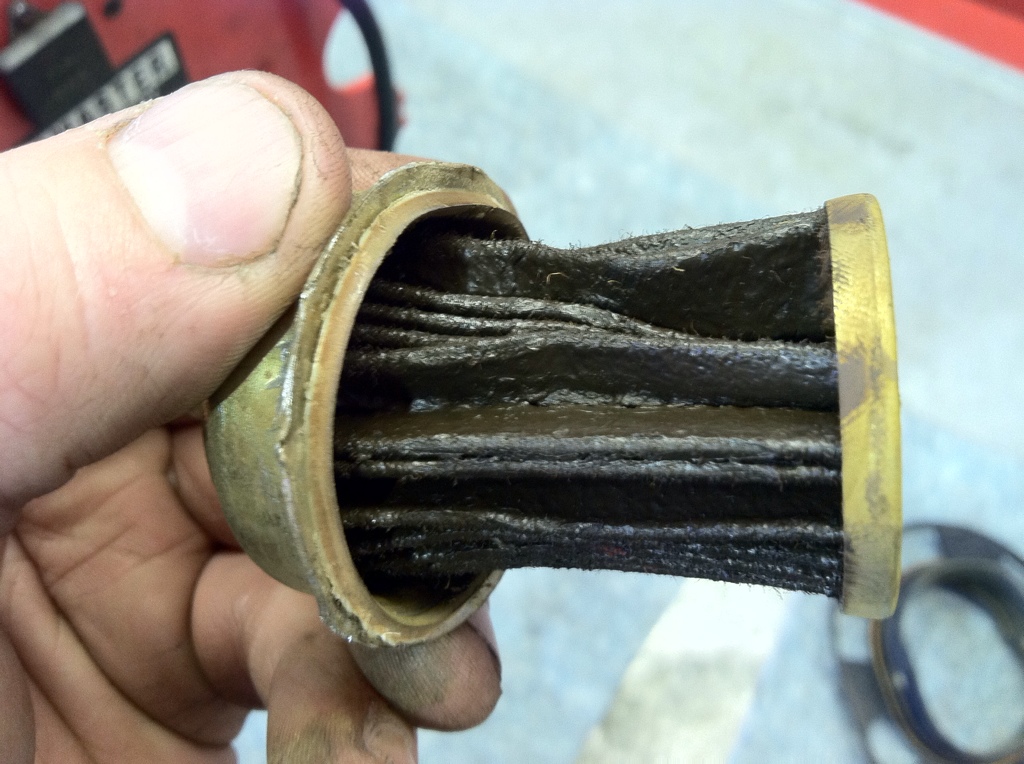
Soooo if you haven't done this, I would most definitely recommend replacing this little filter for safe measure
I cut the filter open to see what it looked like, and....uhhh.... yea. Oddly enough, bike still ran absolutely perfect! haha
Soooo if you haven't done this, I would most definitely recommend replacing this little filter for safe measure
#4
05-29-2013, 03:23 PM

Senior Member
Join Date: Dec 2009
Location: Mexico City
Posts: 331
Likes: 0
Received 0 Likes
on
0 Posts


#8
11-05-2013, 08:51 AM

Senior Member
I don't think you quite understand the unit "mpg".
What you have given appears to be tank range.
#9
08-13-2016, 08:49 PM

I just cleaned my tank out and after I put the fuel pump on and about 2 gallons of fuel, I found out that it was leaking pretty bad. I didn't put on a new rubber gasket, but I think I might have put it on backwards.
In looking at the two pictures, I notice that the orientation of the pumps on the two bikes are opposite. On the original post, the main line goes towards the back of the bike. On the additional post, the main line goes towards the front. Are these bikes different years?
I have a 2004 F4i but am using a manual for 01-03. When I put it on and it started leaking, I had the main fuel line going towards the front of the bike.
#10
01-03-2017, 06:44 PM

Hey thanks for this how-to! This whole site has been enormously helpful to me since i got mine (2002 f4i) last year, and I've been dreading taking off the fuel tank to get to all the goods. I had the same symptoms as everybody else so i got a new mess of parts ( 👍👍 For those links) and swapped it all out in no time. I checked the spark plugs (fine) and replaced the air filter while i was at it (good move on my part). I took it out for a quick spin and now it's simply a beast. I'm the third owner of this bike and now it only has 17,500 miles on it, but I'm not so sure how well it was maintained before me. Anyway, great post!