06 Broncos Build Thread
#1
 03-06-2014, 12:21 PM

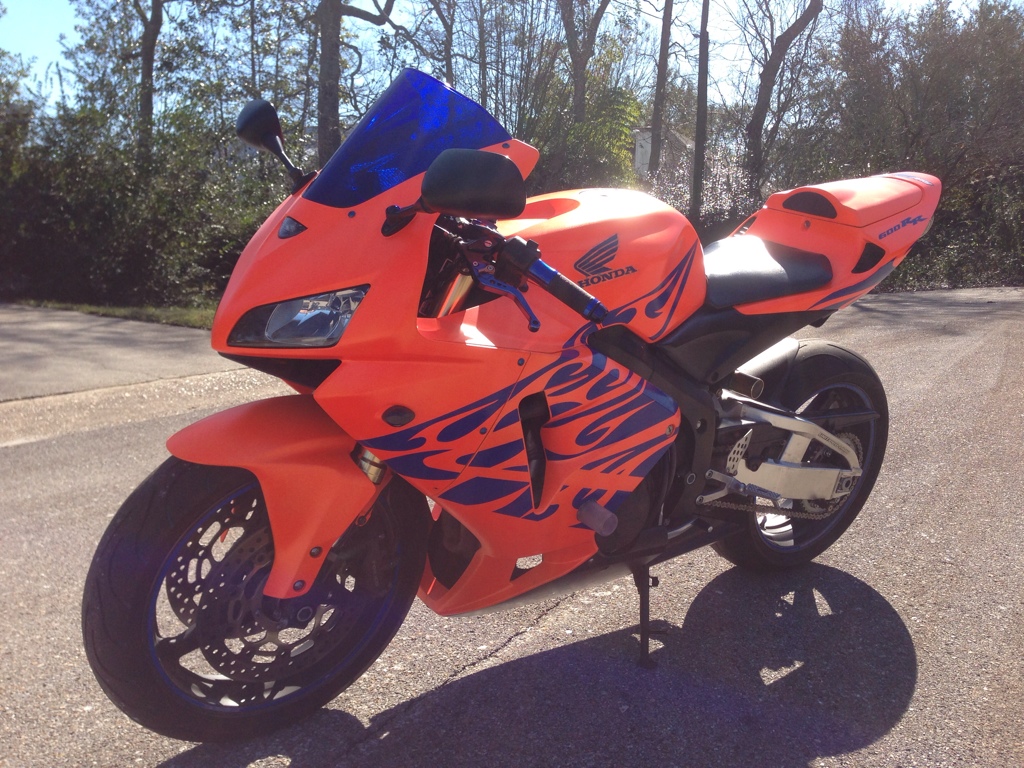
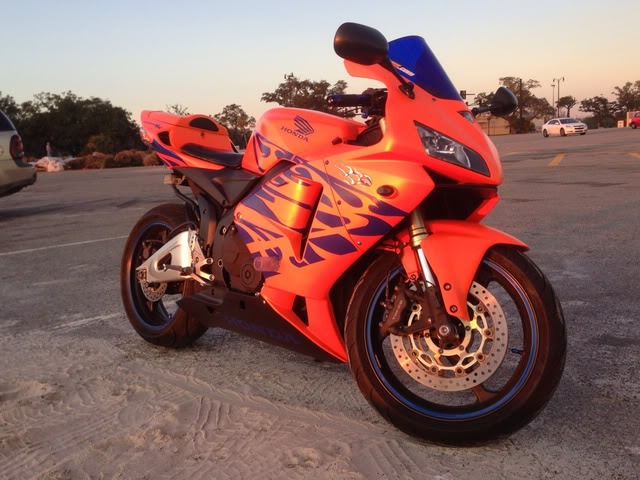
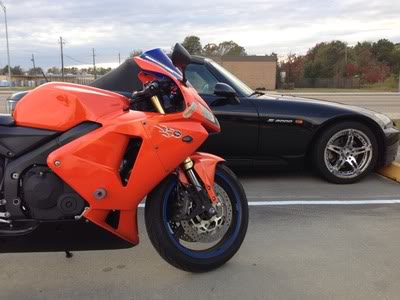
Here is my progress as I turn my '06 Tribal into the Broncos CBR
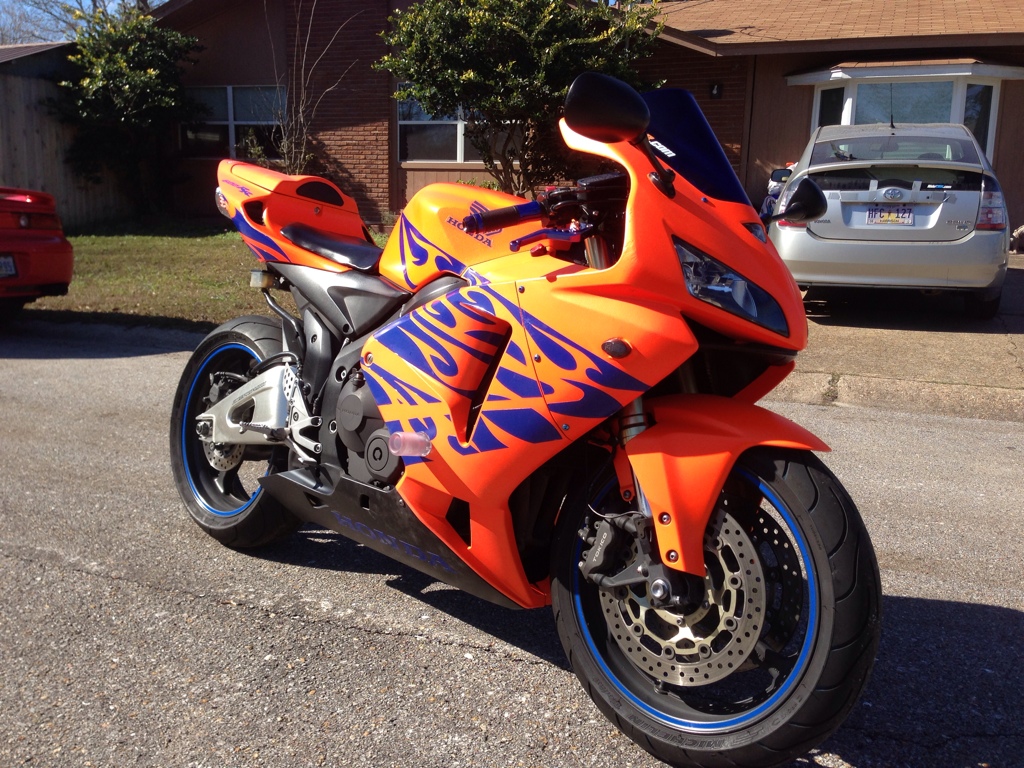
This is how she looked the week after I picked her up. All washed and shined. The bike came with front and rear stands, his and her GMAX helmets, his and her Joe Rocket jackets and gloves, lowering link (unused) and a disc brake lock. She sat at about 8900 miles. I trailered it home since I hadn't taken the MSF course yet and it had been years since I rode.

Mods already installed when purchased:
- DDM HIDs (I have no Idea how to tell the brightness)
- Integrated taillight
- Fender eliminator
- Hot Bodies flush mounted LED signals
- Yoshimura RS-5 chrome slip on
So as a Denver Broncos fan I had to start adding my blue to the orange�
This is how she looked the week after I picked her up. All washed and shined. The bike came with front and rear stands, his and her GMAX helmets, his and her Joe Rocket jackets and gloves, lowering link (unused) and a disc brake lock. She sat at about 8900 miles. I trailered it home since I hadn't taken the MSF course yet and it had been years since I rode.
Mods already installed when purchased:
- DDM HIDs (I have no Idea how to tell the brightness)
- Integrated taillight
- Fender eliminator
- Hot Bodies flush mounted LED signals
- Yoshimura RS-5 chrome slip on
So as a Denver Broncos fan I had to start adding my blue to the orange�
#2
03-06-2014, 12:22 PM
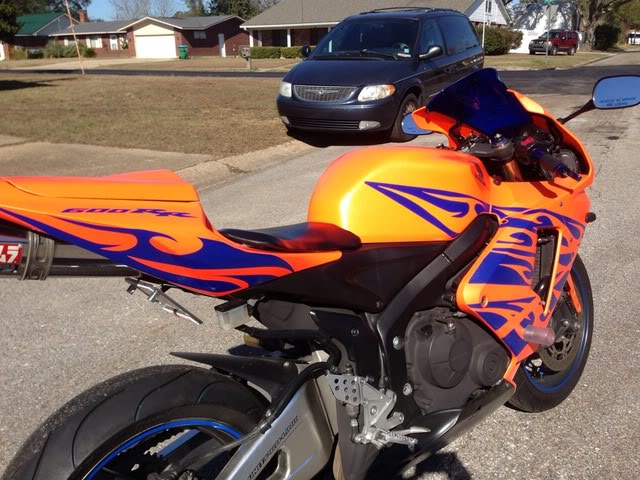
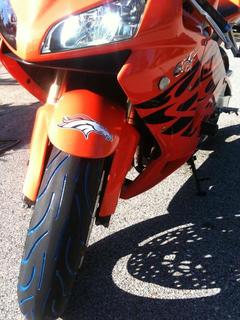
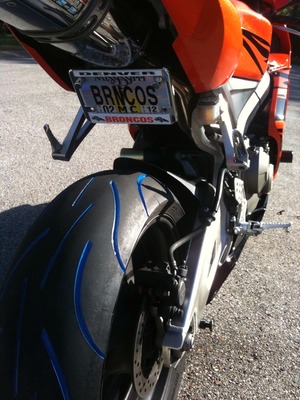
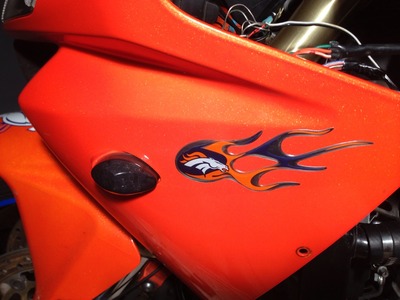
So my first applications were removing the CBR Racing decals behind the side marker and adding the flame Broncos decals. Removing the Air Force on the front fender and adding the Bronco Logo. Then putting on the tread paint, which was a little tedious but I love it!
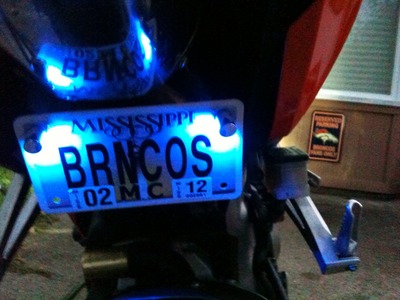
I added blue LED license plate lights and a Broncos cover
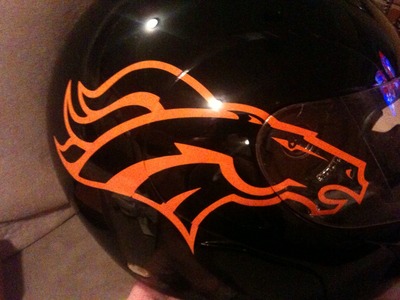
Then I added custom Broncos decals to my helmet. A little tricky since I had to cut it along the lines to open the face of the helmet and the visor.
I added blue LED license plate lights and a Broncos cover
Then I added custom Broncos decals to my helmet. A little tricky since I had to cut it along the lines to open the face of the helmet and the visor.
#3
03-06-2014, 12:24 PM
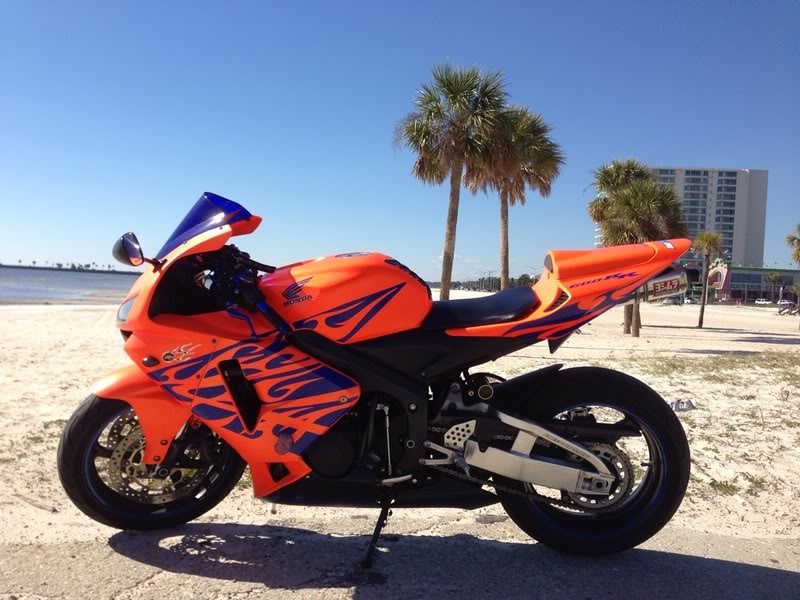
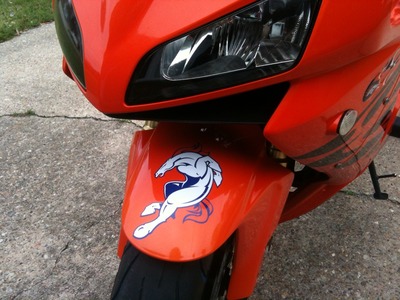
Next, I wasn’t happy with the Broncos decal on the fender so I changed it.
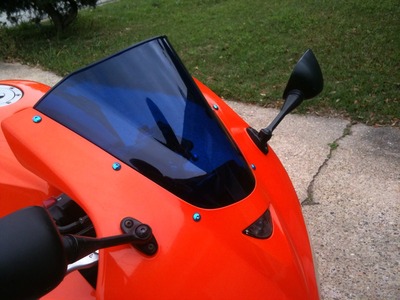
Got my blue windscreen in but they shipped from China and they taped the wrap too tight and it was warped.
So I reordered and got a perfect double bubble. I learned about the difference in color for anything anodized- not the right blue. But I figured I paid for the windscreen bolts so I might as well use them. I still need to find something else or powdercoat some.
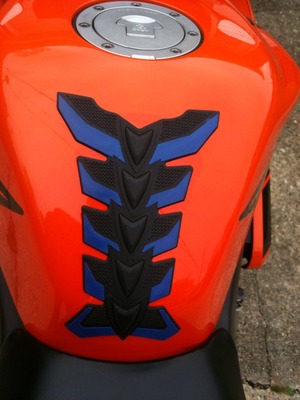
I changed out the grey Progrip tank pad for the blue one. I found another added to the wish list but it’s a Broncos custom and like $75
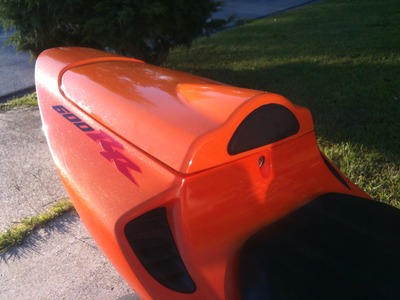
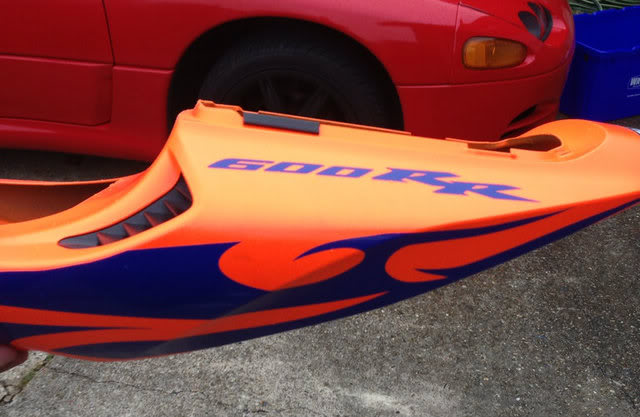
I ordered a rear seat cowl and didn’t think to be sure I got the correct orange but it’s not horrible and the tail needs a paint job anyway because the pearl-fire orange is notorious for fading
Got my blue windscreen in but they shipped from China and they taped the wrap too tight and it was warped.
So I reordered and got a perfect double bubble. I learned about the difference in color for anything anodized- not the right blue. But I figured I paid for the windscreen bolts so I might as well use them. I still need to find something else or powdercoat some.
I changed out the grey Progrip tank pad for the blue one. I found another added to the wish list but it’s a Broncos custom and like $75
I ordered a rear seat cowl and didn’t think to be sure I got the correct orange but it’s not horrible and the tail needs a paint job anyway because the pearl-fire orange is notorious for fading
#4
03-06-2014, 12:26 PM
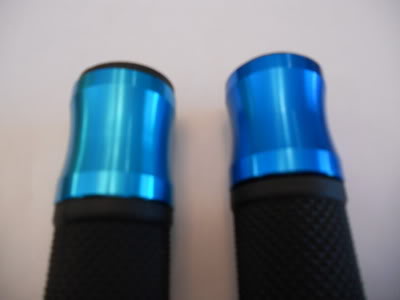
So I ordered new grips and they (again) were the wrong color- gotta love ebay. You can kinda see the coloration difference between the two and they are not the dark blue I wanted. Learned my lesson about ordering items that are cheap price but high shipping- it would cost more to ship back than I paid and they don’t refund shipping cost- DOH!
Ordered new grips and got the right color. Later I added new bar ends.
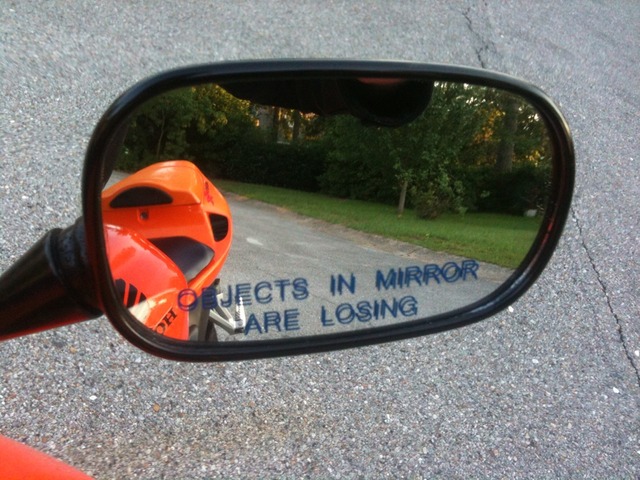
I got me some decals for the mirrors
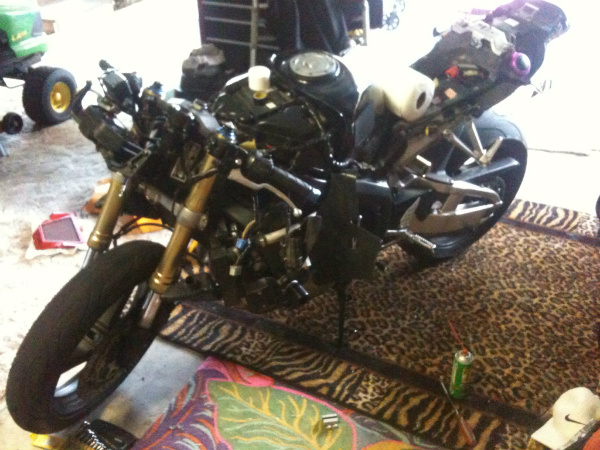
I stripped her down to clean and charge my air filter, change the oil and add LEDs
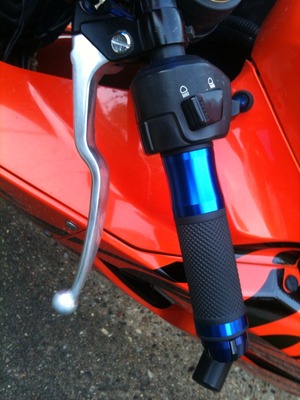
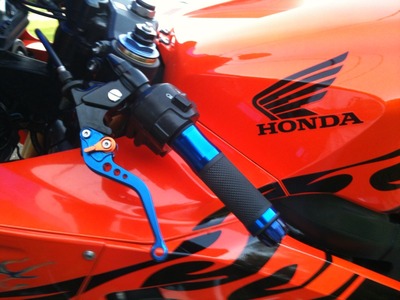
Next up were levers
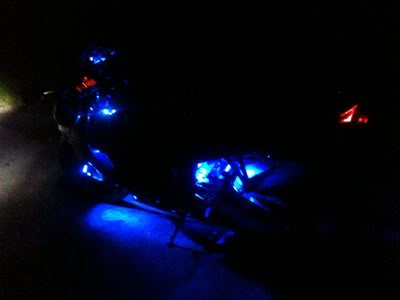
Then I got some blue lens covers. I’m slightly nervous about getting pulled over but they fit in my inside jacket pocket at night

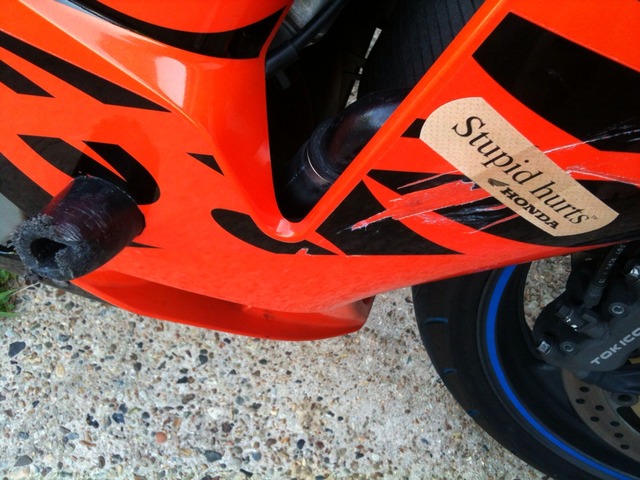
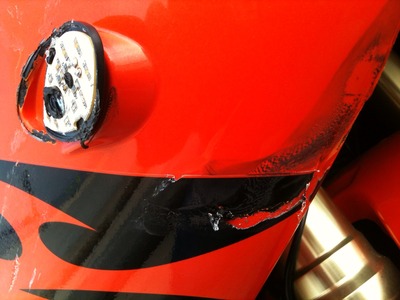
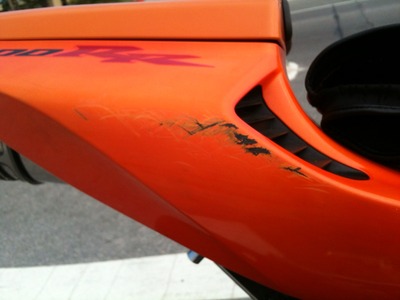
I got knocked over by a cruiser which resulted in some scrapes and bruises. He tried to turn left from the right lane... right into me
Ordered new grips and got the right color. Later I added new bar ends.
I got me some decals for the mirrors
I stripped her down to clean and charge my air filter, change the oil and add LEDs
Next up were levers
Then I got some blue lens covers. I’m slightly nervous about getting pulled over but they fit in my inside jacket pocket at night
I got knocked over by a cruiser which resulted in some scrapes and bruises. He tried to turn left from the right lane... right into me
#5
03-06-2014, 12:28 PM
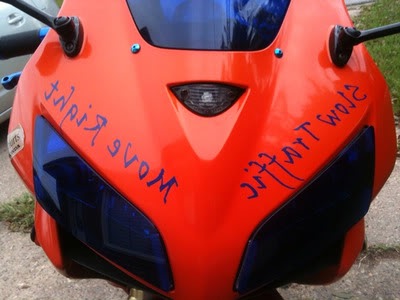
I added new custom graphics to the front. Not that anyone could really read it in the rear view mirror. It’s more for the novelty
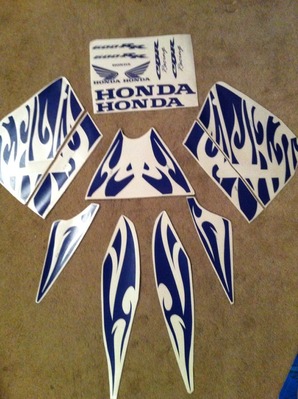
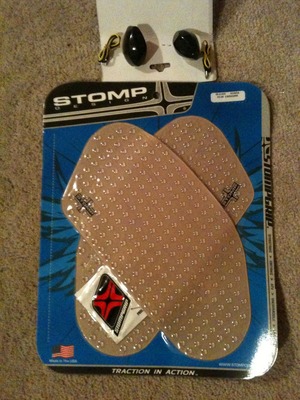
Ordered my Blue Tribal Graphics, Stomp Grip tank pads and smoked turn signals to replace some damage
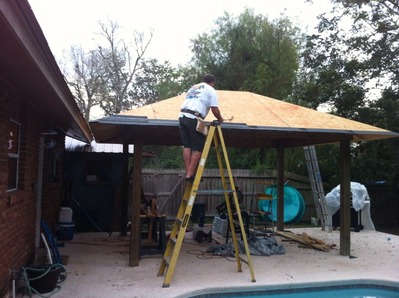
So about this time I was riding with a big group a week or so after Hurricane Isaac and I got bad gas at the gas station and my bike wouldn't start. I tried syphoning the gas and refilling it and just couldn't get it going. Si I decided I would have to tear into it and see what was clogging up the works. Since I dont have a garage and needed a covered area to work I decided to build a roof on my patio. We were just going to do a pergola (simple top) but then it’s slatted and would let in the rain. So I went with a hip roof. Having never built a roof I started my research. You Tube, reading on builders forums. Construction begins…
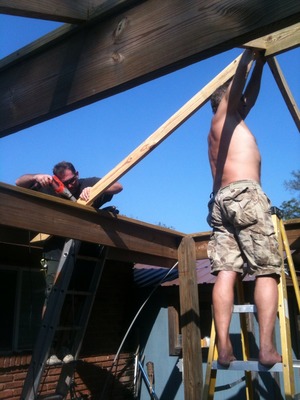
After getting all the rafters up (skipping ahead as not to bore everyone with the INVOLVED process of rafter calculations)
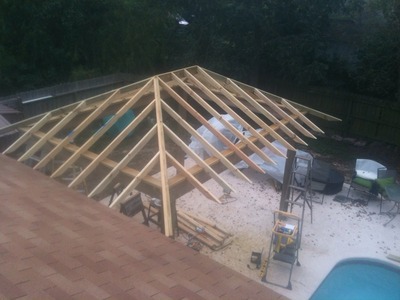
we got the OSB boards (thanks to volcom440) and started shingling
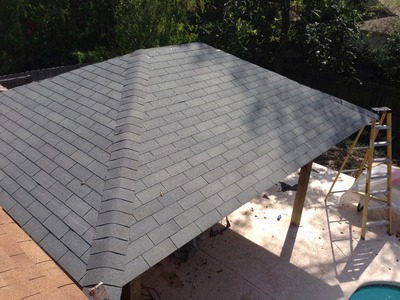
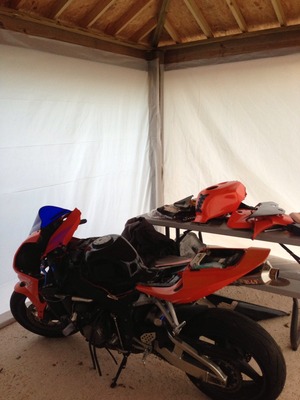
After two months the roof is finally finished and I put up the plastic so I can tear down the bike and not get wet or get flying leaves and sand in my bike.
Ordered my Blue Tribal Graphics, Stomp Grip tank pads and smoked turn signals to replace some damage
So about this time I was riding with a big group a week or so after Hurricane Isaac and I got bad gas at the gas station and my bike wouldn't start. I tried syphoning the gas and refilling it and just couldn't get it going. Si I decided I would have to tear into it and see what was clogging up the works. Since I dont have a garage and needed a covered area to work I decided to build a roof on my patio. We were just going to do a pergola (simple top) but then it’s slatted and would let in the rain. So I went with a hip roof. Having never built a roof I started my research. You Tube, reading on builders forums. Construction begins…
After getting all the rafters up (skipping ahead as not to bore everyone with the INVOLVED process of rafter calculations)
we got the OSB boards (thanks to volcom440) and started shingling
After two months the roof is finally finished and I put up the plastic so I can tear down the bike and not get wet or get flying leaves and sand in my bike.
#6
03-06-2014, 12:29 PM
#7
03-06-2014, 12:30 PM
With the roof built it was time to get into the bike. Since I was sure I had gotten bad gas I drained the fuel tank when it originally wouldn’t start. Refilled with new gas and Sea Foam but no luck. It would only run on two cylinders and wouldn’t stay running.
So I drained the tank again in order to remove it and if you look close you can see the nastiness in the fuel, there are two lines if dirt. It swirls around (I think it’s water) The station was towards the beach so they probably had gunk in their tanks after Hurricane Isaac.
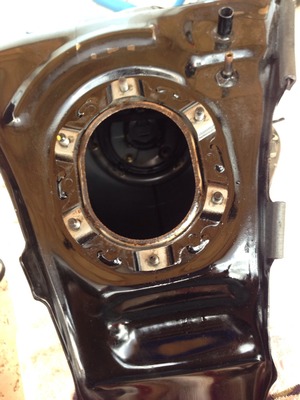
Since there was obviously still contaminants in the tank, I decided the best bet was to take apart the tank, remove the fuel pump and put her all back together. I was excited about the fact that maybe I had just not drained it thoroughly enough the first time.

Once back together I tried charging the battery. No dice. The original battery was toast. Surprised it lasted that long really. After several calls and lots of running around… no battery. None at Walmart, Sears, the dealership. Really?! Well O’Rielly’s said they have one at the warehouse and can have it the next day.
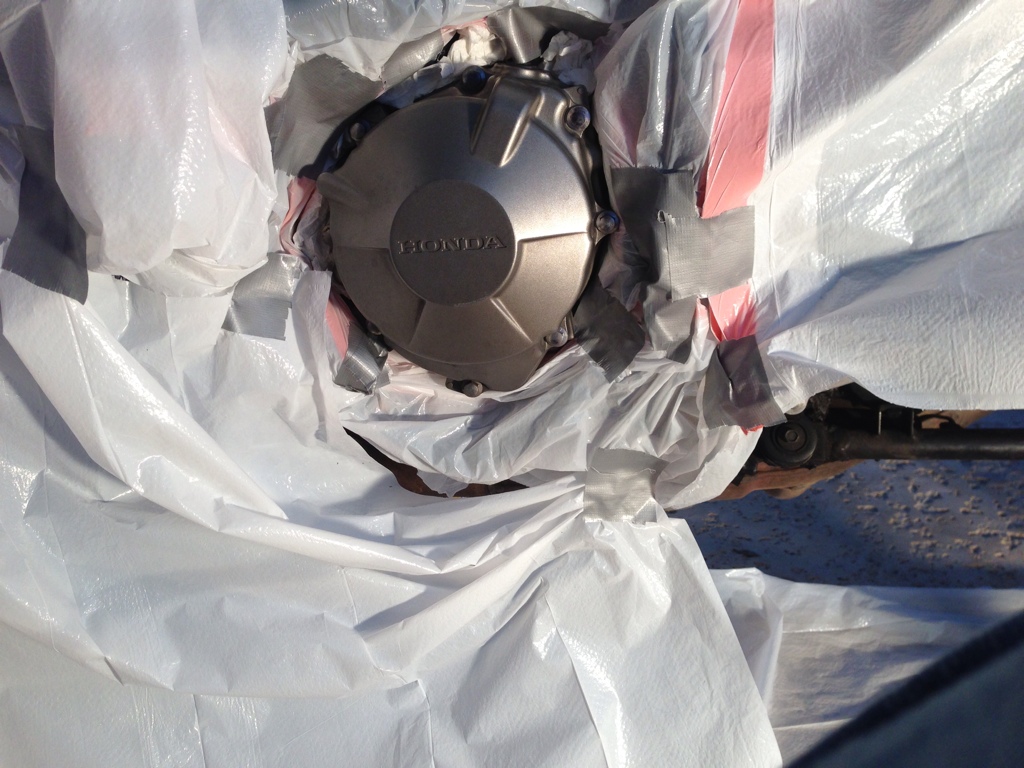
Then, since no battery I decided to get to painting the engine covers with high temp Rustoleum
So I drained the tank again in order to remove it and if you look close you can see the nastiness in the fuel, there are two lines if dirt. It swirls around (I think it’s water) The station was towards the beach so they probably had gunk in their tanks after Hurricane Isaac.
Since there was obviously still contaminants in the tank, I decided the best bet was to take apart the tank, remove the fuel pump and put her all back together. I was excited about the fact that maybe I had just not drained it thoroughly enough the first time.
Once back together I tried charging the battery. No dice. The original battery was toast. Surprised it lasted that long really. After several calls and lots of running around… no battery. None at Walmart, Sears, the dealership. Really?! Well O’Rielly’s said they have one at the warehouse and can have it the next day.
Then, since no battery I decided to get to painting the engine covers with high temp Rustoleum
#8
03-06-2014, 12:32 PM
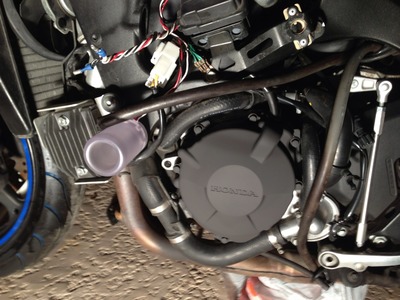
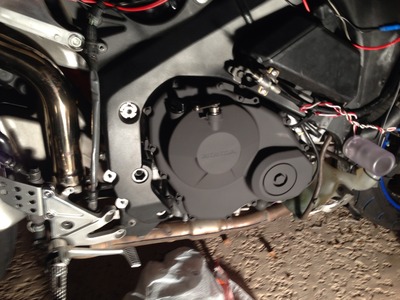
I installed the new battery and after a couple of sputters (assumed clearing the fuel rail) it fired up and ran like a champ again!! I was soooo happy. Two months of being without my bike during Sept/Oct (best riding weather) and all it took was a couple of hours to remove the tank. Live and learn…again
Now she’s all back together and riding again but I need to get my Tribal graphics on so I go to check up on powder coating and painting since I have to fix the scratches from when it went over this summer.
The paint shop was initially quoted $200 but then came back with a quote of $400 just to paint the tail and seat cowl since the paint is so expensive. It would be about $250 to powder coat the swingarm and the pegs. My budget is not allowing that at this time so I am opting for Plast Dip. I decided on a Blaze Orange with Gold Metalizer and Glossifier to get a look similar to the stock Pearlfire. I stripped her down again and get ready to dip the fairings, install a USB port for my iPhone and get ready for my Spy alarm coming in shortly.
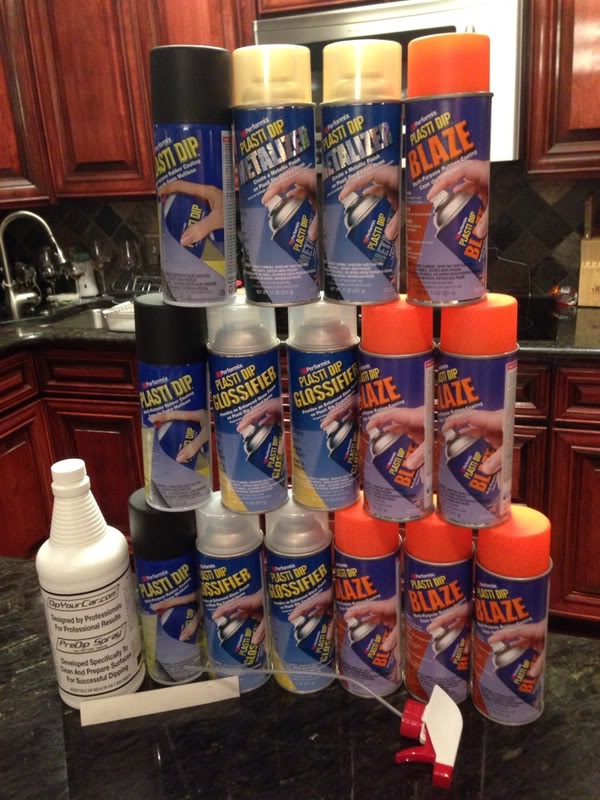
Here is my PLASTI DIP BUILD THREAD Best thing is, if I screw it up or don’t like it…. peel it off. All total it will cost less than $200 to do the entire bike.
This is my dipped helmet on the original color of the bike
I will order the new Navy Blue dip also to do the swingarm and redo my stands.
Now she’s all back together and riding again but I need to get my Tribal graphics on so I go to check up on powder coating and painting since I have to fix the scratches from when it went over this summer.
The paint shop was initially quoted $200 but then came back with a quote of $400 just to paint the tail and seat cowl since the paint is so expensive. It would be about $250 to powder coat the swingarm and the pegs. My budget is not allowing that at this time so I am opting for Plast Dip. I decided on a Blaze Orange with Gold Metalizer and Glossifier to get a look similar to the stock Pearlfire. I stripped her down again and get ready to dip the fairings, install a USB port for my iPhone and get ready for my Spy alarm coming in shortly.
Here is my PLASTI DIP BUILD THREAD Best thing is, if I screw it up or don’t like it…. peel it off. All total it will cost less than $200 to do the entire bike.
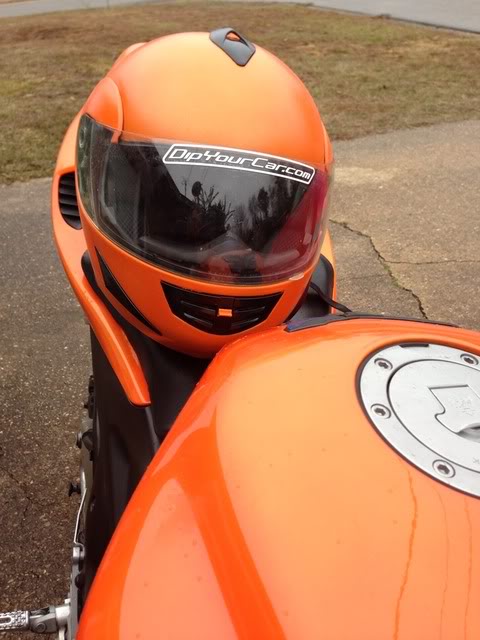
This is my dipped helmet on the original color of the bike
I will order the new Navy Blue dip also to do the swingarm and redo my stands.
#9
03-06-2014, 12:34 PM
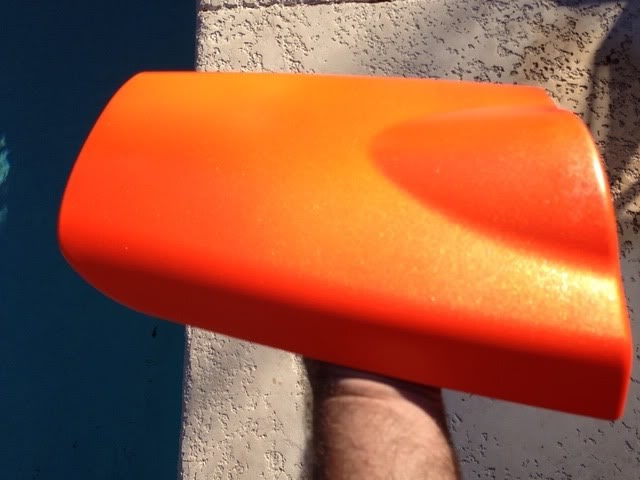
After testing my helmet I was ready to start on the fairings. I started with the seat cowl and tail piece. Here is the seat cowl after several layers of the Blaze Orange and a misting of the Gold Metalizer to give it the gold "flake" look.
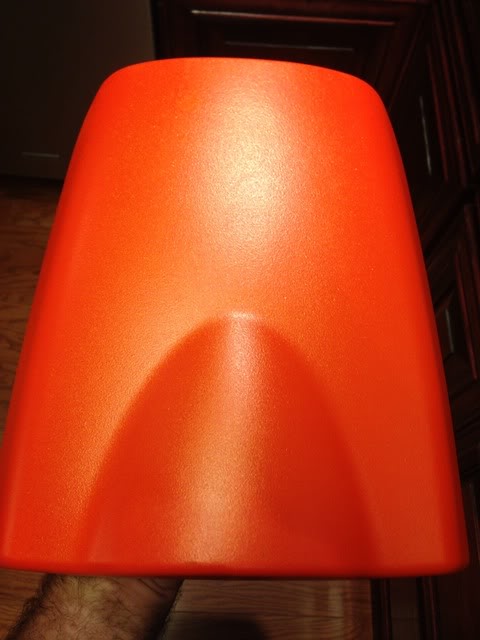
I added Glossifier to give it a sheen. Here is some sunshine to make it sparkle
I gave the tail the same treatment and added the tribal to the tail. Then I decided to enamel clear coat the tail so I don't rub the dip off om the sides where your legs sit.
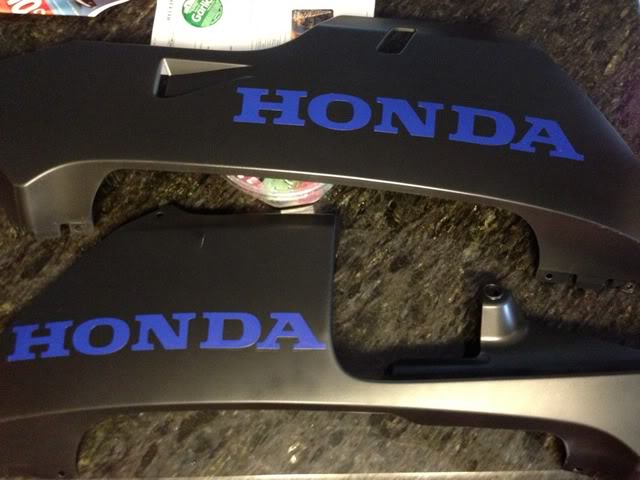
I dipped the lowers in Matte Black, added the decals and Glossified over that.
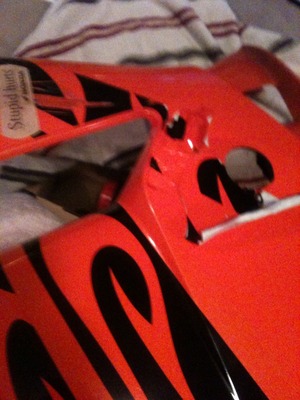
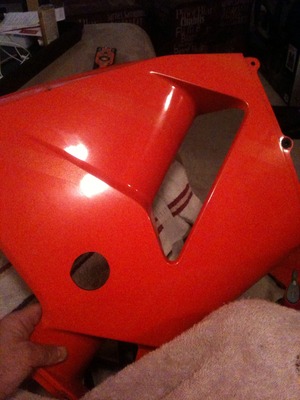
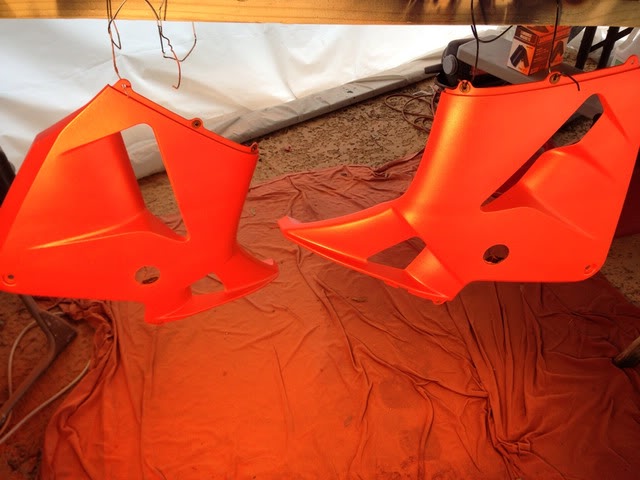
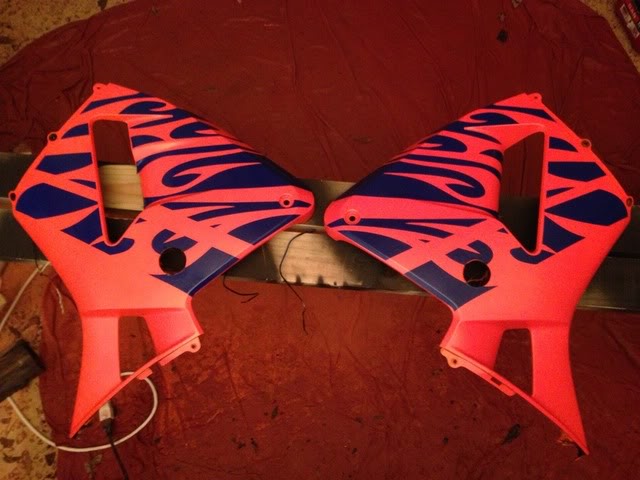
Side fairings
Here is the tank after the enamel clear coat to protect it from gas drips and my knees. I also hope my stomp grip pads will stick better than to the dip.
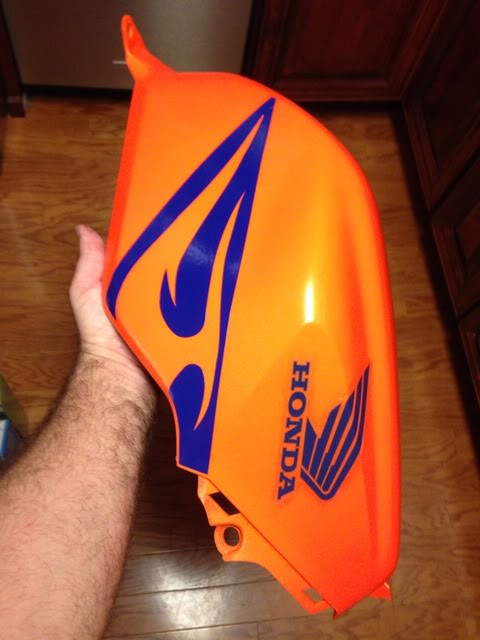
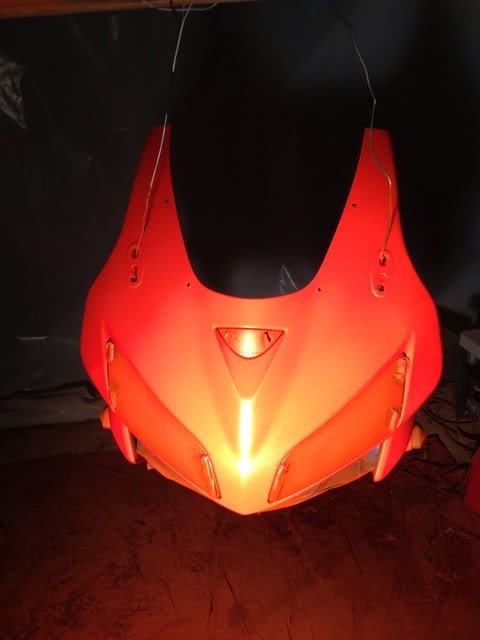
Finishing up the nose piece. Love the fact you can just peel off the headlights
I added Glossifier to give it a sheen. Here is some sunshine to make it sparkle
I gave the tail the same treatment and added the tribal to the tail. Then I decided to enamel clear coat the tail so I don't rub the dip off om the sides where your legs sit.
I dipped the lowers in Matte Black, added the decals and Glossified over that.
Side fairings
Here is the tank after the enamel clear coat to protect it from gas drips and my knees. I also hope my stomp grip pads will stick better than to the dip.
Finishing up the nose piece. Love the fact you can just peel off the headlights