F4i front/600RR tail Full Write-Up for f2
#1
 04-06-2014, 09:03 AM


Okay this is my first write up so well see how this goes....
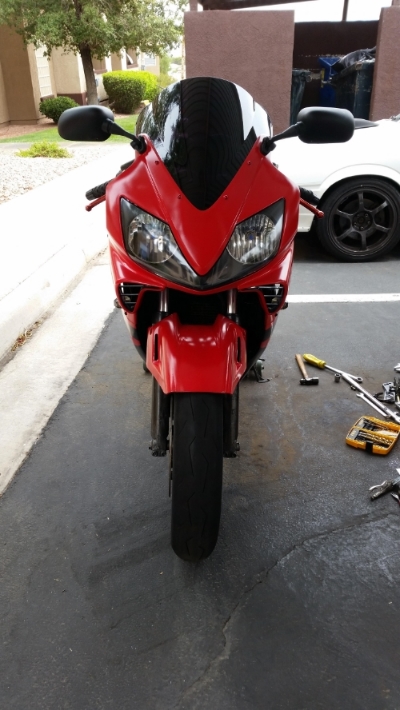
First i started off with my bike. It had some carb issues so I got them rebuilt and got it running right and it was time for a face lift. I got some inspiration for the f4i front and 600rr tail. I quickly learned there was alot of missing info in the DIYs so i managed a way myself, took pictures. Worked slowly on it as it was my winter project.
First I started off with ofcourse my bike and I purchased the following
Parts i purchased:
~F4i upper fairing
~F4i side fairings
~F4i Fairings stay ( 2 pieces)
~F4i windscreen
~F4i mirrors
~F4i headlight
~F4i ram air covers
~F4i guages
~600RR tail
~600RR front and rear seats
~600RR triangle tank guards
~Lots of MSC BOLTS and different shaped brackets
~600RR taillight with integrated blinkers
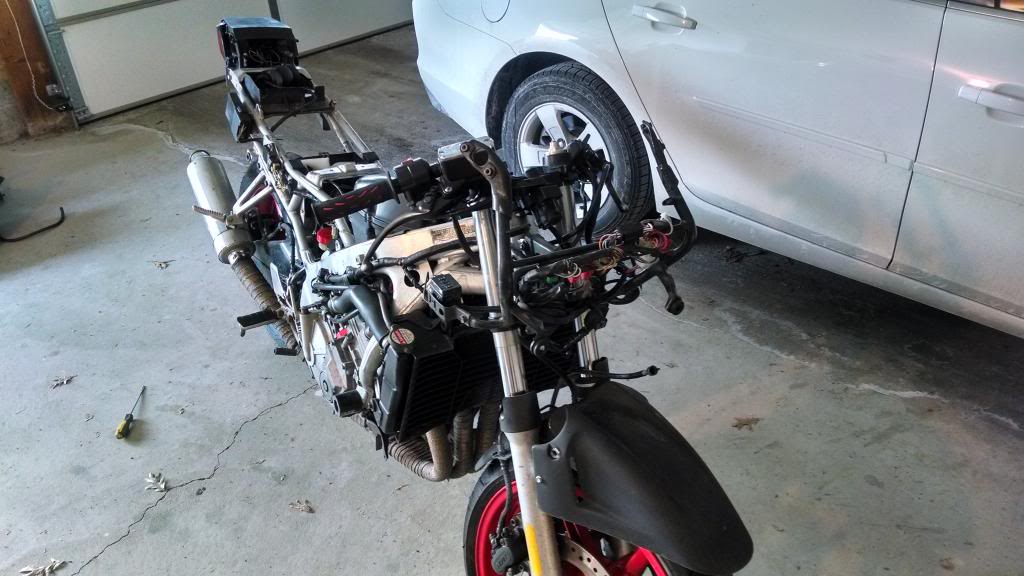
First start off with the bike
Then strip everyting down including the front fairing stay bracket. (careful removing it as i learned its worth alot of money. sold mine for like $130)
Mount the f4i fairing stay bracket and f4i gauges.
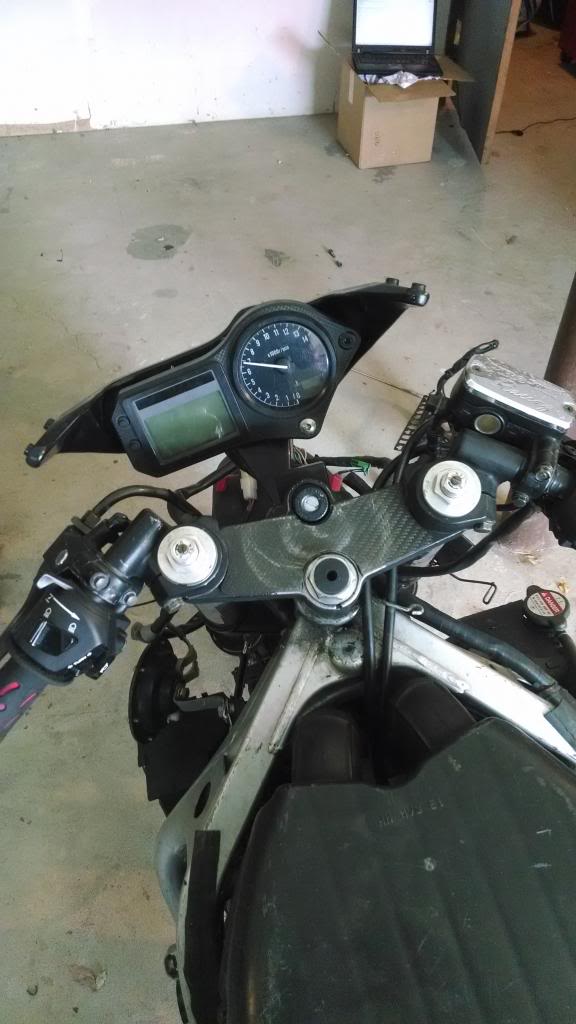
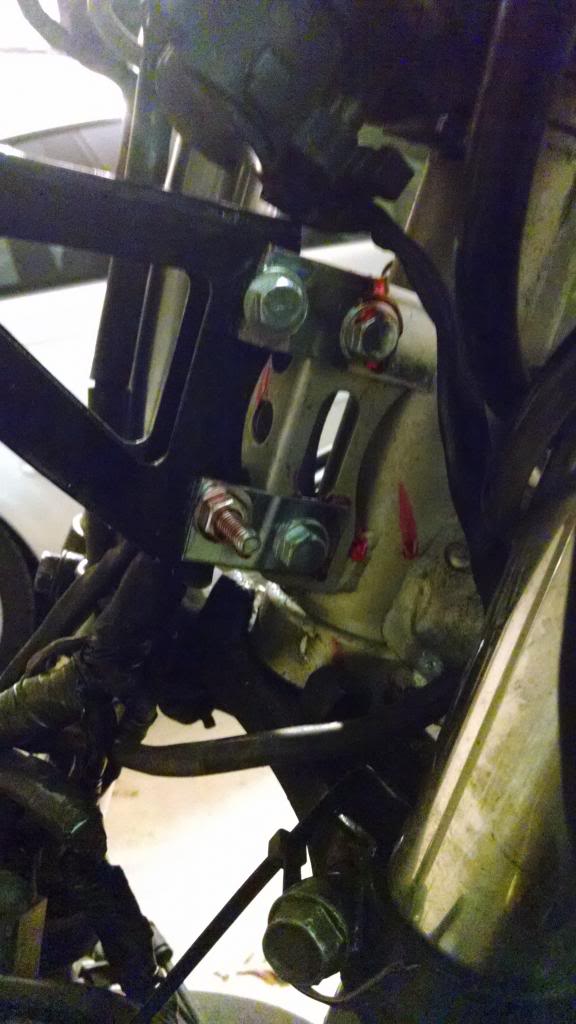
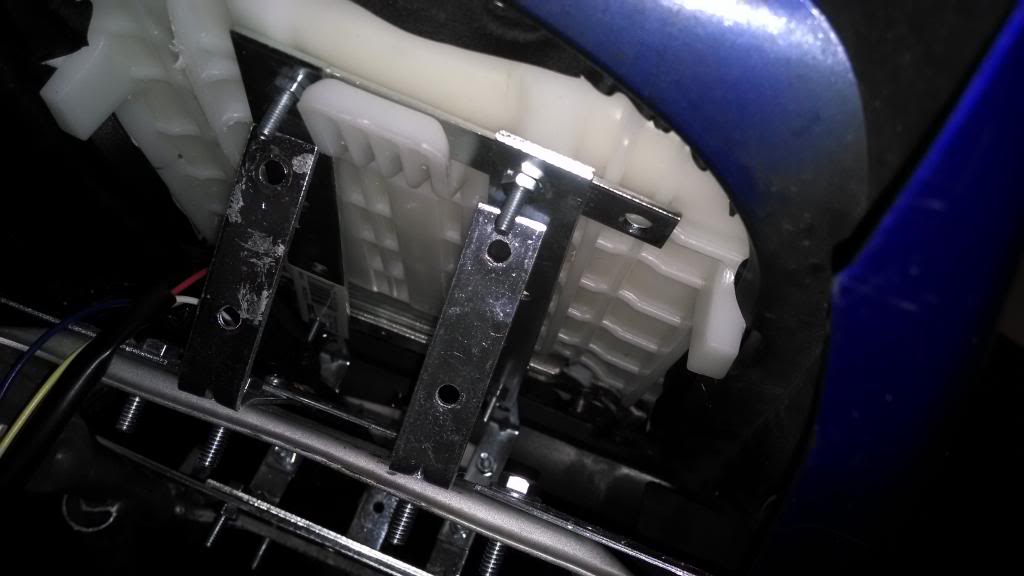
Dementedf3 did a pretty good writeup on how to mount the f4i fairings and gave a pretty good layout on where to cut plastics. I dont think it showed very well the bracket you needed to make to mount the fairing stay bracket so here is what i did. I took 2 straight pieces of bracket, hold everything up, mark it and drill 2 holes. I believe about 1.5'' apart? dont quote me on that though. USE LOCTITE
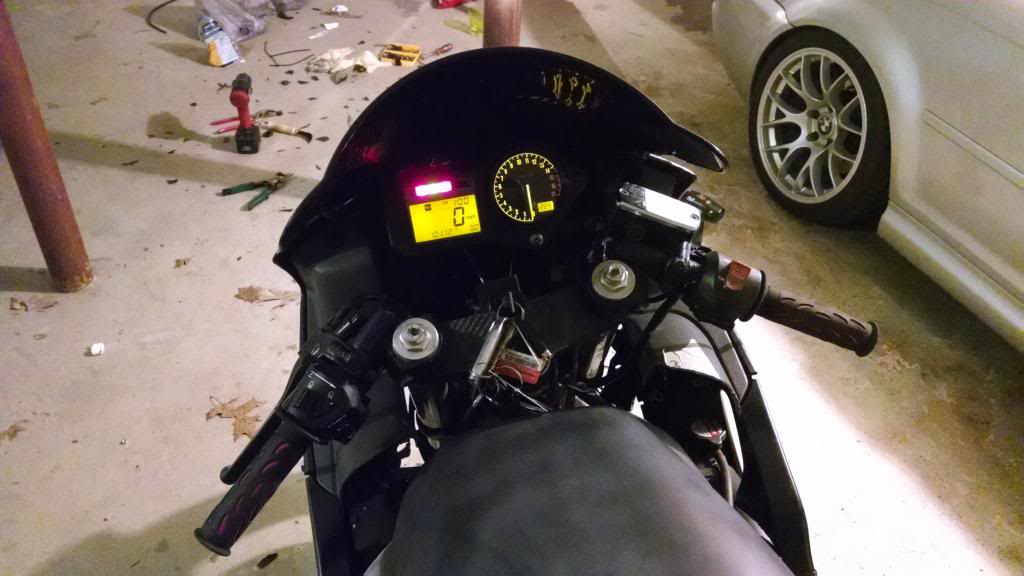
Next was wiring the gauges. Was a couple diagrams on the forums on the wiring pinouts I followed and it didnt work at all. dam near shorted out my gauges. So I took the time and make my own pinouts that make sense and they work. So cut the two plugs off the bike side and the gauge side. Some people use butt connectors, quick connectors. Use your own method. I used male/female connectors because it was a trial and error to get the right wire pinouts but here is what i came up with
Follow this:
F2_________________________________F4i
Gr/blue------------Temp------------- Gr/blue
Black/Brown------Ignition (+)-------Black/Brown
Brown----------Backlight illum------Brown/white
Yellow/bl--------Side Stand------White/blue (light will be FI indicator light)
Yellow/green------Tach------------Yellow/green
Blue/red----------Oil light----------- Blue/red
Light blue---------Turn-R-----------Light blue
Orange------------Turn-L------------Orange
Dark blue--------High Beam----------Dark blue
Light green/red----Neutral--------Light green/red
Green/black-------Ground-------------Green
Wire to battery (+) for f4i cloc------Red/green
Other wires from the f4i are for speed, fuel level and such
*EVERY WIRE FROM F2 IS BEING USED*
put the f4i bracket on, RAM AIR COVERS WILL HAVE TO BE CUT!!!! make sure the handle bars turn fully.
For the rest of the f4i fairing mounting, follow dementedf3. He shows very clearly what needs to be cut off the side pieces to make them fit right.
https://cbrforum.com/forum/cbr-600f3...r-f2-f3-52711/
Youll see its pretty self explanitory, just make em fit!
First i started off with my bike. It had some carb issues so I got them rebuilt and got it running right and it was time for a face lift. I got some inspiration for the f4i front and 600rr tail. I quickly learned there was alot of missing info in the DIYs so i managed a way myself, took pictures. Worked slowly on it as it was my winter project.
First I started off with ofcourse my bike and I purchased the following
Parts i purchased:
~F4i upper fairing
~F4i side fairings
~F4i Fairings stay ( 2 pieces)
~F4i windscreen
~F4i mirrors
~F4i headlight
~F4i ram air covers
~F4i guages
~600RR tail
~600RR front and rear seats
~600RR triangle tank guards
~Lots of MSC BOLTS and different shaped brackets
~600RR taillight with integrated blinkers
First start off with the bike

Then strip everyting down including the front fairing stay bracket. (careful removing it as i learned its worth alot of money. sold mine for like $130)

Mount the f4i fairing stay bracket and f4i gauges.

Dementedf3 did a pretty good writeup on how to mount the f4i fairings and gave a pretty good layout on where to cut plastics. I dont think it showed very well the bracket you needed to make to mount the fairing stay bracket so here is what i did. I took 2 straight pieces of bracket, hold everything up, mark it and drill 2 holes. I believe about 1.5'' apart? dont quote me on that though. USE LOCTITE

Next was wiring the gauges. Was a couple diagrams on the forums on the wiring pinouts I followed and it didnt work at all. dam near shorted out my gauges. So I took the time and make my own pinouts that make sense and they work. So cut the two plugs off the bike side and the gauge side. Some people use butt connectors, quick connectors. Use your own method. I used male/female connectors because it was a trial and error to get the right wire pinouts but here is what i came up with
Follow this:
F2_________________________________F4i
Gr/blue------------Temp------------- Gr/blue
Black/Brown------Ignition (+)-------Black/Brown
Brown----------Backlight illum------Brown/white
Yellow/bl--------Side Stand------White/blue (light will be FI indicator light)
Yellow/green------Tach------------Yellow/green
Blue/red----------Oil light----------- Blue/red
Light blue---------Turn-R-----------Light blue
Orange------------Turn-L------------Orange
Dark blue--------High Beam----------Dark blue
Light green/red----Neutral--------Light green/red
Green/black-------Ground-------------Green
Wire to battery (+) for f4i cloc------Red/green
Other wires from the f4i are for speed, fuel level and such
*EVERY WIRE FROM F2 IS BEING USED*

put the f4i bracket on, RAM AIR COVERS WILL HAVE TO BE CUT!!!! make sure the handle bars turn fully.
For the rest of the f4i fairing mounting, follow dementedf3. He shows very clearly what needs to be cut off the side pieces to make them fit right.
https://cbrforum.com/forum/cbr-600f3...r-f2-f3-52711/
Youll see its pretty self explanitory, just make em fit!
Last edited by Ricecooker; 05-03-2014 at 11:19 AM.
#2
04-06-2014, 09:03 AM
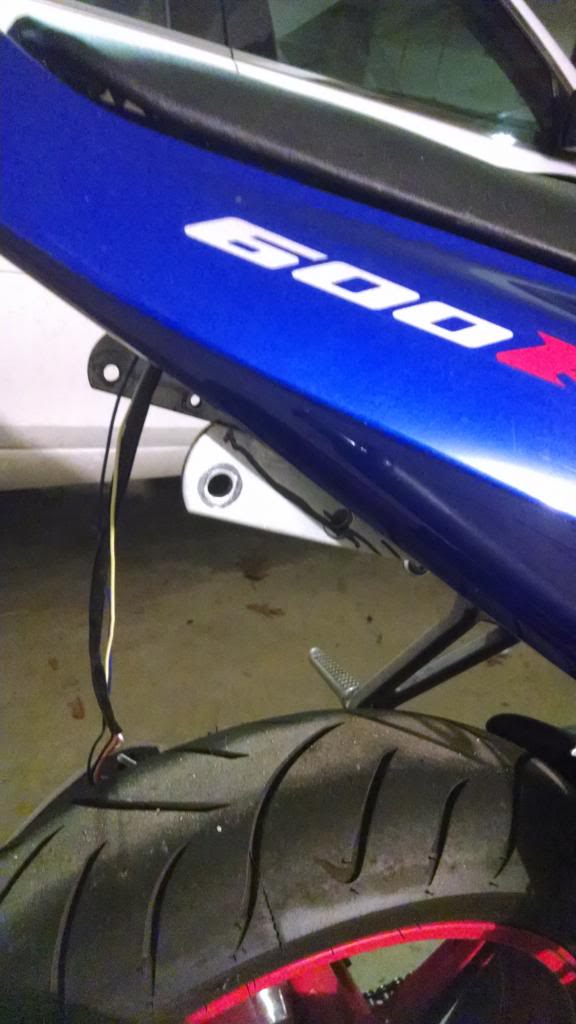
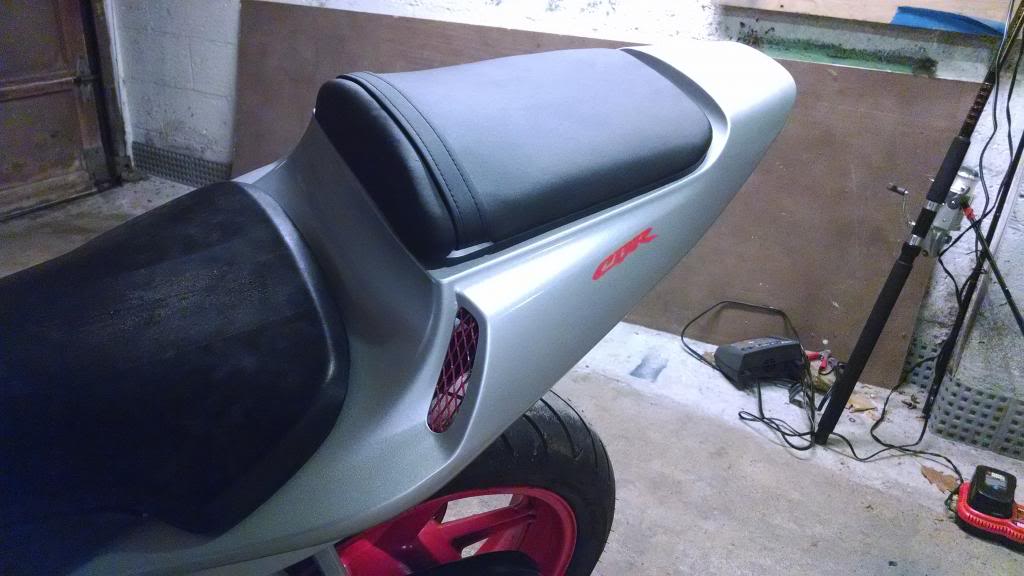
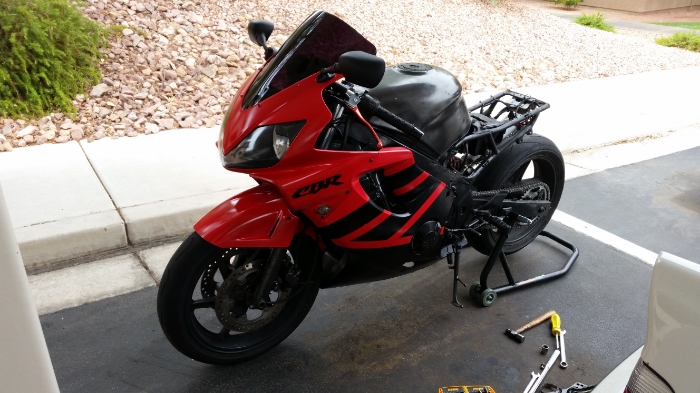
After the f4i fairings are all installed its time to tackle the bastard rear end. I found zero good DIYs on this and after attempting it I quickly began to understand why...
tried taking as many pictures as I could, but I was going in as blind as everyone else.
First lay on the 600rr tail to a way it seems it will look right and fit. Then draw lines on the frame so you know where it went
Then put on the triangle tank pieces and draw a line where those look like they fit
Then take some right angle brackets and tape them to the tail fairing until you get them positioned right then you can epoxy them on permanently
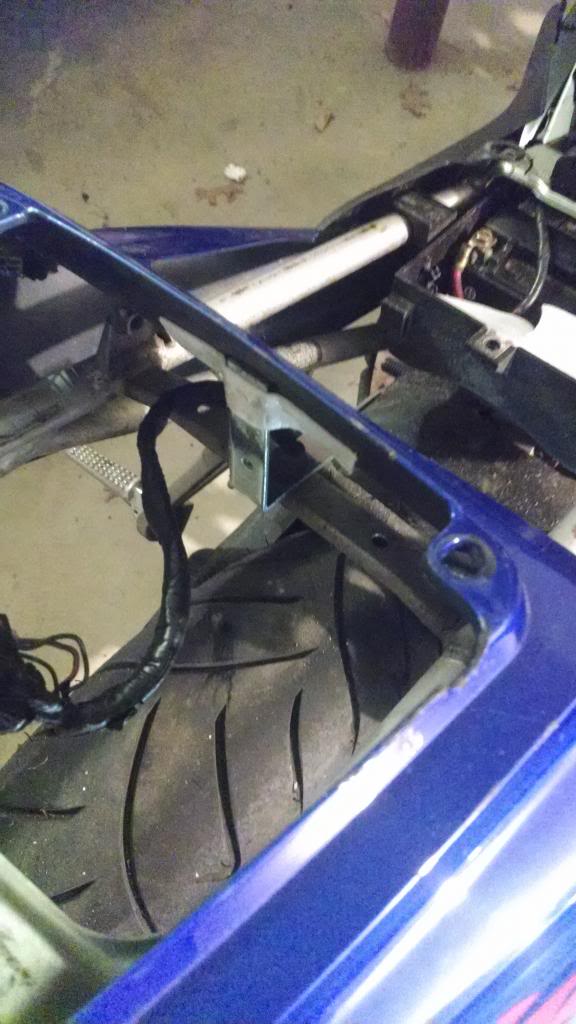

Where the brackets hit the bike frame, bolt them on
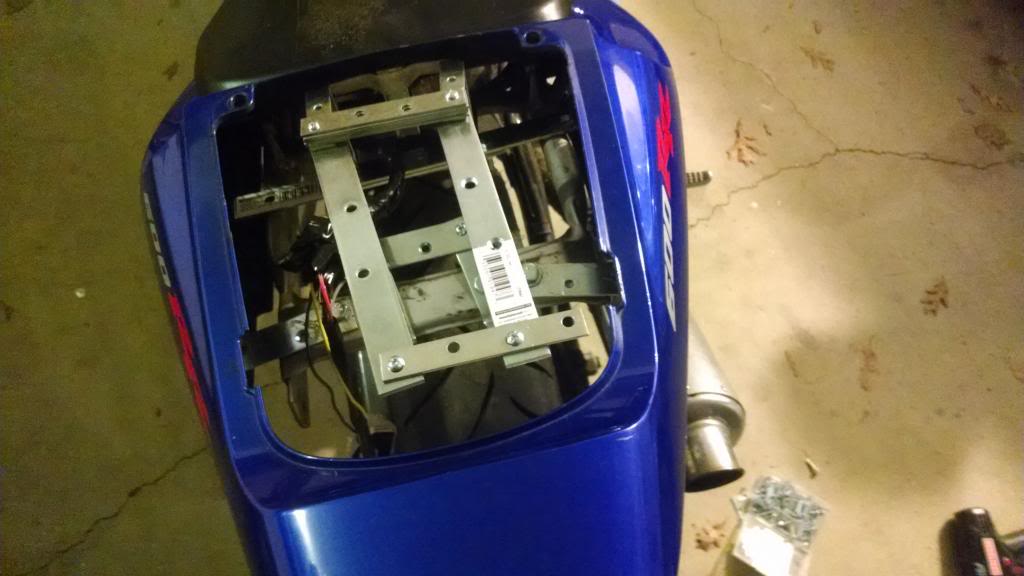
Next up was raising the rear seat. Because as you will quickly understand.... f2 and the 600rr seats dont line up what so ever. The rear seat needs to be raised over 2 inches. I started by taking brackets and bolting them onto the frame then building a raised frame... tough to explain
tried taking as many pictures as I could, but I was going in as blind as everyone else.
First lay on the 600rr tail to a way it seems it will look right and fit. Then draw lines on the frame so you know where it went

Then put on the triangle tank pieces and draw a line where those look like they fit

Then take some right angle brackets and tape them to the tail fairing until you get them positioned right then you can epoxy them on permanently


Where the brackets hit the bike frame, bolt them on
Next up was raising the rear seat. Because as you will quickly understand.... f2 and the 600rr seats dont line up what so ever. The rear seat needs to be raised over 2 inches. I started by taking brackets and bolting them onto the frame then building a raised frame... tough to explain


Last edited by Ricecooker; 04-06-2014 at 09:58 AM.
#3
04-06-2014, 09:04 AM

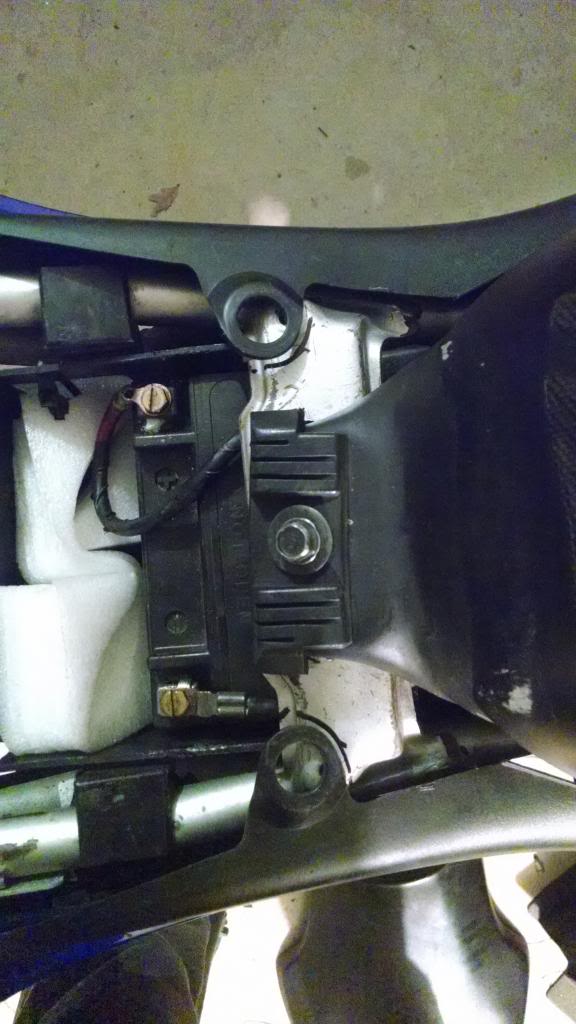
As you can see from one of the pictures above, the clip in the rear seat will clip into the back of the. I put velcrow on the front of the seat and in front of the bracket to hold down the front of the seat. It really isnt going anywhere. I had a couple different ideas on how to get it permanently mounted, bolted it down, I steel reenforce epoxy putty around some joints, it would work fine, but I later took it off and went back and welded all the joints.

After the rear seat bracket is made you need to make a bracket for the front seat. This one was alot easier but again it was trial and error.
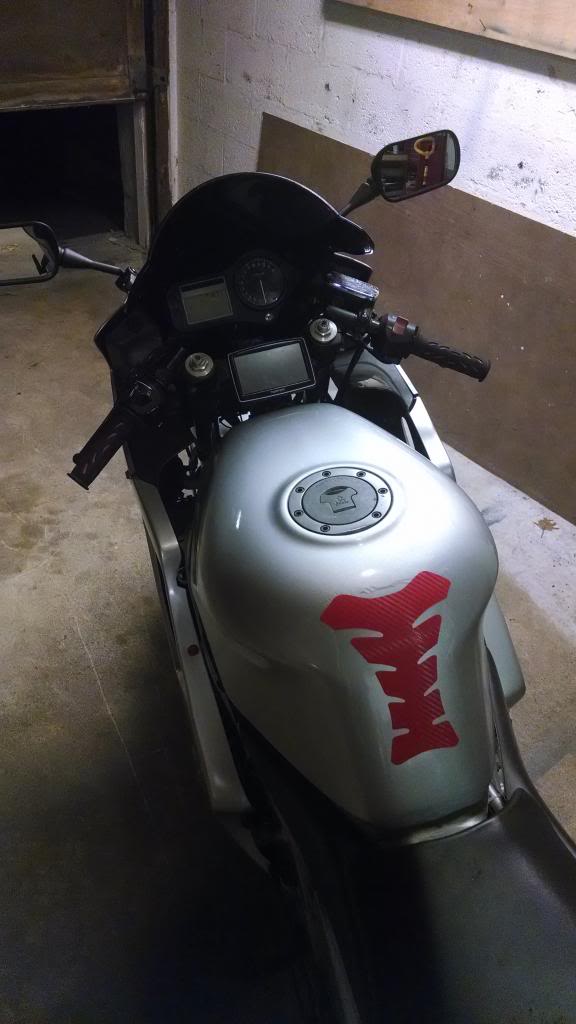
I took a long bracket like a 8 or 9 inch bracket and laid it over the battery from frame to frame and bolted it down. This will catch the hook on the front of the front seat. you will need to cut out some plastic from the front seat or it wont sit right around the fuel tank. Then for the rear of the seat, i raised up about an inch and a half to two inches in order for it to sit flush with the fairing and not crush it. I used a hose clamp at first to secure everything as it was trial and error but then later went back and permanently welded it all

from the f4i gauges, I decided not to have a functioning speedometer because I couldnt find room in my budget to make it work, but my gps has a speedo on it so I decided to wire up my gps. There is some extra room in the battery box so I bought a USB/power outlet for like $5 at walmart and wired it up to the battery. Took the gps charger and wired it along the inside of the frame and up to the center of the handle bars.

Last edited by Ricecooker; 04-06-2014 at 09:56 AM.
#4
04-06-2014, 09:05 AM
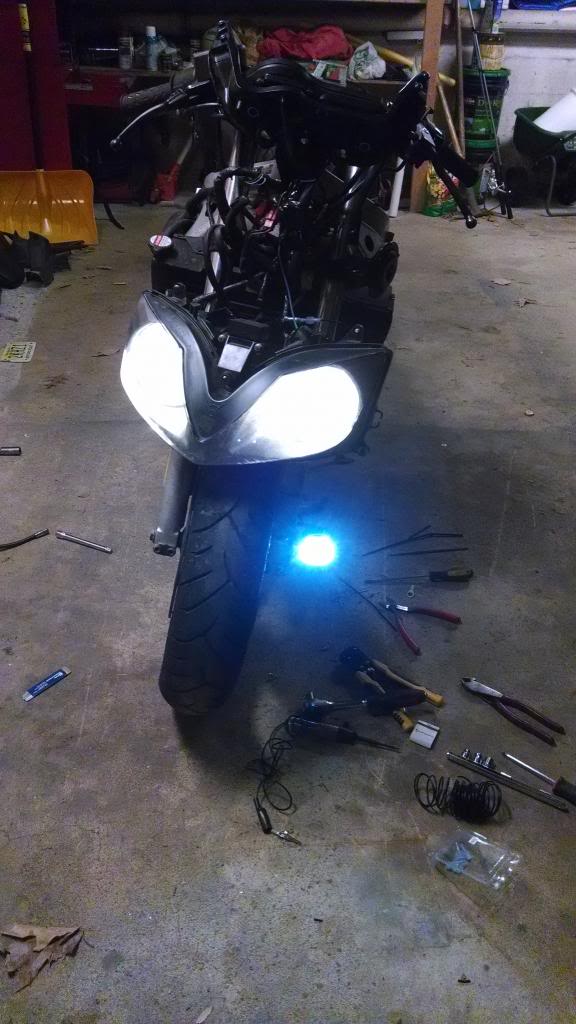
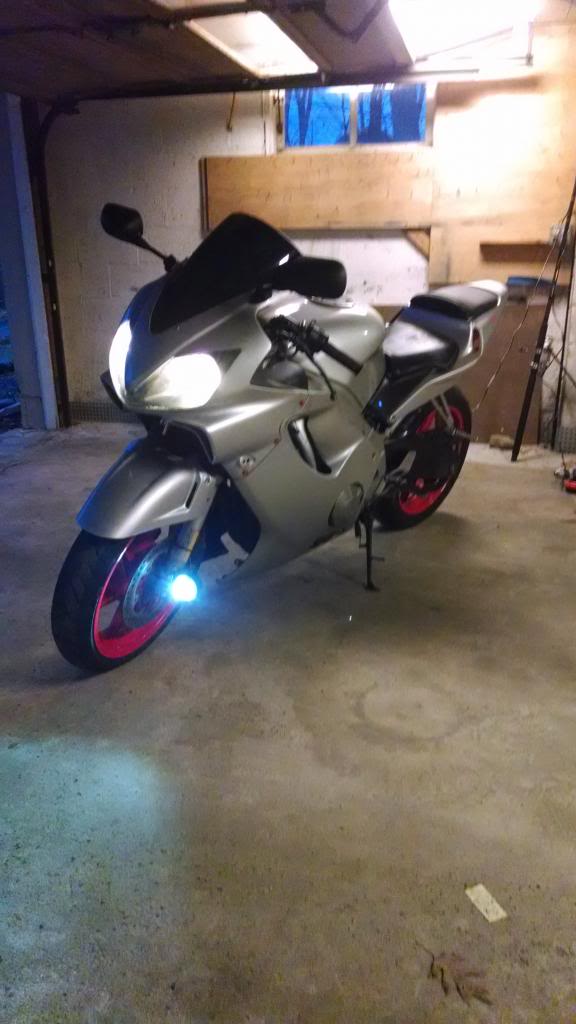
I then stripped off everything and sent the plastics out to get painted. (took forever to get them back but thats the price of getting a bargain) The f2 has a single headlight with dual filament bulb so the high beam is integrated. Now that we have 2 headlights, my bulbs were i believe H11 which were single filament bulbs. So I wired them up to run together, which then caused me to not have a high beam. Flipping the high beam switch caused the headlights to shut off. So I changed the wiring around. I wired the power to the headlights to the ignition + wire so they would be on when the key is on. Then I bought a mini fog light and wired it up to the Highbeam wire, and grounded it to the axle. Now my headlight lights always stay on when the bike is on, and i have a functional high beam switch to switch on and off the fog light.
I also got a 600rr taillight with integrated amber side markers and such and wired them up to the original taillight wiring. Im not going to post a diagram because depending on the light you buy, theyre all different wires but it was really basic.
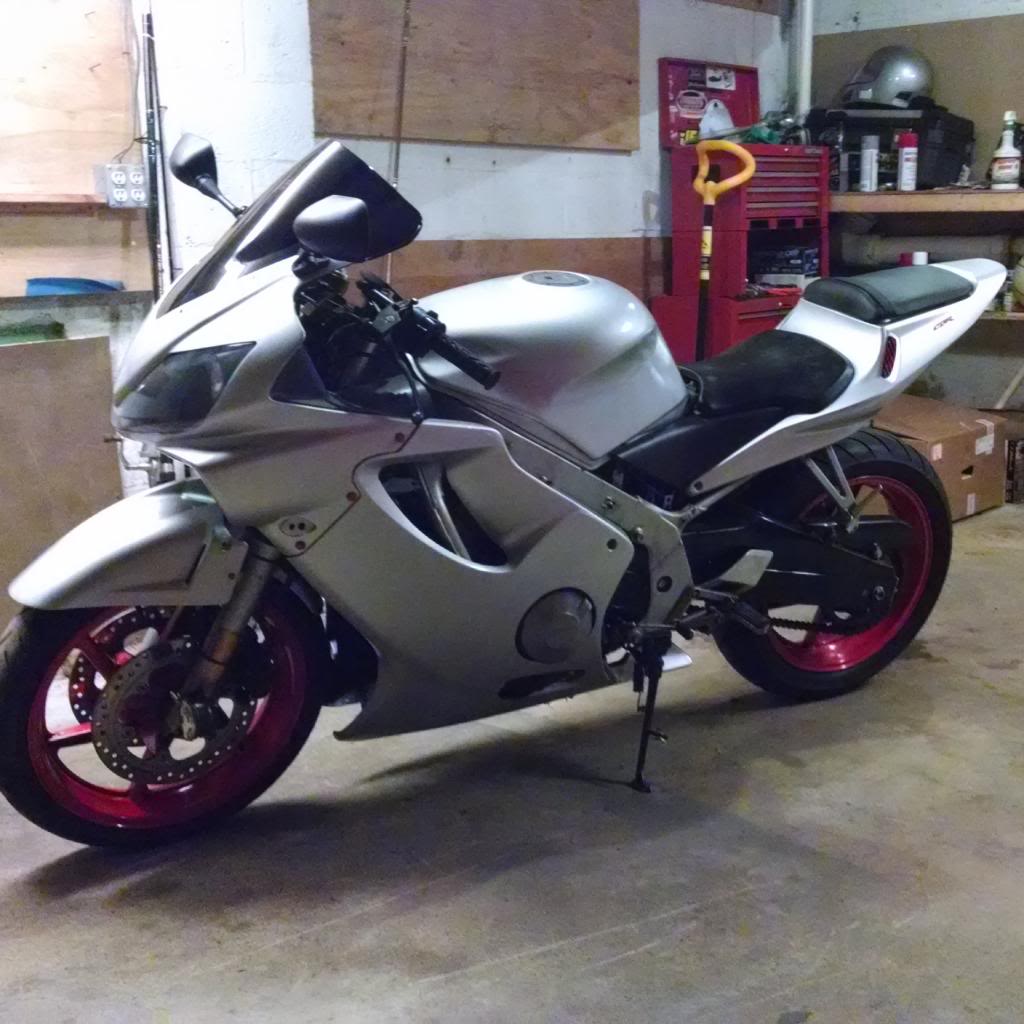
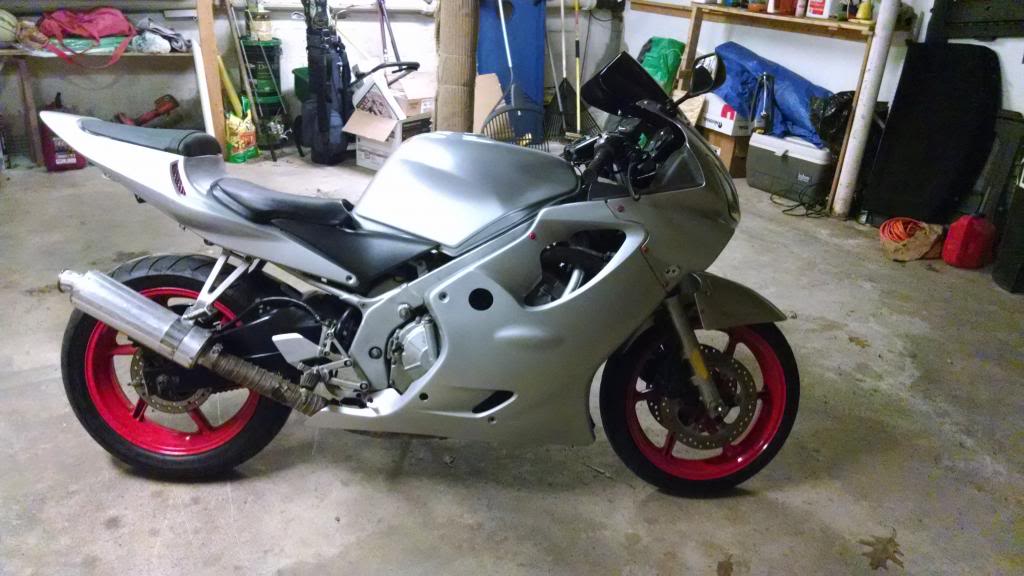
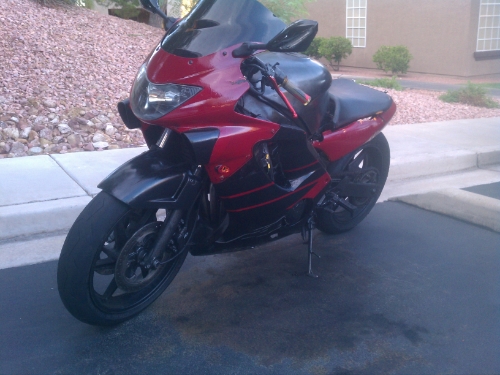
After about a month I got my plastics back, I bought some red stickers, painted the mounting bolts red to match the wheels and painted the expanded metal mesh in the RR tail red also. Mounted the GPS to the center of the handle bars and put it all back together. This is the final product.....

I also got a 600rr taillight with integrated amber side markers and such and wired them up to the original taillight wiring. Im not going to post a diagram because depending on the light you buy, theyre all different wires but it was really basic.
After about a month I got my plastics back, I bought some red stickers, painted the mounting bolts red to match the wheels and painted the expanded metal mesh in the RR tail red also. Mounted the GPS to the center of the handle bars and put it all back together. This is the final product.....
Last edited by Ricecooker; 04-06-2014 at 09:55 AM.
#5
04-06-2014, 09:07 AM
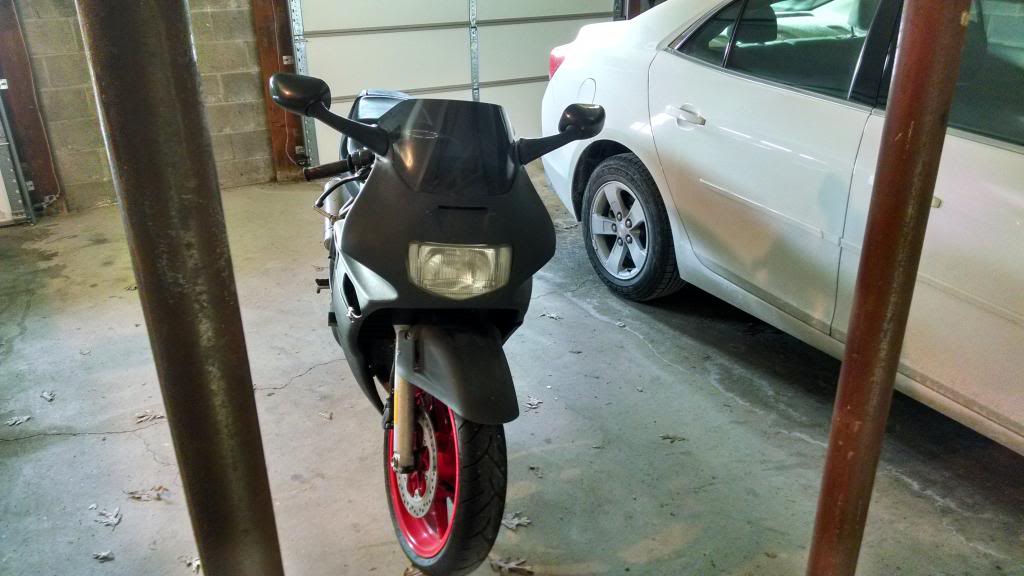
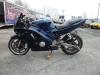
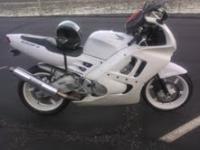
Before...

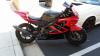
After
I hope this can help. Ill be going back and editing as I find issues. Was my first write up so please give me some input please...
Thanks for looking,
Kevin
p.s. ill try to post a video of the gauges working well with my wiring pinout

After


I hope this can help. Ill be going back and editing as I find issues. Was my first write up so please give me some input please...
Thanks for looking,
Kevin
p.s. ill try to post a video of the gauges working well with my wiring pinout
Last edited by Ricecooker; 04-06-2014 at 09:53 AM.
#6
04-06-2014, 10:53 AM
#7
04-18-2014, 07:10 PM
#8
04-19-2014, 10:42 AM
Senior Member
Join Date: Oct 2011
Location: Central WA./BFE
Posts: 307
Likes: 0
Received 0 Likes
on
0 Posts
#9
04-19-2014, 06:12 PM
#10
08-07-2014, 04:32 AM
Member
Decided to finally tackle this swap after reading your writeup for a bit now.
Here is the front and sides done. Still need to wire up the headlight and im also doing the 05 600rr tail swap hopefully today.
Thanks for taking the time to document your bike as it made me much more at ease about doing this.
Plus this needs to be at the top for future reference. Should be a sticky if it isn't somewhere already.
Here is a before pic.
And now after and almost finished