'92 Stripper Project
#21
#22
Then when I had the wheel off, I noticed The "drive flange" with the sprocket was wobbly against the face of the wheel, or the "cush drive" housing. Sorry If im using wrong terms :P
The drive flange was on tight enough, but it was not seated flat, and easily wobbled. It would not sit flat.
I pulled it off and did not see anything obvious obstructing it yet. I'll have to check if it's warped.
The rubber weights in the housing, two sets of them have broken loose of the little bridges that keep them together. That might be an easy enough fix.
That cush drive spacer is 'beaten', wft? You may want to very little sand any high spots off that space.
The cush drive rubbers get old. If one is broken, it's time to replace them all. they'll make the bike ride smoother and take the shock off the transmission.
#23
The cush drive with sprocket is suppose to have some space between it and the rim. When it's off the bike it will have some wobble to it. This is normal. The cush drive bearings tend to go out the quickest. If it turns smooth and is in straight, then it's probably ok.
That cush drive spacer is 'beaten', wft? You may want to very little sand any high spots off that space.
The cush drive rubbers get old. If one is broken, it's time to replace them all. they'll make the bike ride smoother and take the shock off the transmission.
That cush drive spacer is 'beaten', wft? You may want to very little sand any high spots off that space.
The cush drive rubbers get old. If one is broken, it's time to replace them all. they'll make the bike ride smoother and take the shock off the transmission.
I think the wobble was from build up on the lip. After cleaning it, it sits flat all the way around.
I've got a small file that will take off the ridges of that spacer, and smooth it out. I recently started making coin rings, so this is one thing I actually know how to do.
I've already removed all the bearings on the rear wheel. They might of been ok, but new ones are inexpensive. That and I wanted to learn the process.
Better to practice on this bike, than something newer I may buy in a couple of years.
I've decided that once I'm done stripping, that the bike will become a street fighter. I prefer fairings honestly, but I can't see putting the money into full fairings, even chinese ones, onto this bike.
My main goal is to come up with a cover, or a redesign, for the subframe.
That and some kind of cowl for the front.
But that is a ways away.
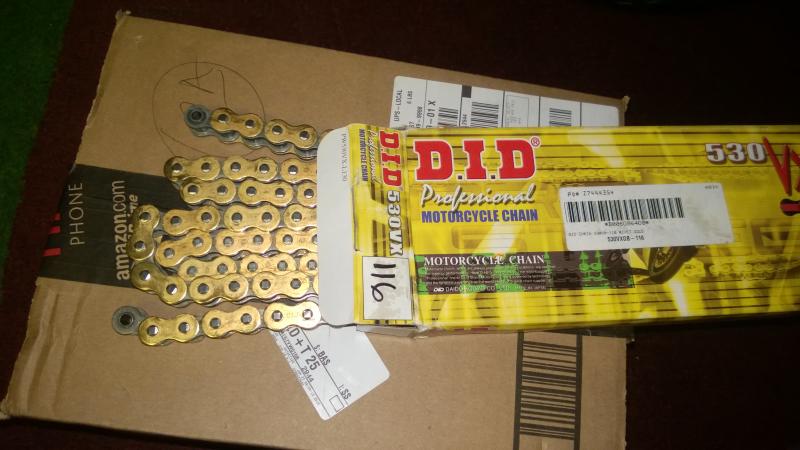
Todays goal is check on valve clearance. That and possibly order a carb jet kit.
#24
A couple of things in case you didn't already know:
When fitting the new bearings to the rim, pop them into a freezer for a couple of hours/overnight before fitting them, it will make them a wee bit smaller and they will go in place much more easy. Work quickly but in a calm manner, make sure thw bearing stays straight or it might wedge itself pretty well.
If you have to fit the bearings by hitting them, never ever hit a new bearing to the center, always to the outer ring. You can make a handy tool out of the old bearing by cutting the outer ring from one place with an angle grinder and gutting the insides so that you're left with only the outer part. Use a rubber mallet or a block of wood in between, never hit a new bearing with anything metal or it might get damaged.
Last edited by Mattson; 01-29-2015 at 10:20 PM.
#25
A couple of things in case you didn't already know:
When fitting the new bearings to the rim, pop them into a freezer for a couple of hours/overnight before fitting them, it will make them a wee bit smaller and they will go in place much more easy. Work quickly but in a calm manner, make sure thw bearing stays straight or it might wedge itself pretty well.
If you have to fit the bearings by hitting them, never ever hit a new bearing to the center, always to the outer ring. You can make a handy tool out of the old bearing by cutting the outer ring from one place with an angle grinder and gutting the insides so that you're left with only the outer part. Use a rubber mallet or a block of wood in between, never hit a new bearing with anything metal or it might get damaged.
When fitting the new bearings to the rim, pop them into a freezer for a couple of hours/overnight before fitting them, it will make them a wee bit smaller and they will go in place much more easy. Work quickly but in a calm manner, make sure thw bearing stays straight or it might wedge itself pretty well.
If you have to fit the bearings by hitting them, never ever hit a new bearing to the center, always to the outer ring. You can make a handy tool out of the old bearing by cutting the outer ring from one place with an angle grinder and gutting the insides so that you're left with only the outer part. Use a rubber mallet or a block of wood in between, never hit a new bearing with anything metal or it might get damaged.
I might overdo both and end up with melty steamy stuff.
#26
#27
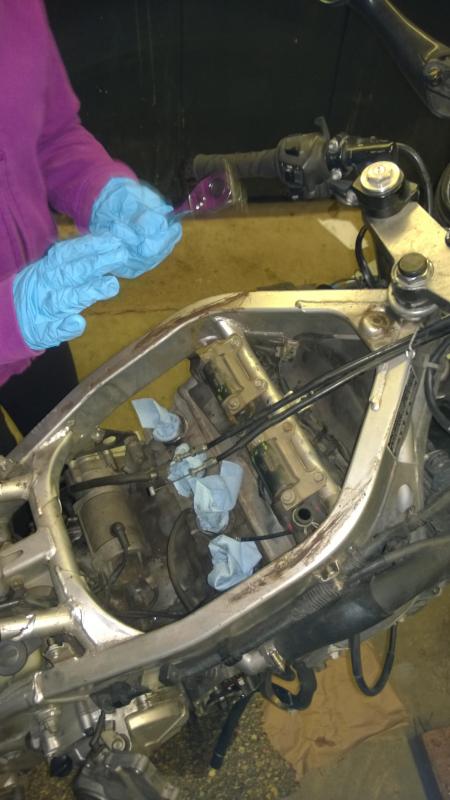
So I had my daughter help remove the radiator, coils and valve cover. Free labor!

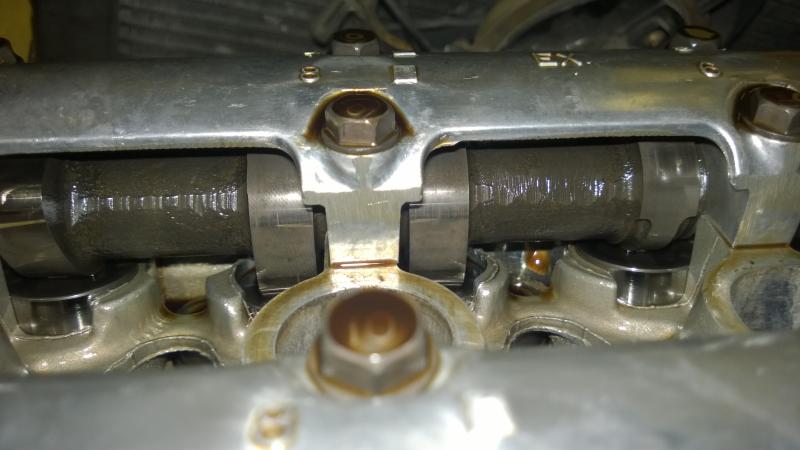
The top side looks to be in great shape. No carbon buildup or varnish.
The lobes are all smooth, no signs of scoring.
I only checked clearance on the 1st set so far, but they were dead on.

Only issue up top, was a small oil leak coming from one of the valve cover bolt/grommets. The back left rear. Not sure if it was slightly loose, or bad grommet. But will likely replace.
Last edited by Existenz_is; 01-30-2015 at 09:54 PM.
#28
I've replaced literally dozens of wheel bearings, more than a few on the side of the road too, and I've never had to freeze or heat anything. Just a FWIW. Cars are a whole different story, but bike just don't see the same harsh environment. I usually just tap it slowly into place using the old bearing.
Last edited by Phil314; 01-30-2015 at 11:35 AM.
#29
I've replaced literally dozens of wheel bearings, more than a few on the side of the road too, and I've never had to freeze or heat anything. Just a FWIW. Cars are a whole different story, but bike just don't see the same harsh environment. I usually just tap it slowly into place using the old bearing.
You carry spares???
#30
Absolutely. Most of the time I carry an emergency box under the seat. It contains least a pair of levers, bearings, fuses, reg/rec, zip ties, safety wire, assorted nuts/bolts, tire patch kit. And probably a couple other things I cant remember at the minute. I've also got a spare clutch cable zip tied inside my tail section. This stuff has save my butt on more than one road trip. Went from MN to AZ and back last year. And there were areas where I didn't see anyone for hours. Got to bring spares and be MacGyver.
Your frame pic shows the same wear marks as mine at the corners from the gas tank. Get some new rubbers under the tank. Keeps it from rocking side to side and digging into the frame.
Your frame pic shows the same wear marks as mine at the corners from the gas tank. Get some new rubbers under the tank. Keeps it from rocking side to side and digging into the frame.
Last edited by Phil314; 01-30-2015 at 01:33 PM.


