Bleeding Brakes - success and my story.
#1
 06-05-2011, 09:43 AM


Join Date: Jun 2011
Posts: 7
Likes: 0
Received 0 Likes
on
0 Posts
I will start out that I probably should have named the thread, "Bleeding Brakes - My stupidity, shame, and read the instructions COMPLETELY."
First, thanks for this forum and the manual posted. Greatly appreciated, hope I can return the favor someday.
On to the story and troubleshooting.
I've bled brakes on both cars and motorcycles with no problem. I feel I'm pretty handy with a wrench as I"ve done spark plugs to swapping out an automatic transmission and made it a manual transmission in my mustang. So bleeding brakes, cake!
Here are some major points:

So, if you're doing it right the sequence should be as you have read on the forum, but I"ll repeat with some added comments.
Turn your handlebars/clip ons full to the left. This will raise the front brake resevoir level and high so it doesn't drip out when you unscrew the cap and dribble brake fluid all over your bike and on top of your horn and radiator.
Remove cap, white sealer cap and black rubber (like my technical terms?)
Start with front brakes. The two brake valves on the right and left side of the bike, front facing or "highest" onest are for the front brake. Do the right side first, then the left side.
Make sure you've loosened the allan screw that is above the left side caliper. Remember, find the flat black cap where it looks like there should be a screw, put your fingernail or something similar underneath it pop it off and turn the screw counter-clockwise to open.
Remove the right hand side panel above the brakes (smaller panel, not your full fairing) and that will expose the rear brake master cylinder. See above comments and shop manual for details.
Unscrew the top, remove the white ring, and then remove the black rubber seal. You should be able to look down and see a small hole where the brake fluid goes down to the rear master cylinder.
Follow the sequence for bleeding the rear brake. Yes, you're working on the front caliper bottom bleeder valve (now isn't that weird, and remember to push on the REAR brake, not the handlebar lever--yes, made that mistake at first, too--its weird). Do the front caliper bleeder valves first, then the rear. The rear is the rear most first, then the second one in next and last.
You can pump the rear brake lever with your hand, but I found giving it a good even hard press with my feet while using my Autozone vacuum gun gave it a good pull and some pretty big bubbles came out. It then firmed up even further and immediately--no sinking brake pedal, very firm.
Remember to tighten up snugly the bleeder valves, but not too tight as you can easily break them off if you're too enthusiastic. They just need to seal, so "snug" fit is better than "tight" fit. Don't forget to close that allan head screw above the front left caliper and put the cap back on. Finally, wipe down and clean everywhere that brake fluid might have touched. You wouldn't want somebody to put paint remover on your bike and leave it there now would you?
Well, thats my story. Hope it was helpful. Appreciate all the posts on this board, kept me from going insane trying to figure this out. Read the instructions completely and fully-versus what I did and try it by the seat of your pants. It doesn't work that way, its a bit more complicated than it seems, but still straightforward.
Good luck and happy trails.
.
First, thanks for this forum and the manual posted. Greatly appreciated, hope I can return the favor someday.
On to the story and troubleshooting.
I've bled brakes on both cars and motorcycles with no problem. I feel I'm pretty handy with a wrench as I"ve done spark plugs to swapping out an automatic transmission and made it a manual transmission in my mustang. So bleeding brakes, cake!
Here are some major points:
- There are two resevoirs There is an obvious one on the handlebar right hand side.
- NO, the resevoir on the left hand side is a clutch resevoir. Although sneaky bastards have written on it, "Use DOT 4 Brake Fluid Only", which any normal person would think, hey, must be the rear brake resevoir! (Even though the clutch is attached to it-yes, laugh at newbies, but I made that mistake, too). It is NOT the resevoir for the rear brakes.
- Speed bleeders and vacuum pump are your friends. The vacuum pump is around $35 at Autozone, get one its your friend.
- Speed bleeders, I think they are definitely worth it, especially on a motorcycle with SIX bleeder valves. Yes, my eight year old daughter is helpful, but sometimes you need to do stuff yourself. That and it prevents air from going back into the lines.
- There is an allan screw from another master cylinder that is above the brakes, next to the fork, and tucked under the fairing. There is a cap that looks like a miniature golf marker that hides the allan head screw, pop the cap off to access the allan screw. Look at the instruction pdf in this forum.
- Important! The rear brake resevoir is tucked behind the right hand panel just under the seat. Its right above and behind the rear brake pedal. Remove the panel to access the reservoir
- Now you're thinking, I need to take off the seat to fill that damn thing up, who thought of this set-up? Read the instructions, remove the single bolt holding the resevoir and you can then move it towards you and fill it up that way.
- NOTE!!! Ok, I'm stupid,- go ahead and think and say it out loud as you read the following, but this is where I ran into problems. Remove the white ring and then remove the black seal/cup in the rear resevoir. If you've had a leak (or done something as I did and pumped the brakes with the black rubber seal in, the rubber extends into what looks like a cup, that LOOKS like the cup for the rear resevoir, but is what becomes a barrier between the brake fluid you've put in, mistakenly thinking that was the resevoir, and the real resevoir. So you can pump away, the brake fluid won't go down, and you'll think damn, my master cylinder is bad--its not. Remove EVERYTHING from the resevoir so its just a plain clear cup.

So, if you're doing it right the sequence should be as you have read on the forum, but I"ll repeat with some added comments.
Turn your handlebars/clip ons full to the left. This will raise the front brake resevoir level and high so it doesn't drip out when you unscrew the cap and dribble brake fluid all over your bike and on top of your horn and radiator.
Remove cap, white sealer cap and black rubber (like my technical terms?)
Start with front brakes. The two brake valves on the right and left side of the bike, front facing or "highest" onest are for the front brake. Do the right side first, then the left side.
Make sure you've loosened the allan screw that is above the left side caliper. Remember, find the flat black cap where it looks like there should be a screw, put your fingernail or something similar underneath it pop it off and turn the screw counter-clockwise to open.
Remove the right hand side panel above the brakes (smaller panel, not your full fairing) and that will expose the rear brake master cylinder. See above comments and shop manual for details.
Unscrew the top, remove the white ring, and then remove the black rubber seal. You should be able to look down and see a small hole where the brake fluid goes down to the rear master cylinder.
Follow the sequence for bleeding the rear brake. Yes, you're working on the front caliper bottom bleeder valve (now isn't that weird, and remember to push on the REAR brake, not the handlebar lever--yes, made that mistake at first, too--its weird). Do the front caliper bleeder valves first, then the rear. The rear is the rear most first, then the second one in next and last.
You can pump the rear brake lever with your hand, but I found giving it a good even hard press with my feet while using my Autozone vacuum gun gave it a good pull and some pretty big bubbles came out. It then firmed up even further and immediately--no sinking brake pedal, very firm.
Remember to tighten up snugly the bleeder valves, but not too tight as you can easily break them off if you're too enthusiastic. They just need to seal, so "snug" fit is better than "tight" fit. Don't forget to close that allan head screw above the front left caliper and put the cap back on. Finally, wipe down and clean everywhere that brake fluid might have touched. You wouldn't want somebody to put paint remover on your bike and leave it there now would you?
Well, thats my story. Hope it was helpful. Appreciate all the posts on this board, kept me from going insane trying to figure this out. Read the instructions completely and fully-versus what I did and try it by the seat of your pants. It doesn't work that way, its a bit more complicated than it seems, but still straightforward.
Good luck and happy trails.
.
#2
06-05-2011, 08:11 PM

#3
06-05-2011, 09:48 PM

#4
06-08-2011, 10:19 PM
Join Date: Jun 2011
Posts: 7
Likes: 0
Received 0 Likes
on
0 Posts
Thanks, glad to find this forum. I had a CBR600F2 in 1993, but it was stolen out of an underground garage. Most recently had an RC51, but sold it. Friend had a CBR1000F and was headed to Brazil and asked if I wanted it. Free bike, hey, why not and I love the paint scheme on it. Never was a fan of the linked brake--and more so now. 
My friend turned me onto this forum, she just bought an F3 and is going through it right now, brakes, throttle cable, etc.,
.
My friend turned me onto this forum, she just bought an F3 and is going through it right now, brakes, throttle cable, etc.,
.
 ....... so pics ????
#6
06-09-2011, 08:55 PM
#7
06-09-2011, 10:38 PM
Join Date: Jun 2011
Posts: 7
Likes: 0
Received 0 Likes
on
0 Posts
Appreciate the advice on the front tire, good to know.
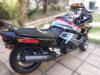
Here are some pics. Drove it from Houston to Washington, DC
.
Last edited by guarddog11; 01-19-2017 at 05:31 AM.
#8
01-05-2017, 10:40 AM
Join Date: Jun 2011
Posts: 7
Likes: 0
Received 0 Likes
on
0 Posts
#9
01-05-2017, 06:08 PM