My F4 mod log
#1
 06-06-2012, 12:38 AM


Join Date: May 2012
Posts: 71
Likes: 0
Received 0 Likes
on
0 Posts
This is to document the progress of modifications made to my 2000 F4.
Soon I intend to create a list of the desired changes and those already made, in addition to any that may be currently in progess. This will help me stay organized as well as hopefully providing some entertainment for You.
Enjoy, I guess. Any constructive thoughts will be appreciated.
First thing is to install my new brake lines.
I will be following
to bleed my brakes and install new fluid.
Soon I intend to create a list of the desired changes and those already made, in addition to any that may be currently in progess. This will help me stay organized as well as hopefully providing some entertainment for You.
Enjoy, I guess. Any constructive thoughts will be appreciated.
First thing is to install my new brake lines.
I will be following
Last edited by Edward Tristram; 06-06-2012 at 12:50 AM. Reason: forgot something

#3
06-11-2012, 03:38 AM
Join Date: May 2012
Posts: 71
Likes: 0
Received 0 Likes
on
0 Posts
Still waiting on the brake lines. Just read a great guide on hooking up a usb port to your bike and I had a lot of fun SOLDERING for the first time in about 8 years... fixed a broken connection on my wife's scooter. Anyway it got me thinking about toying around with electronics again and long story short I went to radioshack and started checking out all their cool switches and lights and stuff and now I want to make something.
I don't really ever need a usb port but I think it'll be fun and who knows, it'll probably come in handy some day so I just ordered one for like 3 bucks and I'm gonna hook it up sometime in July when it gets here (shipping was free, you pretty much get what you pay for).
Now I just need a reason to install a new light on my dashboard and a big-*** switch and I'll be bouncing with joy. I guess I'll post a picture log when I do that stuff, since I'm pretty much a novice and it might be helpful for those who are utterly intimidated by electronics yet a bit curious...


#5
06-27-2012, 01:03 AM
Join Date: May 2012
Posts: 71
Likes: 0
Received 0 Likes
on
0 Posts
K, so mostly for fun and starting on my girl's bike in case I mess up  I'm installing a usb port. I'm adding an led light inline that hopefully will light up only when something is plugged in, cause I wanted to use an led for something.
I'm pretty much following this guide verbatim. It's very informative and concise, so use that as a reference; this is really just here for me to keep note and records of the stuff I've done to my bike.
So here's the little setup I made that will be mounted to her fairings somewhere convenient:
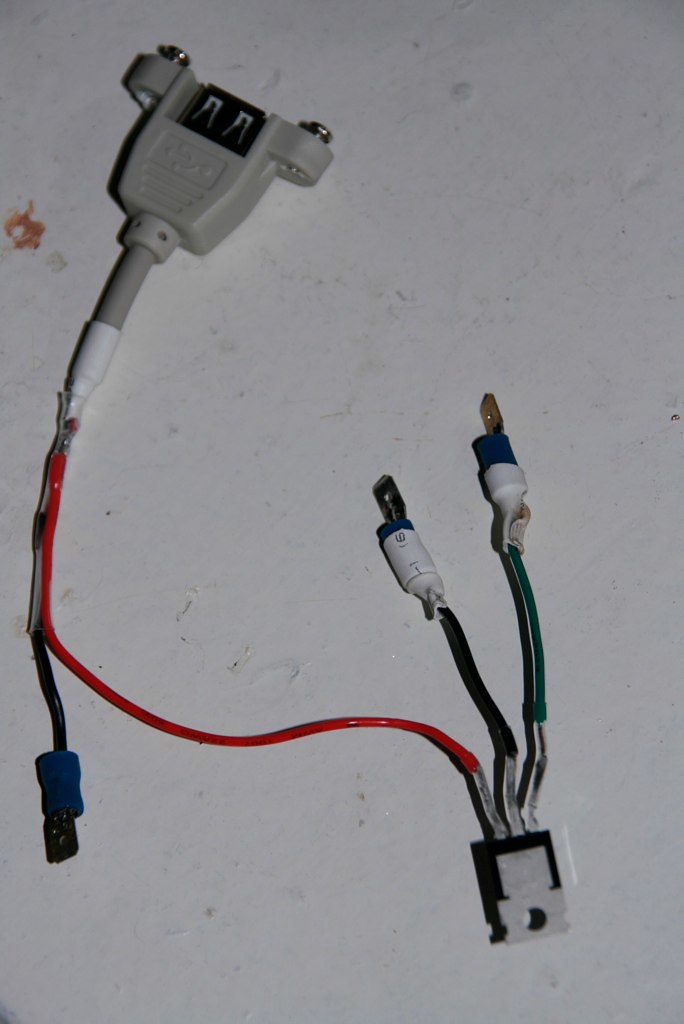
Note that I've been using these little detachable blue connectors in case I have to take stuff apart later.
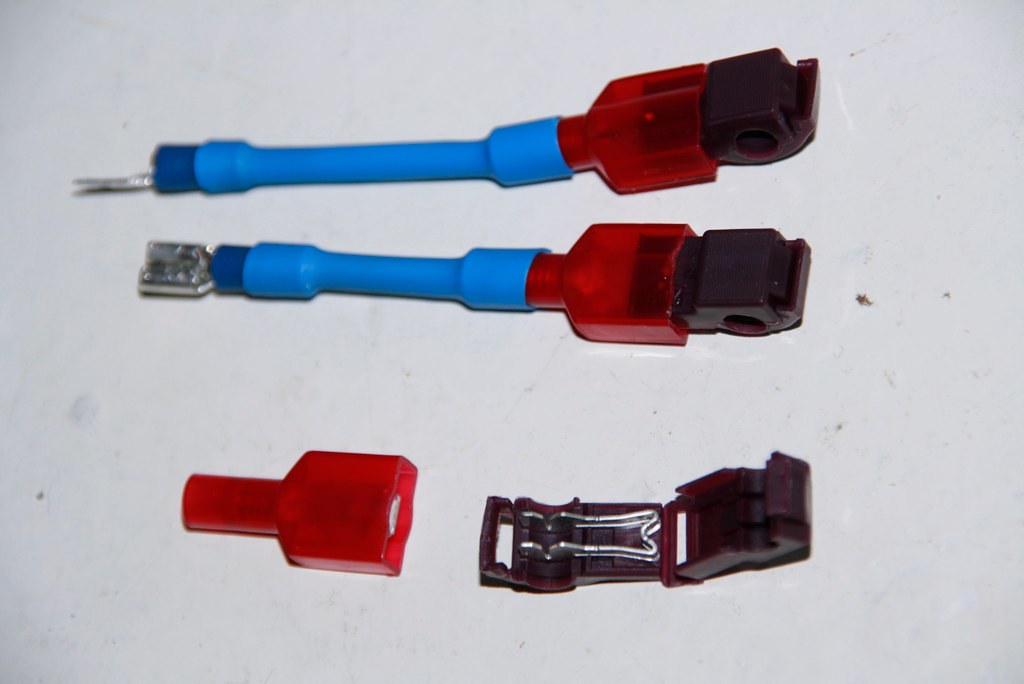
And the purple and red things are great cause they kind of clamp on to an exposed section of wire and then have detachable male connectors:
And the LED, ready to get hooked up: (It's rated for use on a 12V circuit. 12V of electricity will flow from the battery through this light, into the resistor, which will dissipate 7V out of 12V as heat [I still need a heat sink, just to be safe] and then the remaining 5V will continue on to the USB port. Once the circuit is closed by a device being inserted, the light will come on and the device will begin to charge.) Side note--I don't remember what ohms and amps are and I'm hoping it won't matter. We shall see.
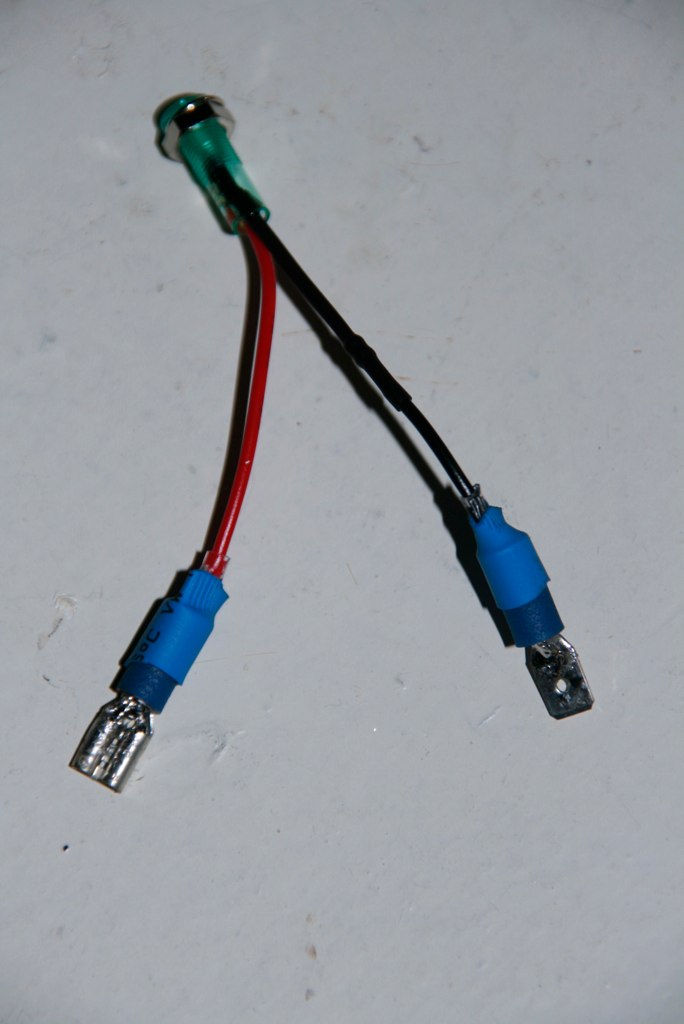
Another note: Whenever possible, I tried to make green the positive, or input, color. Black was designated output, negative or ground. At times (ie: when connecting to the usb port) I was forced to use another color to avoid confusing negative and positive.
And CJardine, it's my flame; my muse--I ride it daily.
As a matter of fact I'm excited to get my old F2 moved into my apartment (my wife is the coolest) so that I can hack it to pieces without worrying about not having a means of transportation. That will be a cool thread, I'm predicting. Albeit a drawn-out one.
I'm installing a usb port. I'm adding an led light inline that hopefully will light up only when something is plugged in, cause I wanted to use an led for something.I'm pretty much following this guide verbatim. It's very informative and concise, so use that as a reference; this is really just here for me to keep note and records of the stuff I've done to my bike.
So here's the little setup I made that will be mounted to her fairings somewhere convenient:
Note that I've been using these little detachable blue connectors in case I have to take stuff apart later.
And the purple and red things are great cause they kind of clamp on to an exposed section of wire and then have detachable male connectors:
And the LED, ready to get hooked up: (It's rated for use on a 12V circuit. 12V of electricity will flow from the battery through this light, into the resistor, which will dissipate 7V out of 12V as heat [I still need a heat sink, just to be safe] and then the remaining 5V will continue on to the USB port. Once the circuit is closed by a device being inserted, the light will come on and the device will begin to charge.) Side note--I don't remember what ohms and amps are and I'm hoping it won't matter. We shall see.
Another note: Whenever possible, I tried to make green the positive, or input, color. Black was designated output, negative or ground. At times (ie: when connecting to the usb port) I was forced to use another color to avoid confusing negative and positive.
And CJardine, it's my flame; my muse--I ride it daily.
As a matter of fact I'm excited to get my old F2 moved into my apartment (my wife is the coolest) so that I can hack it to pieces without worrying about not having a means of transportation. That will be a cool thread, I'm predicting. Albeit a drawn-out one.
Last edited by Edward Tristram; 06-27-2012 at 01:06 AM.
#6
09-16-2012, 04:45 AM


